1993 CHEVROLET ASTRO PASSENGER light
[x] Cancel search: lightPage 273 of 345
Downloaded from www.Manualslib.com manuals search engine 3. Press the tab and turn the socket to the left to remove the socket from
the bezel.
If the socket does not have a tab, turn the socket to the left to remove
the socket from the bezel.
4. Pull out the bulb and replace it with the new bulb.
5. Reverse steps 1-3 to reinstall the headlight.
Taillights
n
PO402
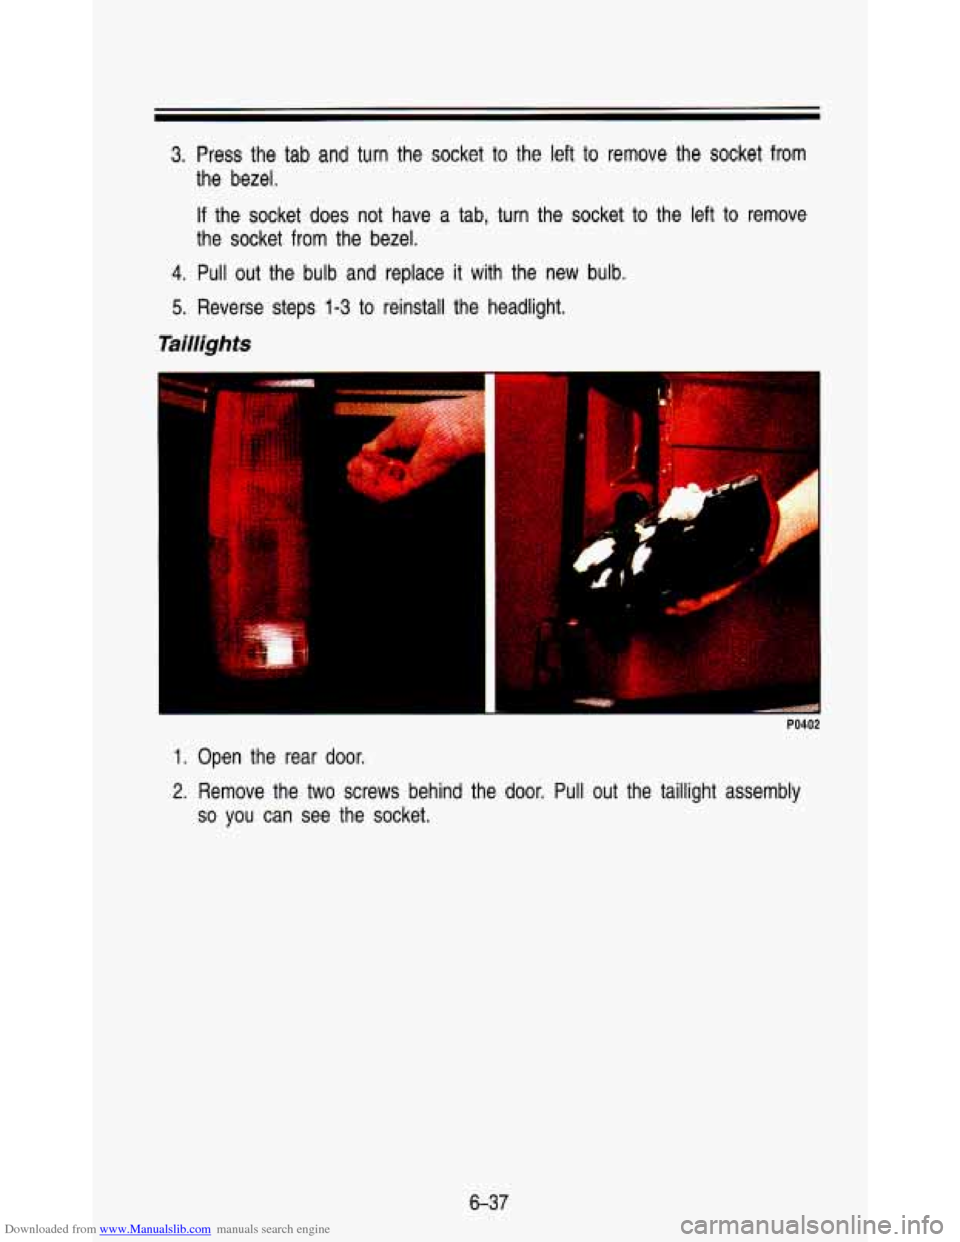
1. Open the rear door.
2. Remove the two screws behind the door. Pull out the taillight assembly
so you can see the socket.
6-37
Page 274 of 345
Downloaded from www.Manualslib.com manuals search engine Service & Appearance Care
PO400
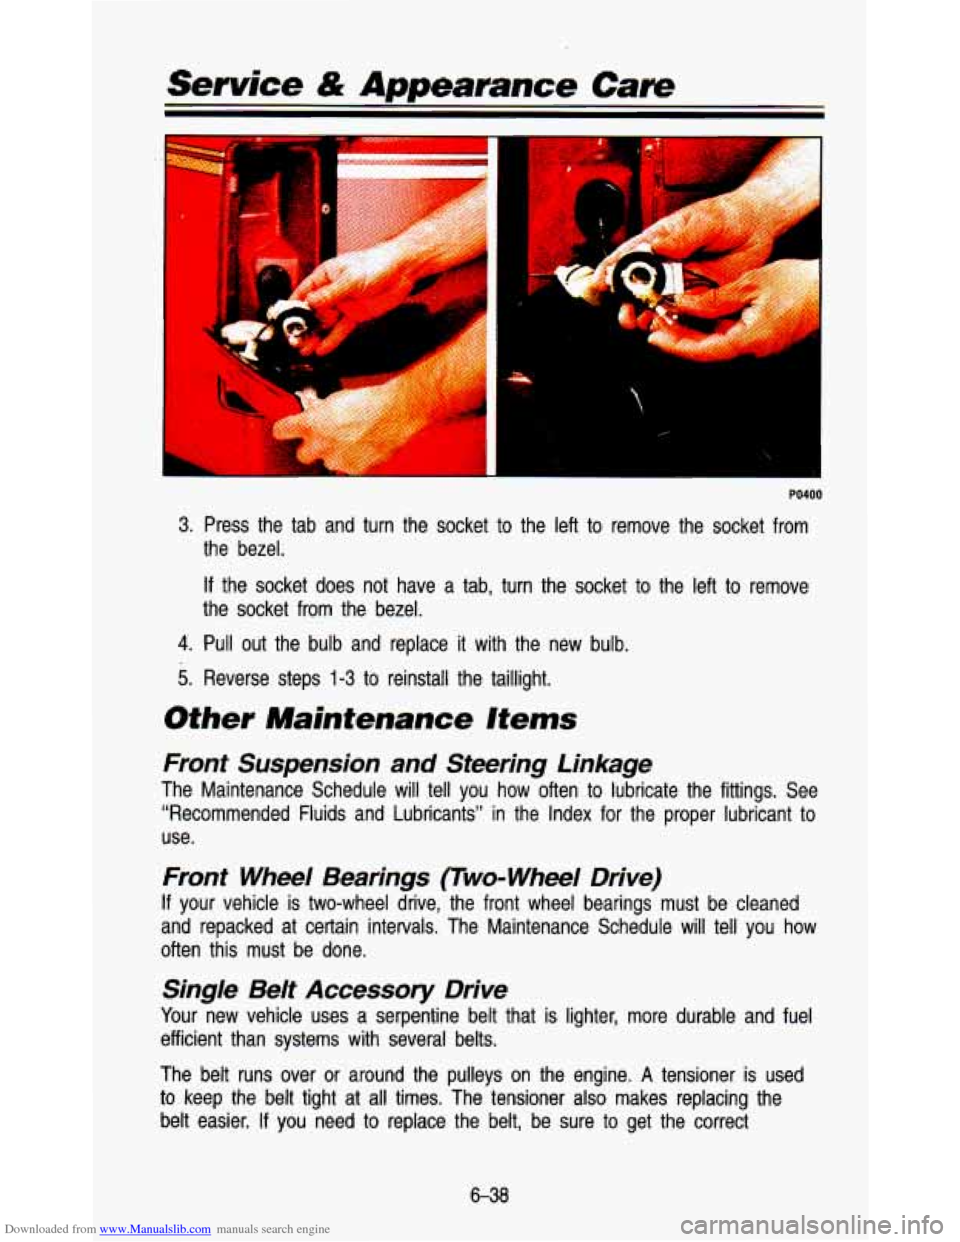
3. Press the tab and turn the socket to the left to remove the socket from
the bezel.
If the socket does not have a tab, turn the socket to the left to remove
the socket from the bezel.
4. Pull out the bulb and replace it with the new bulb.
5. Reverse steps 1-3 to reinstall the taillight.
Other Maintenance Items
Front Suspension and Steering Linkage
The Maintenance Schedule will tell you how often to lubricate the fittings. See
“Recommended Fluids and Lubricants” in the Index for the proper lubricant to
use.
Front Wheel Bearings (Two-Wheel Drive)
If your vehicle is two-wheel drive, the front wheel bearings must \
be cleaned
and repacked at certain intervals. The Maintenance Schedule will tel\
l you how
often this must be done.
Single Belt Accessory Drive
Your new vehicle uses a serpentine belt that is lighter, more durable and fuel
efficient than systems with several belts.
The belt runs over
or around the pulleys on the engine. A tensioner is used
to keep the belt tight at all times. The tensioner also makes replacing the
belt easier.
If you need to replace the belt, be sure to get the correct
6-38
Page 276 of 345
Downloaded from www.Manualslib.com manuals search engine Senrice & Appearance Care
Hood Latches and Hood Hinge
The Maintenance Schedule will tell you how often to lubricate the hood latch
and hood hinge assembly. See “Recommended Fluids and Lubricants”\
in the
Index for the proper lubricant
to use.
Propeller Shaft Slip Splines/Universal Joints
The Maintenance Schedule will tell you how often the slip splines must be
lubricated. See “Recommended Fluids and Lubricants” in the \
Index for the
proper lubricant
to use.
Constant Velocity Joints (All- Wheel Drive Only)
The Maintenance Schedule will tell you how often to lubricate the the
constant velocity joints. See “Recommended Fluids and Lubrican\
ts” in the
Index for the proper lubricant
to use.
Sliding Door Tracks
Your vehicle’s sliding door has three tracks which need lubricatio\
n.
For the upper and lower tracks, open the door, wipe the track\
clean and then
lubricate with Lubriplate@ White Grease.
For the outside middle track, close the door after you finish \
the upper and
lower tracks. Then, wipe the track clean and lubricate with Lu\
briplateB White
Grease.
Body
Normal use of your vehicle will cause metal-to-metal wear at some points \
on
the cab and body
if they are not lubricated.
tor exposed surfaces, such as door checks, door lock bolts, lock s\
triker
plates, dovetail bumper wedges, etc., a thin film
of engine oil should be
applied.
Where oil holes are provided in the body or cab, a dripless \
oil can be used.
The seat adjusters and seat track should be lubricated with chassis grease.
Door weatherstrips and rubber hood bumpers should be lightly coated with
a
rubber lubricant.
Never use
too much of any lubricant and be sure to wipe up any extra
lubricant when you are finished.
Some parts that need lubricating are hard
to get at. Window regulators and
controls are inside the doors. You can get to these by removing the trim
panels.
6-40
Page 277 of 345

Downloaded from www.Manualslib.com manuals search engine The Maintenance Schedule will tell you how often to lubricate these items.
See “Recommended Fluids and Lubricants” in the Index for the proper
lubricant to use.
Lock Cylinders
To be sure your locks operate properly, they must be lubricated. \
The
Maintenance Schedule will tell you how often to lubricate them. See
“Recommended Fluids and Lubricants” in the Index for the \
proper lubricant to use.
You should not use penetrating oils because they could wash out th\
e factory
installed lubricant and cause the lock to bind. De-icers which \
contain alcohol
could also wash away the lubricant,
so be sure to lubricate the lock after
using a de-icer
of this type.
Exhaust System
To help prevent damage to your exhaust system, do not continue to drive
your vehicle
if you notice:
Engine misfiring
Loss of performance
Other unusual operating conditions
Have your engine and exhaust system serviced regularly.
Three- Way Catalytic Converter
Your vehicle’s three-way catalytic converter is designed to reduce the
pollutants in your vehicle’s exhaust. Use only unleaded fuel in your vehicle.
If
you use leaded fuel, you could damage your three-way catalytic \
converter,
and other emission control components.
Malfunction Indicator Lamp (SERVICE ENGINE SOON light)
The Malfunction Indicator Lamp (SERVICE ENGINE SOONlight) on y\
our instrument panel lets you know when your emission system needs \
service.
The light will come on briefly when you start your engine to let you know
that the system is working.
If it does not come on when you start your
engine, or
if it comes on and stays on while you’re driving, your system \
may
need service. Your vehicle should still be driveable, but you should have your
system serviced right away.
6-41
Page 287 of 345
Downloaded from www.Manualslib.com manuals search engine CAUTION
I
Using the wrong replacement wheels, wheel bolts, or wheel nuts \
on
your vehicle can be dangerous. It could affect the braking and\
handling
of your vehicle, make your tires lose air and make you lose
control. You could have a collision in which you or others could be
injured. Always use the correct wheel, wheel bolts, and wheel \
nuts
for replacement.
NOTICE I
The wrong wheel can also cause problems with bearing life, bra\
ke cooling, speedometer/odometer calibration, headlight aim, bumper height, vehiclc
ground clearance, and tire
or tire chain clearance to the body and chassi I
Used Replacement Wheels
Putting a used wheel on your vehicle is dangerous. You can’t know
how it’s been used or how many miles it’s been driven. It could fail
suddenly and cause an accident.
If you have to replace a wheel use
1 a new GM original equipment wheel.
Tire Chains
f your vehicle has PqA
iamage your vehicle
f you have other size tires, use tire chains only when you ... st. se on
SAE Class “S” type chains that are the proper size for your tires. lnst
hem on the rear axle tires and tighten them
as tightly as PO
he ends securely fastened. Drive slowly and follow the chain
nanufacturer’s instructions.
If you can hear the chains contacting your
rehicle, stop and retighten them.
If the contact continues, slow d8
t stops. Driving too fast with chains on will damage your vehicle.
6-5 1
Page 290 of 345
Downloaded from www.Manualslib.com manuals search engine As soon as you’ve cleaned the section, use a sponge to remove the
suds.
Rinse the section with a clean, wet sponge.
Wipe off what’s left with a slightly damp paper towel or cloth.
Then dry it immediately with an air hose, a hair dryer or a heat lamp.
I
Wipe with a clean cloth.
Using Solvent-Type Cleaner on Fabric
First, see if you have to use solvent-type cleaner at all. Some spots and
stains will clean
off better with just water and mild soap.
If you need to use it, then:
Gently scrape excess soil from the trim material with a clean,\
dull knife
or scraper. Use very little cleaner, light pressure and clean cloths
(preferably cheesecloth). Cleaning should start
at the outside of the stain,
“feathering” toward the center. Keep changing to a clean \
section of the
cloth.
When you clean a stain from fabric, immediately dry the area \
with an air hose, hair dryer,
or heat lamp to help prevent a cleaning ring. (See
previous
NOTICE.)
Fabric Protection
Your vehicle has upholstery that has been treated with ScotchgardTM \
Fabric
Protector, a 3M product. ScotchgardTM protects fabrics by repell\
ing oil and
water, which are the carriers of most stains. Even with this protection, you
still need
to clean your upholstery often to keep it looking new.
Further information on cleaning is available by calling 1-800-43\
3-3296 (in
Minnesota, 1-800-642-61 67).
Special Cleaning Problems
Greasy or Oily Stains: Like grease, oil, butter, margarine, shoe polish, coffee
with cream, chewing gum, cosmetic creams, vegetable oils, wax crayon, tar
and asphalt.
Carefully scrape off excess stain.
Then follow the solvent-type instructions above.
6-54
Page 291 of 345
Downloaded from www.Manualslib.com manuals search engine Shoe polish, wax crayon, tar and asphalt will stain if left on a vehicle
seat fabric. They should be removed as soon as possible. Be careful,
because the cleaner will dissolve them and may cause them
to bleed.
Non-Greasy Stains: Like catsup, coffee (black), egg, fruit, fruit juice, milk,
soft drinks, wine, vomit, urine and blood.
Carefully scrape off excess stain, then sponge the soiled area \
with cool
water.
If a stain remains, follow the foam-type instructions above.
If an odor lingers after cleaning vomit or urine, treat the area with a
watedbaking soda solution:
1 teaspoon (5 ml) of baking soda to 1 cup
(250 ml) of lukewarm water.
Finally, if needed, clean lightly with solvent-type cleaner.
Combination Stains: Like candy, ice cream, mayonnaise, chili sauce and
unknown stains.
Carefully scrape off excess stain, then clean with cool water and allow to
If a stain remains, clean it with solvent-type cleaner.
dry.
Cleaning Vinyl
or Leather
Just use warm water and a clean cloth.
Rub with a clean, damp cloth to remove dirt. You may have to do it
more than once.
Things like tar, asphalt and shoe polish will stain if you do\
n’t get them
off quickly. Use a clean cloth and solvent-type vinyl/leather cleane\
r.
Cleaning the Top of the Instrument Panel
Use only mild soap and water to clean the top surfaces of the instrument
panel. Sprays containing silicones
or waxes may cause annoying reflections in
the windshield and even make it difficult
to see through the windshield under
certain conditions.
Care of Safety Belts
Keep belts clean and dry.
CAUTION
* Do not bleach or dye safety’belts. If you do, it may severely weaken I
protection. Clean safety belts only with mild soap and lukewarm\
water.
I
c L them. In a crash they might not be able to provide, adequate
6-55
Page 299 of 345
Downloaded from www.Manualslib.com manuals search engine Headlights
The headlight wiring is protected by a circuit breaker in the light switch. An
electrical overload will cause the lights
to go on and off, or in some cases to
remain
off. If this happens, have your headlight wiring checked right away.
Windshield Wipers
The windshield wiper motor is protected by a circuit breaker and a fuse. If
the motor overheats due to heavy snow, etc., the wiper will s\
top until the
motor cools. If the overload is caused by some electrical prob\
lem and not
snow, etc., be sure to get it fixed.
Power Windows and Other Power Options
Circuit breakers in the fuse panel protect the power windows a\
nd other power
accessories. When the current load is too heavy, the circuit b\
reaker opens
and closes, protecting the circuit until the problem is fixed
or goes away.
Trailer Wiring Harness
The optional seven-wire trailer wiring harness is protected by \
an in-line fuse
in the battery feed wire. This fuse is near the junction bloc\
k. See “Trailer
Wiring Harness” in the Index.
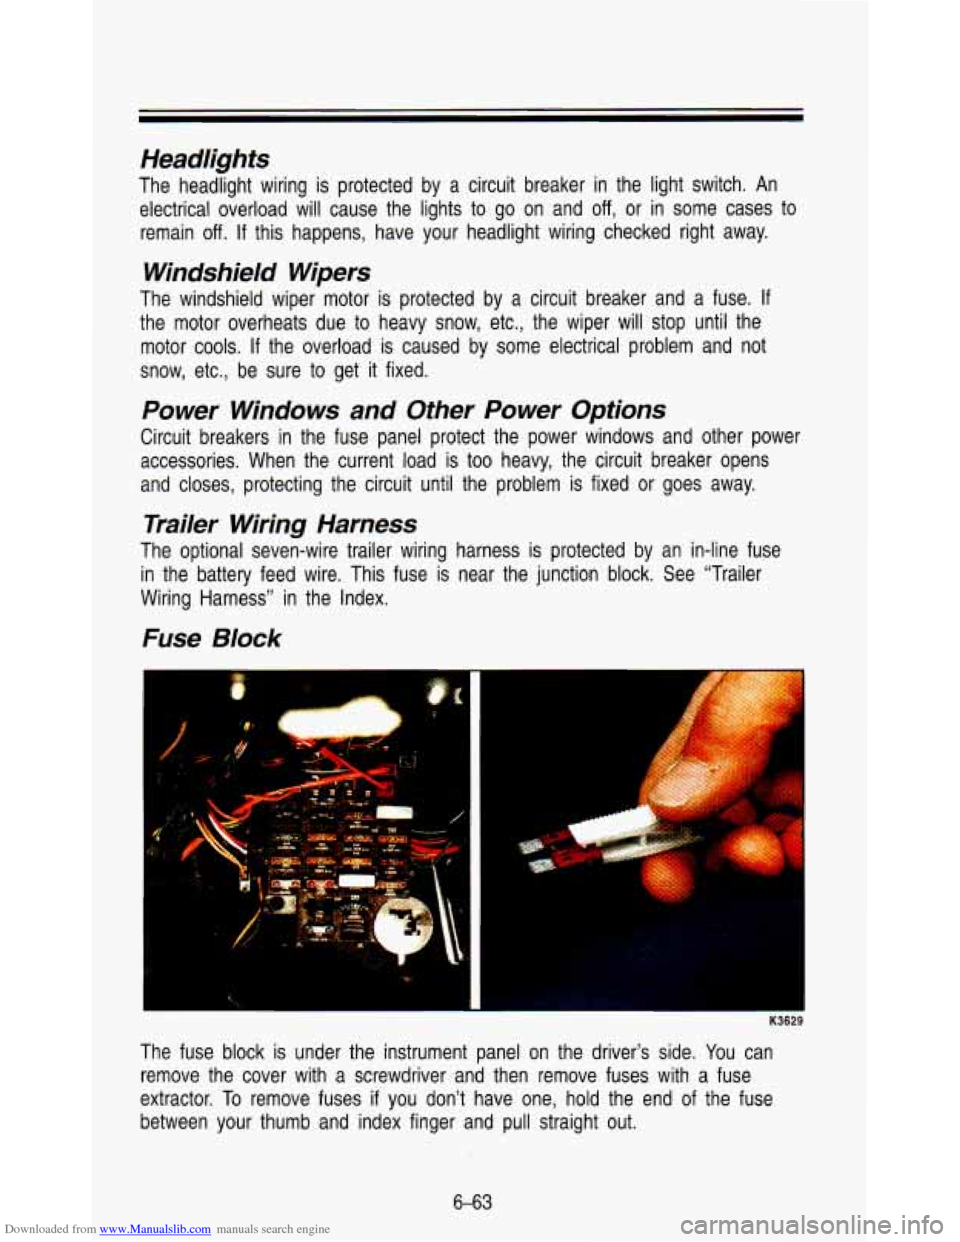
Fuse Block
K3629
The fuse block is under the instrument panel on the driver’\
s side. You can
remove the cover with
a screwdriver and then remove fuses with a fuse
extractor. To remove fuses
if you don’t have one, hold the end of the fuse
between your thumb and index finger and pull straight out.
6-63