1993 CADILLAC FLEETWOOD tire size
[x] Cancel search: tire sizePage 9 of 386

Downloaded from www.Manualslib.com manuals search engine c
c-
For the 1948 model, Cadillac
introduced the I
which set the trend in automotive
styling €or nearly two decades.
This
was followed by the 1949 model with
the two door hardtop Coupe DeVille
and the modern overhead valve,
high compression V8 engine.
Engineering innovations, con-
veniences and styling dominated the
'50s and '60s. Cruise control, auto-
matic climate control,
tilt and
telescoping steering wheels, twilight
sentinel and four door hard tops
all
debuted in these years. In 1957 the
Eldorado Brougham featured
ad-
vances such as air suspension, mem-
ory seat, automatic electric door
locks, transistor radio,
a brushed stainless steel
roof and low profile
tires.
introduced
in
1953, was redesigned for 1967 as the
first front wheel drive personal lux-
ury car. The
472 cu. in. V8 engine
used
in all Cadillacs in 1968 and
1969 was enlarged to 500 cu. in. €or
all 1970 Eldorados.
An Air Cushion Restraint Sys-
tem (airbag) was available for
1974,
1975 and 1976 Cadillacs.
Analog Electronic Fuel Injec-
tion was available, on
1975 Cadillacs
and was standard on the new inter-
national size 1976 Seville. In
1978,
the Trip Computer option incor-
porated an on-board microprocessor.
Page 225 of 386
Downloaded from www.Manualslib.com manuals search engine r
r
c-
If you’re using a “dead-weight” hitch, the trailer tongue (A) should
weigh
10% of the total loaded trailer weight (B). If you have a
“weight-distributing” hitch, the trailer tongue
(A) should weigh
12% of the total loaded trailer weight (B).
If your vehicle
is equipped to tow up to 7,000 pounds (3178 kg), and
you should use a “dead-weight” hitch, the trailer tongue
(A) should
weigh
10% of the total loaded trailer weight (B). Or, if you have a
“weight-distributing” hitch, the trailer tongue
(A) should weigh
12% of the total loaded trailer weight (B).
After you’ve loaded your trailer, weigh the trailer and then the
tongue, separately, to see
if the weights are proper. If they aren’t,
you may be able to get them right simply by moving some items
around in the trailer.
3. Total Weight on Your Vehicle’s Tires
Be sure your vehicle’s tires are inflated to the limit for cold tires.
You’ll find these numbers on the Certification label at the rear edge
of the driver’s door (or see “Tire Loading” in the Index). Then be
sure you don’t go over the
GVW limit for your vehicle.
- Hitches
It’s important to have the correct hitch equipment. Crosswinds, large
trucks going by, and rough roads are a
few reasons why you’ll need the
- right hitch. Here are some rules to follow:
0
0
r
If you’ll be pulling a trailer that, when loaded, will weigh more than
2,000 pounds (900 kg), be sure to use a properly mounted,
weight-distributing hitch and sway control of the proper size. This
equipment is
very important for proper vehicle loading and good
handling when you’re driving.
Will you have to make any holes
in the body of your vehicle when you
install a trailer hitch? If you do, then be sure to seal the holes later
when you remove the hitch. If you don’t seal them, deadly carbon
monoxide (CO) from your exhaust can get into your vehicle (see
Index under “Carbon Monoxide”). Dirt and water can, too.
Don’t let the steel in a hitch contact the aluminum on your bumper. If
you do, the
two will corrode. You can use something like paint or
plastic tape to separate the steel and aluminum. The same steel to
aluminum problem can happen with fasteners,
too.
21 1
Page 262 of 386
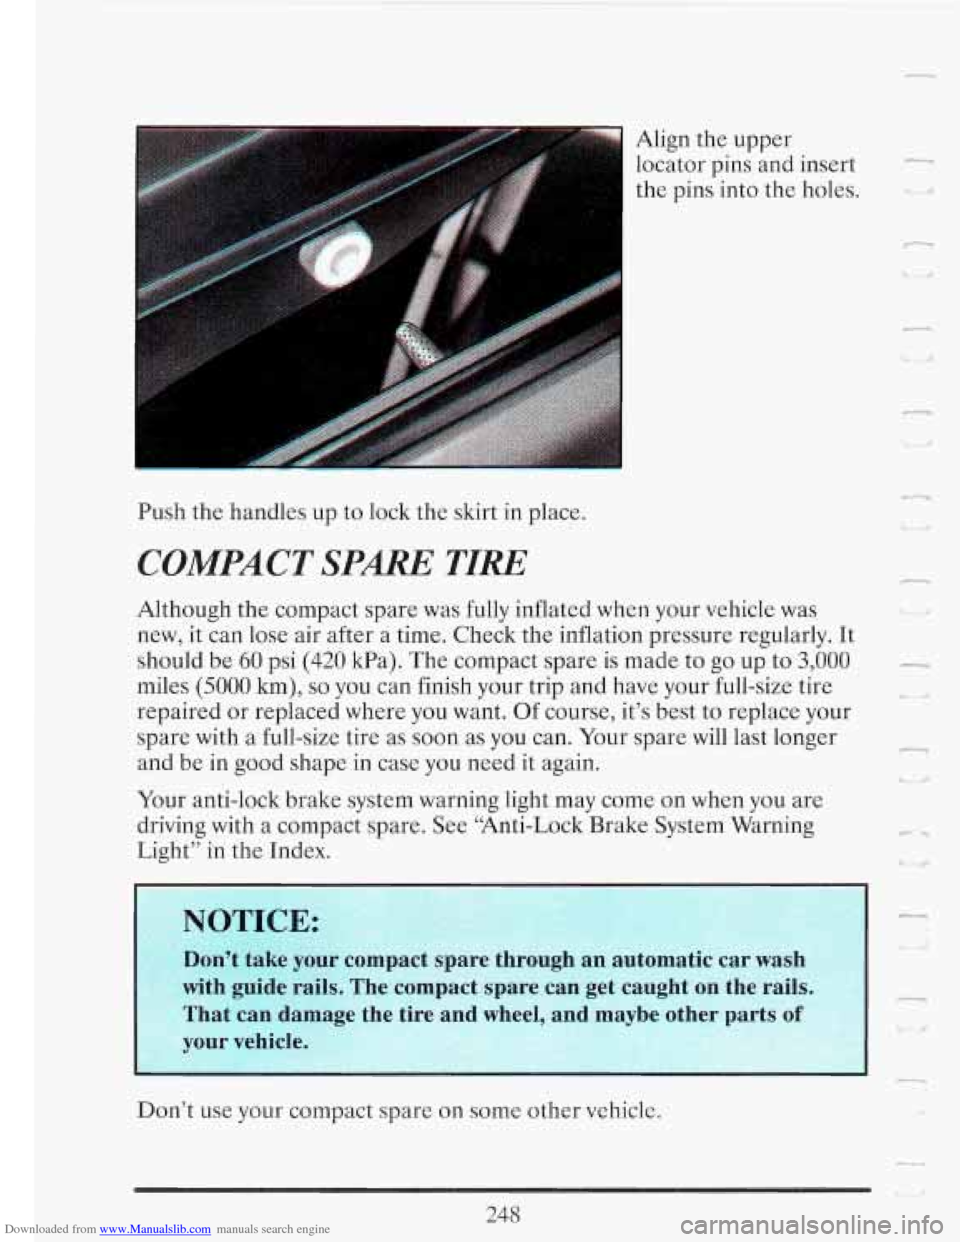
Downloaded from www.Manualslib.com manuals search engine Align the upper
locator pins and insert
-
the pins into the holes. .
n
Push the handles up to lock the skirt in place.
COMPACT SPARE TIRE
Although the compact spare was fully inflated when your vehicle was
new, it can lose air after a time. Check the inflation pressure regularly. It
should be
60 psi (420 kPa). The compact spare is made to go up to 3,000 -
miles (5000 km), so you can finish your trip and have your full-size tire i* u
repaired or replaced where you want. Of course, it’s best to replace your I
spare with a full-size tire as soon as you can. Your spare will last longer
and be in good shape in case you need it again.
Your anti-lock brake system warning light may come on when
you are
driving with a compact spare. See “Anti-Lock Brake System Warning
Light” in the Index.
Don’t use your compact spare on some other vehicle.
248
Page 304 of 386
Downloaded from www.Manualslib.com manuals search engine I
3. Reinstall the new
insert by aligning
the blade housing
tabs and the edge
of the insert. Make
sure that the insert
is connected to all
the housing tabs.
4. Install the wiper blade assembly to the wiper arm.
LOmING YOUR VEHICLE
OCCUPANTS VEHICLE CAP.
WT.
TIRE-LOADING INFORMATION
FRT. CTR.
RR. TOTAL LBS. KG
MAX. LOADING & GVWR SAME AS VEHICLE
CAPACITY WEIGHT XXX COLD TIRE
TIRE
SIZE SPEED PRESSURE RTG
PSVKPa
FRT.
R R.
SPA.
IF TIRES ARE HOT. ADD 4PSV28KPa SEE
OWNER’S MANUAL FOR ADDITIONAL
INFORMATION
GEN GME
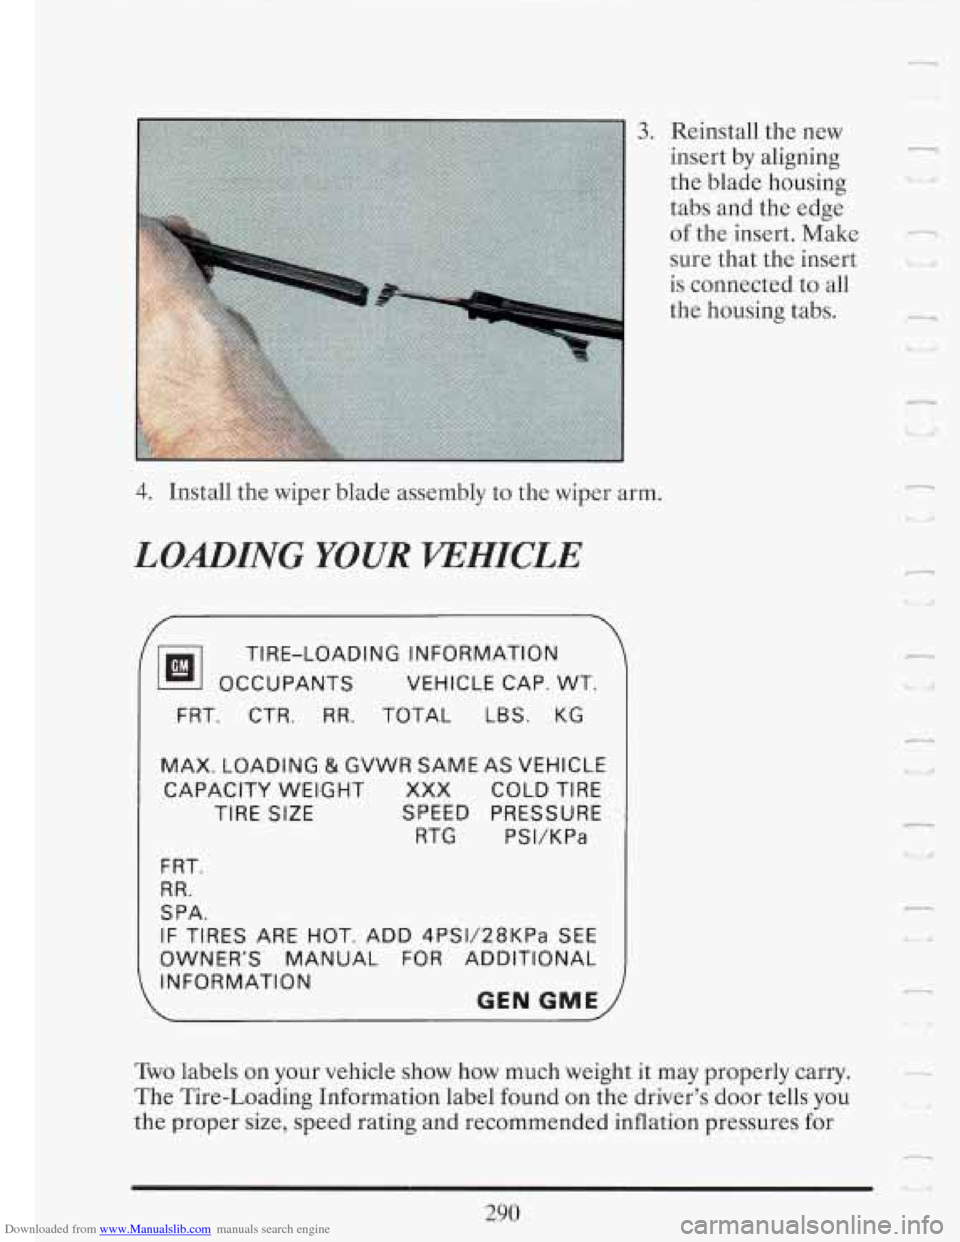
Two labels on your vehicle show how much weight it may properly carry.
The Tire-Loading Information label found on the driver’s door tells you
the proper size, speed rating and recommended inflation pressures for
n
290
Page 308 of 386
Downloaded from www.Manualslib.com manuals search engine ea
When to Check Check your tires once a month or more.
Don't forget your compact spare tire. It should be at
60 psi (420 kPa).
How to Check Use a good quality pocket-type gage to check tire
pressure. Simply looking at the tires
will not tell you the pressure,
especially
if you have radial tires -- which may look properly inflated even
if they're underinflated.
If your tires have valve caps, be sure to put them back on. They help
prevent leaks by keeping out dirt and moisture.
Your tire pressures are:
Front and rear - 30 psi (210 kPa)
Optional Limousine packages:
Front and rear - 35 psi (241 kPa)
Recommended tire size is:
0 P235/70R15 (Front and rear)
0 T145/80D 16 (Compact spare)
0 P235/75R15 XL (Coach Builder Option) d
n
'd I
294
Page 309 of 386
Downloaded from www.Manualslib.com manuals search engine P Tire Inspection and Rotation
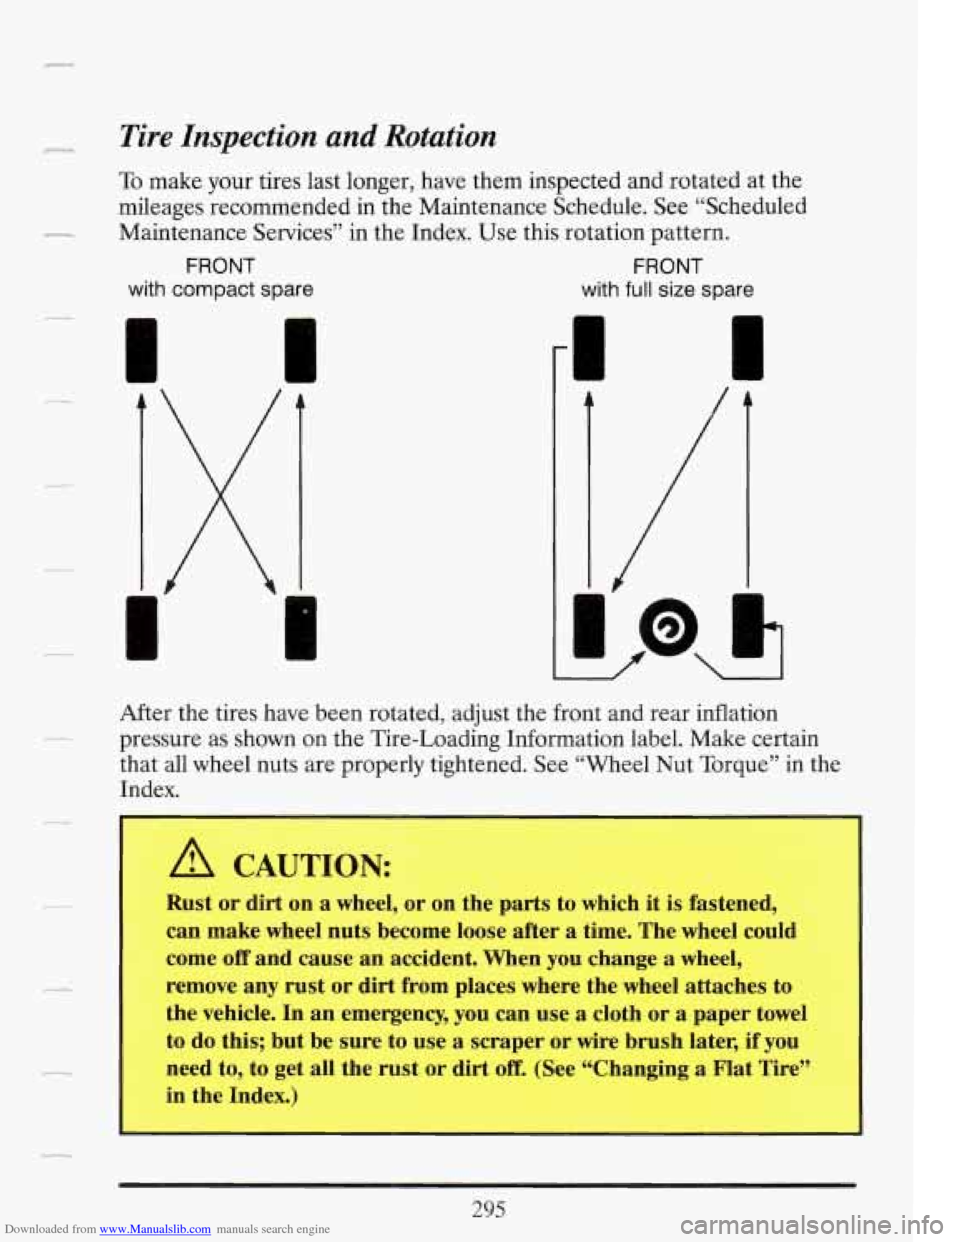
To make your tires last longer, have them inspected and rotated at the
mileages recommended in the Maintenance Schedule. See “Scheduled
- Maintenance Services” in the Index. Use this rotation pattern.
FRONT FRONT
with compact spare
with full size spare
cs
r
A
I
After the tires have been rotated, adjust the front and rear inflation
pressure as shown on the Tire-Loading Information label. Make certain
that all wheel nuts are properly tightened. See “Wheel Nut Torque” in the
Index.
A CAUTION:
Rust or dirt on a wheel, or on the parts to which it is fastened,
can make wheel nuts become loose after a time. The wheel could
come
off and cause an accident. When you change a wheel,
remove any rust
or dirt from places where the wheel attaches to
the vehicle. In an emergency, you can use
a cloth or a paper towel
to do this; but be sure to use a scraper
or wire brush later, if you
need to, to get all the rust
or dirt off. (See “Changing a Flat Tire”
in the Index.)
295
Page 310 of 386

Downloaded from www.Manualslib.com manuals search engine When It’s Time for New Tires
You need a new tire if One
way to tell when
it’s time for new tires
is to check the
treadwear indicators,
which will appear
when your tires have
only
2/32 inch (1.6
mm) or less of tread
remaining.
You can see the indicators at three places around the tire.
0 You can see cord or fabric showing through the tire’s rubber.
The tread or sidewall is cracked, cut or snagged deep enough to show
cord or fabric.
0 The tire has a bump, bulge or split.
The tire has a puncture, cut, or other damage that can’t be repaired
well because of the size or location of the damage.
Buying New Tires
To find out what kind and size of tires you need, look at the Tire-Loading
Information label.
The tires installed on your vehicle when it was new had a Tire
Performance Criteria Specification (TPC Spec) number on each tire’s
sidewall. When you get new tires, get ones with that same TPC Spec
number. That way, your vehicle will continue to have tires that are
designed
to give proper endurance, handling, speed rating, traction, ride
and other things during normal service on your vehicle.
If your tires have
an all-season tread design, the
TPC number will be followed by a “MS”
(for mud and snow).
n I, Lrrl
n
U
i
r?,
u
n
296
Page 311 of 386
Downloaded from www.Manualslib.com manuals search engine i I
r I.
F 1.J
If you ever replace your tires with those not having a TPC Spec number,
make sure they are the same size, load range, speed rating and
construction type (bias, bias-belted or radial) as your original tires.
A CAUTION:
Mixing tires could cause you to lose control, while driving. If you
mix tires of different sizes or types (radial and bias-belted
tires), the vehicle may not handle properly, and you could have a
crash.
Be sure to use the same size and type tires on all wheels.
It's all right to drive with your compact spare, though. It was
developed for limited use
on your vehicle.
I
Ungorm Tire Quality Grading
The following information relates to the system developed by the United'
States National Highway Traffic Safety Administration which grades tires
I
by treadwear, traction and temperature performance. (This applies only
to vehicles sold in the United States.)
Treadwear
The treadwear grade is a comparative rating based on the wear rate of
the tire when tested under controlled conditions on a specified
government test course. For example, a tire graded
150 would wear one
and a half
(1 1/2) times as well on the government course as a tire graded
100. The relative performance of tires depends upon the actual
conditions
of their use, however, and may depart significantly from the
norm due to variations in driving habits, service practices and differences
in road characteristics and climate.
Traction -A, B, C !
-and concrete. A tire marked C may have poor traction performance. I I
The traction grades, from highest to lowest are: A, B, and C. They
represent the tire's ability to stop on wet pavement as measured under
controlled conditions on specified government test surfaces
of asphalt