1992 HONDA PRELUDE clutch
[x] Cancel search: clutchPage 45 of 225

Steering Wheel Controls
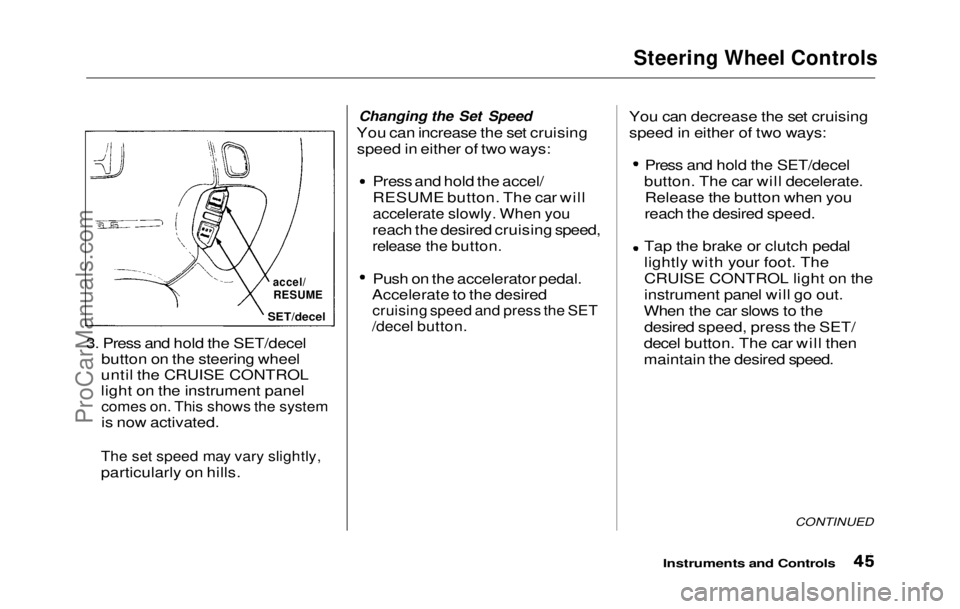
3. Press and hold the SET/decel button on the steering wheel
until the CRUISE CONTROL
light on the instrument panelcomes on. This shows the system
is now activated.
The set speed may vary slightly,
particularly on
hills.
Changing the Set Speed
You can increase the set cruising speed in either of two ways:
Press and hold the accel/
RESUME button. The car will
accelerate slowly. When you
reach the desired cruising speed,
release the button.
Push on the accelerator pedal.
Accelerate to the desired
cruising speed and press the SET
/decel button.
Yo
u can decrease the set cruising
speed in either of two ways: Press and hold the SET/decel
button. The car will decelerate. Release the button when you
reach the desired speed.
Tap the brake or clutch pedal
lightly with your foot. The
CRUISE CONTROL light on the
instrument panel will go out.
When the car slows to the desired speed, press the SET/
decel button. The car will then
maintain the desired speed.
CONTINUED
Instruments and Controls
accel/
RESUME
SET/decelProCarManuals.comMain Menu Table of Contents s t
Page 46 of 225

Steering Wheel Controls
Even with the cruise control turned
on, you can still use the accelerator pedal to speed up for passing. After
completing the pass, take your foot
off the accelerator pedal. The car
will return to the set cruising speed.
Resting your foot on the brake or
clutch pedal will cause the cruise
control to cancel.
Turning off the Cruise Control
Either of these actions take the car
out of cruise control:
Tap the brake or, if manual trans-mission, clutch pedal.
Press the Cruise Control Master
Switch.
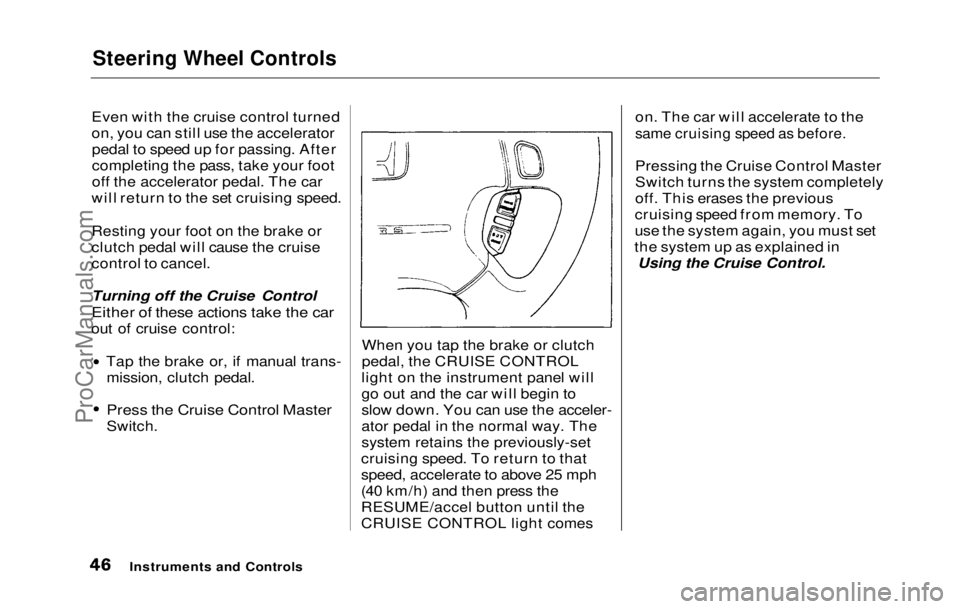
When you tap the brake or clutch
pedal, the CRUISE CONTROL
light on the instrument panel will
go out and the car will begin to
slow down. You can use the acceler-
ator pedal in the normal way. The
system retains the previously-set
cruising speed. To return to that
speed, accelerate to above 25 mph
(40 km/h) and then press the
RESUME/accel button until the
CRUISE CONTROL light comes on. The car will accelerate to the
same cruising speed as before.
Pressing the Cruise Control Master
Switch turns the system completely
off. This erases the previous
cruising speed from memory. To
use the system again, you must set
the system up as explained in Using the Cruise Control.
Instruments and ControlsProCarManuals.comMain Menu Table of Contents s t
Page 108 of 225

Starting the Engine
5-Speed Transmission 1. Apply the parking brake.
2. In cold weather, turn off all electrical accessories to reduce
the drain on the battery.
3. Push the clutch pedal down all the way. START (III) does not
function unless the clutch pedal
is depressed.
4. Without touching the accelerator pedal, turn the ignition key to the
START (III) position. If the
engine does not start right away,
do not hold the key in START
(III) for more than 15 seconds at
a time. Pause for at least 10
seconds before trying again. 5. If the engine does not start
within 15 seconds, or starts butstalls right away, repeat step 4
with the accelerator pedal pressed half-way down. If theengine starts, release pressure on
the accelerator pedal so the
engine does not race.
6. If the
engine still does not start,
press the accelerator pedal all the
way down and hold it there while
starting i n
order to clear flooding.
As before, keep the ignition key in the START (III) position for
no more than 15 seconds. Return
to step 5 if the engine does not
start. If it starts, lift your foot off
the accelerator pedal so the
engine does not race.
Automatic Transmissio
n
1
. Apply the parking brake.
2. In cold weather, turn off all electrical accessories to reduce
the drain on the battery.
3. Make sure the shift lever is in Park. Press on the brake pedal.
4. Without touching the accelerator pedal, turn the ignition key to the
START (III) position. If the
engine does not start right away,
do not hold the key in START
(III) for more than 15 seconds at
a time. Pause for at least 10
seconds before trying again.
CONTINUED
DrivingProCarManuals.comMain Menu Table of Contents s t
Page 110 of 225

5-speed Manual Transmission
The manual
transmission is syn-
chronized in all forward gears for smooth operation. It has a lockout
so you cannot shift directly from
Fifth to Reverse. When shifting up
or down, make sure you push the
clutch pedal down all the way, shift
to the next gear, and let the pedal
up gradually. When you are not shifting, do not rest your foot on
the clutch pedal. This can cause
your clutch to wear out faster. Come to a full stop before you shift
into reverse. You can damage the
transmission by trying to shift into
reverse with the car moving.
Depress the clutch pedal and pause
for a few seconds before putting it in reverse, or shift into one of the
forward gears for a moment. This
stops the gears so they won't
"grind".
You can get extra braking from the
engine when slowing down by
shifting to a lower gear. This extra
braking can help you maintain a safe speed and prevent your brakes
from overheating while going down a steep hill. Before downshifting,
make sure engine speed will not go
into the red zone in the lower gear.
Refer to the Maximum Speeds
chart.
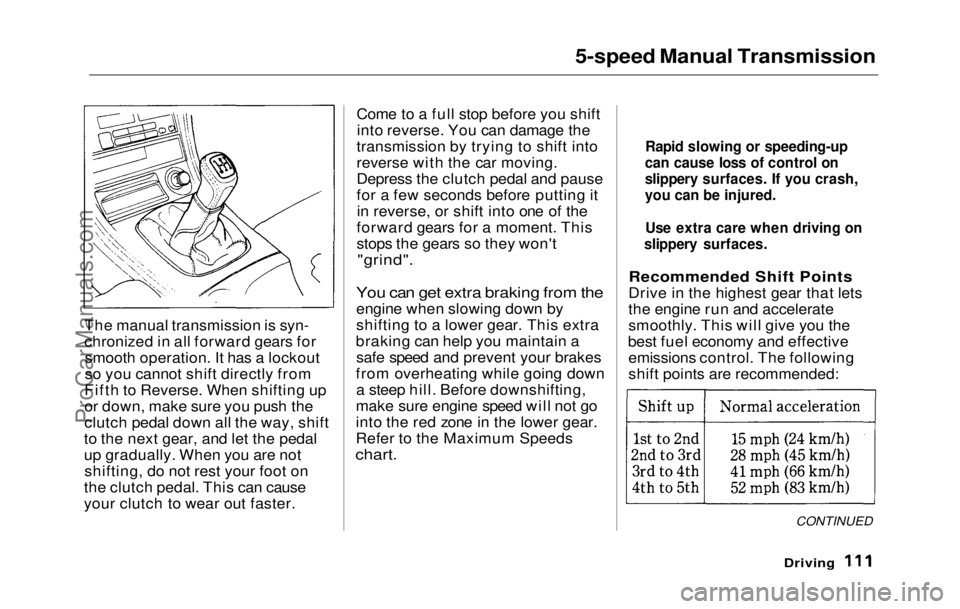
Recommended Shift Points
Drive in the highest gear that lets
the engine run and accelerate
smoothly. This will give you the
best fuel economy and effective emissions control. The following
shift points are recommended:
CONTINUED
Driving
Rapid slowing or speeding-up
can cause loss of control on
slippery surfaces. If you crash,
you can be injured.
Use extra care when driving on
slippery surfaces.ProCarManuals.comMain Menu Table of Contents s t
Page 113 of 225

Automatic Transmission
Reverse (R) — To shift to Re-
verse from Park, see the explana-
tion under Park. To shift to Re-
verse from Neutral, come to a com-
plete stop and then shift. Press the
release button before shifting into
Reverse from Neutral.
Neutral (N) — Use Neutral if you need to restart a stalled engine, or
if it is necessary to stop briefly with
the engine idling. Shift to Park posi-
tion if you need to leave the car for
any reason. Press on the brake pe-
dal when you are moving the shift
lever from Neutral to another gear.
Drive (D4) — Use this position for
your normal driving. The transmis-
sion automatically selects a suita-
ble gear for your speed and acceler-
ation. You may notice the transmis-
sion shifting up at higher speeds
when the engine is cold. This helps
the engine warm up faster. Drive (D3) — This position is simi-
lar to D4, except only the first three
gears are selected. Use D3 to provide engine braking when going
down a steep hill. D3 can also keep
the transmission from cycling
between third and fourth gears in stop-and-go driving.
For faster acceleration when in D3
or D4, you can get the transmission
to automatically downshift by push-
ing the accelerator pedal to the
floor. The transmission will shift down one or two gears, depending
on your speed.
Second (2) — To shift to Second,
press the release button on the side
of the shift lever. This position
locks the transmission in second
gear. It does not downshift to first
gear when you come to a stop.
Second gives you more power when
climbing, and increased engine
braking when going down steep hills. Use second gear when start-
ing out on a slippery surface or in
deep snow. It will help reduce
wheelspin.
Whenever you move the shift lever
to a lower gear, the transmission
downshifts only if the engine's
redline will not be exceeded in the
lower gear.First (1) — To shift from Second
to First ,
press the release button on
the side of the shift lever. With the
lever in this position, the transmis-
sion locks in First gear. By upshift-
ing and downshifting through 1,2,
D3 and D4, you can operate this
transmission much like a manual
transmission without a clutch pedal.
DrivingProCarManuals.comMain Menu Table of Contents s t
Page 125 of 225

Maintenance
Regularly maintaining your Honda
is the best way to protect your investment. You will be rewarded
with safer, more economical,
trouble-free driving. This section
lists items that need to be checked
regularly and explains how to check them. It also details some
simple maintenance tasks you can
do yourself. The maintenance
schedules for normal and severe
driving conditions show you when
these things need to be done.
If you are interested in how to per-
form more complex maintenance
on your Honda, you can purchase
the Service Manual. See page 221 for information on how to
obtain a copy, or see your Honda
dealer.
Maintenance Schedule................ 128
Maintenance Record................ 131
Periodic Checks............................ 133
Fluid Locations............................. 134
Engine Oil...................................... 135
Checking Engine Oil................ 135
Adding........................................ 135
Recommended Oil.................... 136
Additives.................................... 136 Oil and Filter Changes ............ 137
Cooling System............................. 139 Checking the Coolant Level... 139
Adding Radiator Coolant........ 139
Replacing Coolant.................... 140
Windshield Washers.................... 143
Transmission Oil.......................... 144
Automatic Transmission........ 144
5-speed Transmission.............. 145
Brake and Clutch Fluid............... 146
Brake System............................ 146
Anti-lock Brake System ......... 147 Clutch System........................... 147
Power Steering............................. 148
Air Filter....................................... 149
Fuel Filter..................................... 150
Spark Plugs.................................. .
150
Replacement.............................. 150
Specification.............................. 152
Battery............................................ 152
Windshield Wipers....................... 155
Air Conditioner............................. 157 Engine Belts.................................. 158
Tires................................................ 158 Inflation...................................... 158
Inspection................................... 159
Maintenance.............................. 160
Tire Rotation............................ 160
Replacing Tires ........................ 161
Wheels and Tires...................... 161
DOT Tire Quality Grading..... 161 Treadwear............................. 161
Traction................................. 162
Temperature......................... 162
Winter Driving.......................... 163 Snow Tires............................ 163
Tire Chains............................ 163
Lights.............................................. 164
Replacing Bulbs........................ 164
Storing Your Car.......................... 173
MaintenanceProCarManuals.comMain Menu s t
Page 131 of 225

Periodic Checks
You should check the following items at the specified intervals. If
you are unsure of how to perform
any check, turn to the page given. Engine oil level — Check every
time you fill the gas tank. See
page 102.
Engine coolant level — Check
the radiator reserve tank every
time you fill the gas tank. See
page 103.
Windshield washer fluid —
Check the level in the reservoir
monthly. If weather conditions
cause you to use the washers
frequently, check the reservoir each time you stop for gas. See
page 143 .
Automatic transmission — Check the fluid level monthly.
See page 144. Brakes, clutch and power
steering — Check the fluid level
monthly. See page 146.Tires — Check the tire pressure
monthly. Examine the tread for
wear and foreign objects. See
page 159.
Battery — Check its condition
and the terminals for corrosion
monthly. See page 152.
Air conditioner — Check its operation weekly. See page 157.
Lights — Check the operation of
the headlights, parking lights,
taillights, high-mount brake light,
turn signals, brake lights, and
license plate lights monthly. See
page 164.
MaintenanceProCarManuals.comMain Menu Table of Contents s t
Page 132 of 225

Fluid Locations
Maintenance
BRAKE FLUID
(Gray cap)
(5-M/T only)
CLUTCH FLUID (Gray cap)
ENGINE OIL
FILLER CAP
POWER STEERING
FLUID (Red cap)
ANTI-LOCK BRAKE
RESERVOIR
(Gray cap)
COOLANT
RESERVOIR
AUTOMATIC
TRANSMISSION FLUID DIPSTICK
(Yellow loop)
ENGINE OIL DIPSTICK
(Orange loop)WASHER FLUID
(Blue cap)ProCarManuals.comMain Menu Table of Contents s t