1992 HONDA PRELUDE door lock
[x] Cancel search: door lockPage 40 of 225

Controls Near the Steering Wheel
Headlights
The rotating switch on the left
lever controls the lights. Turning this switch to the first position
turns on the parking lights, tail
lights, instrument panel lights, side-marker lights, and rear license
plate lights. Turning the switch to the second position turns on
the headlights. If you leave the lights on with the
ignition switch in ACCESSORY (I)
or LOCK (0), you will hear a
reminder chime when you open the
driver's door.
To change between low beams and
high beams, pull back on the turn signal lever until you hear a click,
then let go. The high beam indica-
tor will light (see page 35). To flash the high beams, pull back
and hold the turn signal lever.
Release the lever and the high
beams will go off.
The high beams will stay on for as
long as you hold the lever, no matter what position the headlight
switch is in.
Daytime Running Lights
(Canadian Models)
With the headlight switch off, the
high beam headlights come on with
reduced brightness when you turn
the ignition switch to ON (II) and
release the parking brake. They
remain on until you turn the
ignition off, even if you set the
parking brake.
The headlights revert to normal
operation when you turn them on
with the switch.
Instruments and ControlsProCarManuals.comMain Menu Table of Contents s t
Page 47 of 225

Steering Wheel Controls, Keys and Locks
Horn
Press either of the buttons on the
steering wheel spokes to sound the
horn.
Key
s
Your
car comes with two kinds of
keys: a master key and a valet key.
The master key fits all locks on
your car: Ignition
Doors
Trunk
Trunk release handle
Rear seat trunk access
Center console compartment
The valet key only works the
ignition and the door locks. You
can keep the trunk, trunk release
handle, center console compart-
ment and rear seat trunk access
locked when you leave your car and valet key at a parking facility.
Each key has a number stamped in
one side. You will need this number
if you have to get a lost key re-
placed. Record this number and
keep it in a safe place.
Instruments and Controls
HORN
VALET KEYMASTER KEY
ProCarManuals.comMain Menu Table of Contents s t
Page 48 of 225

Keys and Locks
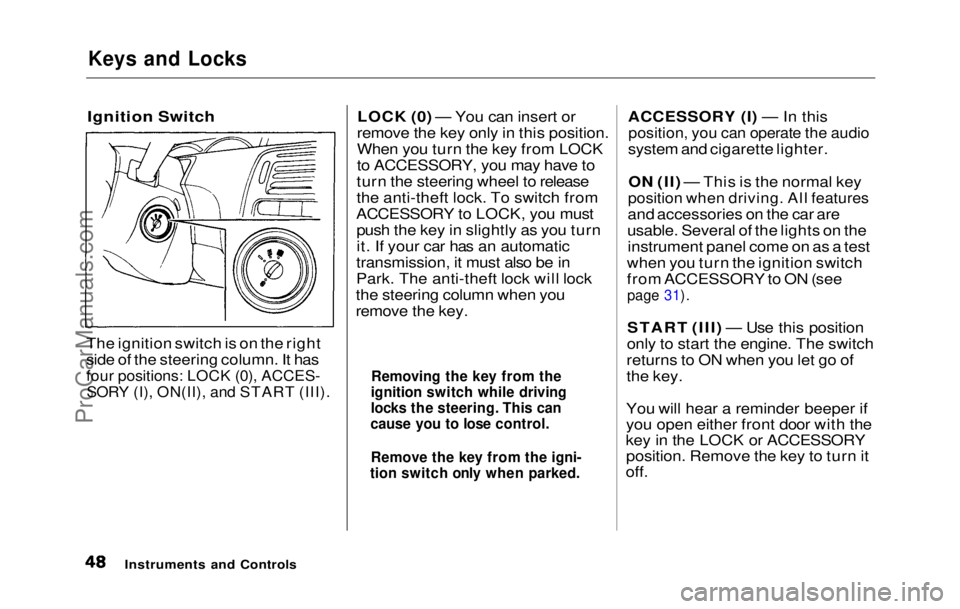
Ignition Switch
The ignition switch is on the right
side of the steering column. It has
four positions: LOCK (0), ACCES-
SORY (I), ON(II), and START (III).
LOCK (0) — You can insert or
remove the key only in this position.
When you turn the key from LOCK
to ACCESSORY, you may have to
turn the steering wheel to release
the anti-theft lock. To switch from
ACCESSORY to LOCK, you must push the key in slightly as you turn
it. If your car has an automatic
transmission, it must also be in
Park. The anti-theft lock will lock
the steering column when you
remove the key. ACCESSORY (I) — In this
position, you can operate the audio
system and cigarette lighter.
ON (II) — This is the normal key
position when driving. All features
and accessories on the car are
usable. Several of the lights on the instrument panel come on as a test
when you turn the ignition switch
from ACCESSORY to ON (see
page 31).
START (III) — Use this position
only to start the engine. The switch
returns to ON when you let go of
the key.
You will hear a reminder beeper if
you open either front door with the
key in the LOCK or ACCESSORY position. Remove the key to turn it
off.
Instruments and Controls
Removing the key from the
ignition switch while driving
locks the steering. This can
cause you to lose control.
Remove the key from the igni-
tion switch only when parked.ProCarManuals.comMain Menu Table of Contents s t
Page 49 of 225

Keys and Locks
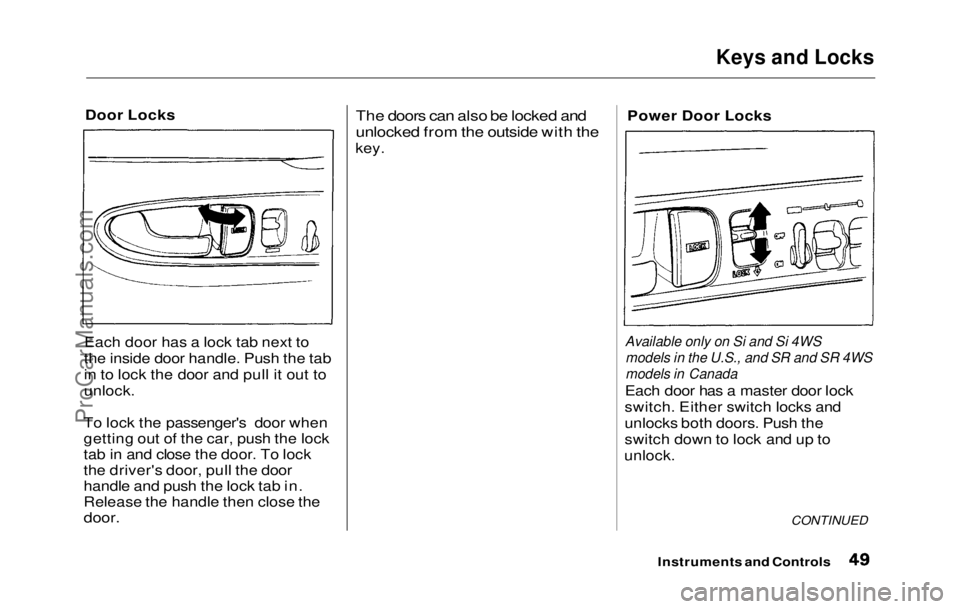
Door Locks
Each door has a lock tab next to
the inside door handle. Push the tab
in to lock the door and pull it out to
unlock.
To lock the passenger's door when
getting out of the car, push the lock
tab in and close the door. To lock
the driver's door, pull the door
handle and push the lock tab in.
Release the handle then close the
door.
The doors can also be locked and
unlocked from the outside with the
key. Power Door Locks
Available only on Si and Si 4WS models in the U.S., and SR and SR 4WS
models in Canada
Each door has a master door lock
switch. Either switch locks and
unlocks both doors. Push the
switch down to lock and up to
unlock.
CONTINUED
Instruments and ControlsProCarManuals.comMain Menu Table of Contents s t
Page 50 of 225

Keys and Locks
Both doors lock when you push in
the lock tab on the driver's door, or
lock the driver's door from the outside with the key. Only the
driver's door unlocks when you use
the key or lock tab. To unlock the
passenger's door, use the master
door lock switch or pull out the
lock tab on passenger's door.
Lockout Prevention
If you forget and leave the key in
the ignition switch, Lockout
Prevention will not allow you to
lock the driver's door. With either
door open and the key in the
ignition, the master door lock
switches are disabled. If you try to
lock the driver's door by pushing in
the lock tab, the tabs on both doors immediately pop up.
Trunk
You can open the trunk in two
ways:
Pull the trunk release handle to
the left of the driver's seat. Use the master key to open the
trunk lock. The valet key does
not work in this lock.
To close the trunk, press down on
the trunk lid.
See page 106 fo
r cargo loading and
weight limit
information. Keep the
trunk lid closed at all times while
driving to avoid damaging the lid
and getting exhaust gas in the
interior. See Carbon Monoxide
Hazard on page 25.
Instruments and Controls
MASTER KEY
TRUNK RELEASE
HANDLEProCarManuals.comMain Menu Table of Contents s t
Page 107 of 225

Preparing to Drive
You should do the following checks and adjustments every day before
you drive your car.
1. Make sure all windows, mirrors, and outside lights are clean and
unobstructed. Remove frost,
snow, or ice.
2. Check that the hood and trunk are fully closed.
3. Check that any items you may be carrying with you inside are
stored properly or fastened down
securely. 4. Check the adjustment of the seat
(see page 51 ).
5. Check the adjustment of the
inside and outside mirrors (see
page 59 ).
6. Chec k
the adjustment of the
steering wheel (see page 43 ).
7. Make sure the doors are securely
closed and locked.
8. Fasten your seat belt. Check that your passengers have fastened
their seat belts (see page 7 ). 9. Turn the ignition ON (II). Check
the indicator lights in the instru-
ment panel.
10.Start th
e
engine.
11.Check the gauges and indicator
lights in the instrument panel
(see page 31 ).
Driving
ProCarManuals.comMain Menu Table of Contents s t
Page 171 of 225

Storing Your Car
If you need to park your car for an
extended period (more than 1
month), there are several things
you should do to prepare it for
storage. Proper preparation helps
prevent deterioration and makes it
easier to get your car back on the
road. It is best to store your car indoors if at all possible. Fill the gas tank.
Change the engine oil and filter
(see page 137).
Wash and dry the exterior
completely.
Clean the interior. Make sure the
carpeting, floor mats, etc. are
completely dry.
Leave the parking brake off. Put
the transmission in Reverse (5-
speed) or Park (automatic). Block the rear wheels.
If the car is to be stored for a
longer period, it should be
supported on jackstands so the
tires are off the ground.
Leave one window open slightly
(if the car is being stored indoors).
Disconnect the battery.
Cover the car with a "breathable" car cover, one made
from a porous material such as
cotton. Nonporous materials,
such as plastic sheeting, trap
moisture which can damage the
paint. If possible, run the engine for a
while periodically (preferably once a month). If you store your car for 12 months
or longer, have your Honda dealer
perform the inspections called for
in the 24 months/48,000 km (30,000
miles) maintenance schedule as
soon as you take it out of storage
(see page 133). The replacements
called for in the maintenance
schedule are not needed unless the
car has actually reached that time or mileage.
MaintenanceProCarManuals.comMain Menu Table of Contents s t
Page 217 of 225

Index
Accessories
Installation................................. 105
ACCESSORY
(Ignition Key Position).............. 48
Adding
Automatic Transmission
Fluid........................................ 144
Brake Fluid............................... 146 Clutch Fluid.............................. 147
Engine Oil...:.............................. 135
Manual Transmission Fluid... 145
Power Steering Fluid.............. 148
Radiator Coolant...................... 139
Windshield Washer fluid ........ 143
Additional Safety Information .... 16
Door Locks.................................. 16
Driving with Pets....................... 17
Seat-back Position..................... 16
Storing Cargo Safely................. 17
Additives, Engine Oil................... 136
Adjustments
Mirrors....................................... .
59
Seats............................................. 51
Steering Wheel..........................
43
Airbag (SRS).................................. 1
0
Air Conditioning............................. 68
Maintenance..............................
157
Usage............................................ 6 8
Ai
r Filter........................................
149
Air Outlet
s
(Vents)......................... 68
Air Pressure, Tires ......................
159
Alcohol an d
Drugs.......................... 24
Alcohol in Gasoline........................ 98
Antifreeze......................................
139
Anti-lock Brake s
(ABS)
Description................................
208
Indicator Light.................. .
34,
118
Operation................................... 117
Anti-theft Steerin
g
Column
Lock.............................................. 48
Appearance Care..........................
175
Ashtray............................................. 65
Audio System................................. .
75
Automatic Speed Control............. 44
Automatic Transmission............ 112
Capacity, Fluid........................
.
206
Checking Fluid Level.............. 144
Shifting
...................................... 113
Shift Leve r
Positions...............
112
Shift Lock Release................... 115
Battery
Charging System Light............. 33
Jump Starting............................ 191
Maintenance.............................. 152
Specifications............................ 207
Before Driving
................................ 97
Belts, Seat ......................................... 4
Body Repair
...................................
181
Brakes
Anti-lock Syste
m (ABS)..........
117
Break-in, Ne
w
Linings.............. 98
Fluid............................................
146
Light, Burned-out................... .
169
Parking......................................... 61
System Light.............................. .
33
Wear Indicators.....................
116
Brakes, AB S
Description...............................
.
208
Operation................................... 117
System Indicator...............
.
34,
118
Braking System...........................
.
116
Break-in, Ne
w
Car ......................... 98
CONTINUEDProCarManuals.comMain Menu s t