1992 HONDA PRELUDE battery
[x] Cancel search: batteryPage 109 of 225

Starting the Engine
5. If the engine does not start within 15 seconds, or starts butstalls right away, repeat step 4
with the accelerator pedal pressed half-way down. If theengine starts, release pressure on
the accelerator pedal so the
engine does not race.
6. If
the engine still does not start,
press the accelerator pedal all the
way down and hold it there while
starting in order to clear flooding.
As before, keep the
ignition key
in the START (III) position for
no more than 15 seconds. Return
to step 5 if the engine does not start. If it starts, lift your foot off
the accelerator pedal so the engine does not race.
Starting in Cold Weather at
High Altitude (Above 2,400
meters/8,000 feet)
An engine is harder to start in cold
weather. The thinner air found at
high altitude above 2,400 meters (8,000 feet) adds to the problem.
Use the following procedure:
1.
Turn off all electrical accessories
to reduce the drain on the
battery.
2. Push the accelerator pedal half-
way t o
the floor and hold it there
while starting the engine. Do not
hold the ignition key in START
(III) for more than 15 seconds.
When the engine starts, release
the accelerator pedal gradually
as the engine speeds up and
smooths out.
3. If the engine fails to start in step
2, push the accelerator pedal tothe floor and hold it there while
you try to start the engine for no
more than 15 seconds. If the
engine does not start, return to
step 2.
DrivingProCarManuals.comMain Menu Table of Contents s t
Page 125 of 225

Maintenance
Regularly maintaining your Honda
is the best way to protect your investment. You will be rewarded
with safer, more economical,
trouble-free driving. This section
lists items that need to be checked
regularly and explains how to check them. It also details some
simple maintenance tasks you can
do yourself. The maintenance
schedules for normal and severe
driving conditions show you when
these things need to be done.
If you are interested in how to per-
form more complex maintenance
on your Honda, you can purchase
the Service Manual. See page 221 for information on how to
obtain a copy, or see your Honda
dealer.
Maintenance Schedule................ 128
Maintenance Record................ 131
Periodic Checks............................ 133
Fluid Locations............................. 134
Engine Oil...................................... 135
Checking Engine Oil................ 135
Adding........................................ 135
Recommended Oil.................... 136
Additives.................................... 136 Oil and Filter Changes ............ 137
Cooling System............................. 139 Checking the Coolant Level... 139
Adding Radiator Coolant........ 139
Replacing Coolant.................... 140
Windshield Washers.................... 143
Transmission Oil.......................... 144
Automatic Transmission........ 144
5-speed Transmission.............. 145
Brake and Clutch Fluid............... 146
Brake System............................ 146
Anti-lock Brake System ......... 147 Clutch System........................... 147
Power Steering............................. 148
Air Filter....................................... 149
Fuel Filter..................................... 150
Spark Plugs.................................. .
150
Replacement.............................. 150
Specification.............................. 152
Battery............................................ 152
Windshield Wipers....................... 155
Air Conditioner............................. 157 Engine Belts.................................. 158
Tires................................................ 158 Inflation...................................... 158
Inspection................................... 159
Maintenance.............................. 160
Tire Rotation............................ 160
Replacing Tires ........................ 161
Wheels and Tires...................... 161
DOT Tire Quality Grading..... 161 Treadwear............................. 161
Traction................................. 162
Temperature......................... 162
Winter Driving.......................... 163 Snow Tires............................ 163
Tire Chains............................ 163
Lights.............................................. 164
Replacing Bulbs........................ 164
Storing Your Car.......................... 173
MaintenanceProCarManuals.comMain Menu s t
Page 131 of 225

Periodic Checks
You should check the following items at the specified intervals. If
you are unsure of how to perform
any check, turn to the page given. Engine oil level — Check every
time you fill the gas tank. See
page 102.
Engine coolant level — Check
the radiator reserve tank every
time you fill the gas tank. See
page 103.
Windshield washer fluid —
Check the level in the reservoir
monthly. If weather conditions
cause you to use the washers
frequently, check the reservoir each time you stop for gas. See
page 143 .
Automatic transmission — Check the fluid level monthly.
See page 144. Brakes, clutch and power
steering — Check the fluid level
monthly. See page 146.Tires — Check the tire pressure
monthly. Examine the tread for
wear and foreign objects. See
page 159.
Battery — Check its condition
and the terminals for corrosion
monthly. See page 152.
Air conditioner — Check its operation weekly. See page 157.
Lights — Check the operation of
the headlights, parking lights,
taillights, high-mount brake light,
turn signals, brake lights, and
license plate lights monthly. See
page 164.
MaintenanceProCarManuals.comMain Menu Table of Contents s t
Page 137 of 225

Cooling System
Checking the Coolant Level
Check the level of the engine
coolant by looking at the radiator
reserve tank next to the battery. If
the level is at or below the MIN line, add coolant to bring it up to the
MAX line. This coolant should
always be a mixture of 50%
antifreeze and 50% water. Never
add straight antifreeze or plain
water. Always use Genuine Honda Anti-
freeze/Coolant. The cooling system contains many aluminum compo-
nents which can corrode if an
improper antifreeze is used. Some
antifreeze, even though labeled as
safe for aluminum parts, may not
provide adequate protection.
Adding Radiator Coolant
If the reserve tank is completely
empty, you should also check the
coolant level in the radiator.
1. Make sure the engine and radiator are cool.
CONTINUED
Maintenance
RESERVE TANK
MAX
MIN
Removing the radiator cap
while the engine is hot can
cause the coolant to spray out,
seriously scalding you.
Always let the engine and
radiator cool down before
removing the radiator cap.ProCarManuals.comMain Menu Table of Contents s t
Page 150 of 225

Spark Plugs, Battery
Specifications:
Battery
Check the condition of your car's
battery monthly. You should check
for proper electrolyte level and
corrosion on the terminals.
Maintenance
The battery gives off explo-
sive hydrogen gas during nor-
mal operation. A spark or open
flame can cause the battery to
explode with enough force to
kill or seriously hurt you.
Wear protective clothing and a
face shield, or have a skilled mechanic do the battery main-
tenance. The battery contains sulfuric
acid (electrolyte) which is
highly corrosive and poisonous.
Getting electrolyte in your
eyes or on your skin can cause
serious burns. Wear protective
clothing and eye protection
when working near the battery.
Swallowing electrolyte can
cause fatal poisoning if immedi- ate action is not taken.
KEEP OUT OF THE REACH OF
CHILDREN
(US: S, Canada: S)
Normal driving conditions
NGK:
Nippondenso:
Hot climates, or continuous high
speed driving NGK:
Nippondenso:
(US: Si, Si 4WS, Canada: SR, SR 4WS)
Normal driving conditions NGK:
Nippondenso:
Hot climates, or continuous high
speed driving NGK:
Nippondenso:
ZFR5F-11
KJ16CR-L11
ZFR6F-11
KJ20CR-L11
ZFR6F-11
KJ20CR-L11
ZFR7F-11
KJ22CR-L11ProCarManuals.comMain Menu Table of Contents s t
Page 151 of 225

Battery
Emergency Procedures
Eyes — Flush with water from a
cup or other container for at least
fifteen minutes. (Water under
pressure can damage the eye.)
Immediately call a physician or 911.
Skin — Remove contaminated
clothing. Flush the skin with large quantities of water. Call a physi-
cian immediately.
Swallowing — Drink water or
milk. Call your local Poison Control
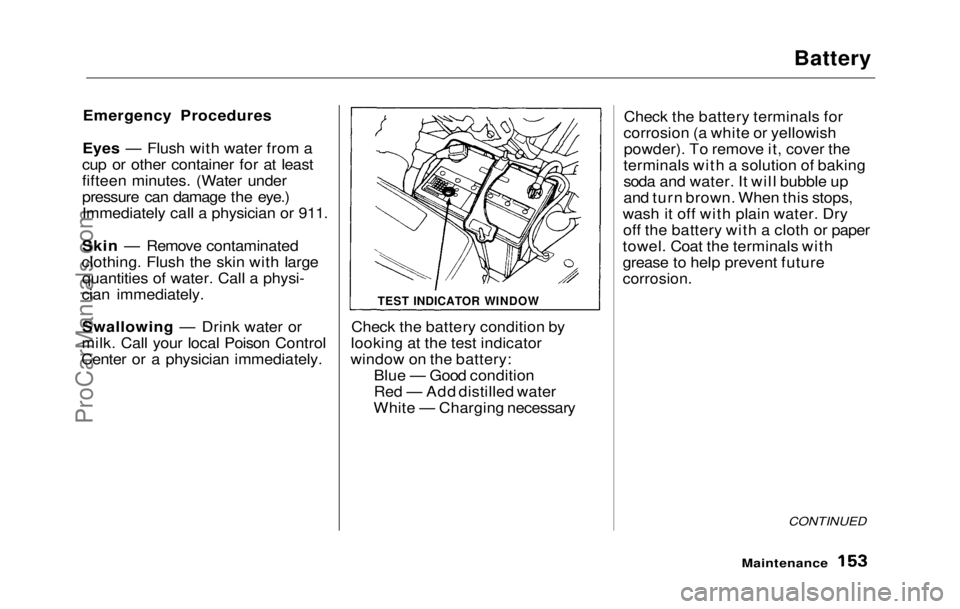
Center or a physician immediately. Check the battery condition by
looking at the test indicator
window on the battery: Blue — Good condition
Red — Add distilled water
White — Charging necessary Check the battery terminals for
corrosion (a white or yellowish powder). To remove it, cover the
terminals with a solution of baking
soda and water. It will bubble up
and turn brown. When this stops,
wash it off with plain water. Dry off the battery with a cloth or paper
towel. Coat the terminals with
grease to help prevent future
corrosion.
CONTINUED
Maintenance
TEST INDICATOR WINDOWProCarManuals.comMain Menu Table of Contents s t
Page 152 of 225

Battery
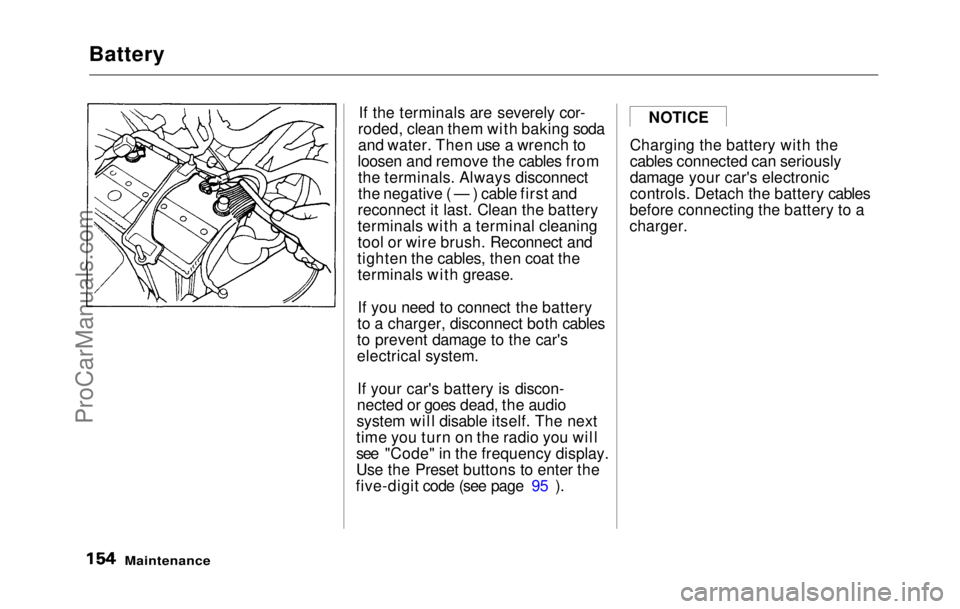
If the terminals are severely cor-
roded, clean them with baking soda
and water. Then use a wrench to
loosen and remove the cables from the terminals. Always disconnect
the negative ( — ) cable first and
reconnect it last. Clean the battery
terminals with a terminal cleaning
tool or wire brush. Reconnect and
tighten the cables, then coat the terminals with grease.
If you need to connect the battery
to a charger, disconnect both cables
to prevent damage to the car's
electrical system.
If your car's battery is discon-
nected or goes dead, the audio
system will disable itself. The next
time you turn on the radio you will
see "Code" in the frequency display.
Use the Preset buttons to enter the
five-digit code (see page 95 ). Charging the battery with the
cables connected can seriously
damage your car's electronic
controls. Detach the battery cables
before connecting the battery to a
charger.
Maintenance
NOTICEProCarManuals.comMain Menu Table of Contents s t
Page 171 of 225

Storing Your Car
If you need to park your car for an
extended period (more than 1
month), there are several things
you should do to prepare it for
storage. Proper preparation helps
prevent deterioration and makes it
easier to get your car back on the
road. It is best to store your car indoors if at all possible. Fill the gas tank.
Change the engine oil and filter
(see page 137).
Wash and dry the exterior
completely.
Clean the interior. Make sure the
carpeting, floor mats, etc. are
completely dry.
Leave the parking brake off. Put
the transmission in Reverse (5-
speed) or Park (automatic). Block the rear wheels.
If the car is to be stored for a
longer period, it should be
supported on jackstands so the
tires are off the ground.
Leave one window open slightly
(if the car is being stored indoors).
Disconnect the battery.
Cover the car with a "breathable" car cover, one made
from a porous material such as
cotton. Nonporous materials,
such as plastic sheeting, trap
moisture which can damage the
paint. If possible, run the engine for a
while periodically (preferably once a month). If you store your car for 12 months
or longer, have your Honda dealer
perform the inspections called for
in the 24 months/48,000 km (30,000
miles) maintenance schedule as
soon as you take it out of storage
(see page 133). The replacements
called for in the maintenance
schedule are not needed unless the
car has actually reached that time or mileage.
MaintenanceProCarManuals.comMain Menu Table of Contents s t