1990 VOLKSWAGEN TRANSPORTER warning light
[x] Cancel search: warning lightPage 43 of 165
Downloaded from www.Manualslib.com manuals search engine
CONTROLS
AND
EQUIPMENT
WARNING continned •
The
engine compartment
of any
motor vehicle
is a
potentially hazard
ous
area.
Before you check anything in the engine compartment, stop
the
engine and
let it
cool down. Always
exercise extreme caution when work
ing
one the
engine. Heed
all of the
WARNINGS on page
97.
Reduce the risk
of
scalding from
hot
coolant by following these steps.
• If the coolant reservoir cap must be
removed, wait until
the
engine
has
cooled down.
• Protect face, hands
and
arms
by
covering
the cap
with
a
large, thick
rag
to
protect against escaping fluid
and
steam.
• Carefully and slowly
turn
cap
one
turn
to
allow excess pressure
to es
cape before completely removing
cap.
•
To
help avoid being burned,
do not
spill
antifreeze
or
coolant
on the ex
haust system
or hot
engine parts.
Under
some conditions, the ethylene
glycol
in
engine coolant
is
combusti
ble.
If a
visual check shows that coolant level
and V-belt
are
normal,
but the
warning light continues to
flash,
contact
your
near
est dealer
to
have
the
cause located
and
corrected.
For more details see "Cooling system"
on
page 104.
If the
coolant gauge needle nears
the
upper end
of
the scale and the engine ap
pears
to be
overheating,
turn
off the air
conditioner.
Do
not
install accessories
(fog
lights
or
in
sect screens,
for
example)
on top of the
front
bumper.
They
may
restrict engine
cooling.
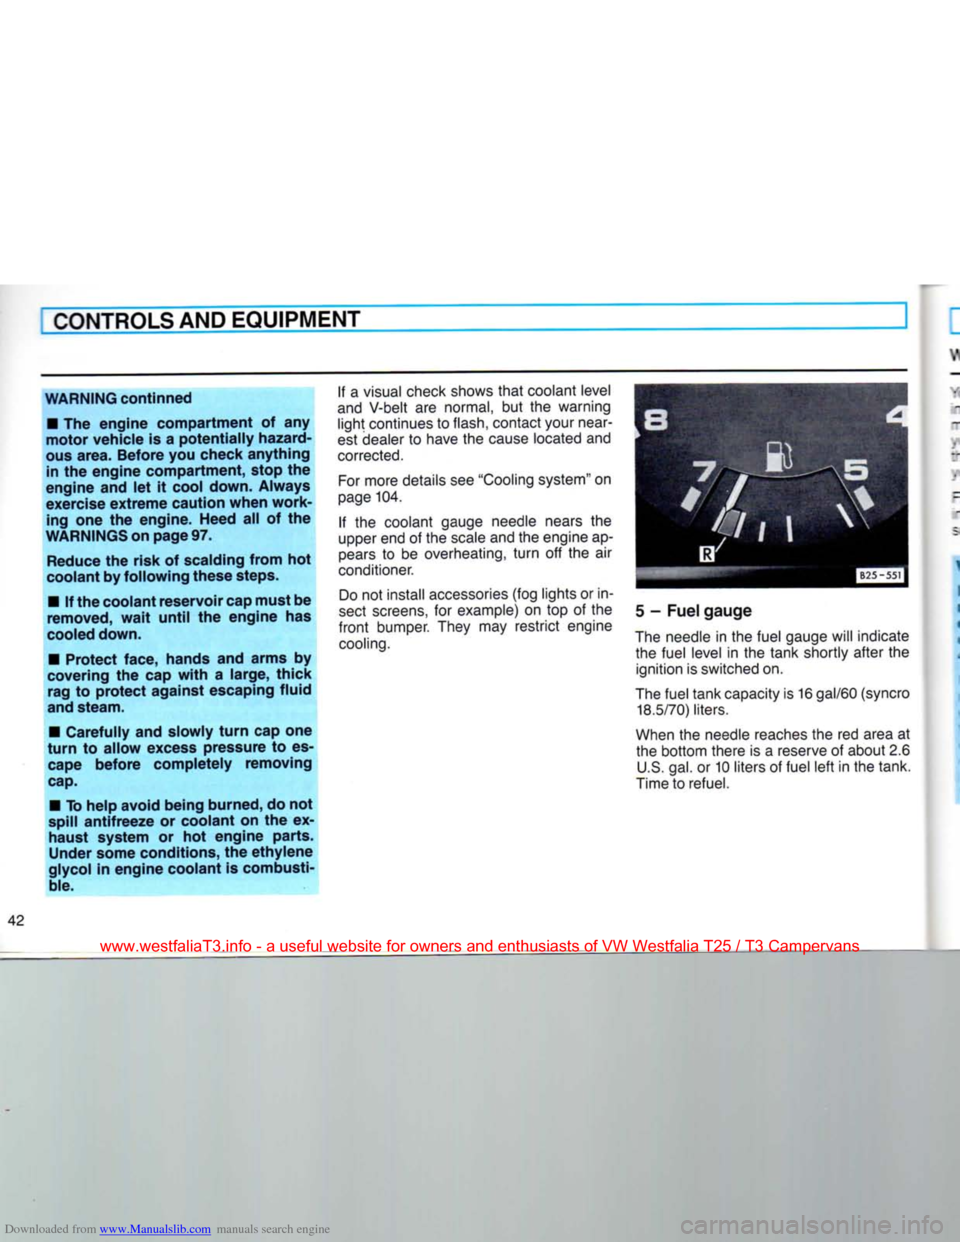
5
-
Fuel gauge
The needle
in
the fuel gauge will indicate the fuel level
in the
tank shortly after
the
ignition is switched on.
The fuel tank capacity is
16
gal/60
(syncro
18.5/70)
liters.
When
the
needle reaches the
red
area
at
the bottom there
is a
reserve
of
about 2.6 U.S. gal.
or
10 liters
of
fuel left in the tank.
Time to refuel.
www.westfaliaT3.info - a useful website for owners and enthusiasts of VW Westfalia T25 / T3 Campervans
Page 44 of 165
Downloaded from www.Manualslib.com manuals search engine
CONTROLS
AND
EQUIPMENT
WARNING
/ INDICATOR
LIGHTS
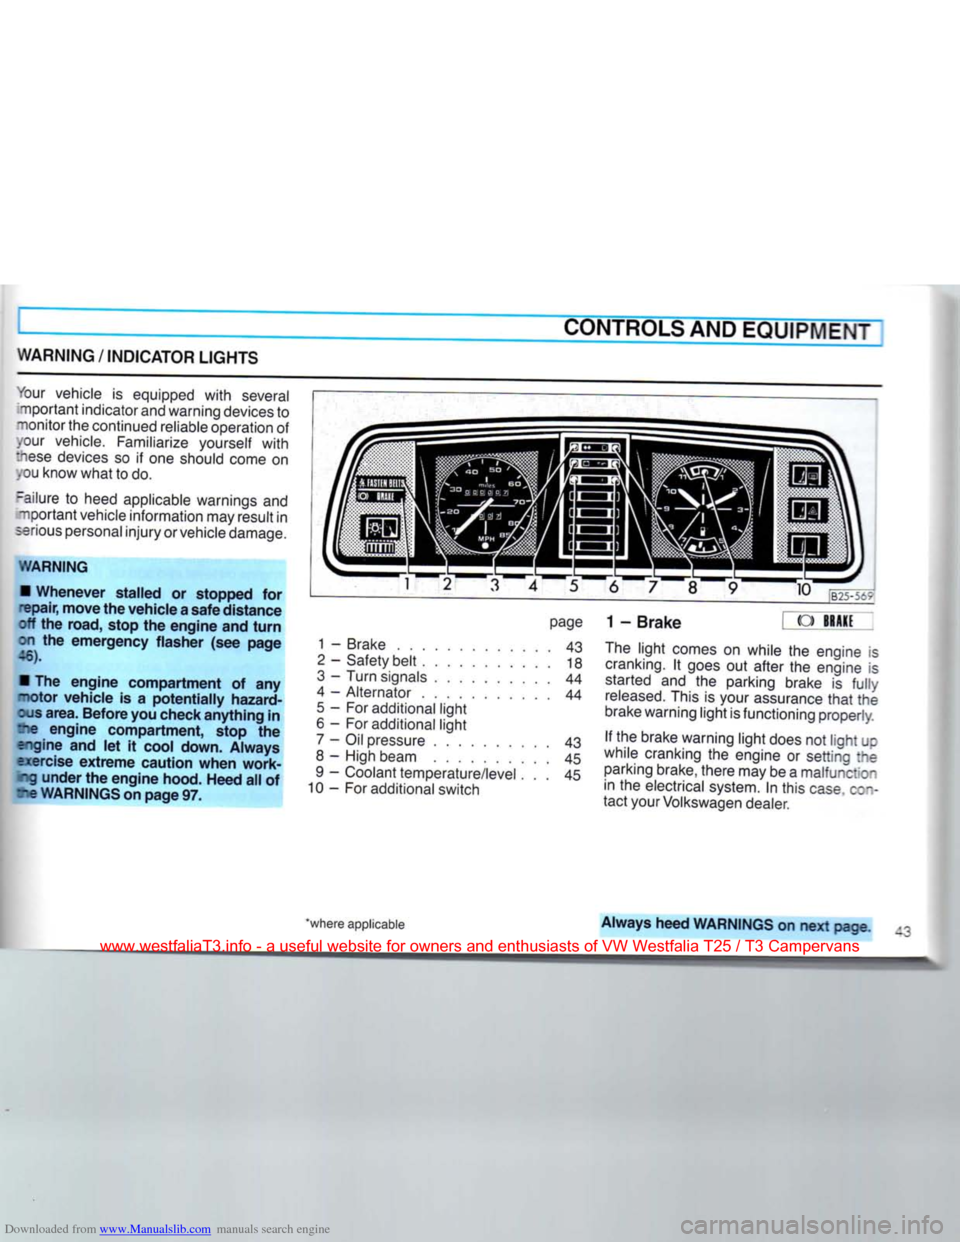
1 2 3 4 5 6 7 8
your vehicle is equipped
with
several
•nportant indicator and warning devices to
~ionitor the continued reliable operation of .our vehicle. Familiarize yourself
with
:hese
devices so if one should come on .ou know what to do.
-allure to heed applicable warnings and "nportant vehicle information may result in
serious
personal injury or vehicle damage.
WARNING
•
Whenever
stalled
or stopped for
epair,
move
the
vehicle
a
safe
distance
off the road, stop the
engine
and
turn
on the
emergency
flasher
(see
page
46).
• The
engine
compartment
of any
-lotor
vehicle
is a
potentially
hazard
ous
area.
Before
you check
anything
in
?ie
engine
compartment,
stop the
engine
and let it cool down.
Always
exercise
extreme
caution
when
work
ing
under
the
engine
hood.
Heed
all of
re
WARNINGS
on
page
97.
page
1 - Brake 43
2
- Safety belt 18
3
- Turn signals 44
4 - Alternator 44
5
- For additional light
6 - For additional light 7 - Oil pressure 43
8 - High beam 45
9 - Coolant temperature/level . . . 45
10 - For additional switch 9 10
B25-5t?
1-Brake
« ->
The
light comes on while the engine is
cranking.
It goes out after the engine is started and the parking brake is
fully
released.
This is your assurance
that
the
brake warning light is functioning properly.
If the brake warning light does not light JC
while cranking the engine or setting :ne parking brake, there may be a malfunction in the electrical system. In this
case
c;~-
tact your Volkswagen dealer.
'where applicable
Always
heed
WARNINGS
on next page
www.westfaliaT3.info - a useful website for owners and enthusiasts of VW Westfalia T25 / T3 Campervans
Page 45 of 165
Downloaded from www.Manualslib.com manuals search engine
I CONTROLSAND EQUIPMENT
WARNING If the brake warning
light
does not go
out
with
the engine running and the parking brake released or lights up
while driving, the fluid level
in
the brake
fluid reservoir may
be
too low.
This might be
due
to
a
leak in one of the two independently functioning brake circuits.
If the brake pedal travel has increased,
one of the brake circuits may have
failed.
Avoid driving the vehicle and have it towed to the nearest Volkswa
gen dealer or qualified workshop for re pair.
If brake pedal travel has not increased
and
braking performance remains un
impaired,
proceed carefully to
your
nearest Volkswagen dealer or qualified
workshop to have the braking system inspected and corrected.
For detailed information see
"Brakes" on
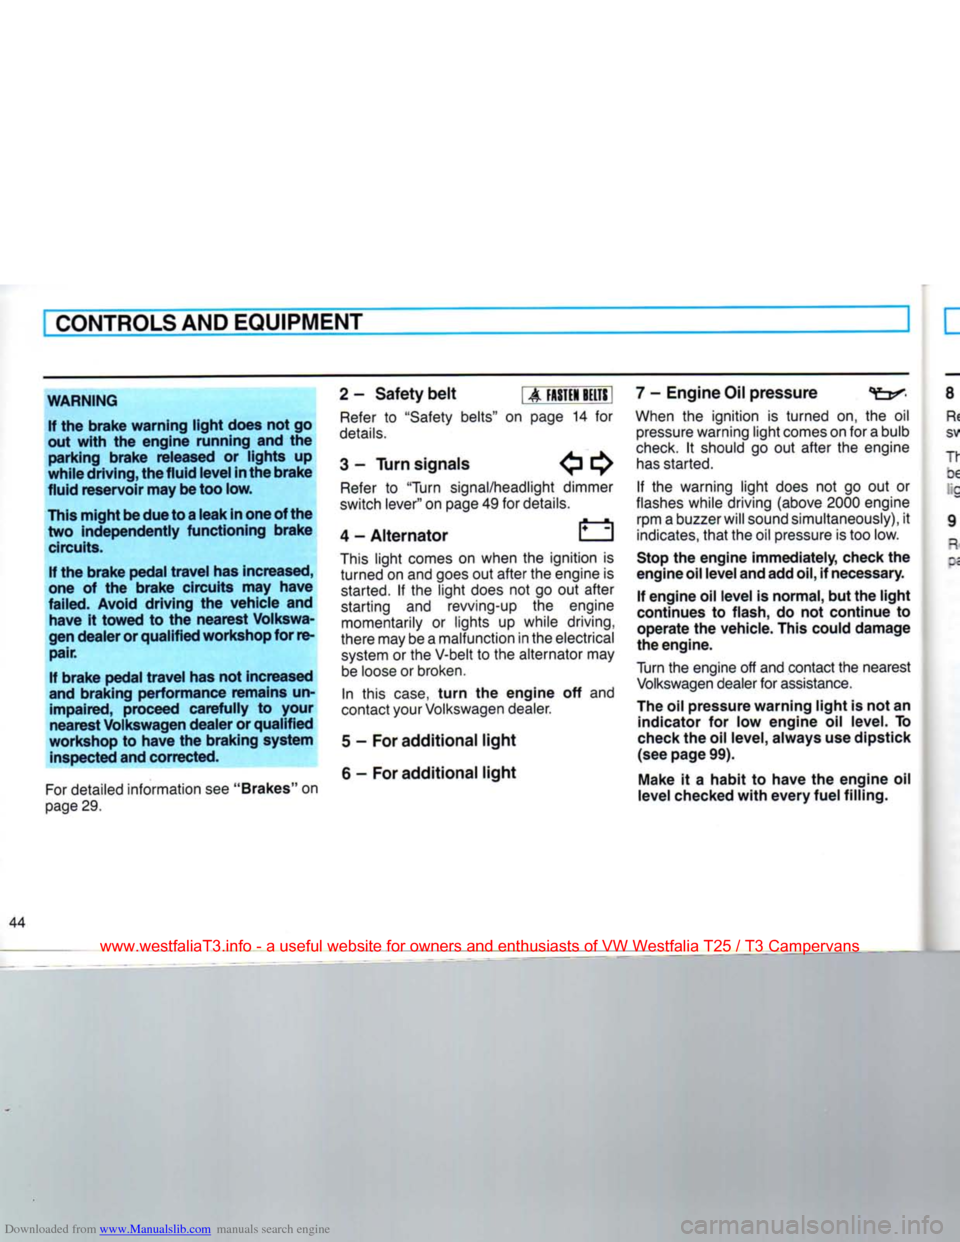
page 29. 2-
Safety belt
|
A
FASTEN
BELTS
Refer
to
"Safety belts"
on
page
14 for
details.
3
-
Turn
signals E^
Refer
to
"Turn
signal/headlight dimmer
switch lever" on page 49 for details.
4
- Alternator
This
light comes
on
when
the
ignition
is
turned on and goes out after the engine
is
started.
If the
light does
not go out
after
starting
and
revving-up
the
engine
momentarily
or
lights
up
while driving,
there may be a malfunction
in
the electrical system
or
the V-belt
to
the alternator may be loose
or
broken.
In
this
case,
turn
the engine off and
contact
your
Volkswagen dealer.
5
- For additional
light
6
- For additional
light
7
- Engine Oil pressure
When
the
ignition
is
turned
on, the oil
pressure warning light comes on for a bulb
check.
It
should
go out
after
the
engine
has
started.
If the
warning light does
not go out or
flashes
while driving
(above
2000
engine rpm a buzzer
will
sound simultaneously),
it
indicates,
that the oil pressure is too low.
Stop the engine immediately, check the
engine
oil
level
and add
oil, if necessary.
If engine oil level is normal, but the
light
continues to flash, do not continue to
operate the vehicle. This could damage
the engine.
Turn
the engine off and contact the nearest Volkswagen dealer for assistance.
The oil pressure warning
light
is not an indicator for low engine oil level. To
check
the oil level, always use dipstick
(see page 99).
Make
it a habit to have the engine oil
level checked
with
every
fuel filling.
www.westfaliaT3.info - a useful website for owners and enthusiasts of VW Westfalia T25 / T3 Campervans
Page 47 of 165
Downloaded from www.Manualslib.com manuals search engine
CONTROLS AND EQUIPMENT
SWITCHES
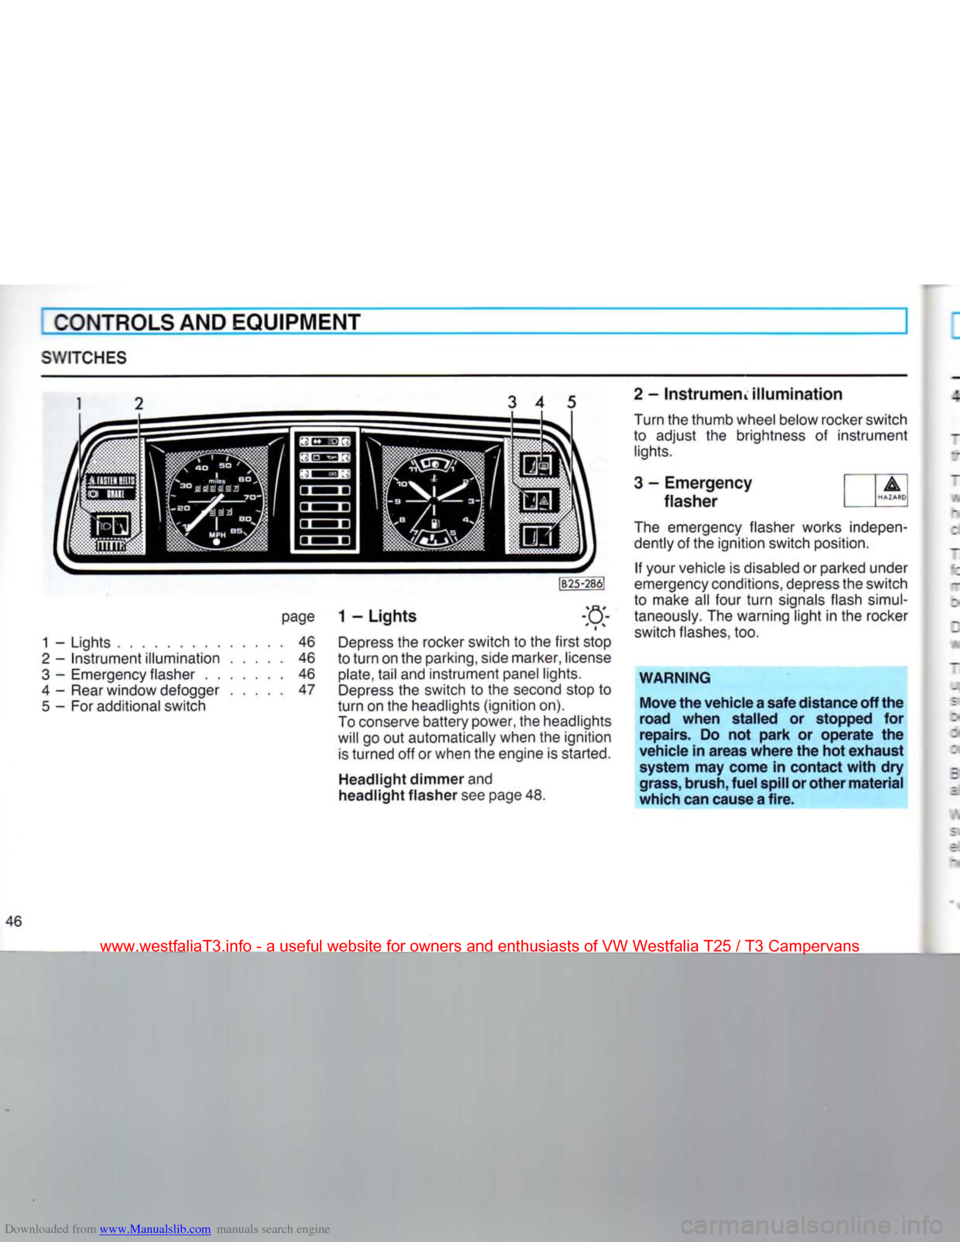
3 4 5
page
1 - Lights
1
-
Lights
46
2
-
Instrument illumination
46
3
-
Emergency flasher
46
4
-
Rear window defogger
47
5
- For
additional switch Depress
the
rocker switch
to the
first stop
to turn
on the
parking, side marker, license
plate,
tail
and
instrument panel lights. Depress
the
switch
to the
second stop
to
turn
on the
headlights (ignition
on).
To conserve battery power,
the
headlights will
go out
automatically when
the
ignition is turned
off or
when
the
engine
is
started.
Headlight dimmer and
headlight flasher see
page
48. 2 - InstrumeriL illumination
Turn
the
thumb wheel below rocker switch
to adjust
the
brightness
of
instrument
lights.
3 - Emergency
flasher
The emergency flasher works indepen dently
of the
ignition switch position.
If your vehicle
is
disabled
or
parked under
emergency conditions, depress the switch
to make
all
four turn signals flash simul
taneously.
The
warning light
in the
rocker
switch flashes,
too.
WARNING
Move the vehicle a safe distance off the
road when stalled or stopped for
repairs. Do not park or operate the
vehicle in areas where the hot exhaust system may come in contact with dry
grass, brush, fuel spill or other material
which can cause a fire.
46
www.westfaliaT3.info - a useful website for owners and enthusiasts of VW Westfalia T25 / T3 Campervans
Page 50 of 165
Downloaded from www.Manualslib.com manuals search engine
I
CONTROLS AND
EQUIPMENT
CRUISE
CONTROL*
JB33-509
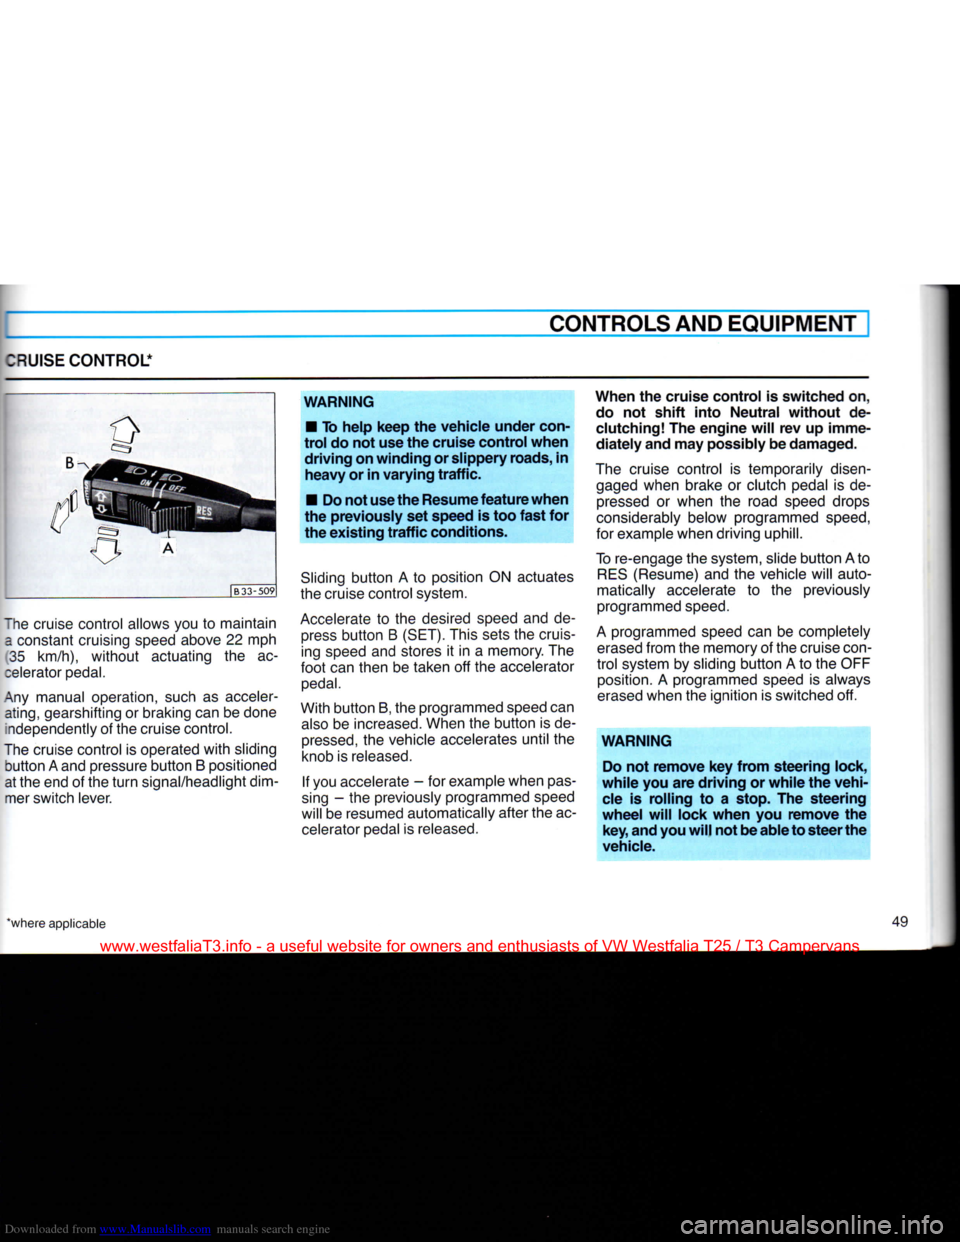
The cruise control allows you
to
maintain a constant cruising speed above
22 mph
35
km/h),
without
actuating
the ac
celerator pedal.
Any
manual operation, such
as
acceler ating, gearshifting
or
braking can be done independently
of
the cruise control.
The cruise control
is
operated
with
sliding
button
A
and pressure
button
B
positioned
at the end
of
the
turn
signal/headlight dim mer switch lever.
WARNING
•
To help keep the vehicle under
con
trol do not use the cruise control when driving on winding or slippery
roads,
in heavy or in varying traffic.
•
Do not
use
the
Resume
feature when
the previously set speed is too fast for the existing traffic
conditions.
Sliding
button
A to
position
ON
actuates
the cruise control system.
Accelerate
to the
desired speed
and de
press
button
B
(SET).
This sets
the
cruising speed and stores
it in a
memory. The
foot
can then
be
taken
off the
accelerator
pedal.
With
button
B, the programmed speed can
also
be
increased. When
the
button
is
de
pressed,
the
vehicle accelerates
until
the
knob
is
released.
If
you accelerate
- for
example when
pas
sing
- the
previously programmed speed
will
be
resumed automatically after the ac celerator pedal
is
released.
When the cruise control is switched on,
do
not shift into Neutral without de
clutching!
The engine
will
rev up imme
diately and may
possibly
be damaged.
The cruise control
is
temporarily disen gaged when brake
or
clutch pedal
is de
pressed
or
when
the
road speed drops
considerably below programmed
speed,
for example when driving uphill.
To
re-engage the system, slide
button
A to
RES
(Resume) and
the
vehicle will auto
matically accelerate
to the
previously
programmed
speed.
A
programmed speed can
be
completely
erased
from the memory
of
the cruise
con
trol
system
by
sliding
button
A to the
OFF position.
A
programmed speed
is
always
erased
when the ignition
is
switched
off.
WARNING
Do
not remove key from steering lock,
while you are driving or while the vehi
cle
is rolling to a stop. The steering
wheel
will
lock when you remove the key, and
you
will
not be able to steer the
vehicle.
'where applicable 49
www.westfaliaT3.info - a useful website for owners and enthusiasts of VW Westfalia T25 / T3 Campervans
Page 59 of 165
Downloaded from www.Manualslib.com manuals search engine
CONTROLS AND EQUIPMENT
Engine
running
Heater
on -
Turn knob clockwise to position 2. Switch knob control light will come on. Adjust
temperature by turning knob between positions 2 and 3.
Heater
off -
Turn switch knob counter-clockwise to position 0. Switch knob control light will go
out.
Notes
• Every time the heater is switched off,
the warm air and combustion air blowers continue running briefly to cool the heater
down quicker.
• To avoid draining the battery, do not
run the heater repeatedly when the engine
is
not running.
• When the heater is running on the
clockwork time switch, it must be switched
off by hand before attempting to start the
engine at low temperatures so
that
the
full
battery capacity is available to
turn
the
engine.
WARNING
Never
start
the
heater
or let the
engine
or the
heater
run in an enclosed, un-
ventilated
area.
Exhaust
fumes
from
the
engine
or the
heater
contain
carbon monoxide,
which
is colorless and
odorless. Carbon monoxide,
however
is a
very
harmful
gas, and may be
fatal
if inhaled.
Due to the
risk
of
fire
the
heater
must
not be used
when
vehicle
is
parked
on
dry grass, brush or leaves.
Maintenance
During the winter and when driving over
very poor roads, mud or snow may tend to
accumulate
in the exhaust and combus
tion air intake pipes. Have these pipes
checked
for blockage from time to time so
that
the heater can continue to work.
58
www.westfaliaT3.info - a useful website for owners and enthusiasts of VW Westfalia T25 / T3 Campervans
Page 62 of 165

Downloaded from www.Manualslib.com manuals search engine
CONTROLS AND EQUIPMENT
Setting
the
time
•
Press
and hold clock button E.
• Set clock
with
buttons A.
The
display lights up as long as button is
oressed.
When button is released the dis
play goes out or, if a time has been pre
selected,
the selected time lights up for 2
sees.
To
switch
heater
on or off • This is done by pressing button
F.
When
-eater is switched on the warning lamp G ghts up.
To
ensure
that
the heater starts the lever ;or the heat output must be pushed fully to
:ie
right.
This
closes
an electrical contact.
Preselecting
starting
time
for
heater
stationary operation, ignition off)
With buttons C two different switch-on
:imes
can be selected within 24 hours.
•
Press
and hold button. The appropriate
*:gure 1 or 2 appears in display. The ready- •or-action lamp lights up.
• Set required switch-on time
with
but
tons A. The display remains on for about 20 seconds after releasing button C.
To
ensure
that
the heater starts up at the
selected
time, the lever for the heat output must be pushed fully over to the
right.
In
addition to this the blower must be
switched to Stage 1. On account of the higher current consumption, a higher
stage
should only be selected in isolated
cases.
Switching
preselected
time
off • The preselected time can be switched
off by briefly pressing the appropriate but
ton C. The ready-for-action lamp and the figure in display then go out.
Fuses
The
fuses for the auxiliary heater are in an additional holder behind the main fuse
box.
Notes
• Every time the heater is switched off,
the warm air and combustion air blowers
continue running briefly to cool the heater
down quicker.
• To avoid draining the battery, do not run
the heater repeatedly when the engine is not running.
• When driving through mud and snow,
the exhaust pipe may tend to get blocked.
Have
a look at it occasionally to see
that
it
is
clear.
WARNING
Never
start
the
heater
or let the
engine
or the
heater
run in an enclosed,
unventilated
area.
Exhaust
fumes
from
the
engine
or the
heater
contain
carbon monoxide,
which
is colorless and odor
less.
Carbon monoxide,
however
is a
very
harmful
gas, and may be
fatal
if in haled.
Due to the
risk
of
fire
the
heater
must
not be used
when
vehicle
is
parked
on
dry grass, brush or leaves.
www.westfaliaT3.info - a useful website for owners and enthusiasts of VW Westfalia T25 / T3 Campervans
Page 63 of 165
Downloaded from www.Manualslib.com manuals search engine
CONTROLS AND EQUIPMENT
SLIDING
ROOF*
SUN
ROOF*
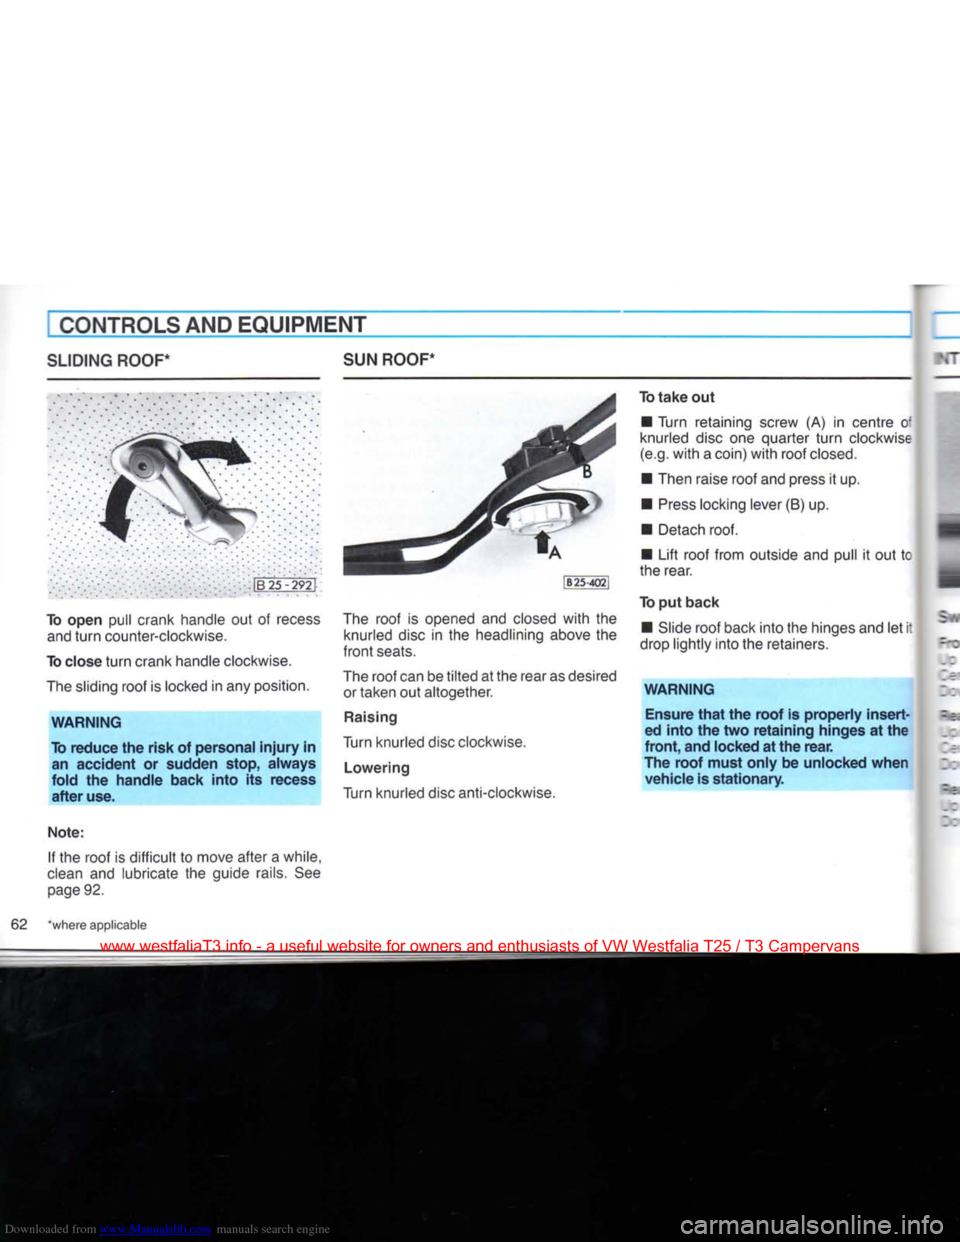
To open pull crank handle out of recess
and
turn
counter-clockwise.
To close
turn
crank handle clockwise.
The
sliding roof is locked in any position.
WARNING
To
reduce
the
risk
of personal
injury
in an
accident
or sudden stop,
always
fold
the
handle
back
into
its recess
after
use.
Note:
If the roof is difficult to move after a while,
clean
and lubricate the guide rails. See
page
92.
The
roof is opened and closed
with
the
knurled disc in the headlining above the
front
seats.
The
roof can be
tilted
at the rear as desired or taken out altogether.
Raising
Turn knurled disc clockwise.
Lowering
Turn knurled disc anti-clockwise. To
take
out
• Turn retaining screw (A) in centre of
knurled disc one quarter
turn
clockwise
(e.g.
with
a coin)
with
roof
closed.
• Then raise roof and press it up.
•
Press
locking lever (B) up. • Detach roof.
• Lift roof from outside and pull it out tc
the rear.
To put
back
• Slide roof back into the hinges and let it
drop lightly into the retainers.
WARNING
Ensure
that
the
roof
is
properly
insert
ed
into
the two
retaining
hinges at the
front,
and locked at the
rear.
The
roof
must
only
be unlocked
when
vehicle
is
stationary.
62 "where applicable
www.westfaliaT3.info - a useful website for owners and enthusiasts of VW Westfalia T25 / T3 Campervans