Page 25 of 143

Safety Indicator Lights
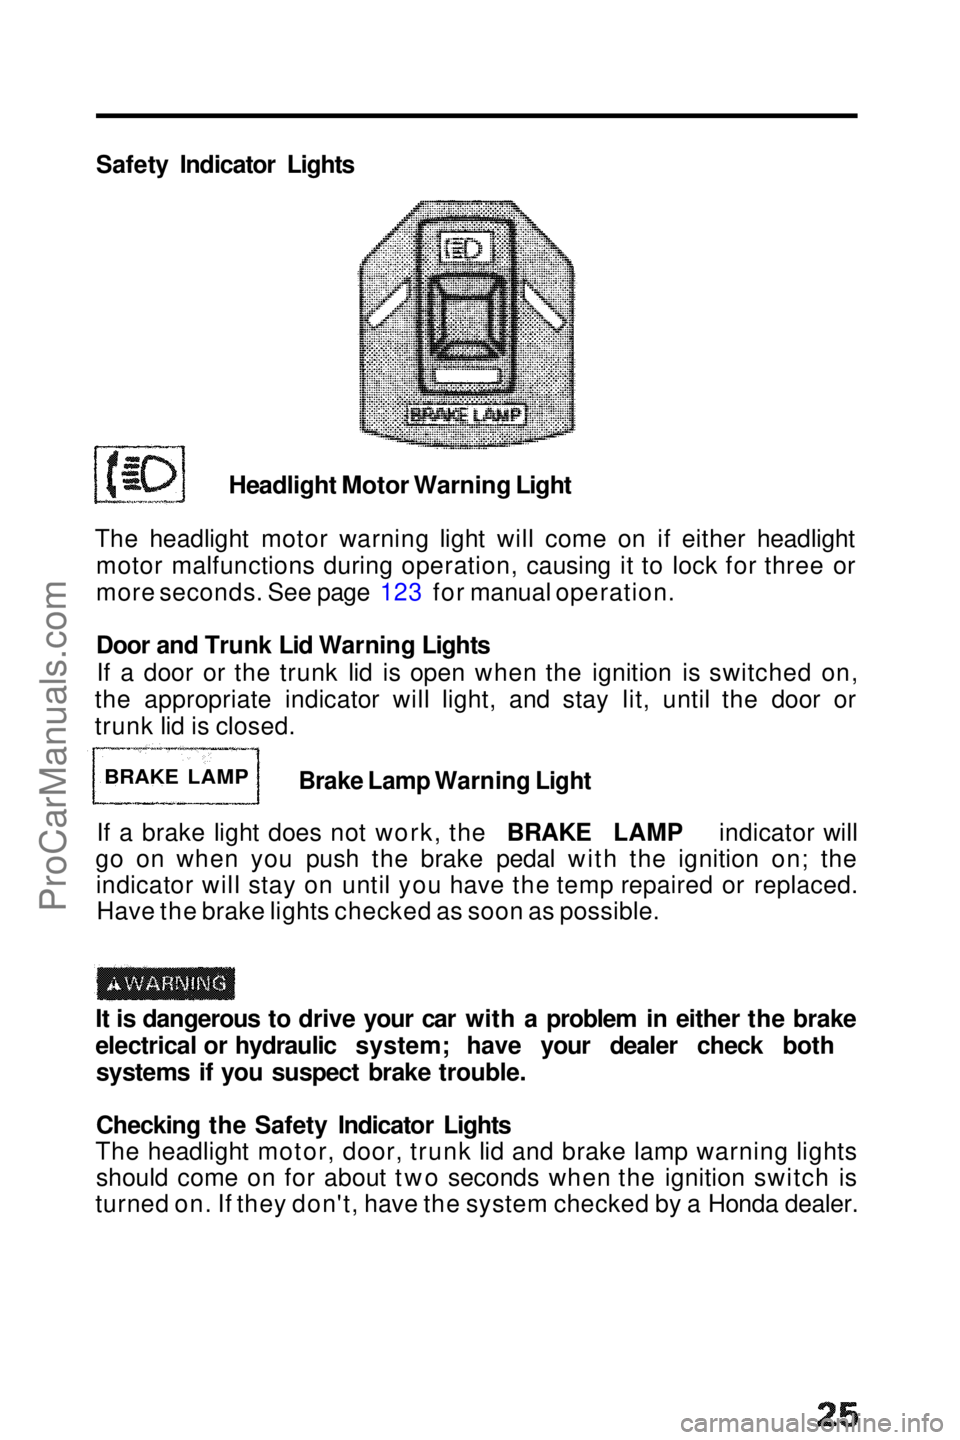
Headlight Motor Warning Light
The headlight motor warning light will come on if either headlight motor malfunctions during operation, causing it to lock for three or
more seconds. See page 123 for manual operation.
Door and Trunk Lid Warning Lights
If a door or the trunk lid is open when the ignition is switched on,
the appropriate indicator will light, and stay lit, until the door or
trunk lid is closed.
Brake Lamp Warning Light
If a brake light does not work, the BRAKE LAMP indicator will
go on when you push the brake pedal with the ignition on; the indicator will stay on until you have the temp repaired or replaced.Have the brake lights checked as soon as possible.
It is dangerous to drive your car with a problem in either the brake
electrical or hydraulic system; have your dealer check both systems if you suspect brake trouble.
Checking the Safety Indicator Lights
The headlight motor, door, trunk lid and brake lamp warning lights should come on for about two seconds when the ignition switch is
turned on. If they don't, have the system checked by a Honda dealer.
BRAKE LAMPProCarManuals.comMain Menu s t
Page 33 of 143
Hazard Warning System
This system should be used only when your car is stopped underemergency or hazardous
conditions. To activate, push the hazard warning switch The
front and rear turn signals will
blink simultaneously and both indicator lights will flash. Push the switch again to turn the
system off.
Panel Brightness Control
When the light switch is in either
of the two "ON" positions, the intensity of the instrument lights
can be adjusted by turning the panel brightness control dial.
Interior Light
The interior light has a three position switch. The light is off all
the time in the OFF position. In
the middle position, it goes on only when a door is opened. In theON position, it is on all the time.
(cont'd)
ON
OFF
DOOR
ACTIVATED
Bright
DarkProCarManuals.comMain Menu t s
Page 39 of 143

Glove Box,Parking Brake and Hood
Glove Box
Open by pulling the handle.Close
with a firm push .The glove box
can be locked by using the master key; turn the key clockwise to
LOCK.
The glove box light will go on when the glove box door is
opened and the headlights are on.
Do not drive the car with the glove
box door open; it could cause injury
in an accident.
Parking Brake
To apply the parking brake, pull up on the lever. To release it, pull up
slightly, push the button, and lower
the lever; when fully released, the BRAKE warning light will go out.
Hood
To open, pull back on the handle under the left side of the dash.
The hood latch is spring-loaded, so the hood will pop up slightly. Release the safety catch under the front center of the hood by
pushing the handle up.
Lift the hood and prop it open with the support rod.
To close, take the support rod down, and return it to its clip , then lower the hood until it is approximately one foot from the closedposition, then let it drop. Be sure the hood is securely latched before
driving away. MASTER KEY
Pull up
CLIP
SUPPORT ROD
Pull to release LockProCarManuals.comMain Menu t s
Page 63 of 143

Safety Items
Before driving away, check that: The doors are closed properly. The mirrors are properly adjusted, and the windows clean.
The driver and passengers are wearing properly adjusted seat
belts.
The head restraints are properly adjusted.
The warning and indicator lights are operating properly.
The brake pedal feels normal.
All luggage and cargo is secured.
Nothing is interfering with the driver's feet or blocking vision to
the rear.
While driving remember to: Always drive defensively; expect the unexpected. Reduce your speed during night hours and bad weather.
Follow at a safe distance; don't tailgate.
Get off the highway when you are tired; stop and take a rest.
When stopping for repairs: Park the car well off the road.
Turn on the hazard warning flasher. Use flares or other warning devices to warn other motorists.
After parking your car: Apply the parking brake and shift to first gear if equipped withmanual transmission, or PARK on automatic transmission
equipped cars.
Make sure the windows are closed and all doors are locked.
If parked on a hill:
Turn the front wheels away from the curb if facing uphill.
Turn the front wheels toward the curb if facing downhill. Never leave children unattended in a parked car.
Take your
keys.ProCarManuals.comMain Menu t s
Page 64 of 143

Engine Exhaust Gas Warning
A properly maintained car is your best protection against exhaust
gas entering the passenger compartment. The exhaust system should be thoroughly inspected by acompetent mechanic whenever:
The car is raised for an oil change.
You notice a change in the sound of the exhaust.
The exhaust system or the rear or underside of the car is
damaged.
Avoid breathing exhaust gases. They contain carbon monoxide, which is a colorless, odorless gas that can cause loss of
consciousness and eventual death. If you suspect that exhaust gas is entering the passenger compartment, have the cause
determined and corrected as soon as possible. If you must drive
under these conditions, drive only with all windows fully open. Do not drive with the trunk lid open. An open trunk may draw
exhaust gases into the passenger compartment. If you must
drive with the trunk lid open, drive only with all the windows
wide open.
Do not run the engine in confined areas, such as garages, any
longer than necessary to move the car in or out. If you must sit in a parked car with the engine running for more
than a short time, adjust the heating/ventilation system as
follows:
1. Push the
and buttons on.
2. Set the temperature lever for best comfort.
3.Turn the fan to the highest speed.
NOTE:
To insure proper operation of the car's ventilation system, keep the
front air inlet clear of snow, mud, leaves or other obstructions.ProCarManuals.comMain Menu t s
Page 86 of 143

Transmission Oil/Fluid Check
Transmission oil/fluid must be checked with the engine off and the
car on level ground.
If the engine has been running, some engine components may
be hot enough to burn you. Keep hands away from the radiator fan. The fan may start
automatically without warning and run for up to 15 minutes,
even after the engine is turned off.
CAUTION:
If the oil/fluid level is low, check for possible leaks before adding
oil. Do not overfill.
Since the transmission and differential are in the same housing, you
are actually checking both oil/fluid levels in one procedure. Change
transmission oil/fluid according to the Maintenance Schedule on
page 78 .
5-Speed
Remove the oil filler bolt (beside the right axle). Feel inside the boh
hole with your finger. If the oil is up to the bottom edge of the hole,
the oil level is correct. If it is not, slowly add oil until it runs out of
the hole, then reinstall the bolt and tighten it securely with a wrench.
CORRECT
LEVEL
5-SPEED TRANSMISSION
OIL CHANGE CAPACITY: 2.1 l (2.2 US qt, 1.8 Imp qt)
Use only SE or SF grade motor oil when adding or changing
transmission oil. OIL CHECK
FILLER BOLTProCarManuals.comMain Menu t s
Page 88 of 143

Cooling System
Your Honda engine contains a number of aluminum parts. Therefore, it requires an antifreeze/coolant specifically formulated to protect
the aluminum parts from corrosion. Failure to use a suitable antifreeze/coolant may seriously shorten the life of the engine as
the result of rapid corrosion damage. Some antifreeze/coolants, although labelled for use in engines containing aluminum, may not provide adequate protection for your engine.
Therefore, use only a Honda RECOMMENDED antifreeze/coolant.
CHECK WITH YOUR AUTHORIZED HONDA DEALER.
For best corrosion protection, the mixture of coolant and water
must be maintained year-round at 50/50. Concentrations less than50% coolant may not provide sufficient protection against
corrosion and freezing. Concentrations of greater than 60% coolant
will impair cooling efficiency and are not recommended. Low- mineral drinking water or distilled water should be mixed with the
antifreeze/coolant. Coolant loss should be replenished by a mixture
containing the proper concentration of antifreeze and water. Do not mix different antifreeze/coolants.
Do not use additional rust inhibitors or anti-rust products, as they
may not be compatible with the radiator coolant.
ENGINE DAMAGE CAUSED BY IMPROPER COOLANT USAGE IS
NOT COVERED BY THE NEW CAR WARRANTY.
Checking Coolant
Check the coolant level in the reserve tank when the engine is at
normal operating temperature (with the engine off and the car on
the level ground), using the dipstick in the reserve tank. Remove the dipstick and wipe it off. Insert the dipstick and remove it. The
coolant level should be between the MAX and MIN marks. Do not remove the radiator cap when the engine is hot; the
coolant is under pressure and could severely scald you. Keep hands away from the radiator fan. The fan may start
automatically without warning and run for up to 15 minutes,
even after the engine is turned off.ProCarManuals.comMain Menu t s
Page 92 of 143
Spark Plugs
Spark plugs should be replaced every 24 months or 30,000 miles
(48,000 km), whichever comes first.
Recommended spark plugs: (2.0S)
For all normal driving
BCPR5EY-N11 (NGK) BCPR5E-11 (NGK)
Q16PR-U11 (ND)
For hot climates or continuous high speed driving
BCPR6EY-N11 (NGK) BCPR6E-11 (NGK)
BCPR7EY-N11 (NGK) BCPR7E-11 (NGK)
Q20PR-U11 (ND) Q22PR-U11 (ND)
(2.0Si,Si)
For all normal driving
ZFR5F-11 (NGK) KJ16CR-L11 (ND)
For hot climates or continuous high speed driving ZFR6F-11 (NGK) KJ20CR-L11 (ND)
Keep hands away from the radiator fan. The fan may start
automatically without warning and run for up to 15 minutes, even
after the engine is turned off.
CAUTION:
Never use spark plugs with an improper heat range; they will
adversely affect engine performance and durability.ProCarManuals.comMain Menu t s