1987 PORSCHE 944 headlights
[x] Cancel search: headlightsPage 3 of 66

INDEX
A
ABS Acceleration diagram Accelerator pedal Air Bag System Air - cleaner
- conditioner
- filter
Alternator warning light Antifreeze Antilock, Brake system Anti-theft alarm Ashtray Automatic- garage door
- speed control
- transmission
- transmission fluid B
Battery
Boost pressure gauge
Brake - booster
- fluid
- fluid warning light
- pads
- parking
- pedal
- system
- warning light
Break-in hints
Bulb replacing
Buzzer 28,39
118-129
55
20, 21, 38, 3980, 8144-4680,81 39
74,75,11028, 39
11
42, 98
25
29
53-55
78,110,128
90-9234
27
39,79,11039
27,37,47,79,80 26
26, 27
26,27,11537
47
93-98
10,18,24,30
C/D
CASIS
Capacities
Car care instructions
Casis
Catalytic Converter
Cautions
Central locking
Central warning light
Cigarette lighter
Cleaning
Clock
Clutch pedal
Collapsible spare tire
Control warning light system
Coolant Temperature Gauge
Cooling system
Corrosion prevention
Dashboard
Defogging/defrosting
Dimensions
Doors
Driving hints
E/F
Electrical system
Emergency- flasher
- starting
Emission Control System
Engine - cooling
- exhaust
- hood
- number
- oil checking & changing
- oil
-speed, max 35
110
61-66
35
50,10267
13
37
41
61-66 40
27
85
36-39 36
74-77
65-66
24
44-46 114
12,138-9, 48, 49
89-92
41
92
100-103 74-77
48
586
69-72
69,110,111,128
34,47,52,106-
108
Fan control switch knob
Fan, radiator
Filling capacities
Fog lights
Fuel - economy
- evaporation control
- gauge
- recommendation
- tank
Fuses and relays
G/H
Gas Station Information
Gasohol
Gasoline
Gear ratio diagram
Gearshift lever
Glove compartment
Hatchback
Headlights
Headlight- dimmer
- flasher
- switch
- washing system
Heater/ventilation controls
Hood - front
- rear
Horn
I/J
Ignition/steering lock
Instrument illumination
Instruments
Interior ligh 44
36, 74 110
30, 96, 97
49
103 37
50, 51
50,110
89,126
126-129 51
50,51
122-125 52-55
42
56
30,95,99 30
30
30
31,32,81,11044-4658
56,57
21,24
24
30
33-40
43, 98
4
Jack
- supports
K/L
Keys
Kickdown
Lane changer
Leather
License plate light
Light switch
Lights - ashtray
- fog
- interior
- license plate
- parking
- turn signal
Locks - doors, wheels
Loudspeakers
Lubricants
Luggage compartment
M/O
Manual transmission
- oil
Mirrors
Oil- change
- consumption
- filter changing
- pressure gauge
- pressure warning light
Octane rating
Oxygen Sensor
P/R
Paint code number 68
87, 88, 129
10-11,86 55
30
65
98
30
98
30, 96, 97
43, 9898
30, 37, 93, 94
30,93,94
10-13, 86 89
110,111 57
52,122-125 77,11022,43
71,72
47, 69
71, 72 38
38
50, 51,106-108 101,102
7
Parking- brake
- lights
Performance
Power assisted steering
Power train
Power windows
Prop-up roof
Radiator fan
Rear - hood
- view mirrors
- window defogger
- wiper
Recirculation Switch
Refrigerant
Relays
Rims
Roof racks
Roof, removable S
Safe driving hints
Safetybelts
Safety belt warning light
Safety compliance sticker
Seat heating System
Seats
Sekuriflex windshield
Shift indicator
Shift points
Side marker lights
Ski racks
Snow- chains
- tires
Spare tire, collapsible
Spark plugs
Specifications, engine
26, 3730,37,93,94116731091259, 6036, 7456,572241424446,11089,12664,112,11357,11459, 60
8-9
17-21,6518,3771514-1631, 63, 643552-559457,11483, 84,112,113
83,84, 111,113
85106-108106-109
Speedometer
Starting procedures
Sun visors
T/U
Tachometer
Technical data
Tirepressure
Tires
Tool kit
Trip odometer
Transmission oil
Trunk
Turn signal lights
Undercoating
Unleaded fuel
V/W
Vehicle identification
Ventilation
Voltmeter
Warning/indicator lights
Washer reservoir
Washing
Water temperature gauge
Weatherstrips
Weights
Wheel alignment
Wheel nuts, lockable
Wheels
Wheel changing
Windows
Windshield- washer reservoir
- wiper/washer lever 3324, 2543
34, 35105-12582,112,113,12947,82-87,112,113683377, 78,11056,5730, 37, 93, 9465, 66,10050, 51,106-108,110
6-744-463835-4081,11061-6636641141158647,64,82-87,11285-8812,63,6481,11031
5
Page 5 of 66

Dear Porsche Owner Before going on a trip...
A lot has gone into the manufacture of your Porsche, including advanced engineering
techniques, rigid quality control and
demanding inspections. These engineering
and safety features will be enhanced by
you... the safe driver...
who knows his car and all controls who maintains his vehicle properly who uses his driving skills wisely, and who always drives within his own capabilities and
his level of familiarity with his vehicle.
You will find helpful hints in this manual on
how to perform most of the checks listed on
these pages. If in doubt, have these checks
performed by your Porsche dealer.
First things first
Turn the engine off before you attempt any
checks or repairs of the vehicle.
Be sure tires are inflated correctly. Check for
damage and tire wear.
See that wheel bolts are properly tightened
and not loose or missing.
Check engine oil level, add if necessary.
Make it a habit to have engine oil checked
with every fuel filling. Check coolant level to assure sufficient
engine cooling.
Be sure you have a well charged battery. Check brake fluid level. If too low, have
brake system checked.
Replenish windshield washer fluid. Check if engine hood is latched safely. Replace worn or cracked wiper blades. See that all windows are clear and
unobstructed.
Keep air intake slots and area between engine hood and windshield free of snow and ice, so that the heater and the windshield wipers work properly.
Check whether all light lenses are clean.
Be sure all lights are working and headlights
are aimed correctly.
Check under vehicle for leaks. Be sure all luggage is stowed securely.
Emergency equipment 3
It is good practice to carry emergency
equipment in your vehicle. Some of the things
you should have are: window scraper, snow
brush, container or bag of sand or salt,
emergency light, small shovel, first-
aid kit, etc.
8
In the driver's seat... On the road...
Check operation of horn.
Position seat for easy reach of controls. Adjust inside and outside rear view mirrors. Attach your safety belts. Check operation of foot and parking brakes. Check all warning and indicator lights when
starting the engine.
NEVER leave car idling unattended. Lock doors from inside, especially with
children in the car.
To prevent inadvertent opening of doors
from inside or outside, drive with locked
doors.
Never drive after you have consumed
alcohol.
Always have your safety belt attached. Always drive defensively. Expect the unexpected. Use signals to indicate turns and lane
changes.
Turn on headlights at dusk. Always keep a safe distance from the vehicle in front of you, depending on traffic, road and weather conditions. Reduce speed at night and during inclement weather.
Driving in wet weather requires caution and
reduced speeds, particularly on roads with
standing water, as the handling characteristics of the vehicle may be impaired due to tire
aquaplaning.
Also, when crossing stretches of deeper water there is a danger that too high of a speed can
cause water to enter the engine combustion
chambers through the intake air system
and/or water may strike the cooling fan
causing cooling system damage. In order to
avoid possible en- gine or cooling system damage when driving
through deep water, the vehicle should be
driven at a walking speed in first gear.
Observe speed limits and obey road signs.
When tired, get well off the road, stop and
take a rest. Turn the engine off. Do not sit in
the vehicle with engine idling. See
WARNINGS on "Engine Exhaust".
When parked, always set the parking brake.
Move the selector lever to "P" (Automatic
transmission) or move the gearshift lever to
reverse or first gear (Manual transmission).
On hills also turn the wheels toward the curb.
When emergency repairs become necessary, move the vehicle well off the road. Turn on
emergency flasher and use other warning
devices to alert other motorists. Do not park
or operate the vehicle in areas where the hot
exhaust system may come in contact with dry grass, brush, fuel spill or other flammable
material.
Make it a habit to have the engine oil
checked with every fuel filling.
9
Page 13 of 66
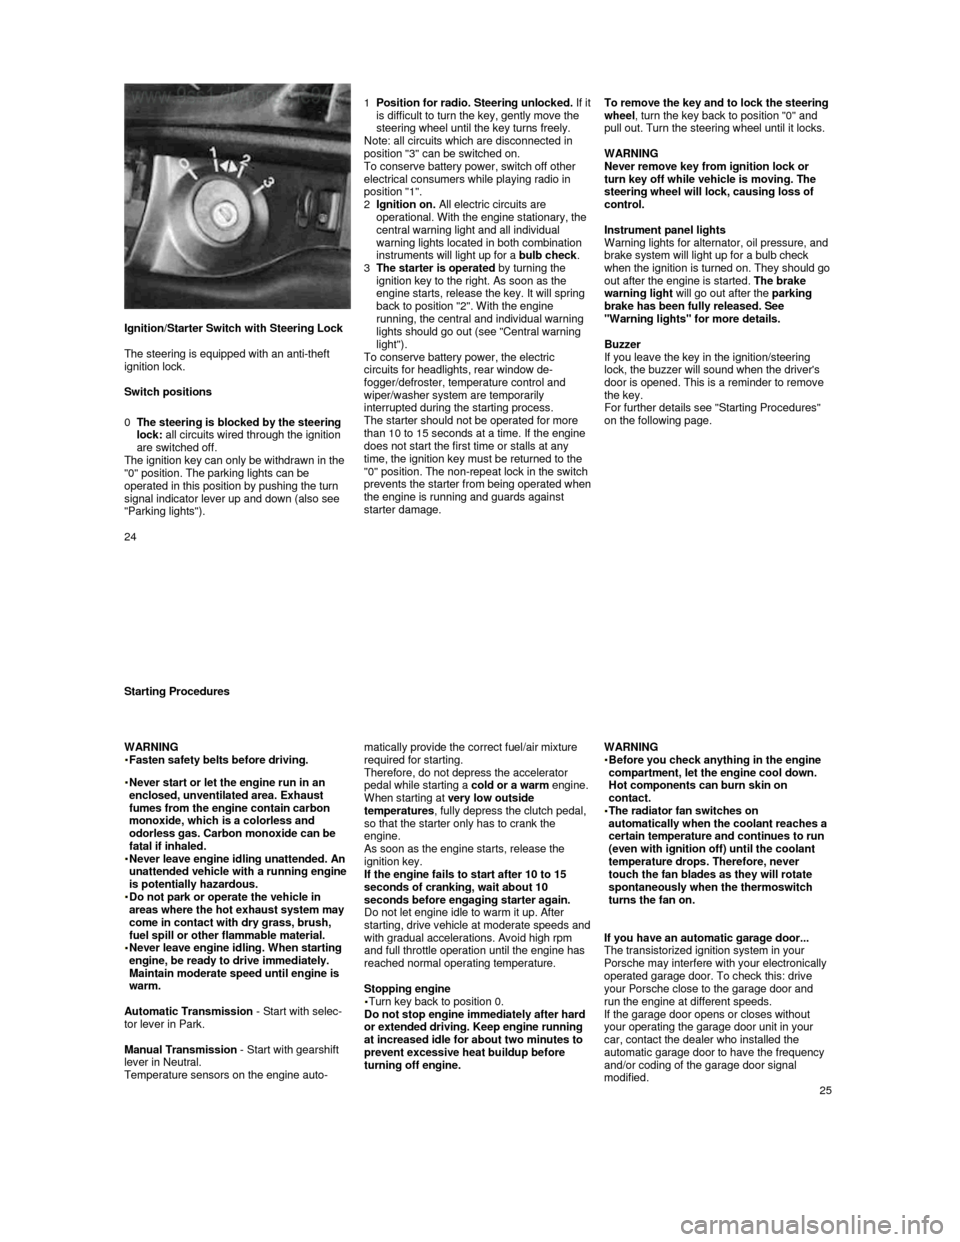
Ignition/Starter Switch with Steering Lock
The steering is equipped with an anti-theft
ignition lock.
Switch positions
0
The steering is blocked by the steering lock: all circuits wired through the ignition
are switched off.
The ignition key can only be withdrawn in the
"0" position. The parking lights can be
operated in this position by pushing the turn
signal indicator lever up and down (also see
"Parking lights").
1 Position for radio. Steering unlocked. If it is difficult to turn the key, gently move the
steering wheel until the key turns freely.
Note: all circuits which are disconnected in
position "3" can be switched on.
To conserve battery power, switch off other
electrical consumers while playing radio in
position "1".
2
Ignition on. All electric circuits are
operational. With the engine stationary, the
central warning light and all individual
warning lights located in both combination
instruments will light up for a bulb check.
3
The starter is operated by turning the
ignition key to the right. As soon as the
engine starts, release the key. It will spring
back to position "2". With the engine
running, the central and individual warning
lights should go out (see "Central warning
light").
To conserve battery power, the electric
circuits for headlights, rear window de-
fogger/defroster, temperature control and
wiper/washer system are temporarily interrupted during the starting process.
The starter should not be operated for more
than 10 to 15 seconds at a time. If the engine
does not start the first time or stalls at any
time, the ignition key must be returned to the
"0" position. The non-repeat lock in the switch
prevents the
starter from being operated when the engine is running and guards against
starter damage.
To remove the key and to lock the steering
wheel
, turn the key back to position "0" and
pull out. Turn the steering wheel until it locks.
WARNING
Never remove key from ignition lock or
turn key off while vehicle is moving. The
steering wheel will lock, causing loss of
control.
Instrument panel lights
Warning lights for alternator, oil pressure, and
brake system will light up for a bulb check
when the ignition is turned on. They should go out after the engine is started. The brake
warning light will go out after the parking
brake has been fully released. See
"Warning lights" for more details.
Buzzer
If you leave the key in the ignition/steering
lock, the buzzer will sound when the driver's
door is opened. This is a reminder to remove
the key.
For further details see "Starting Procedures"
on the following page.
24
Starting Procedures
WARNING
Fasten safety belts before driving.
Never start or let the engine run in an enclosed, unventilated area. Exhaust
fumes from the engine contain carbon
monoxide, which is a colorless and
odorless gas. Carbon monoxide can be
fatal if inhaled.
Never leave engine idling unattended. An unattended vehicle with a running engine
is potentially hazardous.
Do not park or operate the vehicle in areas where the hot exhaust system may
come in contact with dry grass, brush,
fuel spill or other flammable material.
Never leave engine idling. When starting engine, be ready to drive immediately.
Maintain moderate speed until engine is
warm.
Automatic Transmission - Start with selec-
tor lever in Park.
Manual Transmission - Start with gearshift
lever in Neutral.
Temperature sensors on the engine auto- matically provide the correct fuel/air mixture
required for starting.
Therefore, do not depress the accelerator
pedal while starting a cold or a warm engine.
When starting at very low outside
temperatures , fully depress the clutch pedal,
so that the starter only has to crank the
engine.
As soon as the engine starts, release the ignition key.
If the engine fails to start after 10 to 15
seconds of cranking, wait about 10
seconds before engaging starter again.
Do not let engine idle to warm it up. After
starting, drive vehicle at moderate speeds and with gradual accelerations. Avoid high rpm
and full throttle operation until the engine has
reached normal operating temperature.
Stopping engine
Turn key back to position 0.
Do not stop engine immediately after hard
or extended driving. Keep engine running
at increased idle for about two minutes to
prevent excessive heat buildup before
turning off engine.
WARNING
Before you check anything in the engine compartment, let the engine cool down.
Hot components can burn skin on
contact.
The radiator fan switches on automatically when the coolant reaches a
certain temperature and continues to run
(even with ignition off) until the coolant
temperature drops. Therefore, never
touch the fan blades as they will rotate
spontaneously when the thermoswitch
turns the fan on.
If you have an automatic garage door...
The transistorized ignition system in your
Porsche may interfere with your electronically
operated garage door. To check this: drive
your Porsche close to the garage door and
run the engine at different speeds.
If the garage door opens or closes without
your operating the garage door unit in your
car, contact the dealer who installed the
automatic garage door to have the frequency
and/or coding of the garage door signal
modified.
25
Page 16 of 66
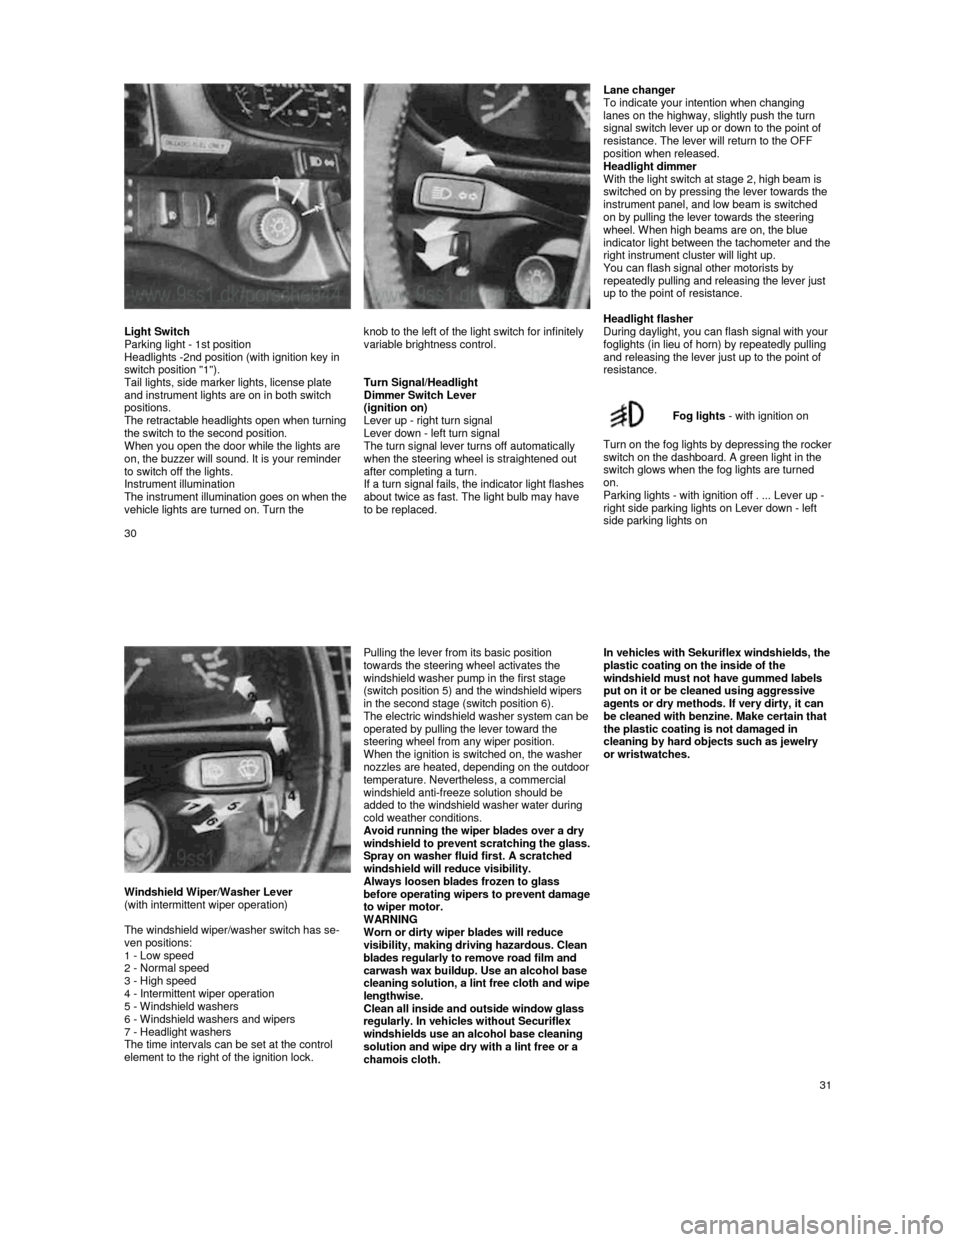
Lane changer
To indicate your intention when changing
lanes on the highway, slightly push the turn
signal switch lever up or down to the point of
resistance. The lever will return to the OFF
position when released.
Headlight dimmer
With the light switch at stage 2, high beam is
switched on by pressing the lever towards the
instrument panel, and low beam is switched
on by pulling the lever towards the steering
wheel. When high beams are on, the blue indicator light between the tachometer and the right instrument cluster will light up.
You can flash signal other motorists by
repeatedly pulling and releasing the lever just
up to the point of resistance.
Light Switch
Parking light - 1st position
Headlights -2nd position (with ignition key in
switch position "1").
Tail lights, side marker lights, license plate
and instrument lights are on in both switch
positions.
The retractable headlights open when turning
the switch to the second position.
When you open the door while the lights are
on, the buzzer will sound. It is your reminder
to switch off the lights.
Instrument illumination
The instrument illumination goes on when the
vehicle lights are turned on. Turn the
knob to the left of the light switch for infinitely
variable brightness control.
Turn Signal/Headlight
Dimmer Switch Lever
(ignition on)
Lever up - right turn signal
Lever down - left turn signal
The turn signal lever turns off automatically
when the steering wheel is straightened out after completing a turn.
If a turn signal fails, the indicator light flashes
about twice as fast. The light bulb may have
to be replaced.
Headlight flasher
During daylight, you can flash signal with your
foglights (in lieu of horn) by repeatedly pulling
and releasing the lever just up to the point of
resistance.
Fog lights
- with ignition on
Turn on the fog lights by depressing the rocker switch on the dashboard. A green light in the
switch glows when the fog lights are turned
on.
Parking lights - with ignition off . ... Lever up -
right side parking lights on Lever down - left
side parking lights on
30
Windshield Wiper/Washer Lever
(with intermittent wiper operation)
The windshield wiper/washer switch has se-
ven positions:
1 - Low speed
2 - Normal speed
3 - High speed
4 - Intermittent wiper operation
5 - Windshield washers
6 - Windshield washers and wipers
7 - Headlight washers
The time intervals can be set at the control
element to the right of the ignition lock.
Pulling the lever from its basic position
towards the steering wheel activates the
windshield washer pump in the first stage
(switch position 5) and the windshield wipers
in the second stage (switch position 6).
The electric windshield washer system can be operated by pulling the lever toward the
steering wheel from any wiper position.
When the ignition is switched on, the washer
nozzles are heated, depending on the outdoor temperature. Nevertheless, a commercial windshield anti-freeze solution should be
added to the windshield washer water during
cold weather conditions.
Avoid running the wiper blades over a dry
windshield to p
revent scratching the glass. Spray on washer fluid first. A scratched
windshield will reduce visibility.
Always loosen blades frozen to glass
before operating wipers to prevent damage to wiper motor.
WARNING
Worn or dirty wiper blades will reduce
visibility, making driving hazardous. Clean
blades regularly to remove road film and
carwash wax buildup. Use an alcohol base
cleaning solution, a lint free cloth and wipe lengthwise.
Clean all inside and outside window glass
regularly. In vehicles without Securiflex
windshields use an alcohol base cleaning
solution and wipe dry with a lint free or a
chamois cloth.
In vehicles with Sekuriflex windshields, the plastic coating on the inside of the
windshield must not have gummed labels
put on it or be cleaned using aggressive
agents or dry methods. If very dirty, it can
be cleaned with benzine. Make certain that
the plastic coating is not damaged in
cleaning by hard objects such as jewelry
or wristwatches.
31
Page 17 of 66
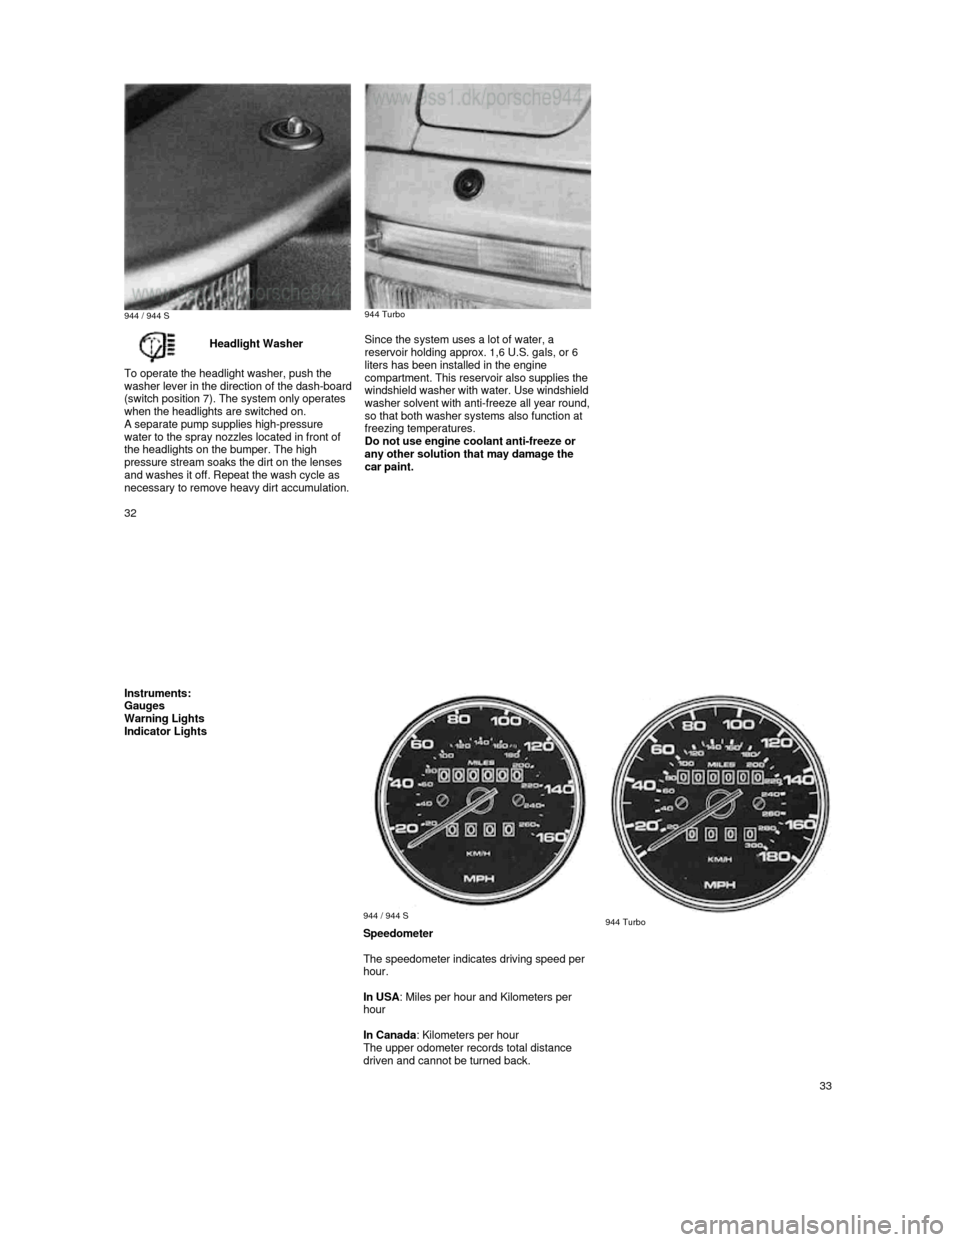
944 / 944 S
944 Turbo
Headlight Washer
To operate the headlight washer, push the
washer lever in the direction of the dash-board (switch position 7). The system only operates when the headlights are switched on. A separate pump supplies high-pressure water to the spray nozzles located in front of the headlights on the bumper. The high
pressure stream soaks the dirt on the lenses
and washes it off. Repeat the wash cycle as
necessary to remove heavy dirt accumulation.
Since the system uses a lot of water, a
reservoir holding approx. 1,6 U.S. gals, or 6
liters has been installed in the engine
compartment. This reservoir also supplies the
windshield washer with water. Use windshield washer solvent with anti-freeze all year round,
so that both washer systems also function at
freezing temperatures.
Do not use engine coolant anti-freeze or
any other solution that may damage the
car paint.
32
Instruments: Gauges
Warning Lights
Indicator Lights
944 / 944 S 944 Turbo
Speedometer
The speedometer indicates driving speed per
hour.
In USA : Miles per hour and Kilometers per
hour
In Canada : Kilometers per hour
The upper odometer records total distance
driven and cannot be turned back.
33
Page 42 of 66
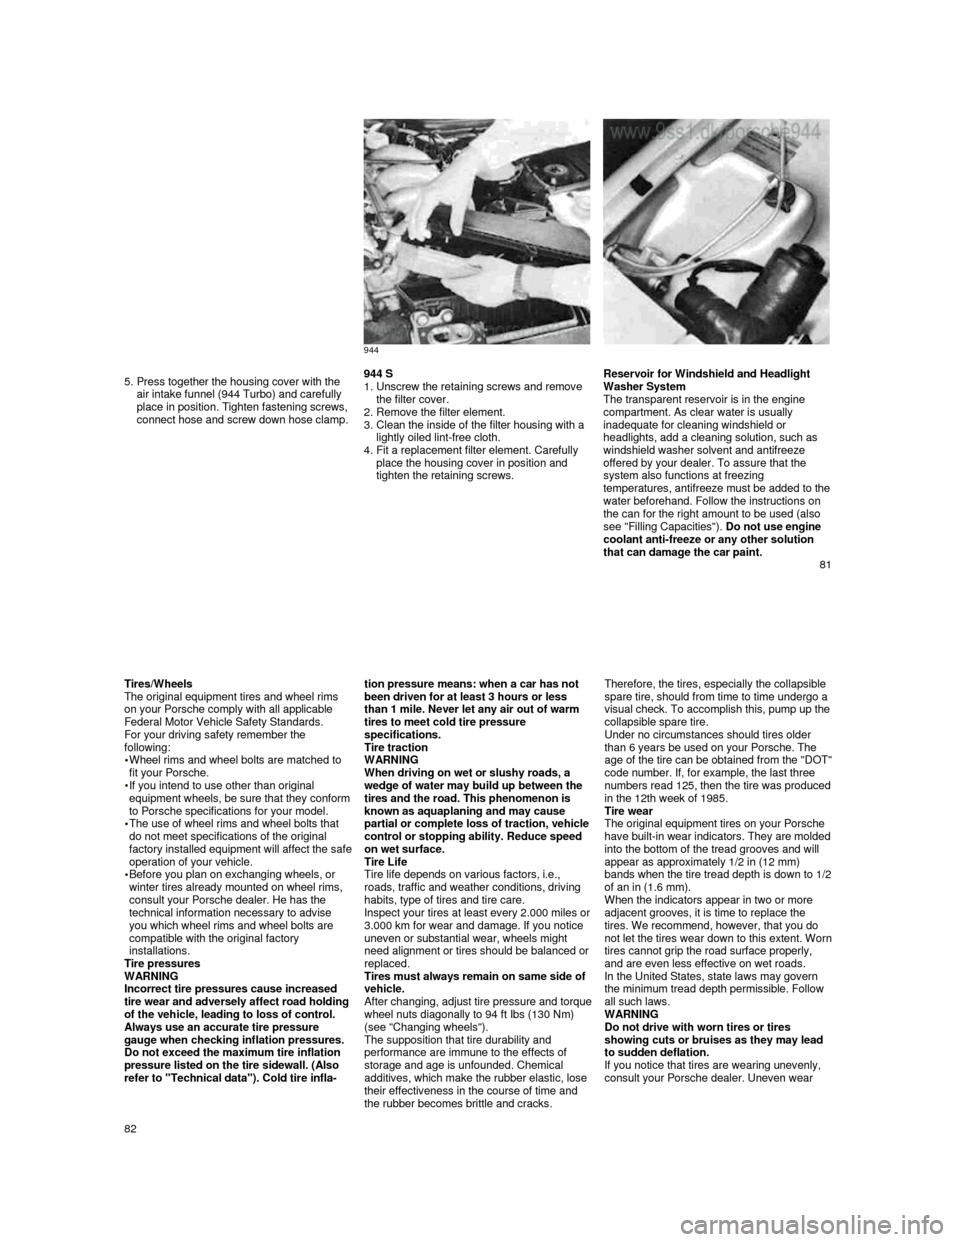
944
5. Press together the housing cover with the air intake funnel (944 Turbo) and carefully
place in position. Tighten fastening screws,
connect hose and screw down hose clamp.
944 S
1. Unscrew the retaining screws and remove
the filter cover.
2.
Remove the filter element.
3. Clean the inside of the filter housing with a
lightly oiled lint-free cloth.
4.
Fit a replacement filter element. Carefully
place the housing cover in position and
tighten the retaining screws.
Reservoir for Windshield and Headlight
Washer System
The transparent reservoir is in the engine
compartment. As clear water is usually
inadequate for cleaning windshield or
headlights, add a cleaning solution, such as
windshield washer solvent and antifreeze offered by your dealer. To assure that the
system also functions at freezing
temperatures, antifreeze must be added to the water beforehand. Follow the instructions on the can for the right amount to be used (also
see "Filling Capacities"). Do not use engine
coolant anti-freeze or any other solution
that can damage the car paint.
81
Tires/Wheels
The original equipment tires and wheel rims
on your Porsche comply with all applicable
Federal Motor Vehicle Safety Standards.
For your driving safety remember the
following:
Wheel rims and wheel bolts are matched to
fit your Porsche.
If you intend to use other than original equipment wheels, be sure that they conform to Porsche specifications for your model. The use of wheel rims and wheel bolts that
do not meet specifications of the original
factory installed equipment will affect the safe operation of your vehicle. Before you plan on exchanging wheels, or winter tires already mounted on wheel rims, consult your Porsche dealer. He has the
technical information necessary to advise
you which wheel rims and wheel bolts are
compatible with the original factory
installations.
Tire pressures
WARNING
Incorrect tire pressures cause increased
tire wear and adversely affect road holding of the vehicle, leading to loss of control.
Always use an accurate tire pressure
gauge when checking inflation pressures.
Do not exceed the maximum tire inflation
pressure listed on the tire sidewall. (Also
refer to "Technical data"). Cold tire infla-
tion pressure means: when a car has not been driven for at least 3 hours or less
than 1 mile. Never let any air out of warm
tires to meet cold tire pressure
specifications.
Tire traction
WARNING
When driving on wet or slushy roads, a
wedge of water may build up between the
tires and the road. This phenomenon is
known as aquaplaning and may cause
partial or com
plete loss of traction, vehicle control or stopping ability. Reduce speed
on wet surface.
Tire Life
Tire life depends on various factors, i.e.,
roads, traffic and weather conditions, driving
habits, type of tires and tire care.
Inspect your tires at least
every 2.000 miles or 3.000 km for wear and damage. If you notice
uneven or substantial wear, wheels might
need alignment or tires should be balanced or
replaced.
Tires must always remain on same side of
vehicle.
After changing, adjust tire pressure and torque wheel nuts diagonally to 94 ft Ibs (130 Nm) (see "Changing wheels").
The supposition that tire durability and
performance are immune to the effects of
storage and age is unfounded. Chemical
additives, which make the rubber elastic, lose
their effectiveness in the course of time and
the rubber becomes brittle and cracks.
Therefore, the tires, especially the collapsible
spare tire, should from time to time undergo a
visual check. To accomplish this,
pump up the collapsible spare tire.
Under no circumstances should tires older
than 6 years be used on your Porsche. The
age of the tire can be obtained from the "DOT" code number. If, for example, the last three
numbers read 125, then the tire was produced in the 12th week of 1985.
Tire wear
The original equipment tires on your Porsche
have built-
in wear indicators. They are molded into the bottom of the tread grooves and will
appear as approximately 1/2 in (12 mm)
bands when the tire tread depth is down to
1/2 of an in (1.6 mm).
When the indicators appear in two or more
adjacent grooves, it is time to replace the
tires. We recommend, however, that you do
not let the tires wear down to this extent. Worn tires cannot grip the road surface properly,
and are even less effective on wet roads.
In the United States, state laws may govern
the minimum tread depth permissible. Follow
all such laws.
WARNING
Do not drive with worn tires or tires
showing cuts or bruises as they may lead
to sudden deflation.
If you notice that tires are wearing unevenly,
consult your Porsche dealer. Uneven wear
82
Page 46 of 66
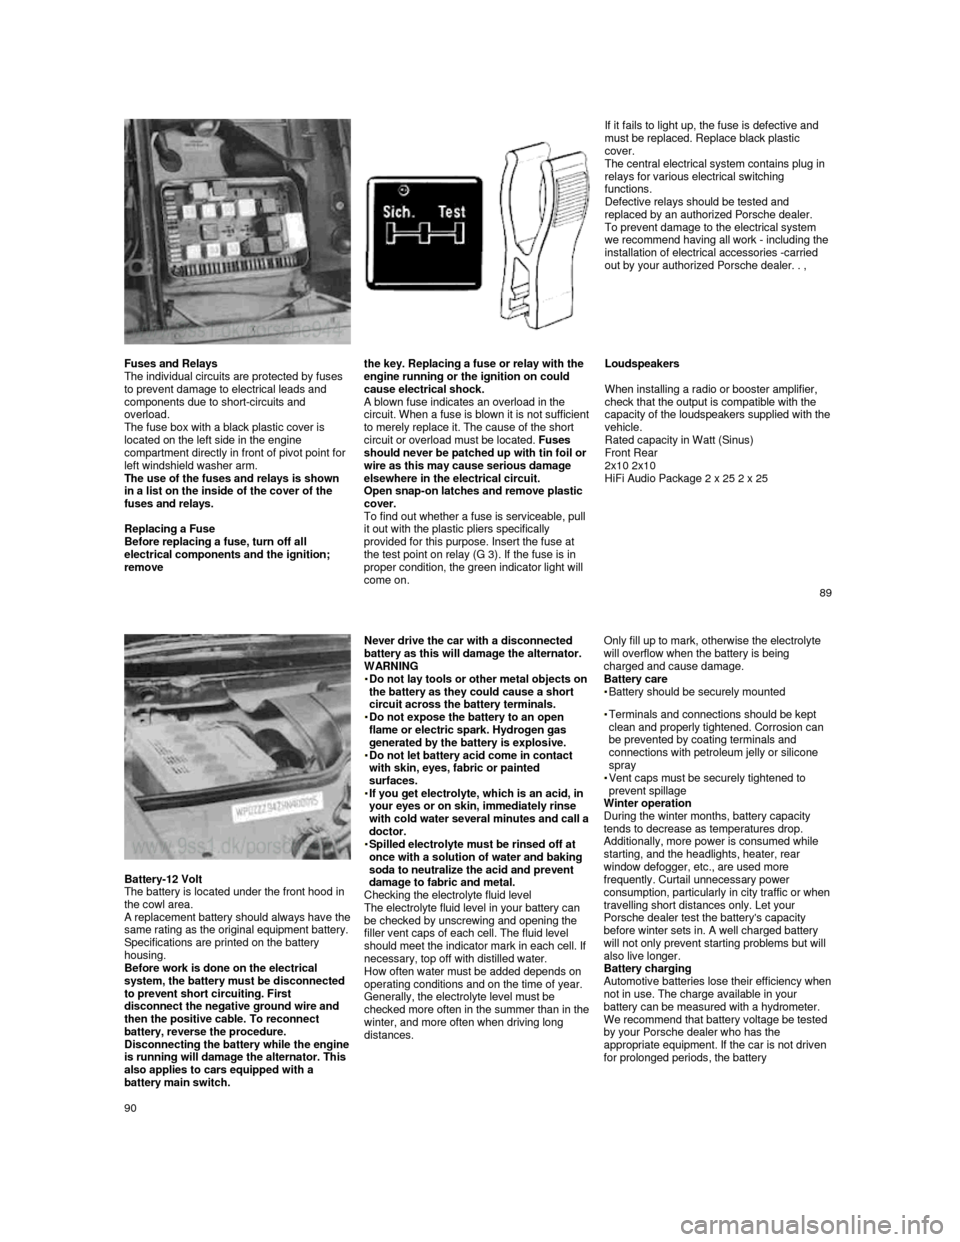
If it fails to light up, the fuse is defective and
must be replaced. Replace black plastic
cover.
The central electrical system contains plug in
relays for various electrical switching
functions.
Defective relays should be tested and
replaced by an authorized Porsche dealer.
To prevent damage to the electrical system
we recommend having all work - including the
installation of electrical accessories -carried
out by your authorized Porsche dealer. . ,
Fuses and Relays
The individual circuits are protected by fuses
to prevent damage to electrical leads and
components due to short-circuits and
overload.
The fuse box with a black plastic cover is
located on the left side in the engine
compartment directly in front of pivot point for
left windshield washer arm.
The use of the fuses and relays is shown
in a list on the inside of the cover of the
fuses and relays.
Replacing a Fuse
Before replacing a fuse, turn off all
electrical components and the ignition;
remove the key. Replacing a fuse or relay with the
engine running or the ignition on could
cause electrical shock.
A blown fuse indicates an overload in the circuit. When a fuse is blown it is not sufficient
to merely replace it. The cause of the short
circuit or overload must be located. Fuses
should never be patched up with tin foil or
wire as this may cause serious damage
elsewhere in the electrical circuit.
Open snap-on latches and remove plastic
cover.
To find out whether a fuse is serviceable, pull
it out with the plastic pliers specifically
provided for this purpose. Insert the fuse at
the test point on relay (G 3). If the fuse is in
proper condition, the green indicator light will
come on.
Loudspeakers
When installing a radio or booster amplifier,
check that the output is compatible with the
capacity of the loudspeakers supplied with the vehicle.
Rated capacity in Watt (Sinus)
Front Rear
2x10 2x10
HiFi Audio Package 2 x 25 2 x 25
89
Battery-12 Volt
The battery is located under the front hood in
the cowl area.
A replacement battery should always have the same rating as the original equipment battery.
Specifications are printed on the battery
housing.
Before work is done on the electrical
system, the battery must be disconnected
to prevent short circuiting. First
disconnect the negative ground wire and
then the positive cable. To reconnect
battery, reverse the procedure.
Disconnecting the battery while the engine is running will damage the alternator. This
also applies to cars equipped with a
battery main switch.
Never drive the car with a disconnected battery as this will damage the alternator. WARNING
Do not lay tools or other metal objects on the battery as they could cause a short
circuit across the battery terminals.
Do not expose the battery to an open flame or electric spark. Hydrogen gas
generated by the battery is explosive.
Do not let battery acid come in contact with skin, eyes, fabric or painted
surfaces.
If you get electrolyte, which is an acid, in your eyes or on skin, immediately rinse
with cold water several minutes and call a doctor. Spilled electrolyte must be rinsed off at once with a solution of water and baking
soda to neutralize the acid and prevent
damage to fabric and metal.
Checking the electrolyte fluid level
The electrolyte fluid level in your battery can
be checked by unscrewing and opening the
filler vent caps of each cell. The fluid level
should meet the indicator mark in each cell. If
necessary, top off with distilled water.
How often water must be added depends on
operating conditions and on the time of year.
Generally, the electrolyte level must be
checked more often in the summer than in the winter, and more often when driving long distances.
Only fill up to mark, otherwise the electrolyte will overflow when the battery is being charged and cause damage.
Battery care
Battery should be securely mounted
Terminals and connections should be kept
clean and properly tightened. Corrosion can
be prevented by coating terminals and
connections with petroleum jelly or silicone
spray
Vent caps must be securely tightened to
prevent spillage
Winter operation
During the winter months, battery capacity
tends to decrease as temperatures drop.
Additionally, more power is consumed while starting, and the headlights, heater, rear window defogger, etc., are used more
frequently. Curtail unnecessary power
consumption, particularly in city traffic or when travelling short distances only. Let your
Porsche dealer test the battery's capacity
before winter sets in. A well charged battery
will not only prevent starting problems but will
also live longer.
Battery charging
Automotive batteries lose their efficiency when not in use. The charge available in your
battery can be measured with a hydrometer.
We recommend that battery voltage be tested
by your Porsche dealer who has the
appropriate equipment. If the car is not driven
for prolonged periods, the battery
90
Page 49 of 66
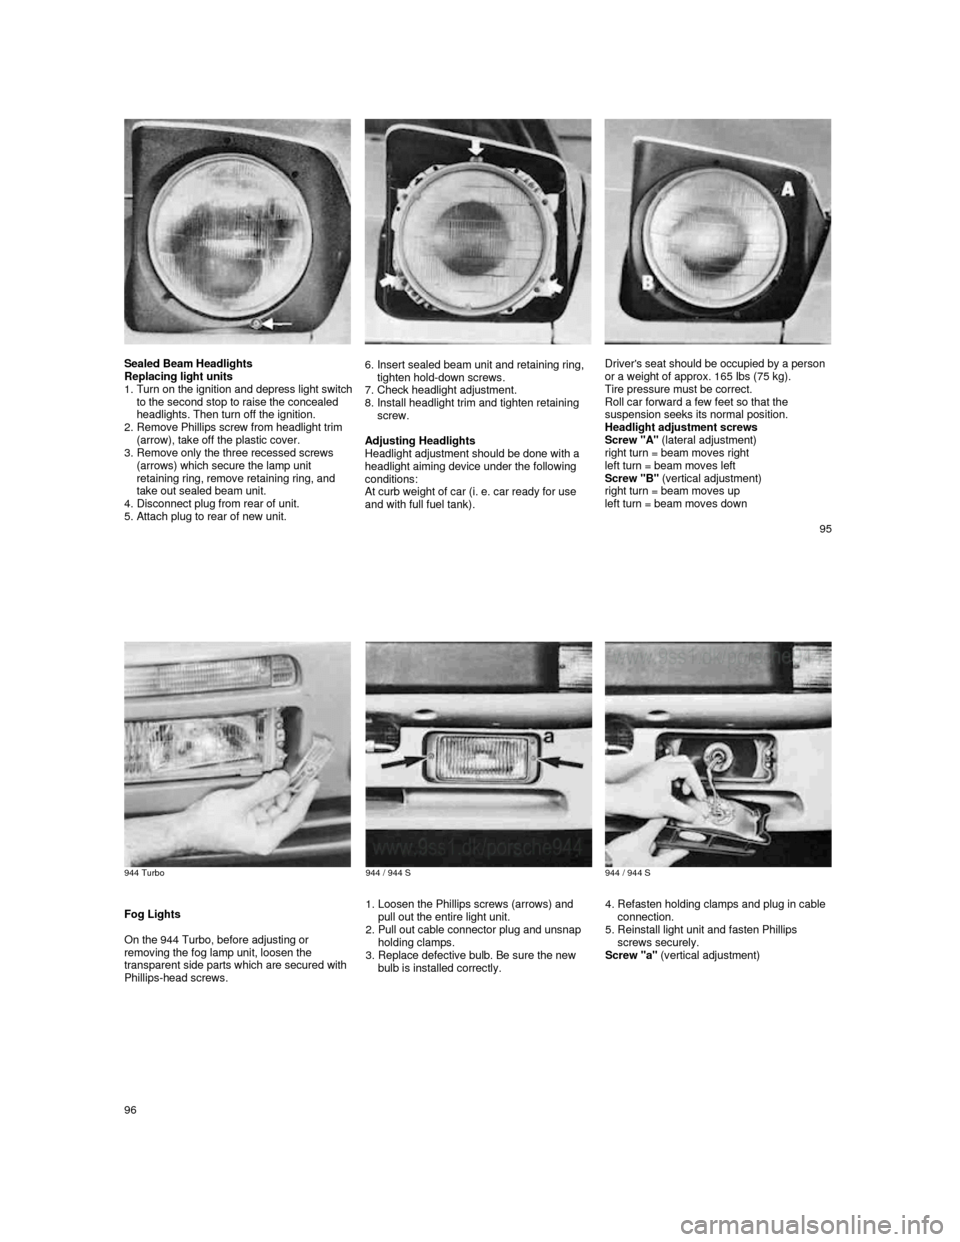
Sealed Beam Headlights
Replacing light units
1.
Turn on the ignition and depress light switch to the second stop to raise the concealed
headlights. Then turn off the ignition.
2.
Remove Phillips screw from headlight trim
(arrow), take off the plastic cover.
3.
Remove only the three recessed screws
(arrows) which secure the lamp unit
retaining ring, remove retaining ring, and
take out sealed beam unit.
4.
Disconnect plug from rear of unit.
5. Attach plug to rear of new unit.
6. Insert sealed beam unit and retaining ring,
tighten hold-down screws.
7.
Check headlight adjustment.
8. Install headlight trim and tighten retaining
screw.
Adjusting Headlights
Headlight adjustment should be done with a
headlight aiming device under the following
conditions:
At curb weight of car (i. e. car ready for use
and with full fuel tank).
Driver's seat should be occupied by a person
or a weight of approx. 165 Ibs (75 kg).
Tire pressure must be correct.
Roll car forward a few feet so that the
suspension seeks its normal position.
Headlight adjustment screws
Screw "A" (lateral adjustment)
right turn = beam moves right
left turn = beam moves left
Screw "B" (vertical adjustment)
right turn = beam moves up
left turn = beam moves down
95
944 Turbo
944 / 944 S
944 / 944 S
Fog Lights
On the 944 Turbo, before adjusting or
removing the fog lamp unit, loosen the
transparent side parts which are secured with
Phillips-head screws.
1. Loosen the Phillips screws (arrows) and
pull out the entire light unit.
2.
Pull out cable connector plug and unsnap
holding clamps.
3.
Replace defective bulb. Be sure the new
bulb is installed correctly.
4. Refasten holding clamps and plug in cable
connection.
5.
Reinstall light unit and fasten Phillips
screws securely.
Screw "a" (vertical adjustment)
96