1987 PORSCHE 944 ignition
[x] Cancel search: ignitionPage 29 of 66
Neutral
Shift to this position for standing with brakes
applied.
Never use Neutral for coasting downhill.
You may lose control over the car because of reduced braking and cause serious damage to the transmission when a driving range has to be selected. CAUTION: While driving with the automatic speed control set (at speeds above 25 mph or 40 km/h), do not bring shift lever into
the Neutral position as excessive engine
rpm and severe engine damage may result.
Maneuvering
When alternating between forward (D) and
reverse (R) (for instance, while maneuvering
the car into a tight parking space), only shift
into Reverse or Drive
when the car has come to a full stop and the engine is running at idle
speed.
Stuck in snow, mud or sand
When alternating between Drive and
Reverse in an effort to free the vehicle,
depress the accelerator pedal lightly while the
transmission is in gear, and release the
accelerator pedal while shifting. Do not race
the engine and avoid spinning the wheels.
Do not repeat "rocking" back and forth
with wheels spinning at high engine speed
and heavy throttle, as serious damage may be caused to the automatic transmission
and other critical parts.
If you cannot free the vehicle after a few
"rocking" attempts, call for help or a tow truck.
Accelerator Pedal
For good fuel economy we recommend
smooth and even acceleration. Very fast, racy
driving, alternating between full throttle and
hard braking, raises the fuel consumption
considerably. Also, tires and brake linings
wear faster. It is more economical to drive smoothly and at a fairly constant speed.
Accelerator "Kickdown"
When depressing the accelerator pedal you
will find resistance near the full throttle position. By applying greater pressure the
pedal can be pushed beyond this point to the
kick-down position. The transmission will now
shift automatically into the next lower gear to
give you maximum acceleration, and only shift up again after the engine has reached
maximum speed in that particular gear.
WARNING
Be careful when using the kickdown on
slippery roads. Rapid acceleration may
cause skidding.
Please observe the following when applying
the accelerator kickdown:
With the selector lever in D, you can apply the kickdown to make the transmission shift down into second gear when driving below 88 mph
or 140 km/h and down to first gear when
driving below 47 mph or 75 km/h.
With the selector lever in "2", you can apply
the kickdown to make the transmission shift
down into first gear when driving below 47
mph or 75 km/h.
As soon as you release the pedal from the kickdown position the next higher gear is
automatically engaged.
Please observe all local and national speed limits.
55
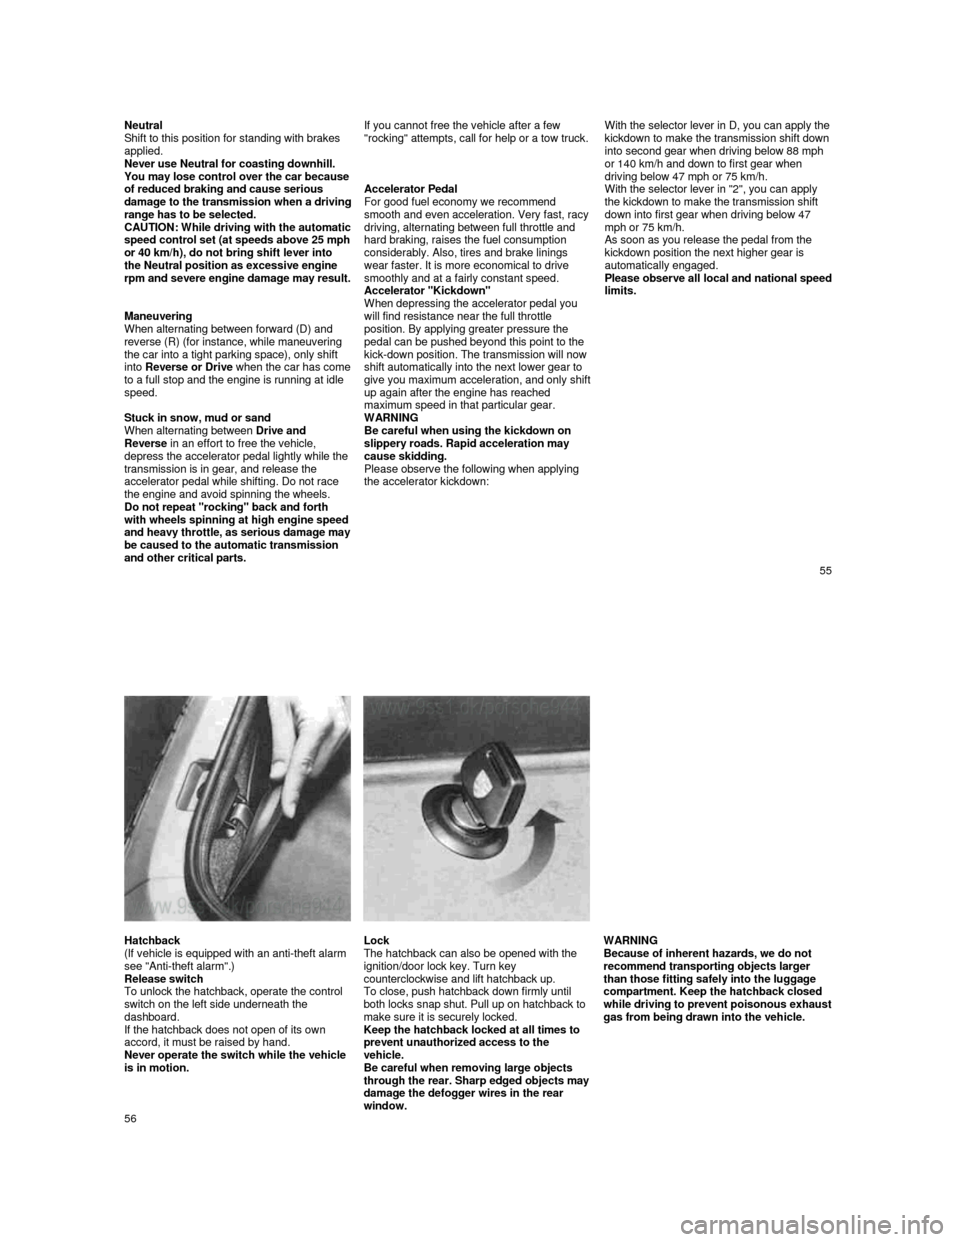
Hatchback
(If vehicle is equipped with an anti-theft alarm
see "Anti-theft alarm".)
Release switch
To unlock the hatchback, operate the control
switch on the left side underneath the
dashboard.
If the hatchback does not open of its own
accord, it must be raised by hand.
Never operate the switch while the vehicle
is in motion. Lock
The hatchback can also be opened with the
ignition/door lock key. Turn key
counterclockwise and lift hatchback up.
To close, push hatchback down firmly until
both locks snap shut. Pull up on hatchback to
make sure it is securely locked.
Keep the hatchback locked at all times to
prevent unauthorized access to the
vehicle.
Be careful when removing large objects
through th
e rear. Sharp edged objects may damage the defogger wires in the rear
window.
WARNING
Because of inherent hazards, we do not
recommend transporting objects larger
than those fitting safely into the luggage
compartment. Keep the hatchback closed
while dr
iving to prevent poisonous exhaust gas from being drawn into the vehicle.
56
Page 30 of 66
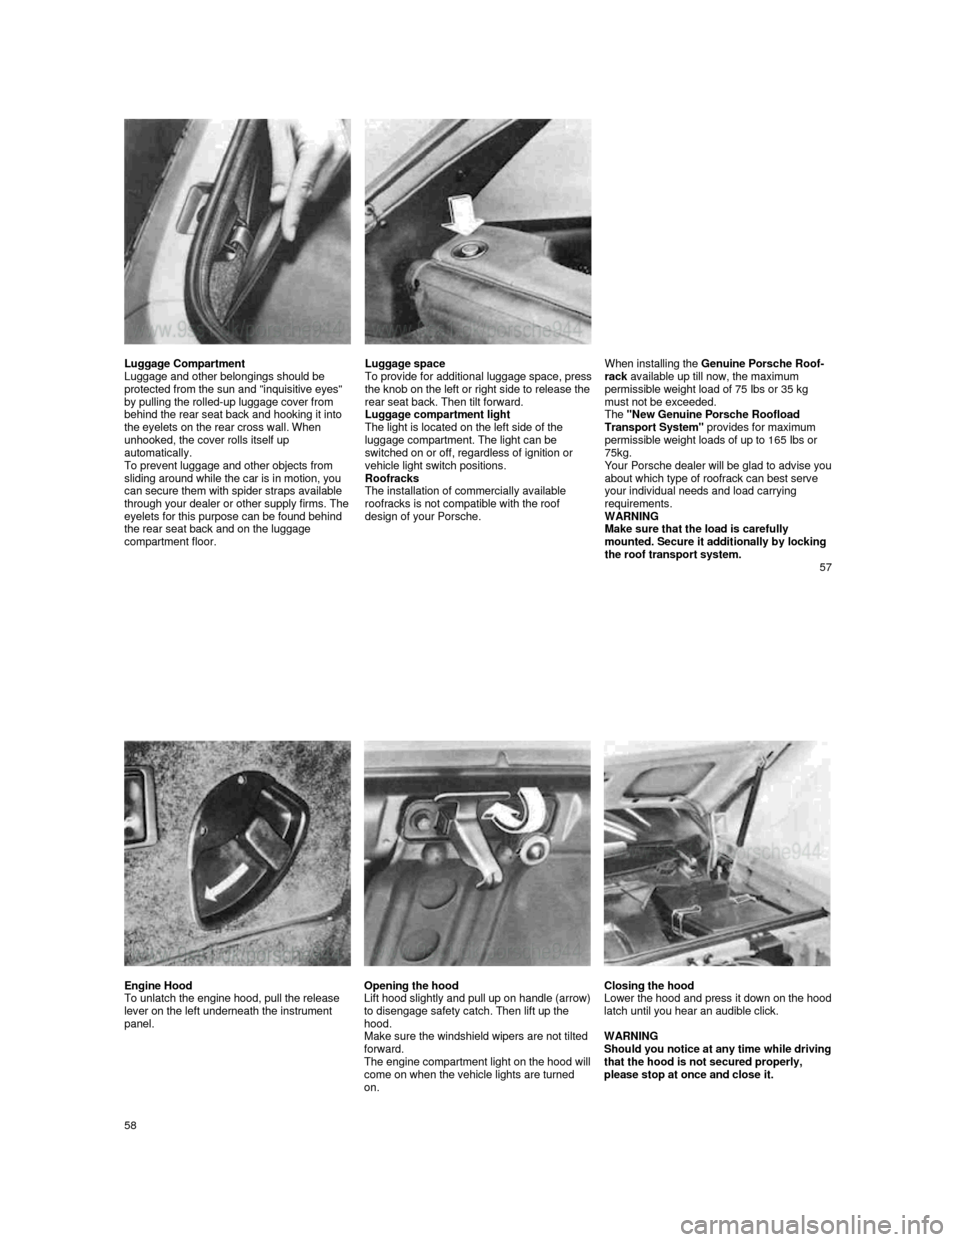
Luggage Compartment
Luggage and other belongings should be
protected from the sun and "inquisitive eyes"
by pulling the rolled-up luggage cover from
behind the rear seat back and hooking it into
the eyelets on the rear cross wall. When
unhooked, the cover rolls itself up
automatically.
To prevent luggage and other objects from
sliding around while the car is in motion, you
can secure them with spider straps available
through your dealer or other supply firms. The
eyelets for this purpose can be found behind
the rear seat back and on the luggage
compartment floor. Luggage space
To provide for additional luggage space, press the knob on the left or right side to release the rear seat back. Then tilt forward.
Luggage compartment light
The light is located on the left side of the
luggage compartment. The light can be
switched on or off, regardless of ignition or
vehicle light switch positions.
Roofracks
The installation of commercially available
roofracks is not compatible with the roof
design of your Porsche.
When installing the Genuine Porsche Roof-
rack available up till now, the maximum
permissible weight load of 75 Ibs or 35 kg
must not be exceeded.
The "New Genuine Porsche Roofload
Transport System" provides for maximum
permissible weight loads of up to 165 Ibs or
75kg.
Your Porsche dealer will be glad to advise you about which type of roofrack can best serve
your individual needs and load carrying
requirements.
WARNING
Make sure that the load is carefully
mounted. Secure it additionally by locking
the roof transport system.
57
Engine Hood
To unlatch the engine hood, pull the release
lever on the left underneath the instrument
panel. Opening the hood
Lift hood slightly and pull up on handle (arrow) to disengage safety catch. Then lift up the
hood.
Make sure the windshield wipers are not tilted
forward.
The engine compartment light on the hood will come on when the vehicle lights are turned
on.
Closing the hood
Lower the hood and press it down on the hood latch until you hear an audible click.
WARNING
Should you notice at any time while driving that the hood is not secured properly,
please stop at once and close it.
58
Page 31 of 66
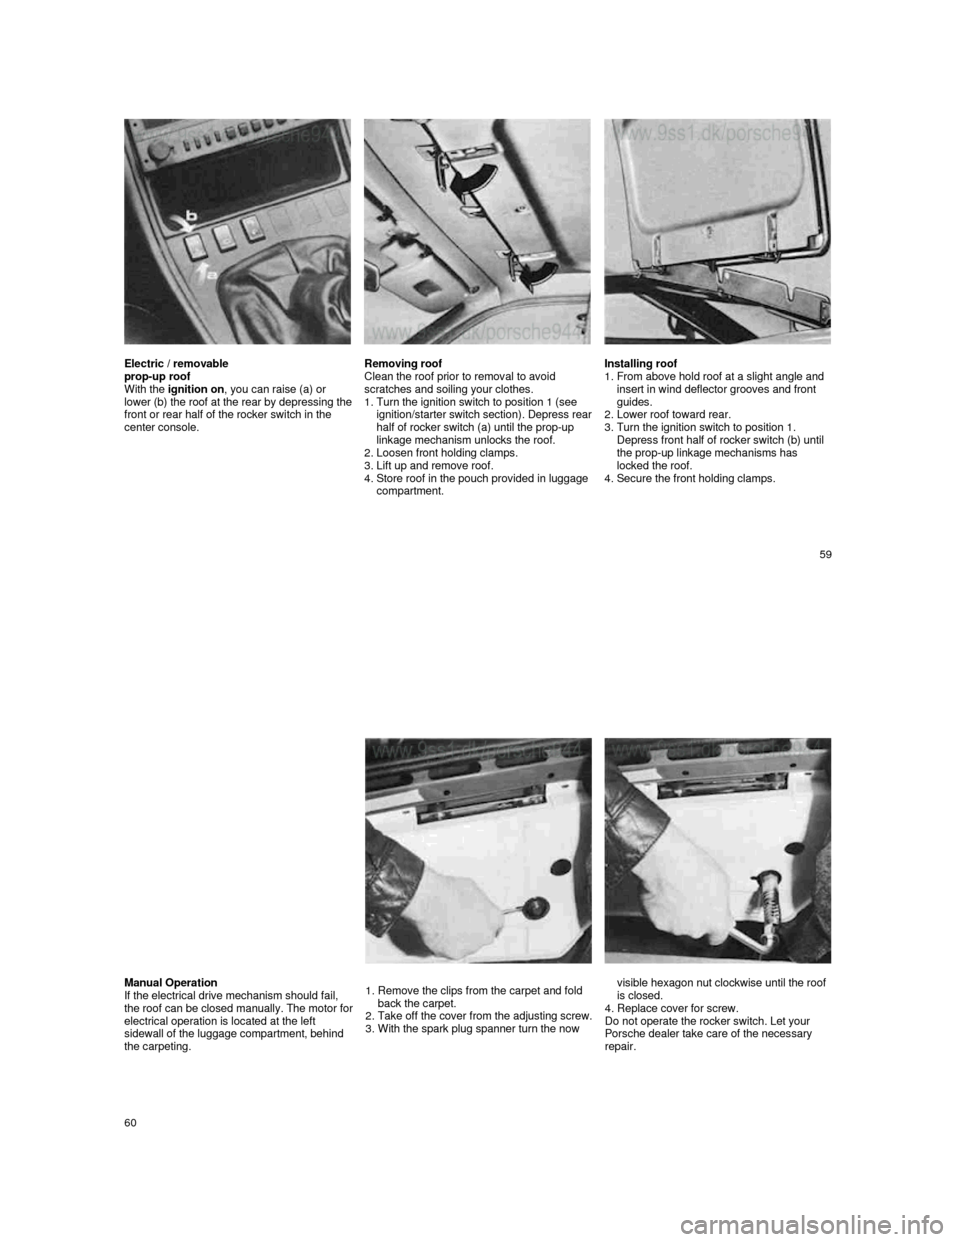
Electric / removable
prop-up roof
With the ignition on , you can raise (a) or
lower (b) the roof at the rear by depressing the front or rear half of the rocker switch in the
center console.
Removing roof
Clean the roof prior to removal to avoid
scratches and soiling your clothes.
1. Turn the ignition switch to position 1 (see
ignition/starter switch section). Depress rear half of rocker switch (a) until the prop-up
linkage mechanism unlocks the roof.
2.
Loosen front holding clamps.
3. Lift up and remove roof.
4. Store roof in the pouch provided in luggage
compartment.
Installing roof
1. From above hold roof at a slight angle and
insert in wind deflector grooves and front
guides.
2.
Lower roof toward rear.
3. Turn the ignition switch to position 1.
Depress front half of rocker switch (b) until
the prop-up linkage mechanisms has
locked the roof.
4.
Secure the front holding clamps.
59
Manual Operation
If the electrical drive mechanism should fail,
the roof can be closed manually. The motor for electrical operation is located at the left
sidewall of the luggage compartment, behind
the carpeting.
1. Remove the clips from the carpet and fold
back the carpet.
2.
Take off the cover from the adjusting screw. 3. With the spark plug spanner turn the now
visible hexagon nut clockwise until the roof
is closed.
4. Replace cover for screw.
Do not operate the rocker switch. Let your
Porsche dealer take care of the necessary
repair.
60
Page 35 of 66
Exercise Extreme Caution when Working under the
Engine Hood
The engine compartment of any motor vehicle is a potentially hazardous area. If you are not
fully familiar with proper repair procedures, do
not attempt the adjustments described on the
following pages. This caution applies to the
entire vehicle.
Only work on your vehicle outdoors or in a well ventilated area. Ensure that there are no open flames in the
area of your vehicles at any time when
gasoline fumes might be present. Be
especially cautious of such devices such as
hot water heaters which ignite a flame
intermittently.
Before working on any part in the engine
compartment, turn the engine off and let it
cool down sufficiently. Hot engine
compartment components can burn skin on
contact.
Even after the engine has stopped the
radiator fan may continue running until the
temperature of the coolant has dropped to a
certain level. Therefore, never touch the fan
blades as they will rotate spontaneously
when the thermostat turns the fan on, even with ignition off. Be alert and cautious around engine at all
times while the engine is running.
If work has to be done with the engine
running, always set the parking brake, and
make sure the shift lever is in either Neutral
or Park.
Exercise extreme caution to prevent
neckties, jewelry or long hair from getting
caught in the fan blades, the drive belts, or
any other moving engine parts.
Your Porsche is equipped with a
transistorized ignition system with
breakerless distributor. When the ignition is
on, high voltage is present in all wires
connected with the ignition system; therefore
exercise extreme caution when working on
any part of the engine while the ignition is on
or the engine is running.
Always support your car with safety stands if it is necessary to work underneath the car.
The jack supplied with the car is not
adequate for this purpose.
When working underneath the car without
safety stands but with the wheels on the
ground, make sure the car is on level ground, that the wheels are blocked, and that the
engine cannot be started. REMOVE THE
IGNITION KEY.
Do not smoke or allow an open flame around the battery or gasoline. Keep a fire extinguisher in close reach.
Incomplete or improper servicing may cause
problems in the operation of the car. If in
doubt about any servicing, have it done by
your authorized Porsche dealer or any other
properly equipped and qualified workshop.
Improper maintenance during the warranty
period may affect your warranty coverage.
67
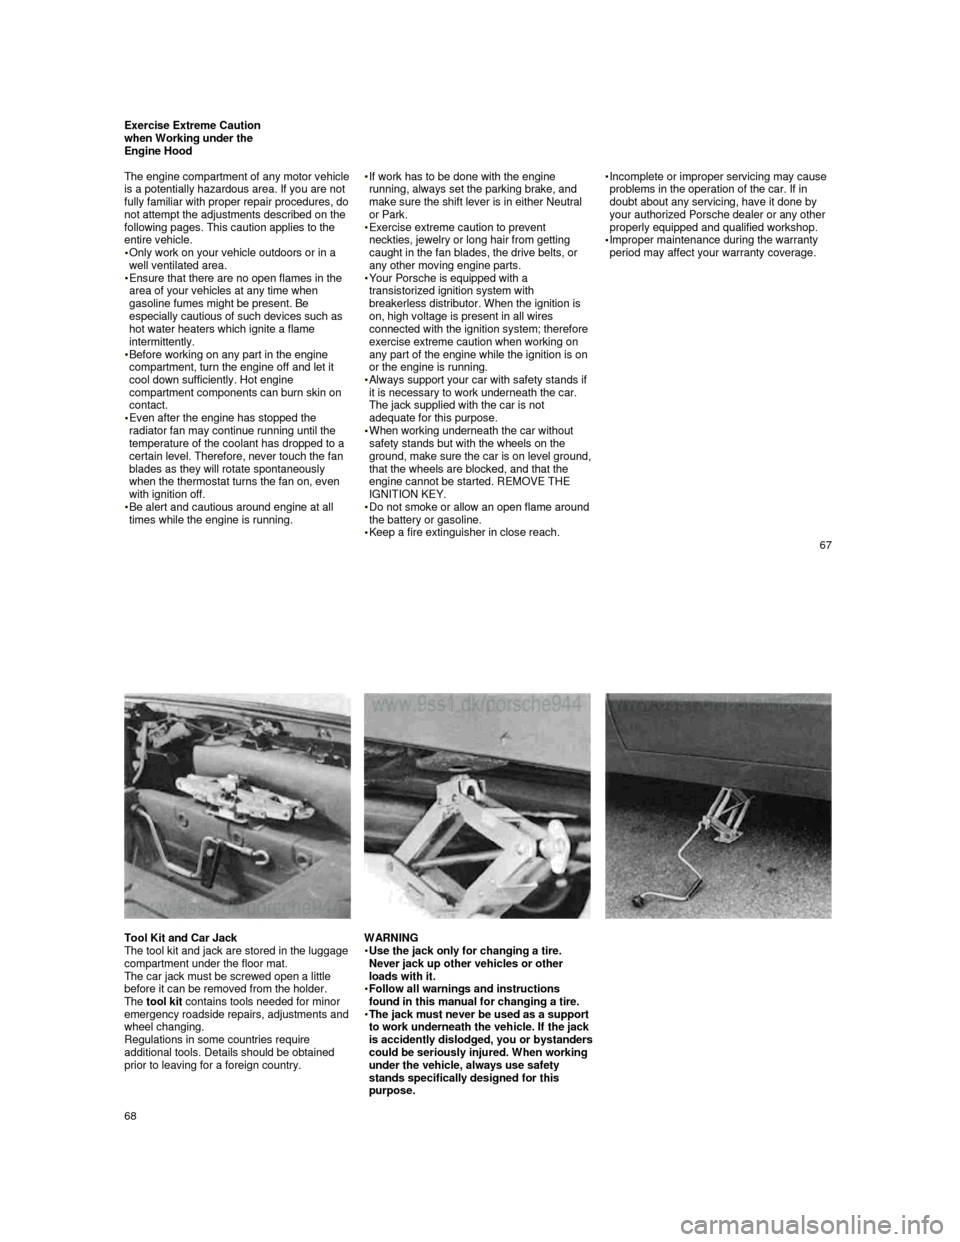
Tool Kit and Car Jack
The tool kit and jack are stored in the luggage
compartment under the floor mat.
The car jack must be screwed open a little
before it can be removed from the holder.
The tool kit contains tools needed for minor
emergency roadside repairs, adjustments and
wheel changing.
Regulations in some countries require
additional tools. Details should be obtained
prior to leaving for a foreign country.
WARNING
Use the jack only for changing a tire. Never jack up other vehicles or other loads with it. Follow all warnings and instructions found in this manual for changing a tire. The jack must never be used as a support to work underneath the vehicle. If the jack is accidently dislodged, you or bystanders could be seriously injured. When working
under the vehicle, always use safety
stands specifically designed for this
purpose.
68
Page 46 of 66
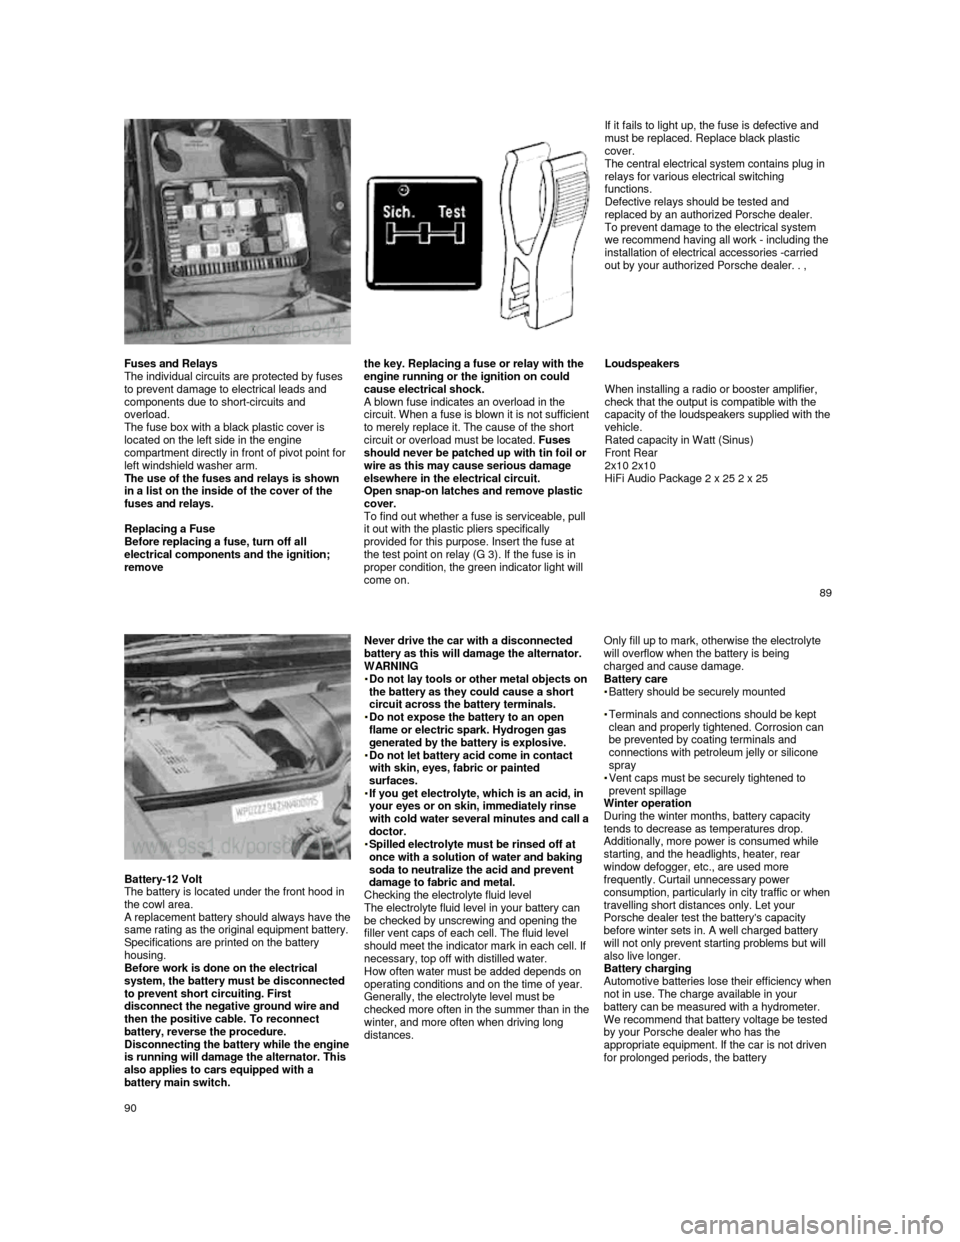
If it fails to light up, the fuse is defective and
must be replaced. Replace black plastic
cover.
The central electrical system contains plug in
relays for various electrical switching
functions.
Defective relays should be tested and
replaced by an authorized Porsche dealer.
To prevent damage to the electrical system
we recommend having all work - including the
installation of electrical accessories -carried
out by your authorized Porsche dealer. . ,
Fuses and Relays
The individual circuits are protected by fuses
to prevent damage to electrical leads and
components due to short-circuits and
overload.
The fuse box with a black plastic cover is
located on the left side in the engine
compartment directly in front of pivot point for
left windshield washer arm.
The use of the fuses and relays is shown
in a list on the inside of the cover of the
fuses and relays.
Replacing a Fuse
Before replacing a fuse, turn off all
electrical components and the ignition;
remove the key. Replacing a fuse or relay with the
engine running or the ignition on could
cause electrical shock.
A blown fuse indicates an overload in the circuit. When a fuse is blown it is not sufficient
to merely replace it. The cause of the short
circuit or overload must be located. Fuses
should never be patched up with tin foil or
wire as this may cause serious damage
elsewhere in the electrical circuit.
Open snap-on latches and remove plastic
cover.
To find out whether a fuse is serviceable, pull
it out with the plastic pliers specifically
provided for this purpose. Insert the fuse at
the test point on relay (G 3). If the fuse is in
proper condition, the green indicator light will
come on.
Loudspeakers
When installing a radio or booster amplifier,
check that the output is compatible with the
capacity of the loudspeakers supplied with the vehicle.
Rated capacity in Watt (Sinus)
Front Rear
2x10 2x10
HiFi Audio Package 2 x 25 2 x 25
89
Battery-12 Volt
The battery is located under the front hood in
the cowl area.
A replacement battery should always have the same rating as the original equipment battery.
Specifications are printed on the battery
housing.
Before work is done on the electrical
system, the battery must be disconnected
to prevent short circuiting. First
disconnect the negative ground wire and
then the positive cable. To reconnect
battery, reverse the procedure.
Disconnecting the battery while the engine is running will damage the alternator. This
also applies to cars equipped with a
battery main switch.
Never drive the car with a disconnected battery as this will damage the alternator. WARNING
Do not lay tools or other metal objects on the battery as they could cause a short
circuit across the battery terminals.
Do not expose the battery to an open flame or electric spark. Hydrogen gas
generated by the battery is explosive.
Do not let battery acid come in contact with skin, eyes, fabric or painted
surfaces.
If you get electrolyte, which is an acid, in your eyes or on skin, immediately rinse
with cold water several minutes and call a doctor. Spilled electrolyte must be rinsed off at once with a solution of water and baking
soda to neutralize the acid and prevent
damage to fabric and metal.
Checking the electrolyte fluid level
The electrolyte fluid level in your battery can
be checked by unscrewing and opening the
filler vent caps of each cell. The fluid level
should meet the indicator mark in each cell. If
necessary, top off with distilled water.
How often water must be added depends on
operating conditions and on the time of year.
Generally, the electrolyte level must be
checked more often in the summer than in the winter, and more often when driving long distances.
Only fill up to mark, otherwise the electrolyte will overflow when the battery is being charged and cause damage.
Battery care
Battery should be securely mounted
Terminals and connections should be kept
clean and properly tightened. Corrosion can
be prevented by coating terminals and
connections with petroleum jelly or silicone
spray
Vent caps must be securely tightened to
prevent spillage
Winter operation
During the winter months, battery capacity
tends to decrease as temperatures drop.
Additionally, more power is consumed while starting, and the headlights, heater, rear window defogger, etc., are used more
frequently. Curtail unnecessary power
consumption, particularly in city traffic or when travelling short distances only. Let your
Porsche dealer test the battery's capacity
before winter sets in. A well charged battery
will not only prevent starting problems but will
also live longer.
Battery charging
Automotive batteries lose their efficiency when not in use. The charge available in your
battery can be measured with a hydrometer.
We recommend that battery voltage be tested
by your Porsche dealer who has the
appropriate equipment. If the car is not driven
for prolonged periods, the battery
90
Page 49 of 66
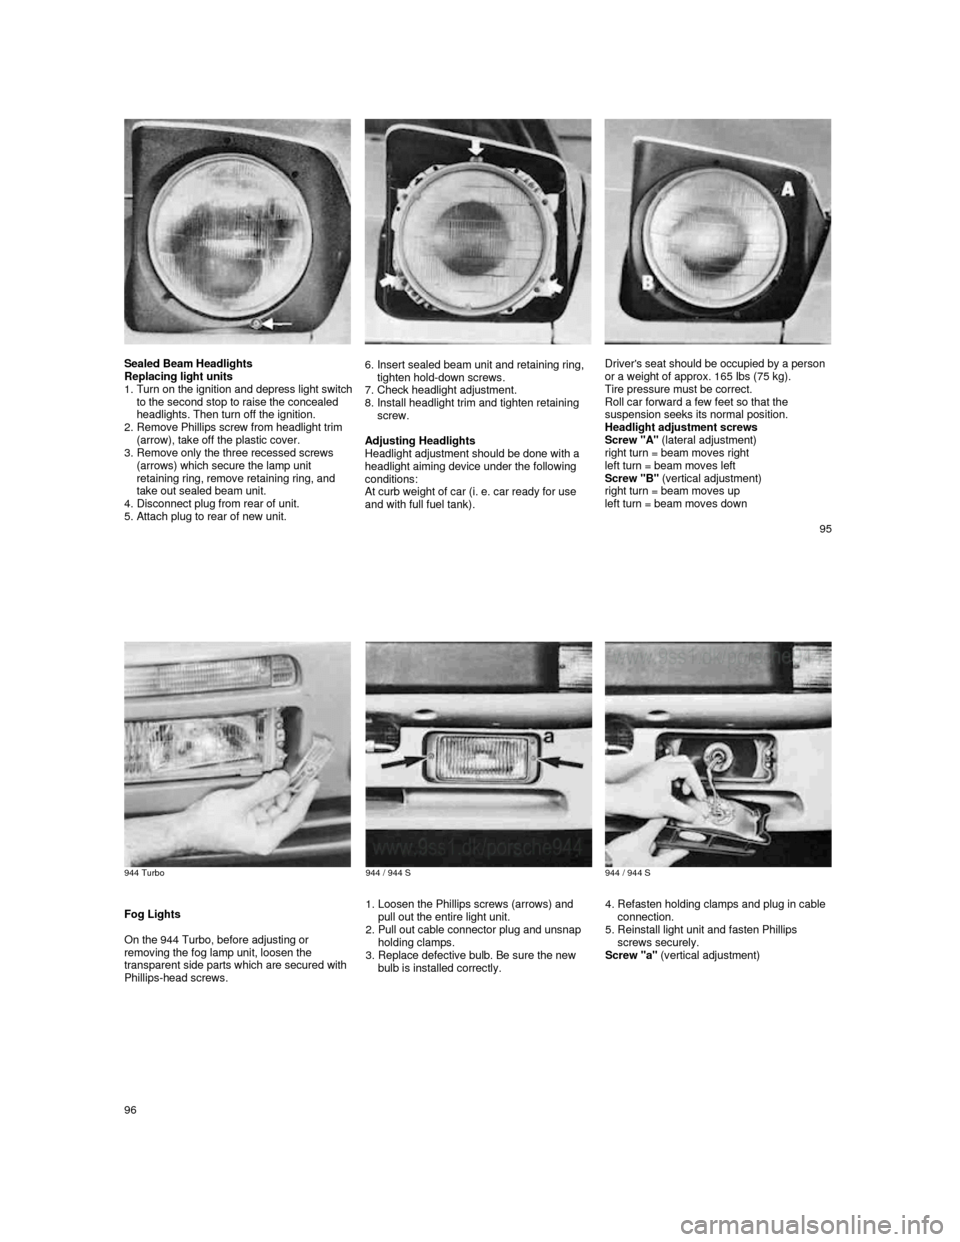
Sealed Beam Headlights
Replacing light units
1.
Turn on the ignition and depress light switch to the second stop to raise the concealed
headlights. Then turn off the ignition.
2.
Remove Phillips screw from headlight trim
(arrow), take off the plastic cover.
3.
Remove only the three recessed screws
(arrows) which secure the lamp unit
retaining ring, remove retaining ring, and
take out sealed beam unit.
4.
Disconnect plug from rear of unit.
5. Attach plug to rear of new unit.
6. Insert sealed beam unit and retaining ring,
tighten hold-down screws.
7.
Check headlight adjustment.
8. Install headlight trim and tighten retaining
screw.
Adjusting Headlights
Headlight adjustment should be done with a
headlight aiming device under the following
conditions:
At curb weight of car (i. e. car ready for use
and with full fuel tank).
Driver's seat should be occupied by a person
or a weight of approx. 165 Ibs (75 kg).
Tire pressure must be correct.
Roll car forward a few feet so that the
suspension seeks its normal position.
Headlight adjustment screws
Screw "A" (lateral adjustment)
right turn = beam moves right
left turn = beam moves left
Screw "B" (vertical adjustment)
right turn = beam moves up
left turn = beam moves down
95
944 Turbo
944 / 944 S
944 / 944 S
Fog Lights
On the 944 Turbo, before adjusting or
removing the fog lamp unit, loosen the
transparent side parts which are secured with
Phillips-head screws.
1. Loosen the Phillips screws (arrows) and
pull out the entire light unit.
2.
Pull out cable connector plug and unsnap
holding clamps.
3.
Replace defective bulb. Be sure the new
bulb is installed correctly.
4. Refasten holding clamps and plug in cable
connection.
5.
Reinstall light unit and fasten Phillips
screws securely.
Screw "a" (vertical adjustment)
96
Page 51 of 66
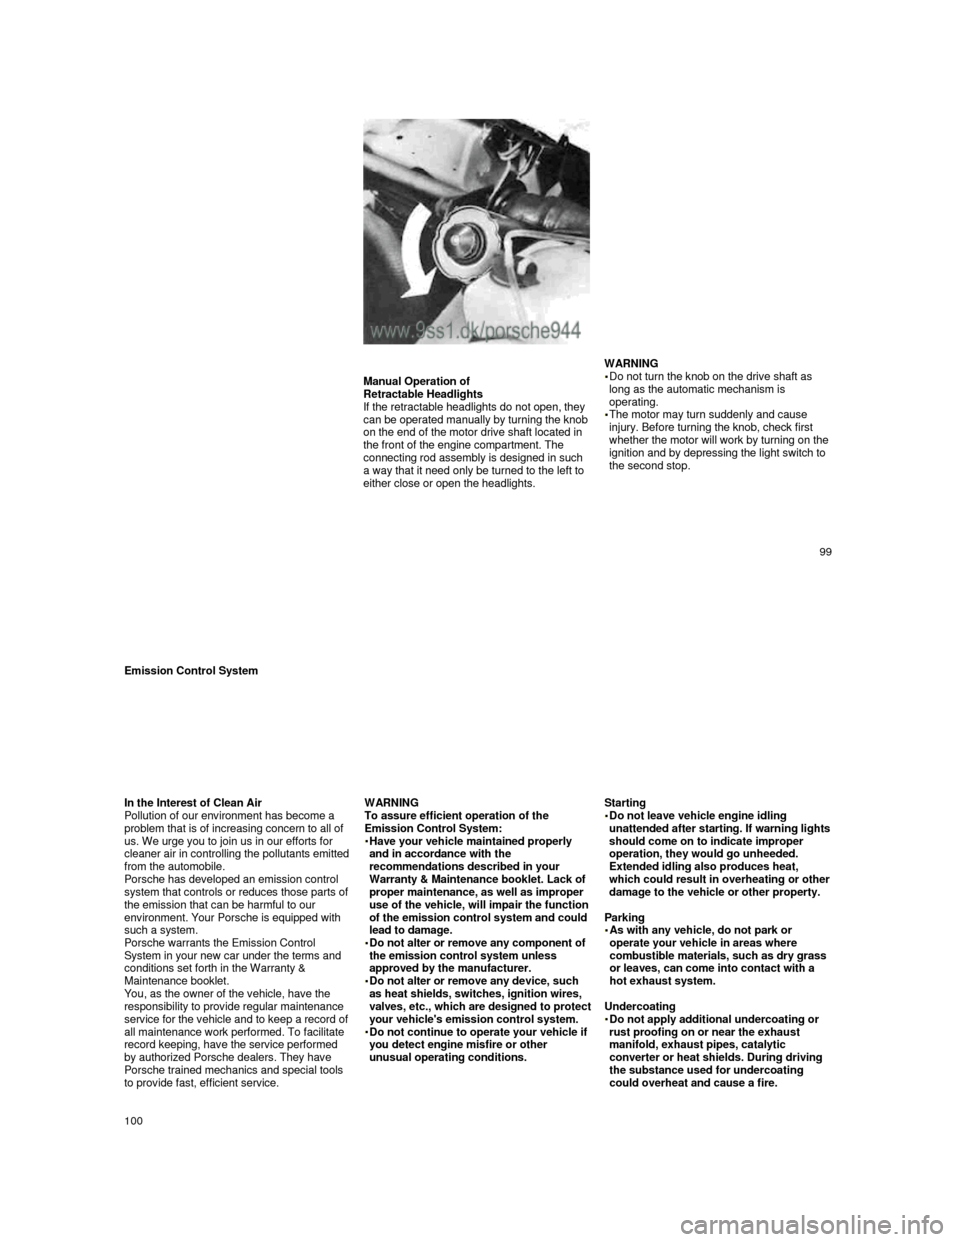
Manual Operation of
Retractable Headlights
If the retractable headlights do not open, they
can be operated manually by turning the knob
on the end of the motor drive shaft located in
the front of the engine compartment. The
connecting rod assembly is designed in such
a way that it need only be turned to the left to
either close or open the headlights.
WARNING
Do not turn the knob on the drive shaft as
long as the automatic mechanism is
operating.
The motor may turn suddenly and cause
injury. Before turning the knob, check first
whether the motor will work by turning on the ignition and by depressing the light switch to
the second stop.
99
Emission Control System
In the Interest of Clean Air
Pollution of our environment has become a
problem that is of increasing concern to all of
us. We urge you to join us in our efforts for
cleaner air in controlling the pollutants emitted from the automobile.
Porsche has developed an emission control
system that controls or reduces those parts of
the emission that can be harmful to our
environment. Your Porsche is equipped with
such a system.
Porsche warrants the Emission Control
System in your new car under the terms and
conditions set forth in the Warranty &
Maintenance booklet.
You, as the owner of the vehicle, have the
responsibility to provide regular maintenance
service for the vehicle and to keep a record of
all maintenance work performed. To facilitate
record keeping, have the service performed
by authorized Porsche dealers. They have
Porsche trained mechanics and special tools
to provide fast, efficient service.
WARNING To assure efficient operation of the
Emission Control System:
Have your vehicle maintained properly and in accordance with the
recommendations described in your
Warranty & Maintenance booklet. Lack of
proper maintenance, as well as improper
use of the vehicle, will impair the function
of the emission control system and could
lead to damage.
Do not alter or remove any component of the emission control system unless
approved by the manufacturer.
Do not alter or remove any device, such as heat shields, switches, ignition wires, valves, etc., which are designed to protect your vehicle's emission control system. Do not continue to operate your vehicle if you detect engine misfire or other
unusual operating conditions.
Starting
Do not leave vehicle engine idling unattended after starting. If warning lights should come on to indicate improper
operation, they would go unheeded.
Extended idling also produces heat,
which could result in overheating or other damage to the vehicle or other property.
Parking
As with any vehicle, do not park or operate your vehicle in areas where
combustible materials, such as dry grass
or leaves, can come into contact with a
hot exhaust system.
Undercoating
Do not apply additional undercoating or rust proofing on or near the exhaust
manifold, exhaust pipes, catalytic
converter or heat shields. During driving
the substance used for undercoating
could overheat and cause a fire.
100
Page 52 of 66
How Emission Control Works
When an automobile engine is running, it uses energy generated through the combustion of a mixture of air and fuel. Depending on whether
a car is driven fast or slowly or whether the
engine is cold or hot, some of the fuel
(hydrocarbons) may not be burned completely but be discharged into the engine crankcase
or exhaust system. Additional hydrocarbons
may enter the atmosphere through
evaporation of fuel from the fuel tank. These
hydrocarbons (HC), when released into the
air, contribute to undesirable pollution.
In addition, carbon monoxide (CO) and oxides of nitrogen (NOx) contribute to engine
emissions. They, too, are formed during the
combustion process and discharged into the
exhaust system.
To reduce these pollutants, your Porsche is
equipped with a precisely calibrated fuel
injection system to assure a finely balanced
air/fuel mixture under all operating conditions.
Oxygen Sensor
The oxygen sensor, installed in the exhaust
pipe continuously senses the oxygen content
of the exhaust and signals the information to
an electronic control unit. The control unit
corrects the air/fuel ratio, so that the engine
always receives an accurately metered air fuel mixture. .
Crankcase Ventilation
Through Crankcase Ventilation undesirable
emissions from the engine crankcase are not
permitted to reach the outside atmosphere.
These emissions are recirculated from the
crankcase to the air intake system. From here
the emissions mix with the intake air and are
later burned in the engine.
Catalytic converter
The catalytic converter is an efficient
"cleanup" device built into the exhaust system
of the vehicle. The catalytic converter burns
the undesirable pollutants in the exhaust gas
before it is released into the atmosphere.
The exclusive use of unleaded fuel is critically important for the life of the
catalytic converter. Therefore, only
unleaded gasoline without additives must
be used.
The catalytic converter will be damaged by
push or tow starting your vehicle
misfiring of the engine turning off the ignition while the vehicle is moving or
by other unusual operating conditions.
Do not continue to operate your vehicle
under these conditions, as otherwise fuel
can reach the catalytic converter. This
could result in overheating of the
converter.
Federal law prohibits use of leaded
gasoline in this car.
The Emission Control System and its other
related components are illustrated and
described on the following pages.
101
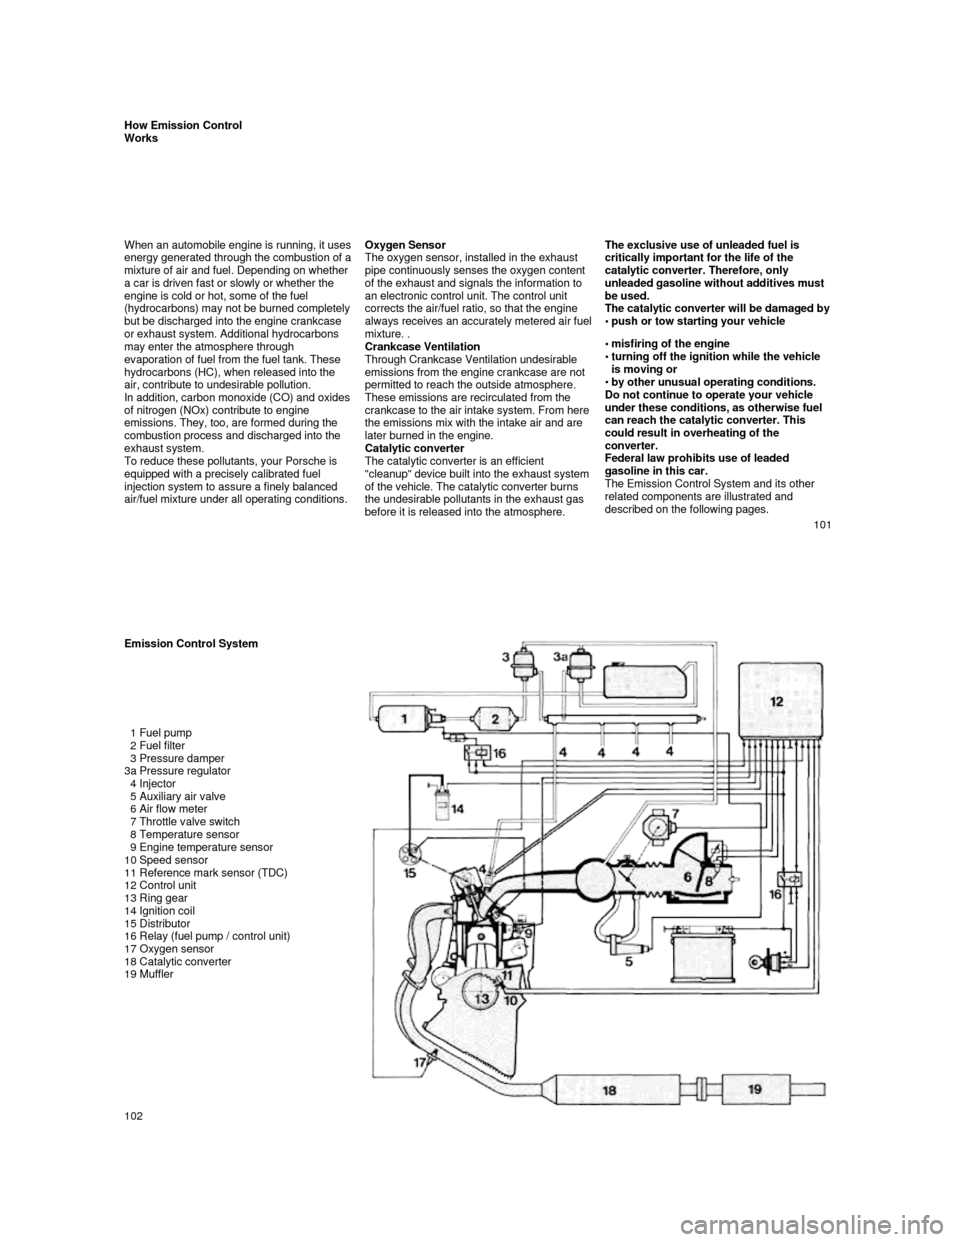
Emission Control System
1 Fuel pump
2 Fuel filter
3 Pressure damper
3a Pressure regulator
4 Injector
5 Auxiliary air valve
6 Air flow meter
7 Throttle valve switch
8 Temperature sensor
9 Engine temperature sensor
10 Speed sensor
11 Reference mark sensor (TDC)
12 Control unit
13 Ring gear
14 Ignition coil
15 Distributor
16 Relay (fuel pump / control unit)
17 Oxygen sensor
18 Catalytic converter
19 Muffler
102