Page 1238 of 2389
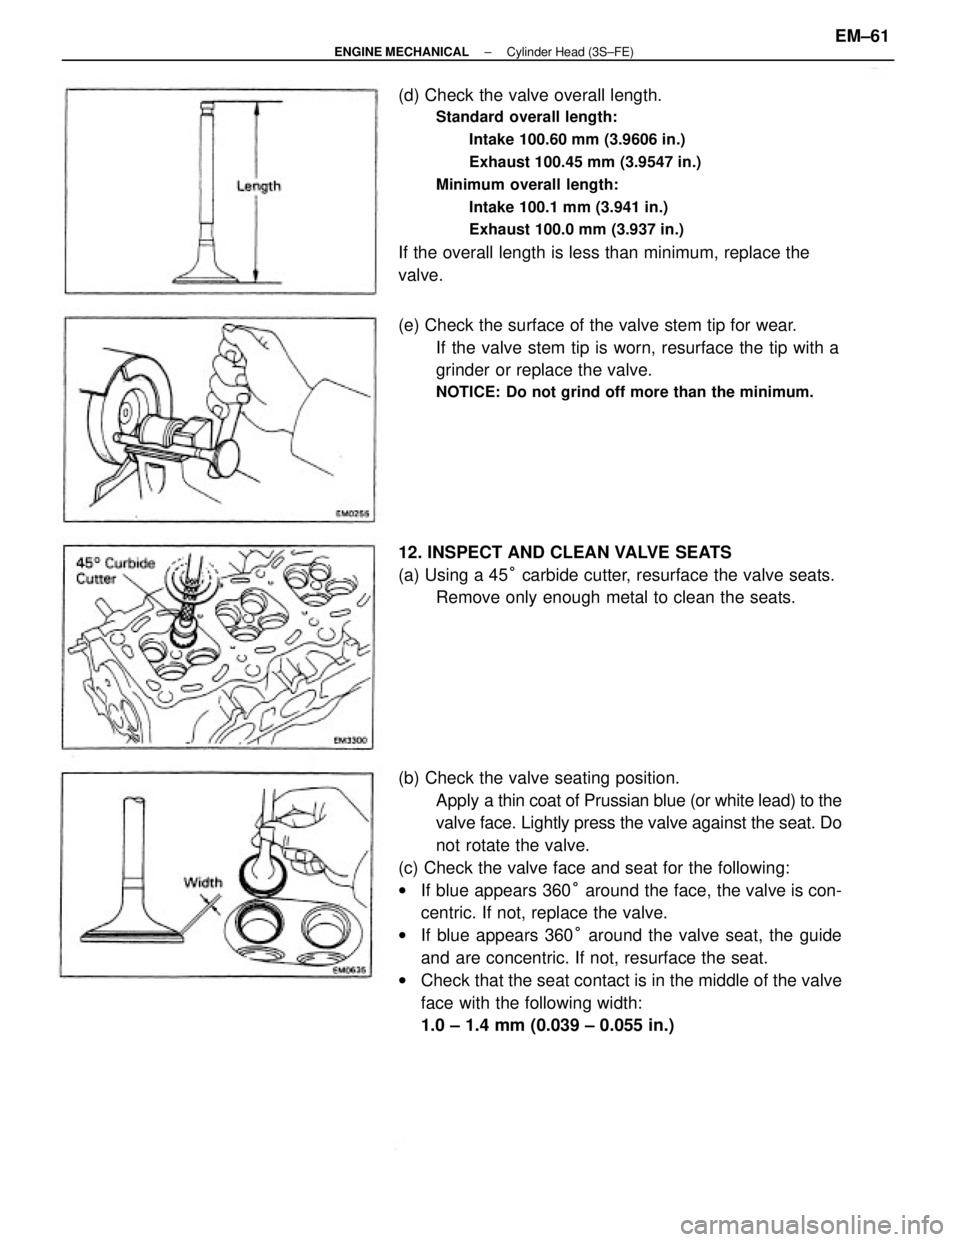
(b) Check the valve seating position.
Apply a thin coat of Prussian blue (or white lead) to the
valve face. Lightly press the valve against the seat. Do
not rotate the valve.
(c) Check the valve face and seat for the following:
wIf blue appears 360° around the face, the valve is con-
centric. If not, replace the valve.
wIf blue appears 360° around the valve seat, the guide
and are concentric. If not, resurface the seat.
wCheck that the seat contact is in the middle of the valve
face with the following width:
1.0 ± 1.4 mm (0.039 ± 0.055 in.) (d) Check the valve overall length.
Standard overall length:
Intake 100.60 mm (3.9606 in.)
Exhaust 100.45 mm (3.9547 in.)
Minimum overall length:
Intake 100.1 mm (3.941 in.)
Exhaust 100.0 mm (3.937 in.)
If the overall length is less than minimum, replace the
valve.
(e) Check the surface of the valve stem tip for wear.
If the valve stem tip is worn, resurface the tip with a
grinder or replace the valve.
NOTICE: Do not grind off more than the minimum.
12. INSPECT AND CLEAN VALVE SEATS
(a) Using a 45° carbide cutter, resurface the valve seats.
Remove only enough metal to clean the seats.
± ENGINE MECHANICALCylinder Head (3S±FE)EM±61
Page 1266 of 2389
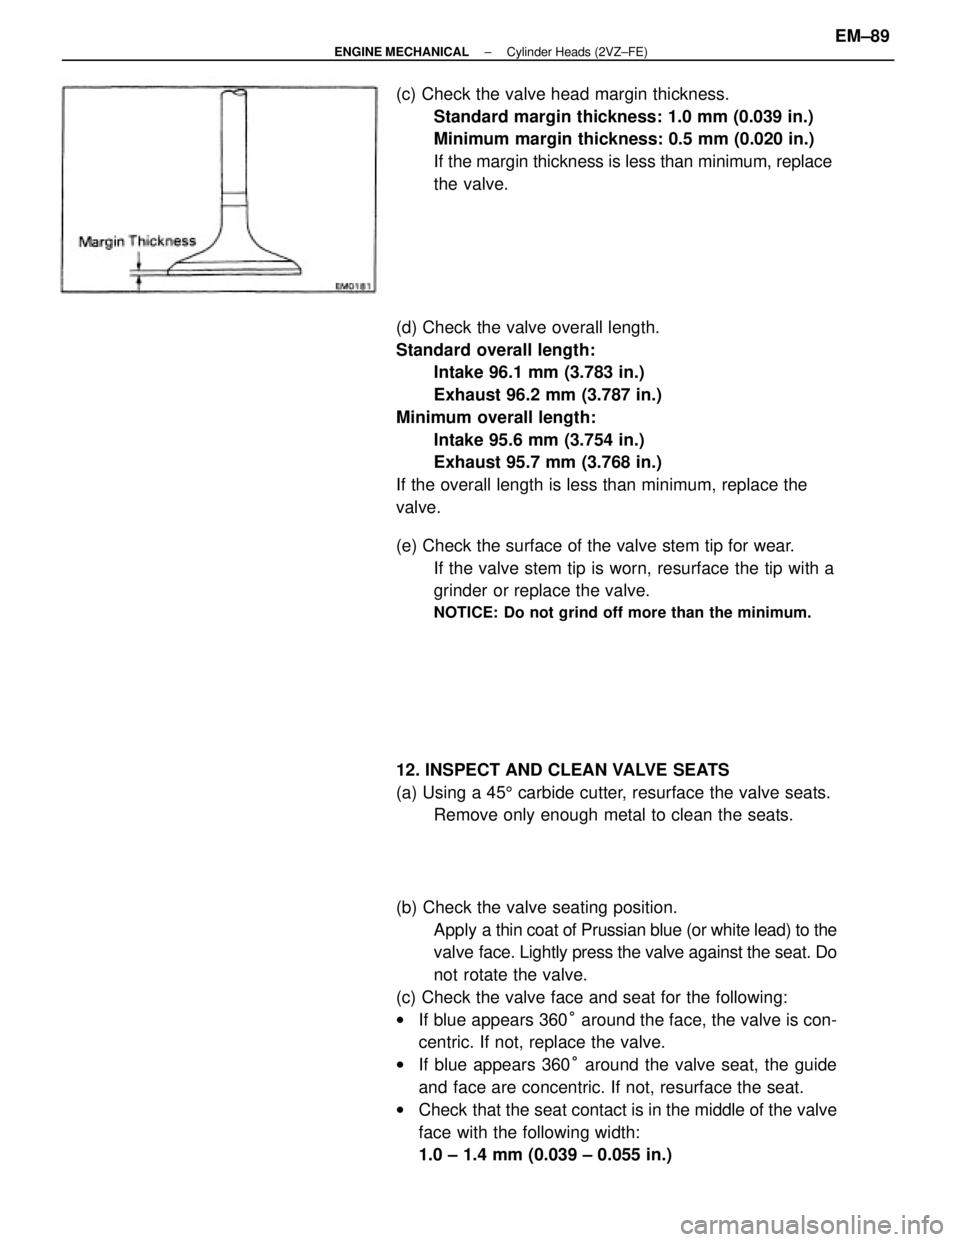
(b) Check the valve seating position.
Apply a thin coat of Prussian blue (or white lead) to the
valve face. Lightly press the valve against the seat. Do
not rotate the valve.
(c) Check the valve face and seat for the following:
wIf blue appears 360° around the face, the valve is con-
centric. If not, replace the valve.
wIf blue appears 360° around the valve seat, the guide
and face are concentric. If not, resurface the seat.
wCheck that the seat contact is in the middle of the valve
face with the following width:
1.0 ± 1.4 mm (0.039 ± 0.055 in.) (d) Check the valve overall length.
Standard overall length:
Intake 96.1 mm (3.783 in.)
Exhaust 96.2 mm (3.787 in.)
Minimum overall length:
Intake 95.6 mm (3.754 in.)
Exhaust 95.7 mm (3.768 in.)
If the overall length is less than minimum, replace the
valve. (c) Check the valve head margin thickness.
Standard margin thickness: 1.0 mm (0.039 in.)
Minimum margin thickness: 0.5 mm (0.020 in.)
If the margin thickness is less than minimum, replace
the valve.
(e) Check the surface of the valve stem tip for wear.
If the valve stem tip is worn, resurface the tip with a
grinder or replace the valve.
NOTICE: Do not grind off more than the minimum.
12. INSPECT AND CLEAN VALVE SEATS
(a) Using a 455 carbide cutter, resurface the valve seats.
Remove only enough metal to clean the seats.
± ENGINE MECHANICALCylinder Heads (2VZ±FE)EM±89
Page 1340 of 2389
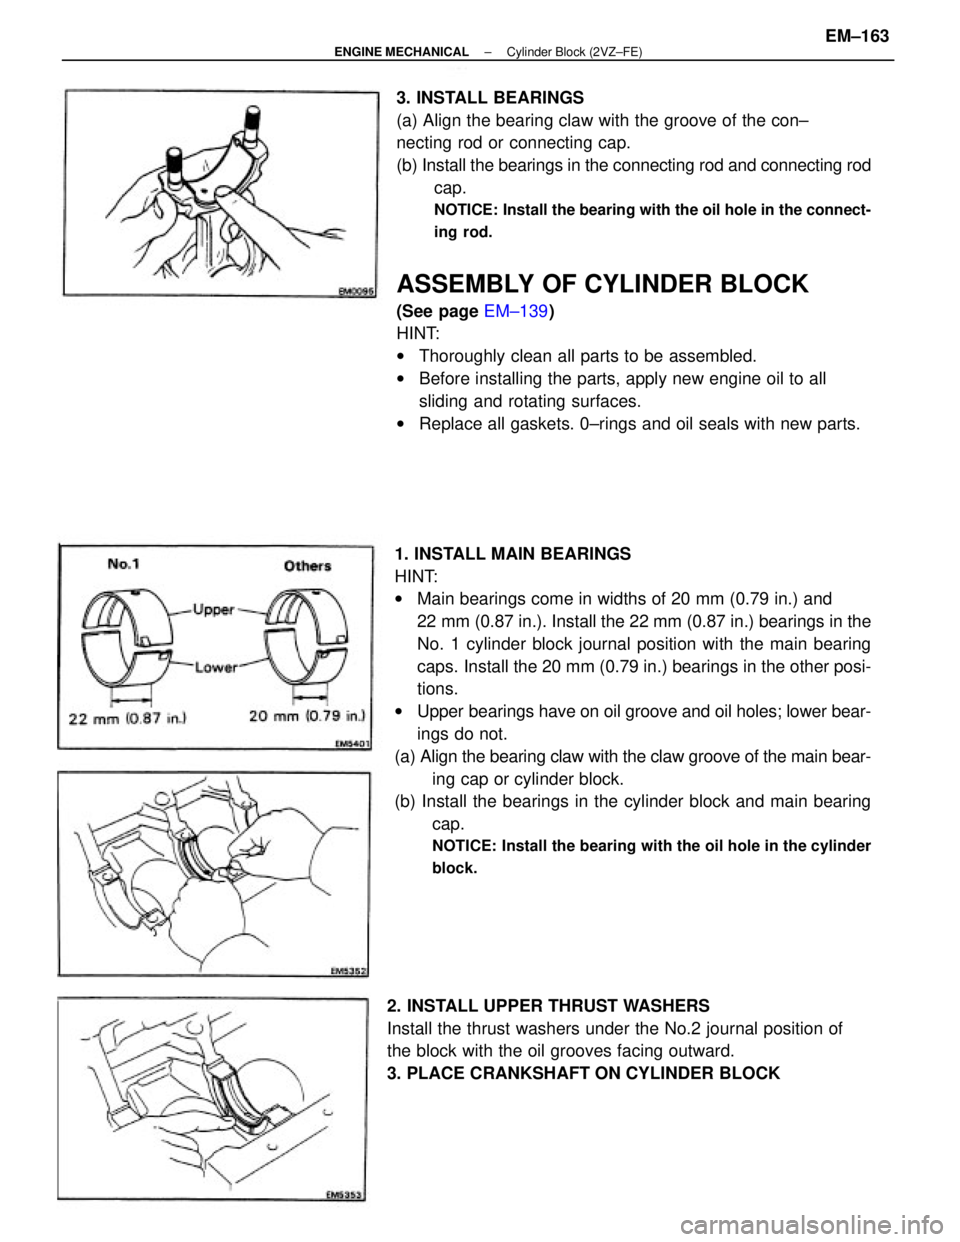
1. INSTALL MAIN BEARINGS
HINT:
wMain bearings come in widths of 20 mm (0.79 in.) and
22 mm (0.87 in.). Install the 22 mm (0.87 in.) bearings in the
No. 1 cylinder block journal position with the main bearing
caps. Install the 20 mm (0.79 in.) bearings in the other posi-
tions.
wUpper bearings have on oil groove and oil holes; lower bear-
ings do not.
(a) Align the bearing claw with the claw groove of the main bear-
ing cap or cylinder block.
(b) Install the bearings in the cylinder block and main bearing
cap.
NOTICE: Install the bearing with the oil hole in the cylinder
block.
3. INSTALL BEARINGS
(a) Align the bearing claw with the groove of the con±
necting rod or connecting cap.
(b) Install the bearings in the connecting rod and connecting rod
cap.
NOTICE: Install the bearing with the oil hole in the connect-
ing rod.
ASSEMBLY OF CYLINDER BLOCK
(See page EM±139)
HINT:
wThoroughly clean all parts to be assembled.
wBefore installing the parts, apply new engine oil to all
sliding and rotating surfaces.
wReplace all gaskets. 0±rings and oil seals with new parts.
2. INSTALL UPPER THRUST WASHERS
Install the thrust washers under the No.2 journal position of
the block with the oil grooves facing outward.
3. PLACE CRANKSHAFT ON CYLINDER BLOCK
± ENGINE MECHANICALCylinder Block (2VZ±FE)EM±163
Page 1421 of 2389
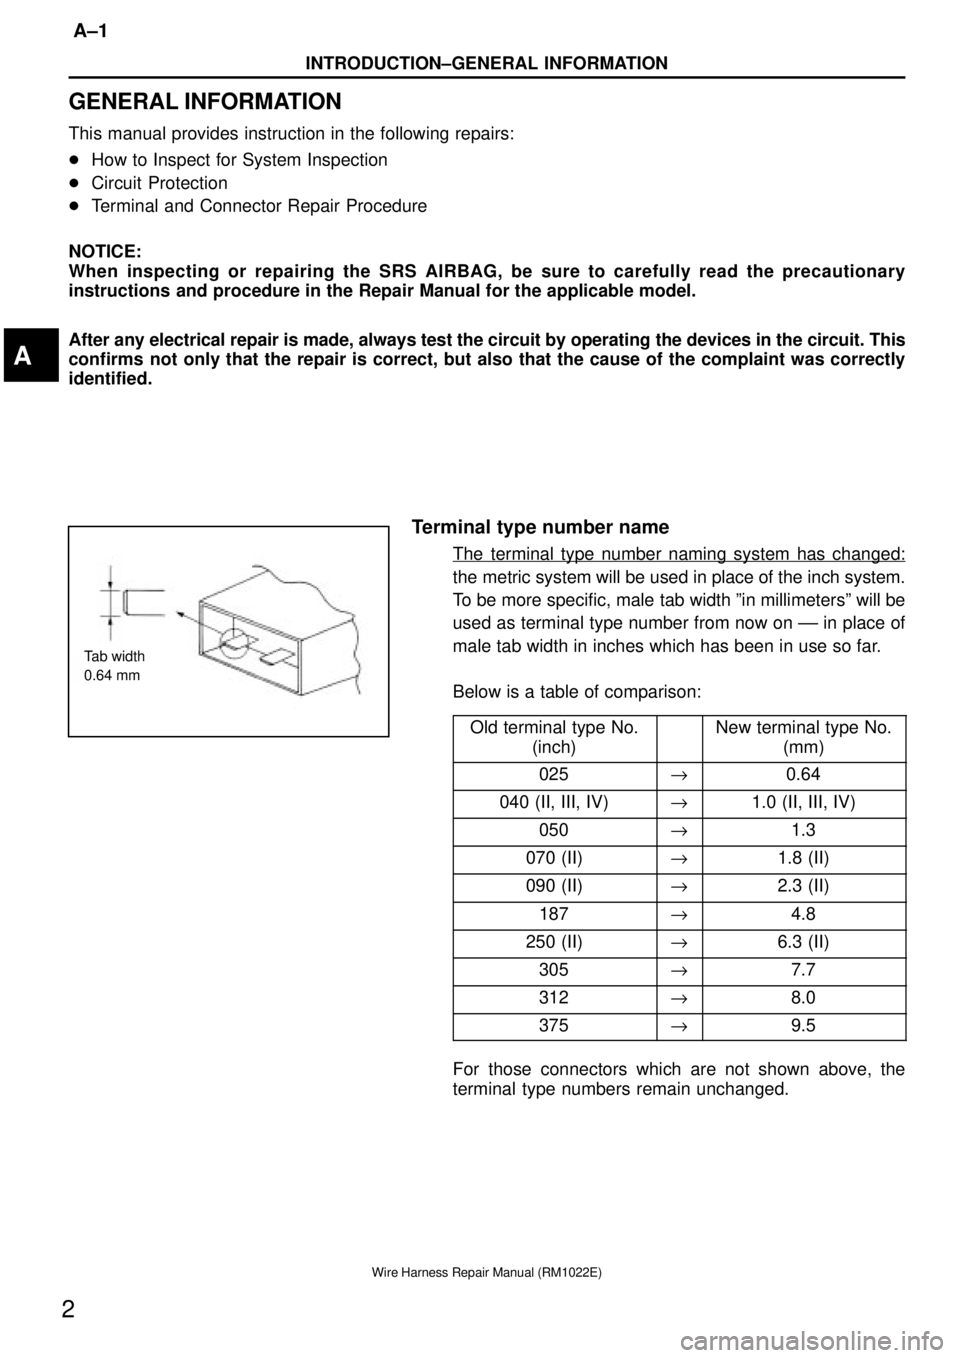
Tab width
0.64 mm
INTRODUCTION±GENERAL INFORMATION
A±1
2
Wire Harness Repair Manual (RM1022E)
GENERAL INFORMATION
This manual provides instruction in the following repairs:
�How to Inspect for System Inspection
�Circuit Protection
�Terminal and Connector Repair Procedure
NOTICE:
When inspecting or repairing the SRS AIRBAG, be sure to carefully read the precautionary
instructions and procedure in the Repair Manual for the applicable model.
After any electrical repair is made, always test the circuit by operating the devices in the circuit. This
confirms not only that the repair is correct, but also that the cause of the complaint was correctly
identified.
Terminal type number name
The terminal type number naming system has changed:
the metric system will be used in place of the inch system.
To be more specific, male tab width ºin millimetersº will be
used as terminal type number from now on ±± in place of
male tab width in inches which has been in use so far.
Below is a table of comparison:
Old terminal type No.
(inch)
New terminal type No.
(mm)
025"0.64
040 (II, III, IV)"1.0 (II, III, IV)
050"1.3
070 (II)"1.8 (II)
090 (II)"2.3 (II)
187"4.8
250 (II)"6.3 (II)
305"7.7
312"8.0
375"9.5
For those connectors which are not shown above, the
terminal type numbers remain unchanged.
A
Page 1423 of 2389
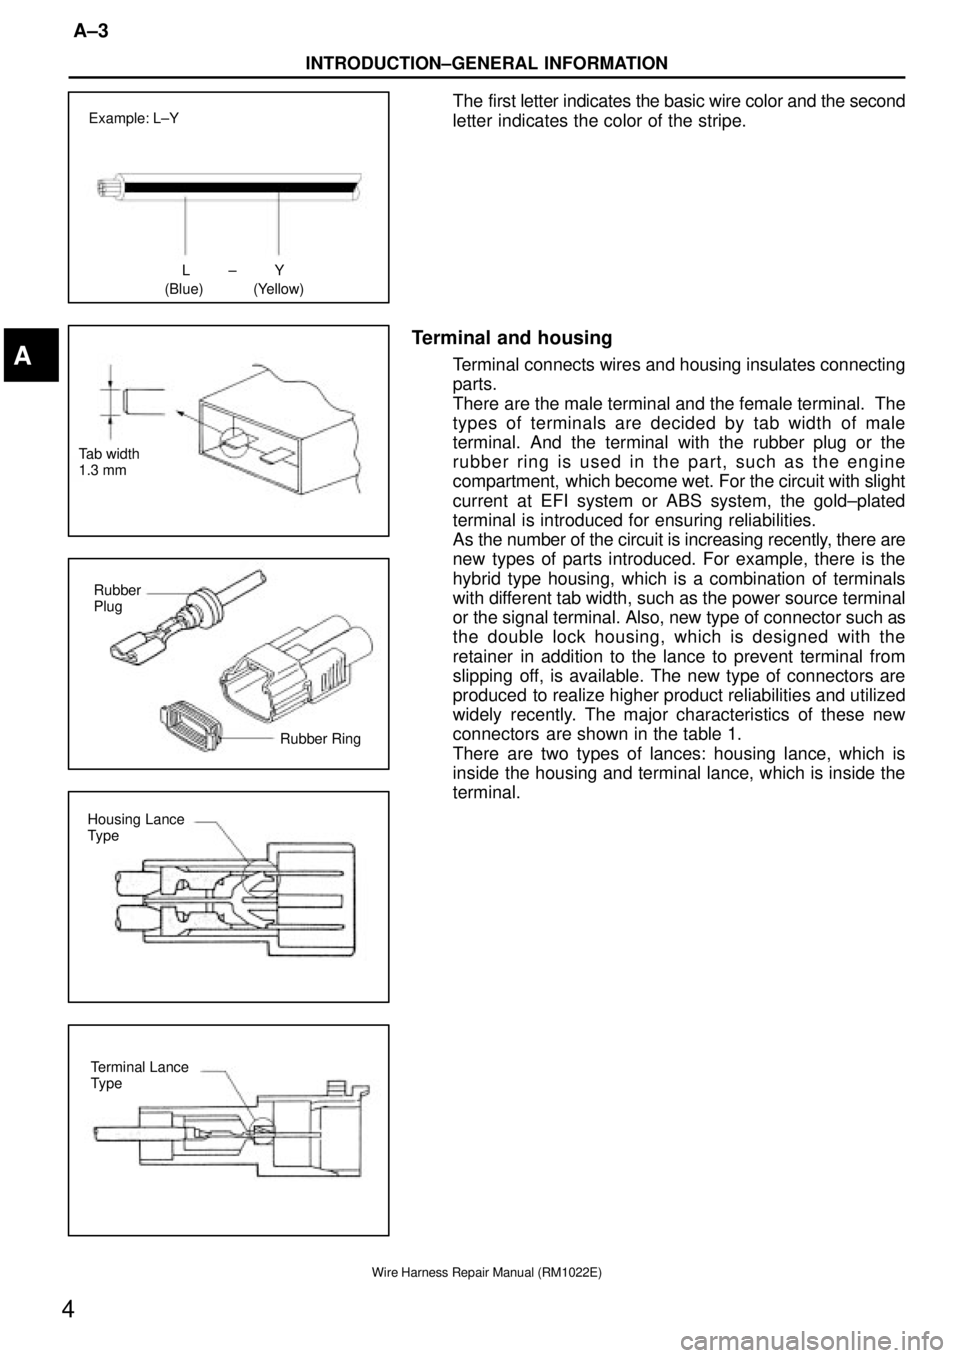
LY±
(Blue) (Yellow) Example: L±Y
Tab width
1.3 mm
Rubber
Plug
Rubber Ring
Housing Lance
Type
Terminal Lance
Type
INTRODUCTION±GENERAL INFORMATION
A±3
4
Wire Harness Repair Manual (RM1022E)
The first letter indicates the basic wire color and the second
letter indicates the color of the stripe.
Terminal and housing
Terminal connects wires and housing insulates connecting
parts.
There are the male terminal and the female terminal. The
types of terminals are decided by tab width of male
terminal. And the terminal with the rubber plug or the
rubber ring is used in the part, such as the engine
compartment, which become wet. For the circuit with slight
current at EFI system or ABS system, the gold±plated
terminal is introduced for ensuring reliabilities.
As the number of the circuit is increasing recently, there are
new types of parts introduced. For example, there is the
hybrid type housing, which is a combination of terminals
with different tab width, such as the power source terminal
or the signal terminal. Also, new type of connector such as
the double lock housing, which is designed with the
retainer in addition to the lance to prevent terminal from
slipping off, is available. The new type of connectors are
produced to realize higher product reliabilities and utilized
widely recently. The major characteristics of these new
connectors are shown in the table 1.
There are two types of lances: housing lance, which is
inside the housing and terminal lance, which is inside the
terminal.A
Page 1460 of 2389
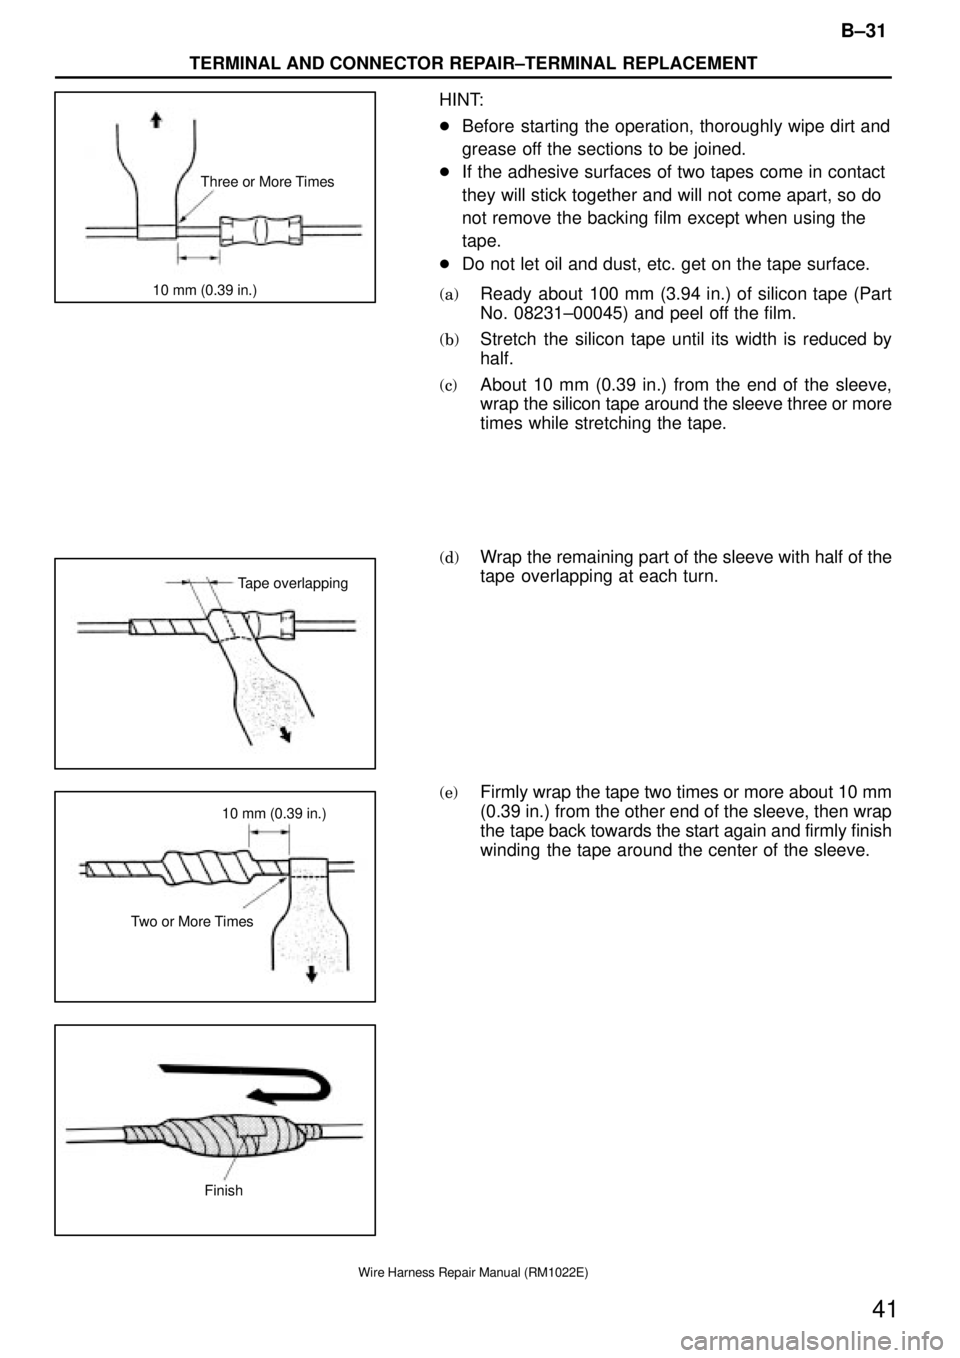
Three or More Times
10 mm (0.39 in.)
Tape overlapping
10 mm (0.39 in.)
Two or More Times
Finish
B±31
TERMINAL AND CONNECTOR REPAIR±TERMINAL REPLACEMENT
41
Wire Harness Repair Manual (RM1022E)
HINT:
�Before starting the operation, thoroughly wipe dirt and
grease off the sections to be joined.
�If the adhesive surfaces of two tapes come in contact
they will stick together and will not come apart, so do
not remove the backing film except when using the
tape.
�Do not let oil and dust, etc. get on the tape surface.
(a)Ready about 100 mm (3.94 in.) of silicon tape (Part
No. 08231±00045) and peel off the film.
(b)Stretch the silicon tape until its width is reduced by
half.
(c)About 10 mm (0.39 in.) from the end of the sleeve,
wrap the silicon tape around the sleeve three or more
times while stretching the tape.
(d)Wrap the remaining part of the sleeve with half of the
tape overlapping at each turn.
(e)Firmly wrap the tape two times or more about 10 mm
(0.39 in.) from the other end of the sleeve, then wrap
the tape back towards the start again and firmly finish
winding the tape around the center of the sleeve.
Page 1481 of 2389
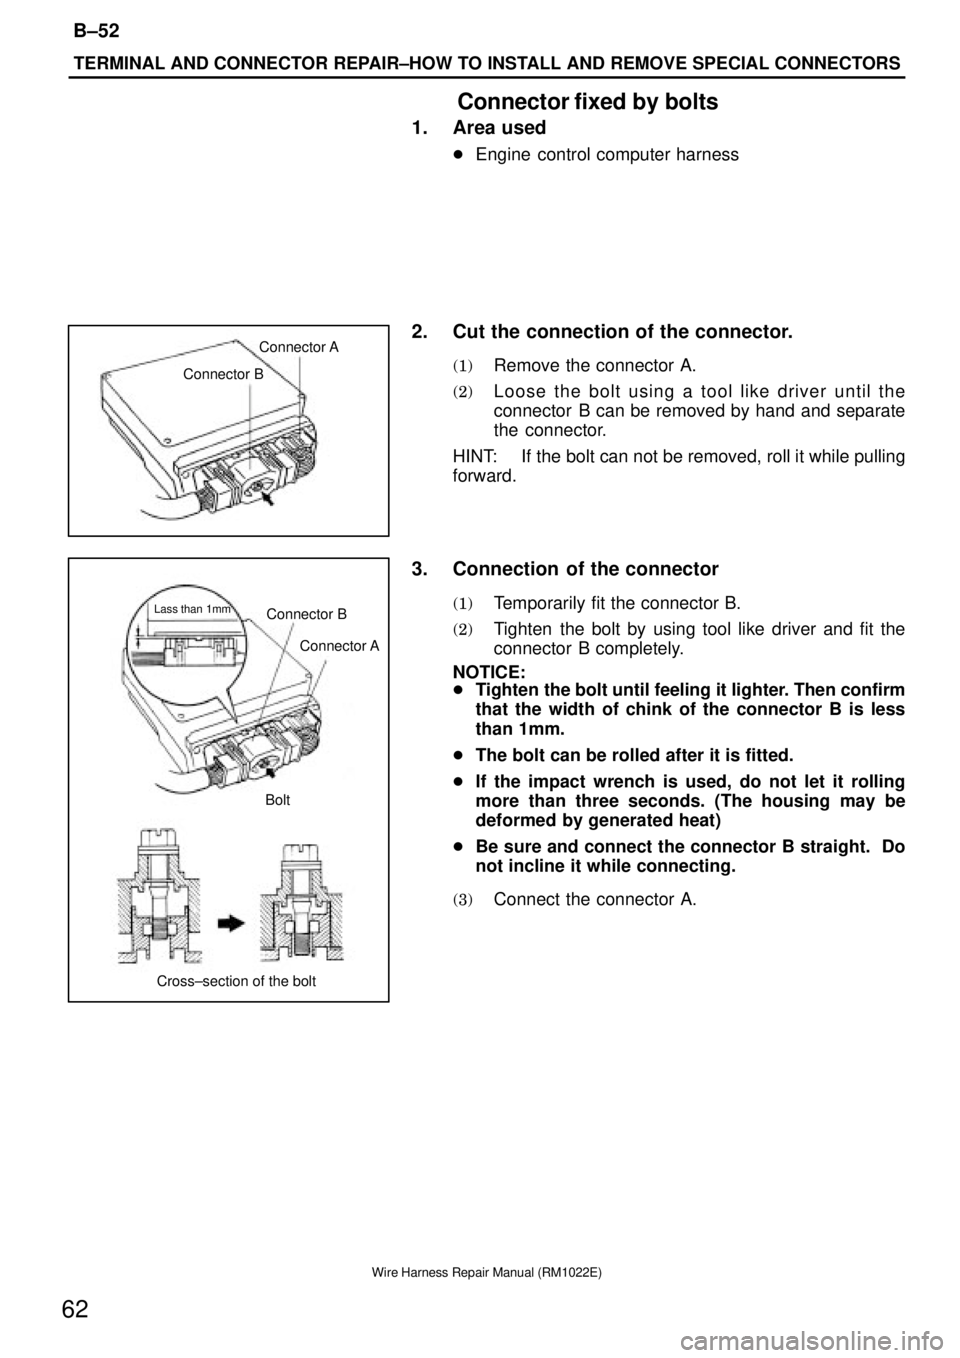
Connector A
Connector B
Connector A
Lass than 1mmConnector B
Bolt
Cross±section of the bolt
TERMINAL AND CONNECTOR REPAIR±HOW TO INSTALL AND REMOVE SPECIAL CONNECTORS
B±52
62
Wire Harness Repair Manual (RM1022E)
Connector fixed by bolts
1. Area used
�Engine control computer harness
2. Cut the connection of the connector.
(1)Remove the connector A.
(2)Loose the bolt using a tool like driver until the
connector B can be removed by hand and separate
the connector.
HINT: If the bolt can not be removed, roll it while pulling
forward.
3. Connection of the connector
(1)Temporarily fit the connector B.
(2)Tighten the bolt by using tool like driver and fit the
connector B completely.
NOTICE:
�Tighten the bolt until feeling it lighter. Then confirm
that the width of chink of the connector B is less
than 1mm.
�The bolt can be rolled after it is fitted.
�If the impact wrench is used, do not let it rolling
more than three seconds. (The housing may be
deformed by generated heat)
�Be sure and connect the connector B straight. Do
not incline it while connecting.
(3)Connect the connector A.
Page 2237 of 2389
Input shaft
Roller bearing journal diameter
3rd gear journal diameter
4th gear journal diameter
5th gear journal diameter
Runout
Output shaft
Roller bearing journal diameter
1 st gear journal diameter
2nd gear journal diameter
Runout
Gear thrust clearancePedal height (from asphalt sheet)
Push rod play at pedal top
Pedal freepiay
Clutch release point (from pedal stroke end)
Disc rivet head depth
Disc runout
Diaphragm spring out of alignment
Diaphragm spring finger wear Depth Width
Flywheel runout
Clutch cover x Flywheel
Master cylinder set nut
Release cylinder set bolt
Reservoir tank x Master cylinder
Clutch line union
Bleeder plug
Release fork support
MANUAL TRANSAXLE (S51)
Specifications
CLUTCH
Specifications
Torque Specifications
Part tightened
± SERVICE SPECIFICATIONSClutchA±2