1984 CHEVROLET CAVALIER check engine
[x] Cancel search: check enginePage 3 of 105
Downloaded from www.Manualslib.com manuals search engine INTRODUCTION
This manual has been prepared to acquaint you with the operation and
maintenan ce of your 1984
Cavalier. and to provide important safety
information .
It is supplemented by a Maintenance Schedule Folder and a
Warranty and Owner Assistance Information booklet. We urge you to read all
Uvee
publications carefully . Following the recommendations will help assure
the most enjoyable. safe and troubl efree operation of your
vehicle.
When it comes to ser vice, remember that your Chevrolet dealer knows your
vehicle best and is inter ested in your complete satisfaction . Your dealer invites
you to return for all 01 your service needs both during and after the warranty
period.
To help dealers handle your needs. Chevrolet has a number of Zone Offices
throughout the country .
If you have a problem that has not been handled to your satisfaction. follow the steps in the separate "Warranty and Owner
Assistance
Information" booklet.
We thank you for choosing a Chevrolet product, and want to assure you of our continuing interest in your motoring pleasure and satisfaction .
SPECIAL NOTE TO CANADIAN OWNERS
Some vehicles sold in Canada have the Computer Command Control system.
while others do not. II a "CHECK ENGINE" light comes on during engine
starting . your vehicle does have this system . For those vehicles sold in
'"canada which do not have the Computer Command Control system, please refer to the Canadian OWner's Manual Supplement supplied with
your vehicle for information on engine starting, specifications, etc. The
"CHECK ENGINE" light is covered in "Instrument Panel." Section 2 of this
manual.
FRENCH OWNER'S MANUAL
If preferred. a French Owner's Manual can be obtained either from your dealer
or by writing to General Motors of Canada ~imited. Technical Publications
Department . Oshawa. Ontario L 1 J 5Z6.
Aux proprietaires canadians:
Vous pouvez vous procurer un exemplaire dece
guide en fran~ais chez votre concessionnaire OU au Service des publications
techniques . General Motors du Canada Limit"", Oshawa . Ontario L 1 J 5Z6.
FOR CONTINUING SATISFACTION. KEEP YOUR GM CAR ALL GM.
GENERAL MOTORS PARTS ARE IDENTIFIED BY ONE OF THESE
TRADEMARKS: ~[j]~
Page 6 of 105
Downloaded from www.Manualslib.com manuals search engine SECTION 1
BEFORE DRIVING YOUR CAVALIER
TRANSAXLE
While reading this manual, you will nole many references 10 Ihe "transaxle." The transaxle is a transmission and differential (axle) combined in a singl ,e unit.
To avoid confusion, the word
"transaxle" will be used throughout this manual 10 refer to bolh Ihe transmission and differenlial funclions.
DRIVER DAILY CHECKUST
Be sure you know how to use your vehicle and its equipment before operating it
Before Entering the Vehicle
1. See that windows, mirrors and lights are clean and unobstructed.
2. If any lire does not look normal, check it with a pressure gage.
3. Look for fluid leaks .
4. Be sure everything is properly stowed.
5. Check the area behind the vehicle if you are about to back up.
__ Before Driving Off
1. Lock all doors.
2. Adjust the seat and any movable head restraint
3. Adjust inside and outside mirrors.
4. DO NOT allow anyone to ride where there is no seat belt ; and ALWAYS properly fasten the seat belt.
5. Check that all the warning lights work as the key is turned to "Run" or "Start"
6. Check all gages (including the fuel gage).
7 . Release the parking brake (and make sure the
"BRAKE " light turns .off).
See related topics in this manual
or the Maintenance Schedule folder H problems are found.
STOWING THINGS IN (OR ON) THE VEHICLE
CAUTION: Put luggage or cargo In the trunk, or rea' area if postible. Cargo weight,
whether In the trunk or rear area, should be located as far forward as possible. Cargo weight on the roof Shoukt be positioned .s evenly as possible. Secure all i1ems in place to help keep them -from being thrown about and injuring people during a cot"-ion or sudden maneuver. Do not pile luggage or cargo higher than the seetbaCks. Do not place anything on the filler panel, or any cargo cover between the rear seat~.ck and window.
GUARD AGAINST THEFT
Your new Cava~er has many features to help prevent then of the vehicle, its
equipment, and contents. But these anti-then features
depend upon you to work.
t -1
Page 11 of 105
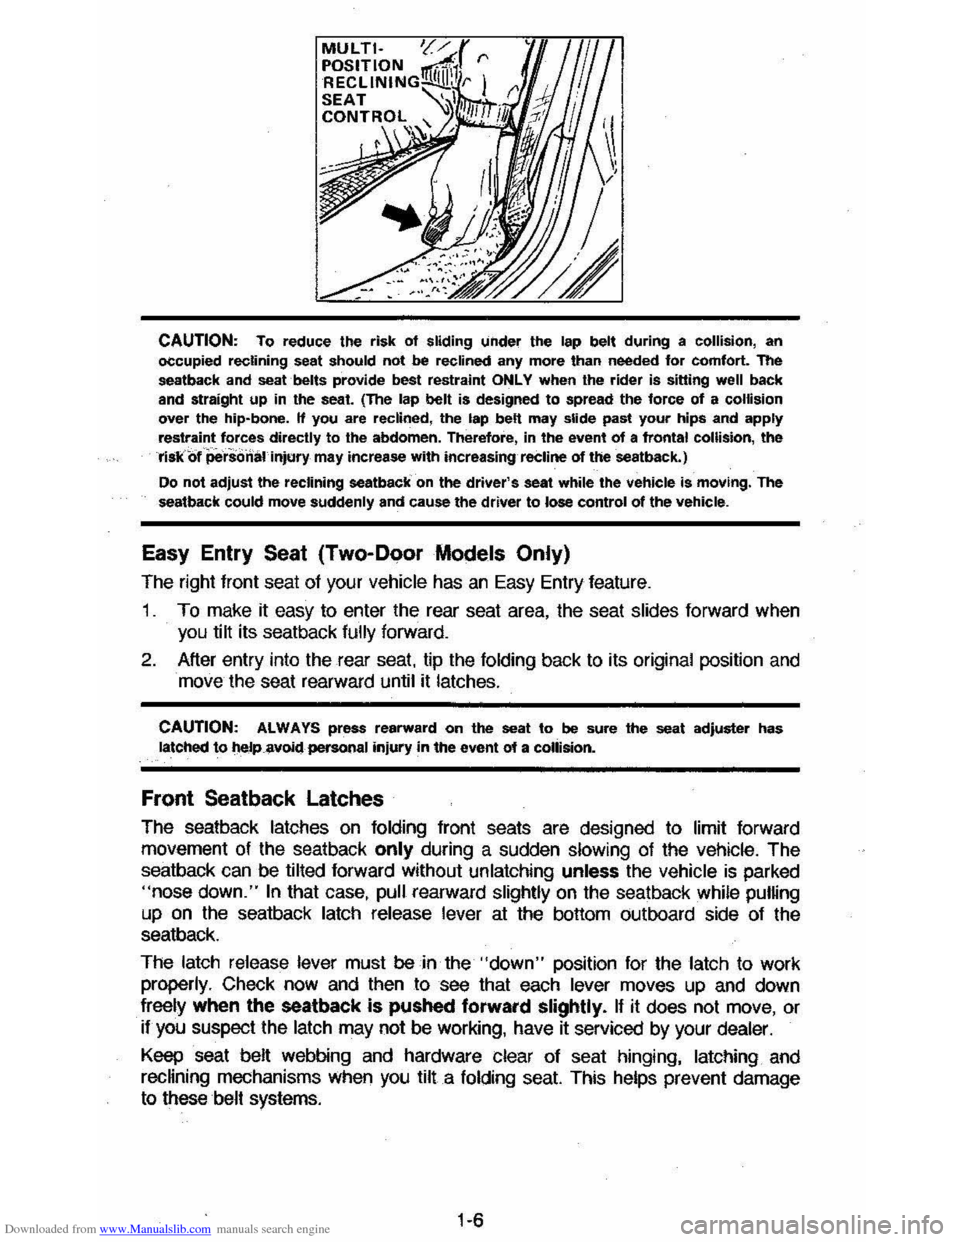
Downloaded from www.Manualslib.com manuals search engine CAUTION: To reduce the risk of sliding under the lap belt during a collision, an
occupied reclining seat should not be reclined any more than needed for comfort. The
seatback and seat belts provide best restraint ONLY when the rider is siuing well back
and straight up in the seat. (The lap belt is designed to spread the force of a collision over the hip-bone. If you are reclined, the lap belt may slide past your hips and apply restraint forces directly to the abdomen. Therefore, in the event of a frontal collision, the riskof 'personal Injury may increase with increasing reCline of theseatback.)
Do not adjust the reclining seatback on the driver's seat while the vehicle is moving. The
seatback could move suddenly and cause the driver to lose control of the vehicle.
Easy Entry Seat (Two-Door Models Only)
The right front seat of your vehicle has an Easy Entry feature.
1 . To make it easy to enter the rear seat area, the seat slides forward when
you tilt its seatback
fully forward.
2. After entry into the rear seat. tip the folding back to its original position and
move the seat rearward until it latches.
CAUTION: ALWAYS press rearward on the seat to be sure the seat adjuster has latched to t\eJp.8voidpersonal injury in the event of a collision.
Front Seatback Latches
The seatback latches on folding front seats are designed to limit forward
movement of the seatback
only during a sudden slowing of the vehicle. The
seatback can be tilted forward without unlatching unless the vehicle
is parked "nose down." In that case, pull rearward slightly on the seatback while pumng
up on the seatback latch release lever at the bottom outboard side of the
seatback.
The latch release lever must
be in the "down" position for the latch to work
properly. Check now and then to see that each lever moves up and down
freely when the seatback
is pushed forward slightly. If it does not move, or
if you suspect the latch may not be working, have it serviced by your dealer.
Keep seat belt webbing and hardware clear of seat hinging, latching and
recHning mechanisms When you tilt a folding seat. This helps prevent damage
to these belt systems.
1·6
Page 16 of 105
Downloaded from www.Manualslib.com manuals search engine Keep any shoulder belt slack to a minimum. Too much belt slack could
reduce the amount of protection in an accident because the belt is too loose to restrain you properly_
Seat Belt Inspection
Now and Ihen check that belts. buckles, latch plates, retractors, reminder
systems and guide
loops work properly; look for loose parts or damage that
could keep the restraint system from doing its job. Replace a
belt if the
webbing has been cut or otherwise damaged. Replace belts in use during all
but a minor collision; if there is any question, replace the belt.
SEAT BELT LIGHT/BUZZER REMINDER
When the key is turned to "Run" or "Start," a light will come on for four to
eight seconds to remind people to fasten their· seat belts. Unless the driver's
seat
belt is buckled, a buzzer will sound at the same time.
If the seat belt or reminder system does not work as described, see your dealer
for service.
CHILD RESTRAINT
All vehicle occupants and especially children should be restrained
whenever riding
in vehicles. Holding a child in your arms is NOT a substitute for a child restraint system. In an accident, a child held in a person's arms can
be struck or crushed by any unrestrained- rider. An unrestrained child could
also be injured by striking the interior, or by being ejected from the vehicle
during a sudden maneuver or impact. A child restraint system can help
protect a child in a vehicle.
In convertibles, a top-strap-equipped child restraint can only be used in
the Iront seat because there is no appropriate place to aUach a top strap
anchor bracket behind the rear seat in this vehicle. Installing a top strap
anchor bracket behind the rear seat may expose the child to hazards if the top
is raised or lowered with the child restraint occupied,
and, the bracket itself
may damage the convertible top.
In using any child restraint system, be sure to read and follow all instructions on installation and use that come with the system.
Riding Without A Child Restraint
For the best protection in an accident or sudden maneuver, children
small enough lor child restraint systems should be restrained that way.
However, the
following may provide some degree of protection for such children if a child restraint is not used.
• Place an infant who cannot sit up in a baby carrier, preferably covered and
padded. Put it crossways on the vehicle seat and securely restrain it with the vehicle's seat belts. Or, if that is not possible, place it crossways on the floor behind the driver's seat.
• Children who can sit up by themselves should be restrained with a lap belt
when riding in a rear seat. In the front seat a child should wear both lap
and shoulder belt. If the shoulder belt irritates the neck or face move the
child
closer to the center of the vehicle or to the rear seat. Never let a child stand or kneel on any seat. If unusual conditions prevent the use of
restraints, the
child should stand on the floor behind the driver's seat.
1-11
Page 19 of 105
Downloaded from www.Manualslib.com manuals search engine Now and then, check that all trailer hitch bolts and nuts are tight. Also see the
Maintenance
Schedule folder, and thelndax in this manual , for important facts
on
belts , cooling system care and brake ~tment.
Break-In Schedule
See the new vehicle break-in information in this manual. Also, we recommend
you drive your new vehicle for 500 miles (800 kilometers) before trailer towing.
At the end of this 500 mile (800 kilometer) break-in period, avoid speeds over
50 mph (80 km/h) and full throttle starts during the first 500 miles (800 kilometers) of trailer towing .
CAUTION:
BRAKES-To help avoid personal injury due to poor braking action :
•
Trailer brakes of adequate size are required on trailers more than 450
kilograms (1,000 pounds) loaded weight.
• If you use trailer brakes with this vehicle, follow the instailation and balance instructions of the trailer brake manufacturer.
• Do not tap into the vehicle's brake system iUhe trailer brake system uses
more than 0.3 cubic centimeter (0.02 cubic inches) 01 fluid from the
vehicle 's
mast.". cyllnd<1r .. , In this case, the vehicle's brake fluid capacity will not be enough to operate both thevehicte and trailer brakes under all kinds
of use.
• All brake fluid parts must be able to stand 20 650 kPa (3,000 psi) . The
brake fluid tap must be made at the upper rear master cylinder port.
Copper tubing is subject to fatigue failure and must not be used.
HITCHES-To help avoid personal injury due to sway caused by such things as
crosswinds, large trucks passing or road roughness , or due to separation of
the trailer :
• A properly installed and adjusted (1) frame mounted, weight-dstribut ing hitch and (2) sway control witheoough capacity are required for trailers
more than 900 kilograms (2,000 pounds) loaded weight.
• Keep the trailer tongue load at 10 percent of the loaded trailer weight for
dead-weight hitches and 12 percent for weight-distributing hitches. Tongue
loads can be adjusted by proper distribution of the load in the trailer. This
can
be checked by weighing separately the loaded trailer and then the
tongue .
• Do not use axle-mounted Mches. They can damage the axle housing , wheel bearings , wheels or tires.
• Do not allow steel hitch parts to be in direct contact with aluminum bumper
parts, if so equipped. When steel and aluminum are in contact, a galvanic
reaction (a form of corrosion) can occur which will progressively lessen the
strength of the contacting metals to the point
of failure. An organic
compound or paint should
be used as a barrier on the contacting surfaces
and on the attaching fasteners.
• When you remove a trailer hitch, be sure to seal any mounting holes in the body. This will help prevent entry 01 exhaust fumes,
"Starting and Operating ," Section 2 ollhis manual.)
2-3
Page 20 of 105
Downloaded from www.Manualslib.com manuals search engine NonCE: Use only trailer hitches which permit normal operation of the Energy
Absorbing Bumper system, If so equipped. For example, a rigid fore and aft connection between the bumper and any other part of-the vehicle may increase damage in the event of a collision.
TRAILER TOWING TIPS
Getting Started
Before entering traffic with a trailer that has electric brakes, start the vehicle and trailer moving and apply the trailer brakes by hand to be sure the trailer
brakes are working and the trailer electrical system is connected.
Engine Cooling
If your engine overheats, follow the steps under "Engine Cooling System
Overheating" in "In Case of Emergency," Section 3 of this manual.
Long Uphill Grades
When going up long grades, you can reduce the chance 01 engine overheating
by turning off the air conditioner, if so equipped.
Down Steep Or Long Grades
Before going down a steep or long grade, reduce speed and shift the transaxle
into a lower gear to help control your vehicle's speed. Try not to hold the brake pedal down too long or too often. This could cause the brakes to overheat and
reduce brake effectiveness.
Transaxle
See the method for checking the transaxle fluid level in "Service and
Maintenance,"
Section 5 of this manual.
Parkin!!
You should not park vehicles with trailers on a grade (hill). However, if you
must park on a grade, these steps must be followed:
1. Apply the regular brakes.
2. Have someone place wheel chocks under the trailer wheels.
3. When the wheel chocks are in place, release the regular brakes until the
chocks absorb the load.
4. Apply the parking brake.
5. Shift the transaxle to "P"(Park),
If the vehicle is parked on a grade, don't shift the transaxle to "P"(Park) until the trailer wheels are chocked and the parking brake is set. If you do, the
weight of the
vehicle and trailer may put so much force on the parking pawl in
the transaxle that it may be hard to shift out of "P"(Park).
When starting, after being parked
on a grade:
1. Apply the regular brakes and hold.
2. Start the engine in "P"(Park).
3. Shift into gear and release the parking brake.
4. Release the regular brakes and drive until the chocks are free.
5. Apply the regular brakes and have someone remove the chocks.
2·4
Page 22 of 105
Downloaded from www.Manualslib.com manuals search engine Other Gasolinel Alcohol Blends
Some fuel suppliers sell gasoline containing alcohol without advertising the
presence of
alcohol or giving it a special name such as gasohol. " you are not
sure whether there is alcohol in the gasoline you buy, check with the service
station operator.
DO NOT USE gasolines containing methanol (methyl or wood alcohol) that do
not
also contain cosolvents and corrosion inhibitors for methanol. Also, DO NOT USE gasolines that contain more than 5 percent methanol even if they
contain
cosolvents and corrosion inhib~ors. Fuel system damage or vehicle performance problems resuHing from the use of such fuels is not the
responsibility
of Chevrolet and may not be covered under the new vehicle
warranties.
Mhough gasolines containing 5 percent or less methanol and appropriate
cosolvents and inhibitors for methanol may be suitable for use in your vehicle,
evidence of their suitability is as yet incomplete; therefore, Chevrolet cannot, at
this time, endorse their use.
NOTICE: Take care to not spill gasoline during refueling. Guolines containing alcohol can cause paint damage, whiCh may notba covered under the New Vehicle Warranty.
OPERATION IN FOREIGN COUNTRIES
All models are specifically bum to comply with United States Federal Regulations regarding environmental quality. To comply, unleaded fuel of
sufficient octane rating must be used. These
fuels may not be available in
other countries. "you intend to take your vehicle outside the U.S. or Canada,
contact the GM Overseas Service Section at the
following address, to find out
what you must
do in order to operate your vehicles in other countries, or for
additional information and a. copy of the applicable maintenance schedule.
General Motors Corporation, Overseas Service Section, 2-128 General Motors
Building,
Detroij, Michigan 48202, (313) 556-4862.
When
writing, please include:
•
the Vehicle Identification Number and
• the countries in which yOu plan to travel.
Before taking your vehicle to a foreign country, check to see if the proper fuel
is available. Most major oil companies or domestic auto clubs should have this
information. Foreign offices of major oil
COmpanies or auto clubs may also be
of
help.
Be aware that, use of leaded gasoline or use of fuel that has a lower octane
rating than is required by your
vehicle, will cause the emission control system to lose its effectiveness and can cause ,engine knock or serious engine
damage. Ne~her GM Overseas nor Chevrolet will be responsible for damage to
your
vehicle as a result of not USing the proper fuel.
IMPORTANT FACTS YOU SHOULD KNOW ABOUT FUEL
ECONOMY AND HOW
TO IMPROVE IT
How you drive, where you drive, and when you drive all affect how many
miles/kilometers you can get from a galion/liter of fuel. You can save fuel if
you avoid
"Jackrabbit" starts, maintain as constant a throttle position as traffic
conditions
allow once you have reached cruising speed, and avoid sudden
stops which waste energy in the form of heat generated in braking.
2-6
Page 25 of 105
Downloaded from www.Manualslib.com manuals search engine • Lane Change Signal -In some turns, such as changing lanes, the steering wheel tS not turned far enough to cancel the turn signal. For convenience, you can flash the turn signal by moving the lever part way (to the first stop)
and holding it there. The lever will return to horizontal when you release it.
A green light on the instrument panel is designed to flash to tell you that the
front
and rear turn signal lights are working. If the light stays on, but does not flash, check for burned-out turn signal bulbs. If the green light does not come
on when
you move the lever, check the fuse and indicator bulb.
However, if you ordered a trailertowing·optiOil.·in which extra wiring was added to attach the trailer lighting, a different type of flasher was installed. In this
case, the green light will continue to flash even if a turn signal bulb burns out.
Therefore, you must regularly look at the front
and rear turn signal lights to be
sure they are working.
• Headlight Beam Changer -With the headlights on, pull the lever toward you until you hear a click, then release it. The lights will change from Iow
beam to high-beam or from high-beam to low-beam. When the high-beams
are
on, a light will appear on the instrument panel.
HEADLIGHT BEAM CHANGER
(HEADLIGHTS ON)
PULL LEVER
TOWARD YOU
• Standard Windshield Wiper -The standard Windshield wiper system
con
ols are on the band marked "WIPER" on the turn signal lever.
• For a single wiping cycle, turn the band toward you. Hold it there until
the wipers begin
Wiping, then release.it. The wipers will stop after one
cycle. For several cycles, hold the band in place as long as needed.
• For steady wiping at low speed, turn the band away from you to the
first stop. For high-speed wiping, turn the band to the next stop. Turn
the band back to
"OFF" to turn off the wipers.
• Delay Windshield Wiper -The optional delay windshield wiper system lets you vary the wiper speed from a 16-second delay between sweeps up to
the normal
low and high speeds of the standard wiper.
• The Delay wipers work the same as the standard wipers, except for the
delay feature. To use the wipers with a delay between sweeps, turn the
band on the turn signal lever to
"ON."
• Turn the "Delay" band away from you to control the amount of delay. The
wipers will move more often the closer the band is to "LO." Turn it fully to
the first stop for steady wiping at
low speed.
• Windshield Washer -To spray washer fluid on the windshield, pUSh the "paddle" on top of the turn signal lever. (This will also turn on the low~ speed wipers.) The spray will continue as long as you hold in the paddle.
After using the windshield washer
on the standard wiper system, turn the band
back to "OFF" to turn off the wipers.
2-9