1980 CHEVROLET CITATION seats
[x] Cancel search: seatsPage 8 of 95
Downloaded from www.Manualslib.com manuals search engine SEAT CONTROLS
ADJUSTMENT OF SEAT POSITION
Manually Operated Front Seats
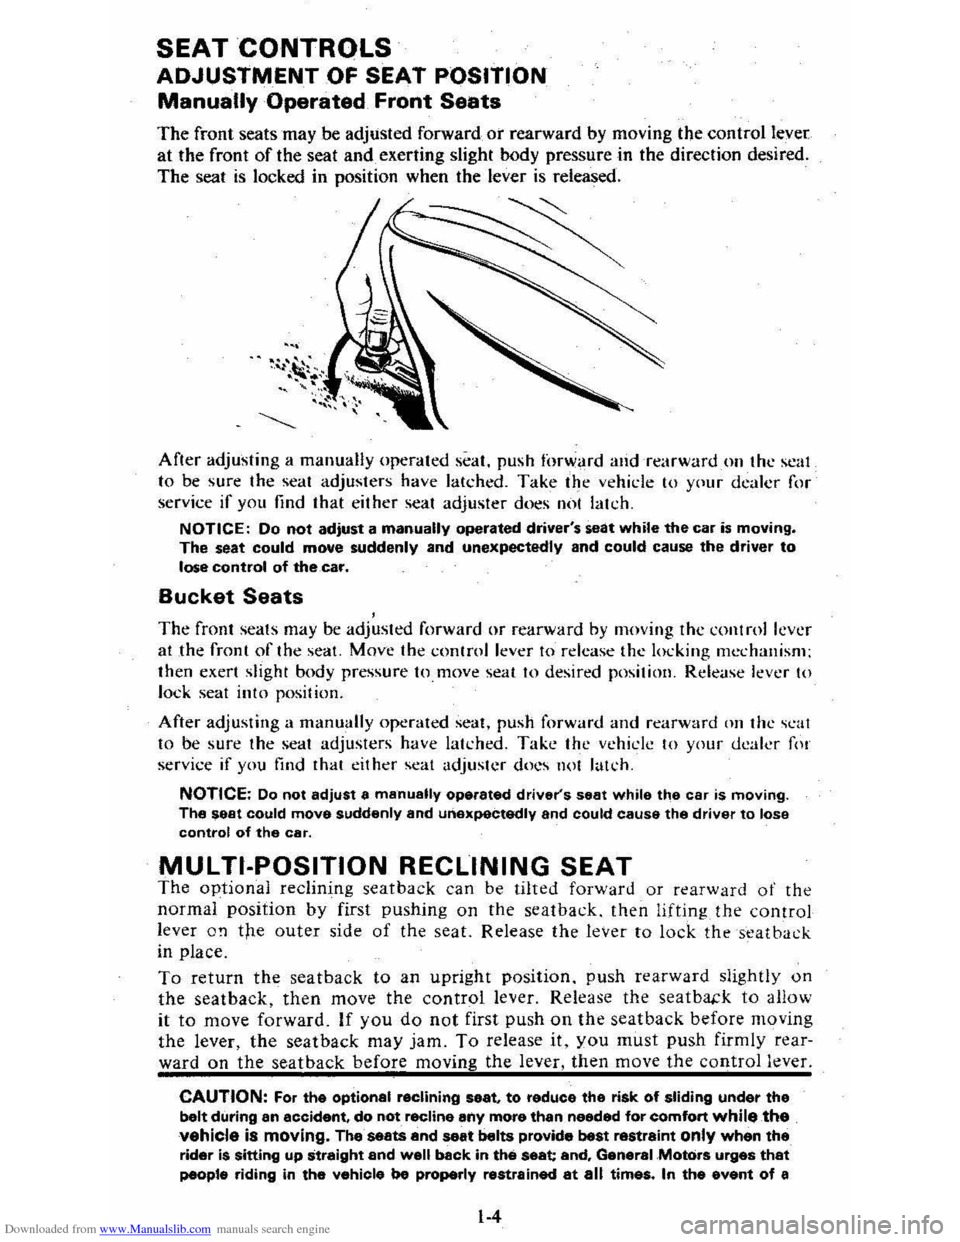
The front seats may be adjusted forward or rearward by moving the control lever
at the front of the seat and exerting slight body pressure in the direction desired.
The seat
is locked in position when the lever is released.
After adjusting a manually operated seat. push forward and rearwardon the scal
to be sure the seat adjusters have latched. Take the vehicle 10 Y(lur dealer for
service if you find that either seat adjuster does IIi)! lakh.
NOTICE: Do not adjust a manually operated driver's seat while the car is moving. The seat could move suddenly and unexpectedly and could cause the driver to lose control of thecaf.
Bucket Seats , The front seats may be adjusted forward or rearward by moving the control lever at the front of the seat. Move the control lever to release the locking mechanism;
then exert slight body pressure to. move seat to desired position. Release lever to lock seat into position.
After adjusting a manually operated seat. push forward and rearward Oil the scat to be sure the seat adjusters have latched. Take the vehicle to your dealer fo!
service if you find that either seat adjuster docs not latch.
NOTICE: Do not adjust a manually operated driver's seat while the car is moving. The seat could move suddenly and unexpectedly and could cause the driver to lose control of the car.
MULTI-POSITION RECLINING SEAT The optional reclining seat back can be tilted forward or rearward of the
normal position by first pushing on the seatback. then lifting the control
lever O!l the outer side of the seat. Release the lever to lock the seat back
in place.
To return the seatback to an upright position. push rearward slightly on
the seatback, then move the control lever. Release the seatba.:k to allow
it to move forward. If you do not first push on the seat back before moving
the lever, the seat back may jam. To release it. you must push firmly rear
ward on the seat back before moving the lever, then move the control lever.
CAUTION: For the optional reclining seat. to reduce the risk of sliding under the belt during an accident, do not recline any more than needed for comfort while the vehicle is moving. The seats and seat belts provide best restraint only when the rider is Sitting up straight and well back in the seat and, General .Motors urges that people riding in the vahicle be properly restrained at all times. In the event of a
1-4
Page 9 of 95
Downloaded from www.Manualslib.com manuals search engine frontal collision, the chance and/or severity of injury may increase with increasing
recline of the saatbeck. The -lap belt is d .. ignad to spread the force of a collision over the strong hlp bone instead of across the abdomen. However, if the hips are
reclined, the lap bett may slide past the hips and ilpply restraint forceS directly to the abdominal region.
Front Seatback Latches
Vehicles with folding front seats have inertial seatback latches. The latches are
designed to prevent forward movement of the front seatback only during a sudden
slowing
of the vehicle. Normally, the seatback can be tilted forward without
unlatching, to get in
or out of the rear seat. But when the vehicle is ""nose down"
such as on a very steep hill, the inertial latch may keep the seat back from being
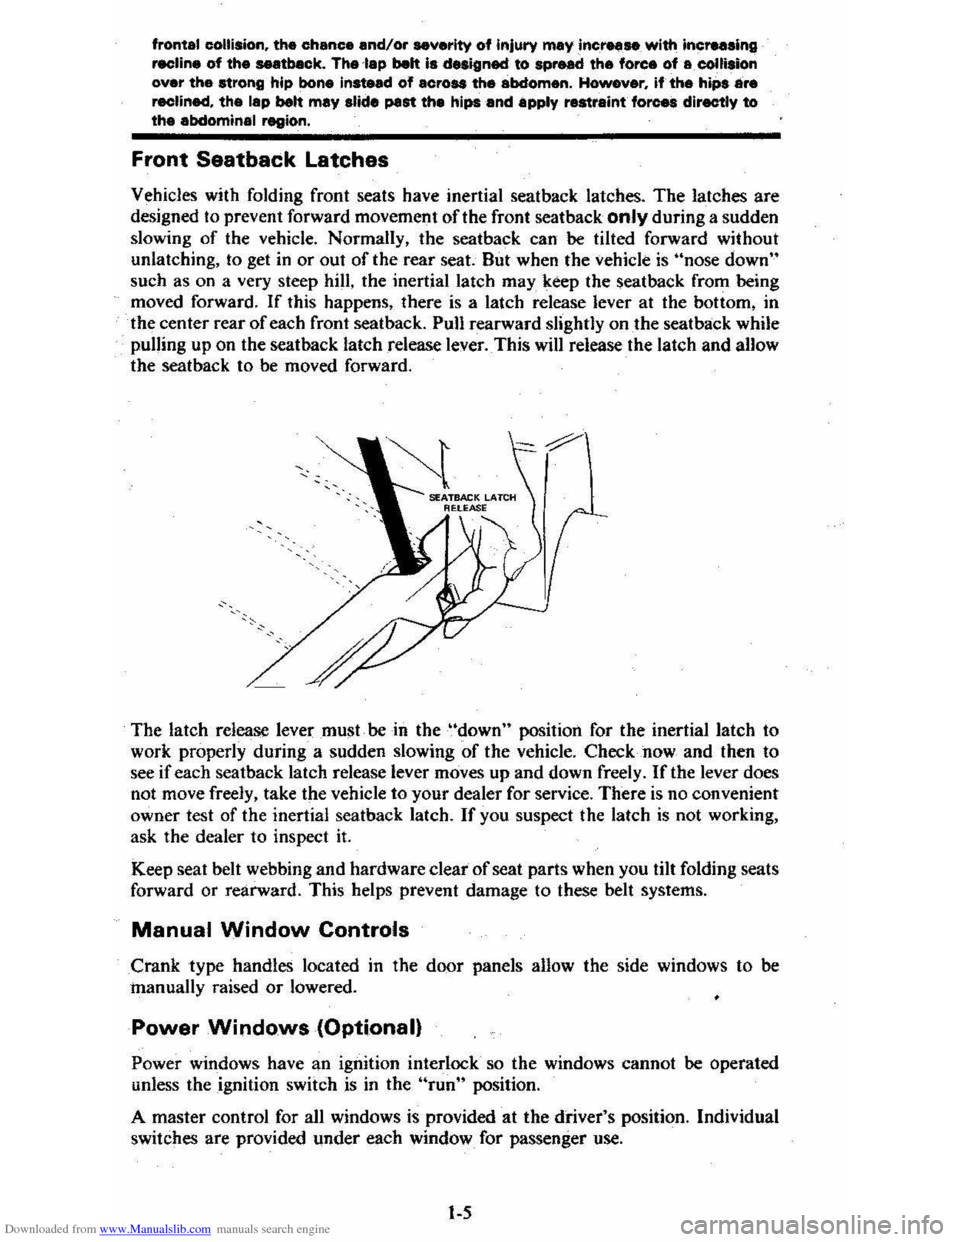
moved forward. If this happens, there is a latch release lever at the bottom, in
the center rear
of each front seatback. pun rearward slightly on the seat back while
pulling up on the seatback latch release lever .. This will release the latch and alJow
the seat back to be moved forward.
The latch release lever must.
be in the "down" position for the inertial latch to
work properly during a sudden slowing of the vehicle. Checkrtow and then to
see
if each seatback latch release lever moves up and down freely. If the lever does
not move freely, take the vehicle to your dealer for service. There is no convenient
owner test of the inertial seatback latch.
If you suspect the latch is not working,
ask the dealer to inspect
it.
Keep seat belt webbing and hardware clear of seat parts when you tilt folding seats
forward or rearward. This helps prevent damage to these belt systems.
Manual Window Controls
Crank type handles located in the door panels anow the side windows to be
manually raised or lowered.
Power Windows (Optional)
Power windows have an ignition interlock so the windows cannot be operated
unless the ignition switch is in the "run" position.
A master control for all windows
is provided at the driver's position. Individual
switches are provided under each window for passenger use.
1-5
Page 19 of 95
Downloaded from www.Manualslib.com manuals search engine • Adjust the heating or cooling system to force outside air into the car as . d esc ribed abo ve bUI set the fan to high speed .
• On cars with outside air vents in or under the instrument panel, open the vents fully.
New. Car "Break-In" Period
You can drive your new car from its very first mile/kilometer without following .
a
formal"break~in" schedule. However, there'are things you can do during the
fir st few hundred miles/kilometers of driving that will add to the future
perf orm ance and econ omy of your car.
We recommend you limit your speed during the first 500 miles (800 kiJomet ers) ~
to a maximum of 55 mph (90 km/h) ; but do not drive for long period s al any'
one constant speed, either Jast
or slow. During this time , avoid fulllhronJe start s _ and, if possible, avoid h"ard stops especially during the first 200 miles (320
kilometers) of driving.
Always drive at moderate speed until the engine has completely warmed
up.
If yo u plan to use your new car for trailer towing, see additional information in Section 1 under "Trailer Towing."
GUARD AGAINST THEFT
Your new Citation has many features to help prevent theft of the car itself, its
equ ipment, and its content s. But these ami-theft features depend upon you to
work .
THE TIME TO BE MOST ON GUARD IS WHEN LEAVING THE CAR ...
• PARK IN A LIGHTED SPOT WHEN YOU CAN.
• LOCK THE STEERING COLUMN AND TAKE THE KEYS,
•
Turn the key to "Lock," and remove the key. This locks the igniti on and
both steering and shift connols unless your car has a manual transaxle.
In that case, the shift control- is not locked .
• If you must leave a key with the car, leave the square-head key .only .
Take the oval-Read key with you. This will help prevent unwanted entry into your car at a later date, or into your -trunk.
•
FULLY CLOSE ALL WINDOWS AND ANY ROOF PANELS. AND LOCK ALL DOORS.
•
KEEP COSTLY ITEMS OUT OF SIGHT AND LOCKED UP,
•
Never leave things of value in plain sight on seats or noor.
• The glove box offers a place -to hide small items.
• Lock larger items in the trunk or place them in the rear storage .
FUEL REQUIREMENTS
Your engine is designed to use only unleaded gasoline. Unleaded gasoline must
be' used for the emission control $ystem to operate properly. Its use will also reduce
s park plug fouling , -exhaust system corrosion and engine oil deterionition .
Using leaded gasoline can damage the emiS5ion control system and could result
in loss of warranty coverage. This is especially true on cars that have the C-4
System . Leaded gasoline will damage tbe oxygen sensor, which may affect
emission control, fuel economy
and drivabiJity . See "C-4 (Computer Controlled
Catalytic Converter) System" in "Service and Maintenance" Section 5 of this
manual for more information.
2-2
Page 42 of 95
Downloaded from www.Manualslib.com manuals search engine AM-FM Stereo with Citizens Band Transceiver
If your vehicle has an optional Delco GM Citizens Band radio, please refer to
the separdte booklet supplied with this unit.
MOBILE RADIO SYSTEMS
Mobile two-way units are subject to Federal Communications Commission (FCC) regulations' arid must be-installed by trained radio people . Mobile telephones
installed
by your local phone 'company, Citizens Band (CB) radios, and garage
door openers normally will not affect vehicle operation.
If any other mobile radio
transmitters are installed, there can
possibly , be _ adverse effects on vehicle
operation.
Antenna
The standard radioanterma is incorporated in the windshield glass. If necessary,
adjustments for maximum antenna effectiveness can be made by your Authorized
Dealer.
Power. Antenna
The optional power antenna is controlled by the radio. When the radio is ON the
antenna will go up. When the radio is turned OFF either by the ON/OFF knob
or by turning the ignition switch to the OFF poSition, the antenna will go down.
OTHER CONTRQLS AND
FEATURES
Hatchback Coupe
·R.ear Compartment lid -UnlOCk.' and open the lid with your oval hta,d key.
Close the lid firmly to lock.
folding Rear Seilt
The folding rear seat quickly folds to heir provide aq.ditional ,cargo space.
To operate , the folding rear seat:
• Pull the seat cushion forward and up toward the front seatback.
• Pull the seatback strap downward and forward to release the:: seatback latch.
• Swing seatback forward and down to form deck.
• When return.ing seat to the passenger position make sure seatback is latched.
Check now and then to see
if the latch on any folding rear seat works properly.
'To do this. push forward andreat',wai'd on the top of the seatback. If the seat does
not latch properly in the upright. posttion, have it repaired.
Keep
seat belt webbing and hardware clear of seat parts when you tilt folding seats
forward or rearward , This .. helps prevent damage to these bell systems.
CAUTION: The hatchback should be closed while driving to help avoid drawing dangerous exhausigaS8s into the car. (See "Engine Exhaust Gas Caution (Carbon Monoxide)" at the beginning of thi. section.)
2-25
Page 60 of 95
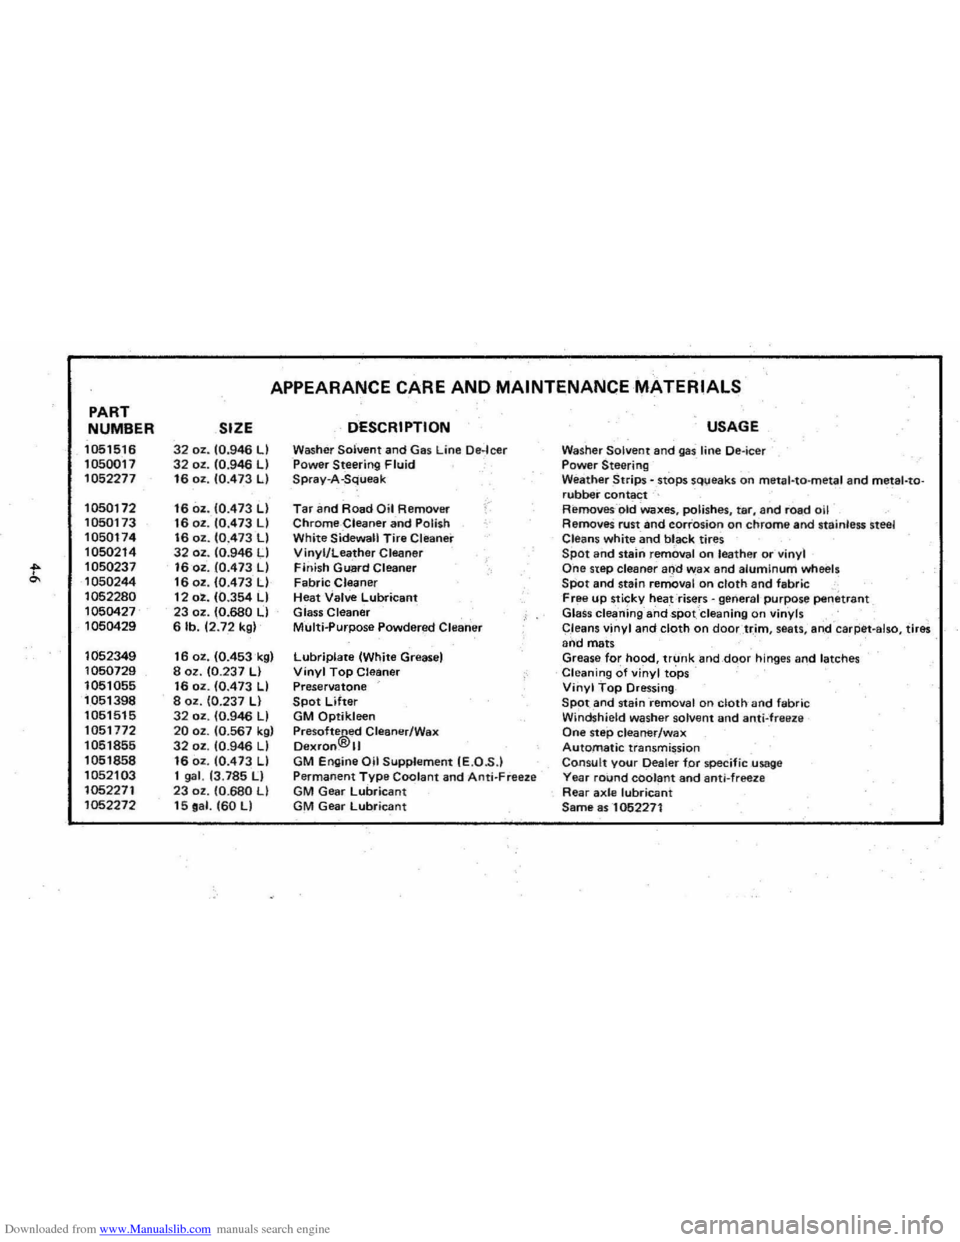
Downloaded from www.Manualslib.com manuals search engine PART
NUMBER
1051516
1050017
1052277
1050172 1050173
1050174
1050214
t 1050237
1050244
1052280
1050427 1050429
1052349
1050729
1051055 1051398 1051515
1051772 1051855
1051858
1052103
1052271 1052272
APPEARANCE CARE AND MAINTENANCE MATERIALS
SIZE DESCRIPTION
32 oz. 10.946 LI Washer Solvent and Gas Line De·leer 32 oz. 10.946 LI Power Steering Fluid 16 oz. 10.473 LI Spray-A-Squeak
16 oz. 10.473 LI Tar an d Road Oil Removirr /"
16 oz . 10.473 LI Chrome-Cleaner and Polish 16 oz. 10.473 LI White Sidewall Tire Cleaner 32 oz. 10:946 LI Vinyl/Leather Cleaner 16 oz . 10.473 LI Finish Guard Cleaner 16 oz. 10.473 LI Fabric Cleaner 12 oz. 10.354 LI Heat Valve Lubricant 23 oz. (0.680 LI Glass Cleaner 6 lb. 12.72 kgl Multi..purpose Powdered Clearier
16 oz. 10.453k91 Lubriplate (White Greasel 8 oz. 10.237 LI Vinyl Top Cleaner 16 oz. 10.473 LI Preservatone 8 oz. 10.237 LI Spot Lifter 32 oz. 10.946 LI GM Qptikleen 20 oz. 10.567 kgl Pre softe®ed Cleaner/Wax 32 oz. 10.946 LI Dexfon. II 16 oz. 10.473 LI GM Engine Oil Supplement IE.O .S .) 1 gal. 13.785 II Permanent Type Coolant and Anti- Freeze 23 oz . 10.680 LI GM Gear lubricant 15 oa l. 160 LI GM Gear Lubricant
USAGE
Washer Solvent and gas line Oe-ieer Power Steering Weather Strips - .stops sq\;leaks on meta l-ta-metal and metal-torubber contact Removes- -old Waxes, polishes, tar, and road oil RemoveS rust and corrosion on chrome and stainless steel
Cleans white and bl _ack tires Spot and stalrl removal o n leather or vinyl One step cleaner and wax and alumInum wh eels SPot and stain removal on cloth and fabric , Free up sticky heat risers -general 'purpose penetrant Glass cleaning ahdspot Cleaning on vinyls
C,leans vinyl and cloth on doortr,im , seats , ari,d -caq:iet -also, tires and mats Grease for hood, trunk and,dQor hinges and latches Cleaning of vinyl tops Vinyl Top Dressing SPOt and staini-emoval on cloth and fabric Windshield washer solvent and anti-freeze One step cleaner/wax Automatic transmission Consult your Dealer for specific usage Yea r round coolant and anti-freez e Rear axle lubricant Same as -1052271
Page 66 of 95
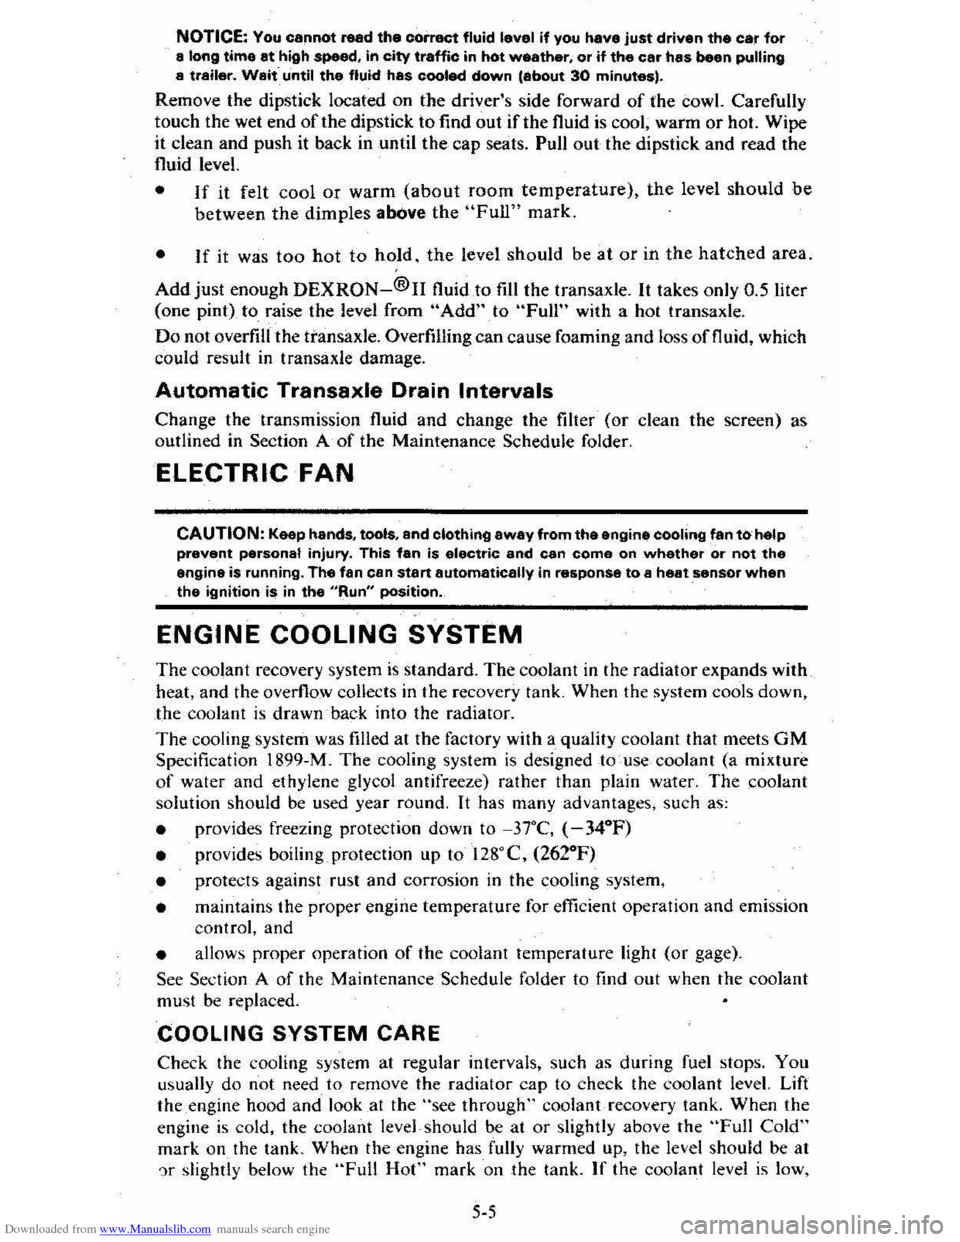
Downloaded from www.Manualslib.com manuals search engine NOTICE: You cannot read the correct fluid level if you have just driven the car for a long time at high speed, in city traffic in hot weather, or if the car has been pulling a trailer. Wait. until the fluid has cooled down (about 30 minutes).
Remove the dipstick located on the driver's side forward of the cowl. Carefully
touch the wet end of the dipstick to find out if the fluid is cool, warm or hot. Wipe
it clean and push it back in until the cap seats. Pull
out the dipstick and read the
fluid level.
• If it felt cool or warm (about room temperature), the level should be
between the dimples above the "Full" mark.
• If it was too hot to hold. the level should be at or in the hatched area.
Add just enough DEXRON-®n fluid to fill the transaxle. It takes only 0.5 liter
(one pint)to raise the level from "Add" to "Full" with a hot transaxle.
Do not overfill the transaxle. Overfilling can cause foaming and loss of fluid, which
could result in transaxle damage.
Automatic Transaxle Drain Intervals
Change the transmission fluid and change the filter (or clean the screen) as
outlined in Section
A of the Maintenance Schedule folder.
ELECTRIC FAN
CAUTION: Keep hands, tools, and clothing away from the angine cooling fan to help prevent personal injury. This fan is electric and can come on whether or not the engine is running. The fan can start automatically in response to a heat sensor when the ignition is in the "Run" position.
ENGINE COOLING SYSTEM
The coolant recovery system is standard. The coolant in the radiator expands with
heat, and the overflow collects in the recovery tank. When the system cools down,
the coolant
is drawn back into the radiator.
The cooling system was filled at the factory with a quality coolant that meets
GM Specification 1899-M. The cooling system is designed to use coolant (a mixture
of water and ethylene glycol antifreeze) rather than plain water. The coolant
solution should be used year round. It has many advantages, such as:
• provides freezing protection down to _37°C, (-34°P)
•
provides boiling protection up to 128QC, (262°P)
•
protects against rust and corrosion in the cooling system,
• maintains the proper engine temperature for efficient operation and emission
control, and
• allows proper operation of the coolant temperature light (or gage).
See Section A of the Maintenance Schedule folder to find out when the coolant
must
be replaced.
COOLING SYSTEM CARE
Check the cooling system at regular intervals, such as during fuel stops. You
usually do not need to remove the radiator cap to check the coolant level. Lift
the engine hood and look at the "see through" coolant recovery tank. When the
engine
is cold, the coolant level -should be at or slightly above the "Full Cold"
mark on the tank. When the engine has fully warmed up, the level should be at ')r slightly below the "Full Hot" mark on the tank. If the coolant level is low,
5-5
Page 88 of 95
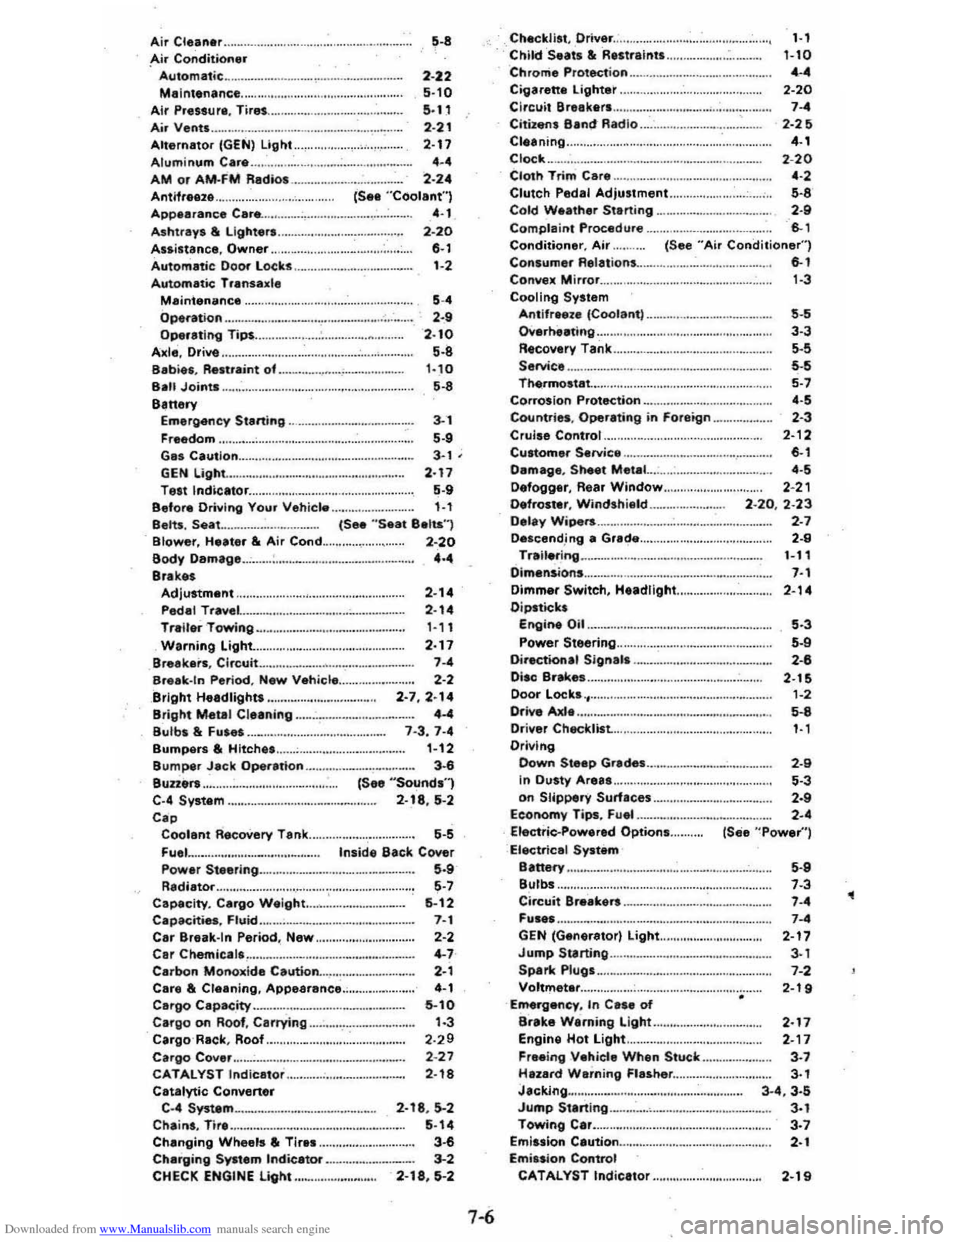
Downloaded from www.Manualslib.com manuals search engine Air Cleaner ...... . Air Conditioner
Automat ic ............ . Malnt.nance Air Pre •• ur •. Tire .... A ir Vents ..... Alternator (GEN) Light .. Aluminum Car •.. AM or AM·fM R.dios ..... Antifra.z . ..... ......... .......... . App.aranc. Car ...... Ashtrays & l ighters. Assi.tance. Owner .. Autom.tic DOOf lOCks
Autom.tic: Trann.l. Malnt.mimc. Operation .. Operating Tip$ ..... Axl. , Drive .. Sabies, Reatraint of . San Joints S.ttary
5-8
2 -
22 5·10 5·11 2·21 2·17 .-. 2·24 (S •• "Coolant") '-1 2-20 0-1 1-2
5-. ,-a 2 ·10 5-8 1·10 5-8
Em.rgency SIIHting.. 3-1 Fr •• dom .... 5·9 G •• Caution... 3-1 ; GEN Light ... 2·11 T •• t Indicator... 5·9 Befortl Oriylng Your V.hicle ,., Belt •. Seat .... M. (S .. "Seat Baits",
Blower, H.at.r &. Air Cond.... 2-20 Body Oamag... 4·4 Brak.s Adjustment P.dal Trav.l Traller 'Towing .. Warning Light Bre.ka,., Circuit
Break·ln Period, N.w V.hicl •... Bright Headlights .....
2-14 2·14 1 -11 2·17 7-4 2-' 2·7,2·14 4-4 1 -3.7·4 1-12 3-6 {S •• "Sound"l 2·18, 5-2
Bright Metal CI.aning ......... .. Bl,llbs lit Fu ••• Bumpe ... lit Hitch ••.. 81,1mper Jack Operetion Bun.r •.. C·4 Syst.m .. C •• Coolant RaeoV.ry Tenk .. FI,I.I. Powar St •• ring .... R.diator ..... . Cap.city. Cargo W.ight ... .•. Cap3Cme •. Fluid .. C.r Br.ak·ln Period , N.w ..... . C.r Chemic. I ......... .. C.rbon Monoxid. Caution
'-5 Inside Back Cover .-a '-7 6-12 7-1 2-' '-7 '-1 C.r. &. CI.aning, Appear.nce 4-1 C.rgo Capacity. 5-10 Cargo on Roof, C.rrying.. ......... ............... 1·3 CargoR.ck, Roof ..... 2·29 Cargo Coyer .. ................ ........... 2-27 CATALYST Indic.tor..... 2 ·18 C.t.lytic Conv.n.r C ·4 System ......... . Chains, Tir • ..... Ch.nging Whe.'s • Tiras .. Ch.rging Systam Indicator .... CHECK ENGINE light..
2·18,5--2 5·14 3-6 3-2 2-18, 5-2
7-6
Checklist. Driver ....... . Child Seats lit Ra.traint •.. Chrome Protection .. Cigarette lightar .... Circuit Breakars . Citizens Band Radio ... " .... " .... " .. M ••••••• Cleening .. Clock
Cloth Trim Car." .. Clutch Pedal Adjl,lstment.. .. Cold Welther Stlrting ..... Compla int Procedure ..
1-1 1-10 .-. 2·20 7-' 2·2 ~ 4-1 2·20 .-, 5-8 '-a 6-1
Conditionar, Air ....... (See "Air Conditi on.r") Con.umer Relations... 6-1
Cony.)! Mirror ... C ooling System Antifraet. ICoolant, .. Overheating .. Recovary Tank .. S.rvice .. Thermostat .. CorrOSion Protection Countries. Oper.ting in Foraign ..... Cruise Control .. Cu.tomer Sarvice .. Oamage. Sheet M.tal...-. D.fogger. Rear Window. Defro.hlT , Windshiflld .. Oalay Wipers .. Descend .ing a Grade Trail.ring .. Dimen.ion. Dimmer Switch, H.adlight Dipsticks
Engine Oil .. Power Staering .. Diractional Sign." .... . Oi.c Br~ ••.. Door lock ......
Drrve lOOe
1-3
'-5 3-3 5-S '-5 5-7 .-. 2 -3 2·12 6-1 '-5 2-21 2 -20, 2·23 '-7 '-8 1-11 7-1 2-14
'-3 .-a ,-u 2·1S 1-2 5-8 Driver Checklist.... 1·1 Driving Down Steep Gr.de........ 2·9 In Ou.ty Ar......... 5·3 on Slippery Surfaces ....... .......... ,.... 2·9 Ec;Gnomy Tips , Fu" 2·4 Electric-Powered Option...... (See "Power")
Ele<:tricel System 8IttMY ... ... .
Bulbs ...... .
Circuit Brlak.rs. , .... GEN (Glnerator) light ...... Jump Scarting .. .. Sparil Plugs .. Voltm.ter ... Erne:rg.ncy , In Ca •• of Brak. Warning Light Engine Hot light .. Freeing Vahicle When Stuck ... Hazard Warning Fla.h.r .... J.cking ..... Jump 51anlng._. Towing Clr. Emission Caution .................................. . Emi .. ion Control CAT AL YST Indicator
5-S 7-3 7-. 7-' 2·17 3-1
7-2
2·19
2·17 2·17 3-7
3-1
3 ·4 .3·5 3-1
3-7
'-1
2·19
,
Page 90 of 95
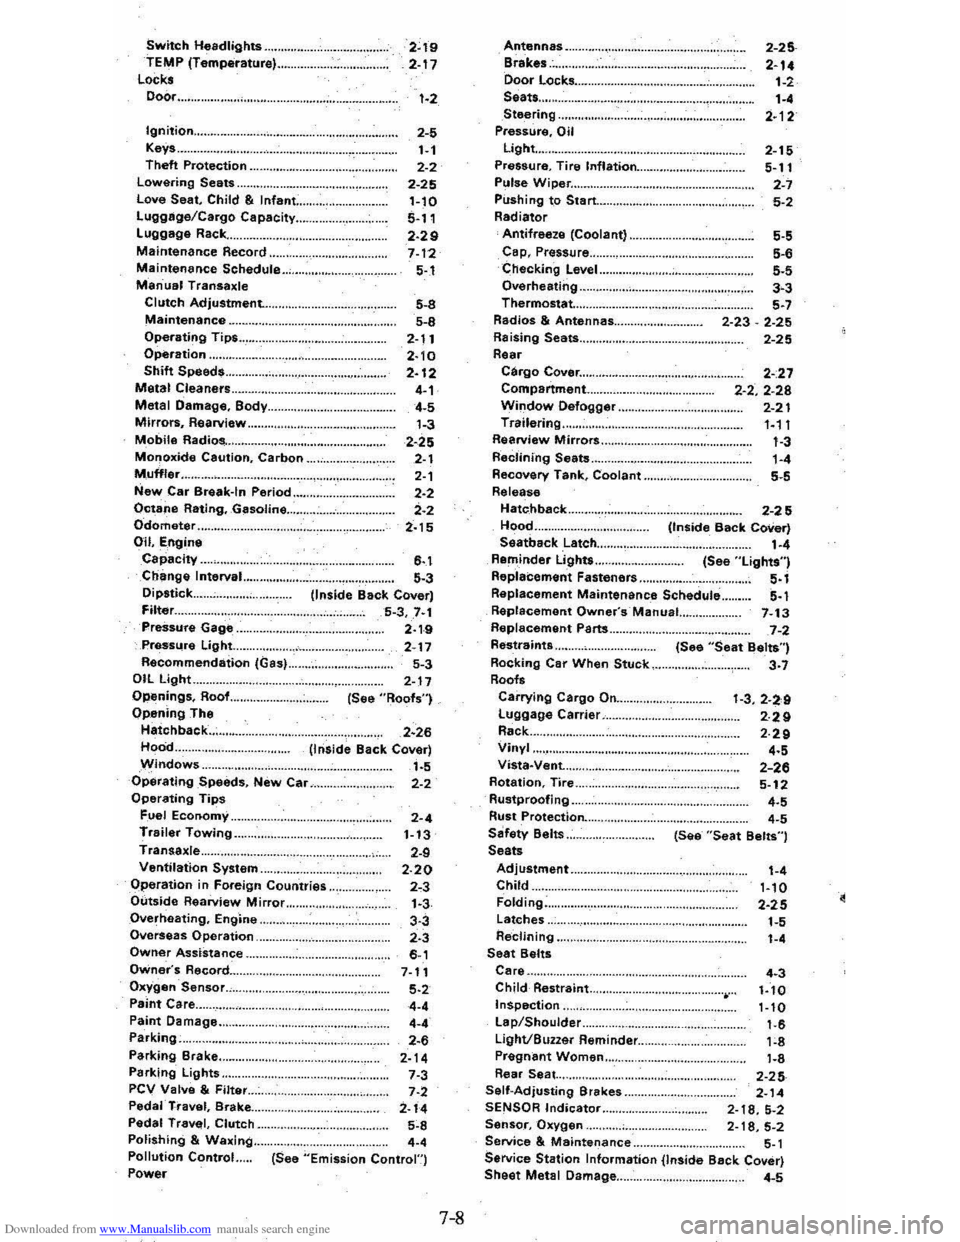
Downloaded from www.Manualslib.com manuals search engine Switch Headlights .... TEMP (Temperature) .. Locks Door ...
2~19 2-17 1-2
Ignition ............................................. .. 2-5 1-1 2-2
2-25 Keys .. Theft Protection .. Lowering Seats .. Love Seat, Child & Infant: .. Lugglige/Cargo Capacity ... Luggage Rack ... Maintenance Record .. Maintenance Schedule .. Manual Transaxle Clutch Adjustment. .. .
1-10 5-11 2·29 7-12 5-.1
Maintenance ........................................... . 5-8
5-8
2-11
2· 10 2-12 4-1 4-5
1-3
Operating Tips .. Operation .. Shift Speeds. Metal Cleaners .. Metal Damage, Body ... Mirrors, Rearview .. Mobile Radios-. Monoxide Caution, Carbon .. . 2-25 2-1
2-1 2-2
2-2
2-15 Muffler ............................................... . New Car Break-In Period Octane Rating, Gasoline ... Odometer Oil, Engine Capacity .. Change Interval.. Dipstick ... Filter ... PreSsure Gage .. Pressure Light... Recommendation (Gas) .. OIL Light.. Openings, Roof... Opening The Hatchback ... Hood .. Windows ..
6-.1 5-3 (inside Back Cover) 5-3,7·1 2·1-9 2-17
5-3
2-17 (See "Roofs")
2·26 (Inside Back Cover) 1-5 Operating Speeds, New Car... 2-2 Operating Tips Fuel Economy.. 2-4 Trailer Towing.. 1-13 Transaxle... 2-9 Ventilation System.. 2.20 Operation in Foreign Countries.. 2"3 Outside Rearview Mirror.. 1.3 Overheating, Engine.. 3-3 Overseas Operation.. 2.3 Owner Assistance.. 6-1 Owner's Record... 7-11 Oxygen Sensor., 5.2 Paint Care.. 4-4
Paint Damage .. Parking;. Parking Brake .. Parking Lights .. PCV Valve & Filter .. Peda'·TI"avel, Brake ... Pedal Travel, Clutch .. Polishing & Waxing .. Pollution Control Power
4-' 2-. 2-14 7-3 7·2 2-14 5~8
.-. (See "Emission Contron
7-8
Antennas Brakes .. Door Locks .... Seats ... Steering Pressure, Oil Light ... Pressure. Tire Inflation ... Pulse Wiper ...
2-25
2-14
1-2 1-' 2·12
2-15
5-11
2-7
Pushing to Start ................................ .. 5-2 Radiator Antifreeze (Coolant) .. Cap, Prassure .. Checking Level .. Overheating .. Thermostat...
Radios & Antennas ... Raising Seats ... Rear Cargo Cover ...................... .. Compartment .. . Window Defogger .. Trailering .. Rearview Mirrors .. Reclining Seats .. Recovery Tank, Coolant .. Release
Hatc.hback
Hood .. Seatback Latch ... Reminder Lights ....
Replacement Fasteners
5-5 5-. 5-5 3-3 5-7
2-23 -2-25
2-25
2-:27
2-2,2-28 2-21 '·11 1-3 1-' 5-5
2-25 (Inside Back Cover)
1-' (See "Lights") 5-1
5-1 Replacement Maintenance Schedule .. Raplacement Owner's·Manual... 7-13 Replacement Parts ............. ....................... 7-2 Restraints .. Rocking Car When Stuck .. Roofs Carrying Cargo On ... Luggage Carrier .. Rack .. Vinyl .. Vista-Vent. ... Rotation, Tire .. Rustproofing .. Rust Protection ... Sefety Belts .. Seats (See
"Seat Belts") 3-7
1-3,2-2,9 2·29 2·29
'-5 2-26 5-12
'-5 '-5 (See "Seat Belts")
Adjustment.. 1-4 Child... 1-10 Folding.. 2-25 Latches..
1-5 Reclining.... . '-4 Seat Belts Care.. 4.3 Child Restraint ............................................ 1.10 Inspection.. 1-10 Lap/Shoulder.. 1-6 Light/Buzzer Reminder... 1;8 Pregn~nt Women .. Rear Seat. ... Self-Adjusting Brakes .. SENSOR Indicator ..
1-8 2-25 2-14 2-18,5-2 Sensor, Oxygen.... 2-18,5-2 Service & Maintenance.. 5-1 Service Station Information (InSide Back Cover) Sheet Metlll Damage... 4-5