1976 CHEVROLET VEGA lights
[x] Cancel search: lightsPage 6 of 87
Downloaded from www.Manualslib.com manuals search engine BEFORE DRIVING YOUR VEGA
DRIVER CHECKLIST
Before Entering Car
1. See that windows , mirrors and
lights are clean.
2. Visually note inflation condition
of tires.
3. Check that area to rear
is clear
if about
to back up.
Before Driving Off
1. Lock all doors.
2. Position seat.
3. Adjust inside and outside
mirrors.
4. Fasten belt restraints.
5. Check that warning bulbs light
when key
is turned to start posi
tion.
6. Release parking brake (and see
that brake warning light turns
off).
7. Be sure you understand your
car and how to operate it safely.
Keys
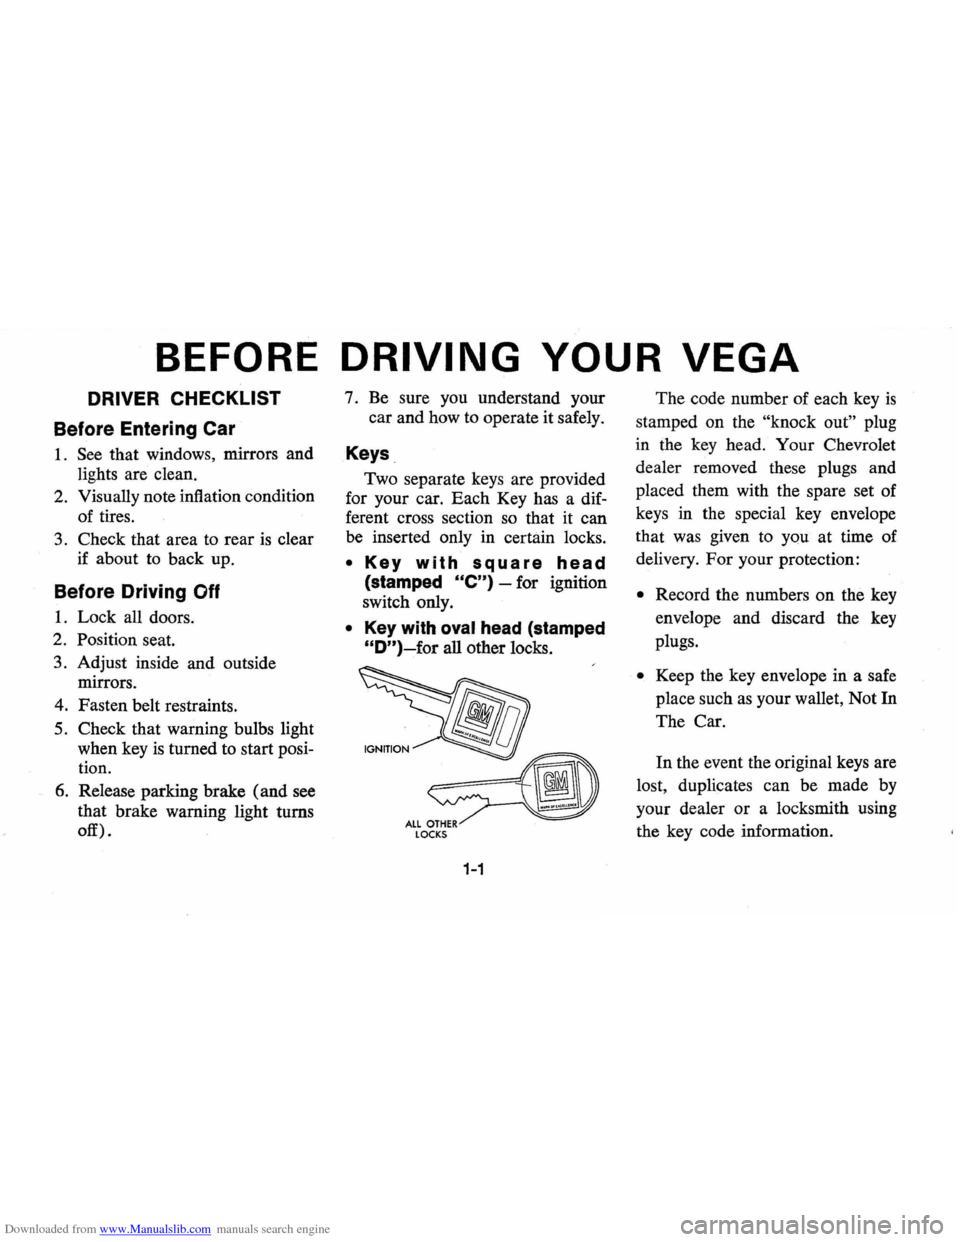
Two separate keys are provided
for your car. Each Key has a dif
ferent cross section so that it can
be inserted only in certain locks.
• Key with square head
(stamped Ole") -for ignition
switch only.
• Key with oval head (stamped
"D")~for all other locks.
LOCKS
1-1
The code number of each key is
stamped on the "knock out" plug
in the key head. Your Chevrolet
dealer removed these plugs and
placed them with the spare set of
keys in the special key envelope
that was given to you at time of
delivery.
For your protection:
• Record the numbers on the key
envelope and discard the key
plugs.
• Keep the key envelope in a safe
place such
as your wallet, Not In
The Car.
In the event the original keys are
lost, duplicates can be made by
your dealer or a locksmith using
the key code information.
Page 8 of 87
Downloaded from www.Manualslib.com manuals search engine wards, to help prevent damage to
these belt systems.
Manually Operated
Front
Seats
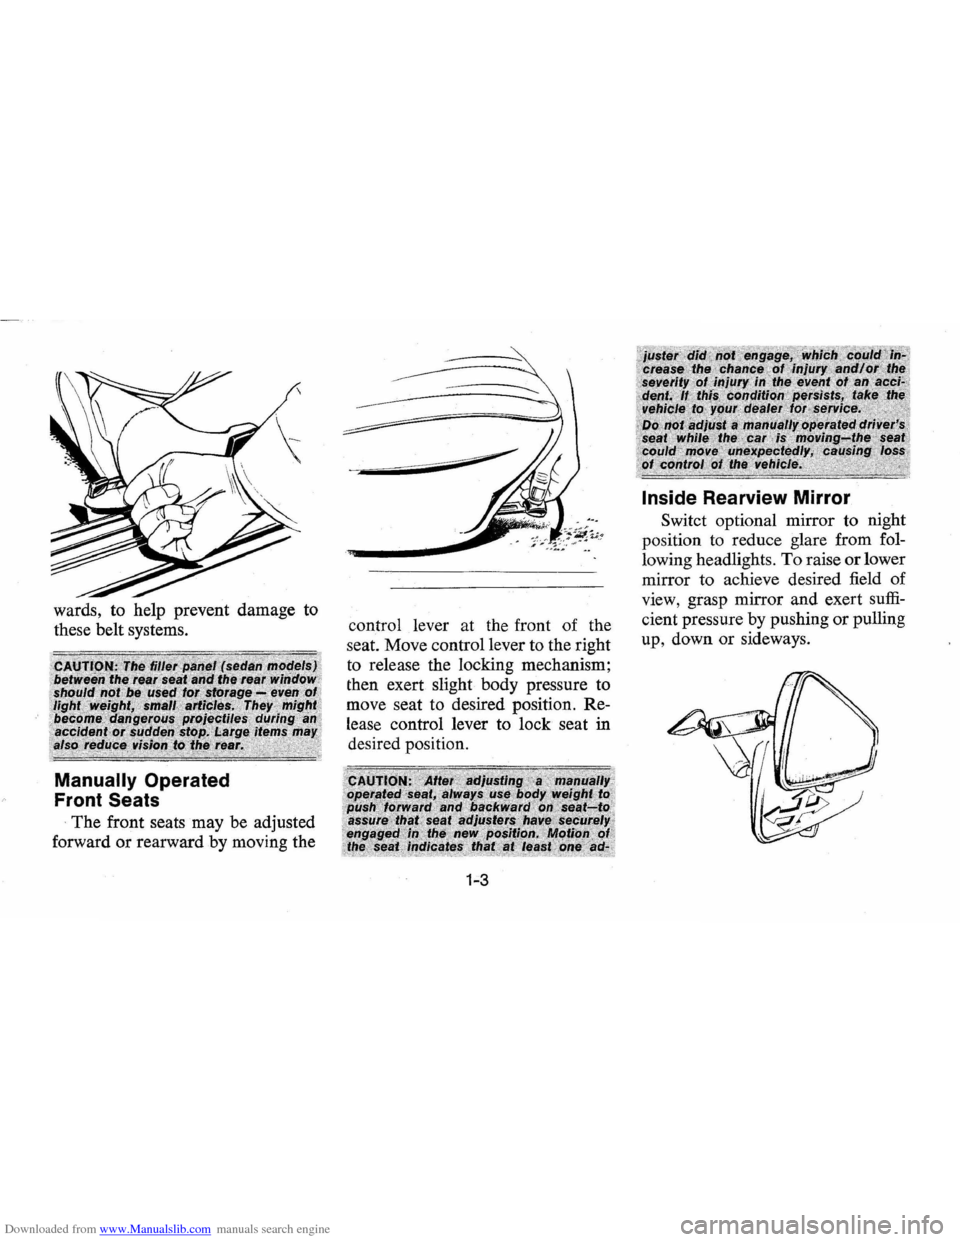
The front seats may be adjusted
forward or rearward by moving the
~---
control lever at the front of the
seat. Move control lever to the right
to release the locking mechanism;
then exert slight body pressure to
move seat to desired position. Re
lease control lever to lock seat
in
desired position.
1-3
Inside Rearview Mirror
Switct optional mirror to night
position to reduce glare from fol
lowing headlights .
To raise or lower
mirror to achieve desired field of
view, grasp mirror and exert
suffi
cient pressure by pushing or pulling
up , down or sideways.
Page 29 of 87
Downloaded from www.Manualslib.com manuals search engine INSTRUMENTS AND CONTROLS
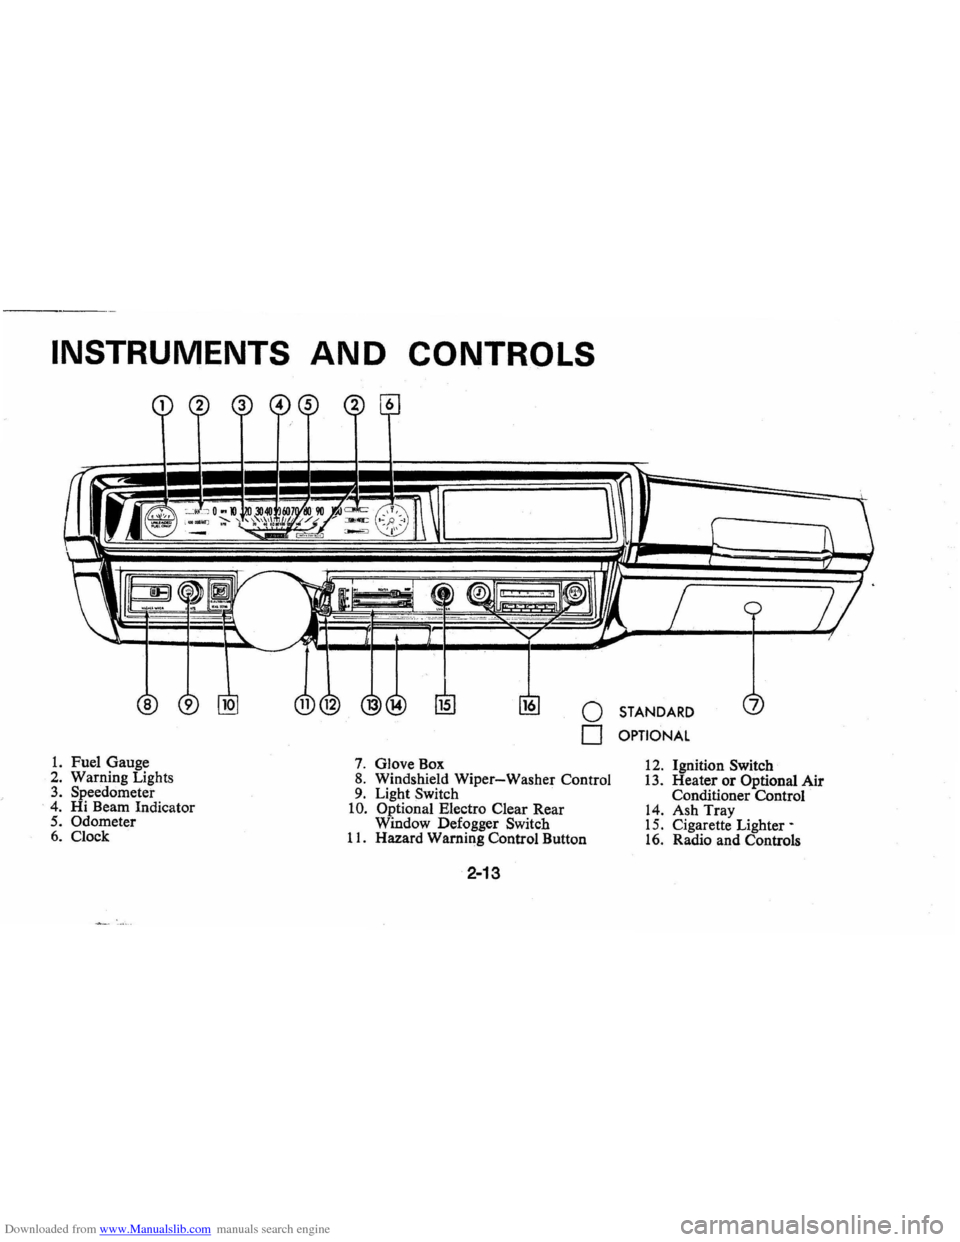
1. Fuel Gauge 2. Warning Lights 3. Speedometer . 4. Hi Beam Indicator 5. Odometer 6. Clock
o STANDARD
o OPTIONAL
7. Glove Box 8. Windshield Wiper-Washer Control 9. Light Switch . 10. Optional Electro Clear Rear
Window Defogger Switch
11. Hazard Warning Control Button
2-13
12. Ignition Switch 13. Heater or Optional Air Conditioner Control 14. Ash Tray 15. Cigarette Lighter-16. Radio and Controls
Page 30 of 87
Downloaded from www.Manualslib.com manuals search engine HI BEAM INDICATOR
=.Q(LJ 0 .PH 10 20 30 40 iO 60 70 80 90 100 c:=M!LJ
'ADD coiillT' ..............,," ,,'\. 11// / / ./ ././'" .ruf/~ L! !.!LL"'!l!!LJ lP1I 0 20 40 6080100 120 140 160
Instruments
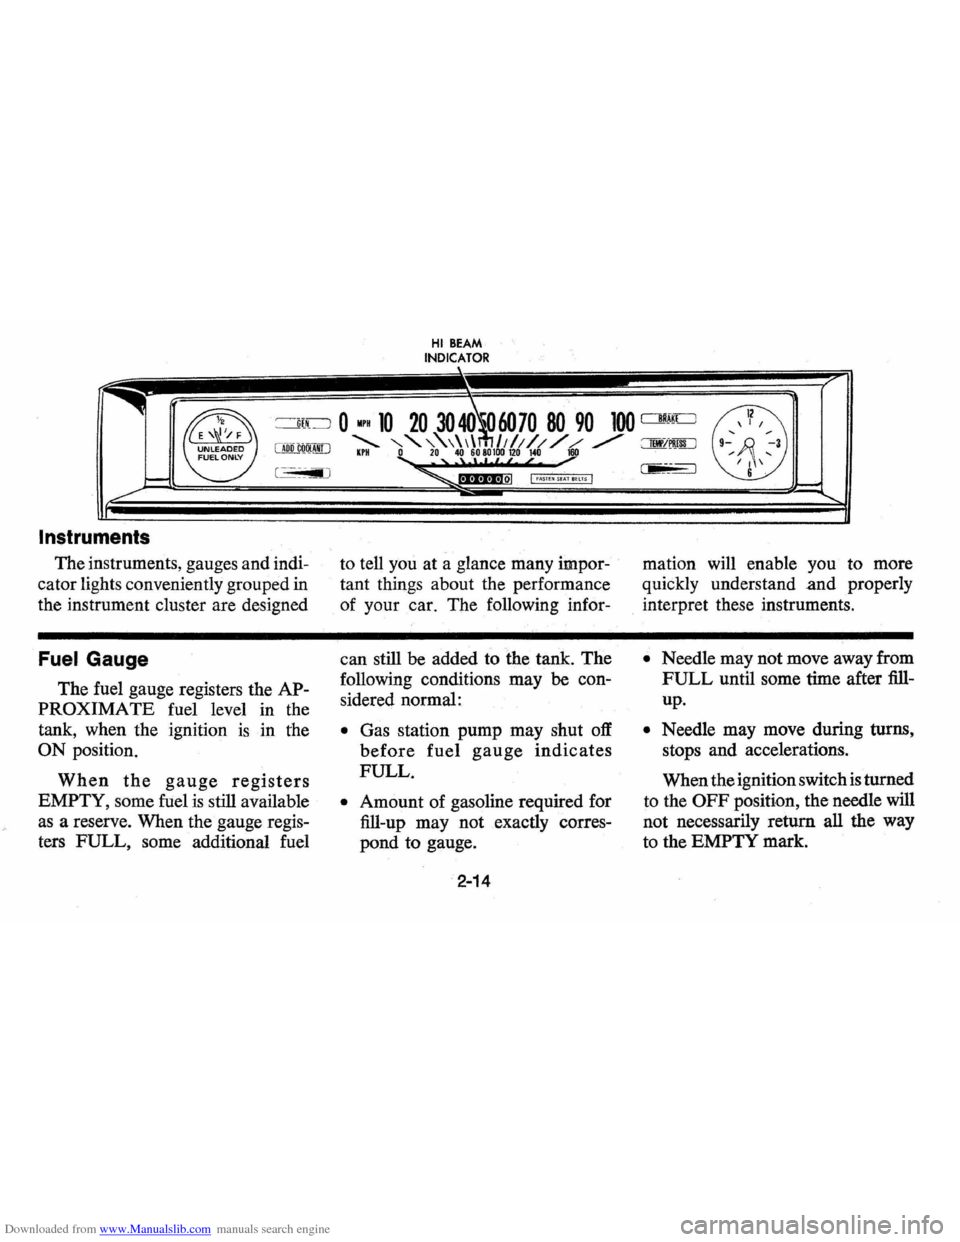
The instruments, gauges and indi
cator lights conveniently grouped
in
the instrument cluster are designed
Fuel Gauge
The fuel gauge registers the AP
PROXIMATE fuel level
in the
tank, when the ignition
is ill the
ON position.
When the gauge registers
EMPTY, some fuel is still available
as a reserve. When the gauge regis
ters FULL, some additional fuel
I •••••••• nol I fASTE~ Sf A! BEtTS ·1
to tell you at a glance many impor
tant things about the performance
of your
car. The following infor-
can still
be added to the tank. The
following conditions may
be con
sidered normal:
• Gas station pump may shut off
before fuel gauge indicates
FULL.
• Amount of gasoline required for
fill-up may not exactly
corres
pond to gauge.
2-14
mation will enable you to more
quickly understand and properly
interpret these instruments.
• Needle may not move away from
FULL until some time after fill
up.
• Needle may move during turns,
stops and accelerations.
When the ignition switch
is turned
to the
OFF position, the needle will
not necessarily return all the way
to the EMPTY mark.
Page 32 of 87
Downloaded from www.Manualslib.com manuals search engine • The light is also designed to come
on during engine starting to
verify that the bulb
is operating
properly.
• Have system repaired if light does
not come
on during check.
• This warning light is not a substi
tute for the visual check of brake
fluid level required
as part of
normal maintenance.
If the light comes on:
• The parking brake control is not
fully released, or,
• The service brake system is par
tially inoperative.
What to do:
1. Check that parking brake is re
leased.
If it is . . .
2.
Pull off the road and stop, care
fully-remembering that:
• Stopping distances may be
greater.
• Greater pedal effort may be re
quired.
• Pedal travel may be greater. 3.
Try out brake operation by start
ing and s,topping on road shoul
der-then:
• If you judge such operation to
be safe, proceed cautiously at
a safe speed to nearest dealer
for repair.
• Or have car towed to dealer for
repair.
Continued operation of the car in this
condition
is dangerous.
Headlight Beam Indicator
Light
The headlights of your car have
high and
low beams to provide you
with proper night-time visibility
for most driving conditions. The
"low" beams are used during most
city driving. The
"high" beams are
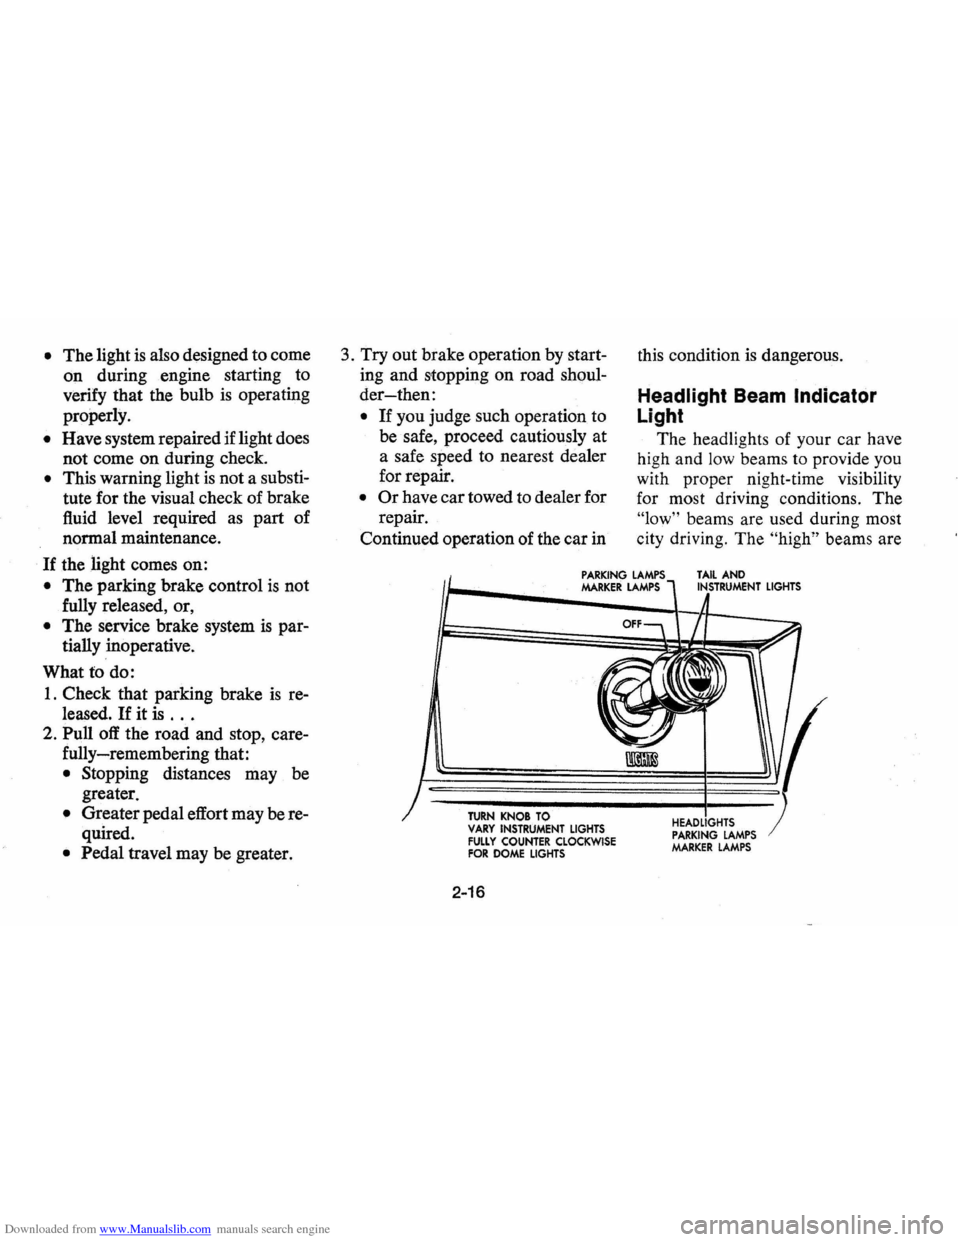
PARKING LAMPS MARKER LAMPS TAIL AND INSTRUMENT LIGHTS
TURN KNOB TO VARY INSTRUMENT LIGHTS FULLY COUNTER CLOCKWISE FOR DOME LIGHTS
2-16
HEADLIGHTS PARKING LAMPS MARKER LAMPS
Page 33 of 87
Downloaded from www.Manualslib.com manuals search engine especially useful when driving on
dark roads since they provide ex
cellent long range illumination. The
headlight beam indicator will be on
whenever the high beams or
"brights" are in use. The Headlight
Beam
Switch controls the headlight
beams (see Page
2-12).
Light Switch
The three position light switch
controls the headlights, taillights,
parking lights, side marker lights,
instrument lights and dome lights
as shown. The headlamp circuit
is protected by a circuit breaker in
the light switch.
An overload on
the breaker will cause the lamps to
"flicker" on and off. If this condi
tion develops, have your headlamp
wiring checked immediately.
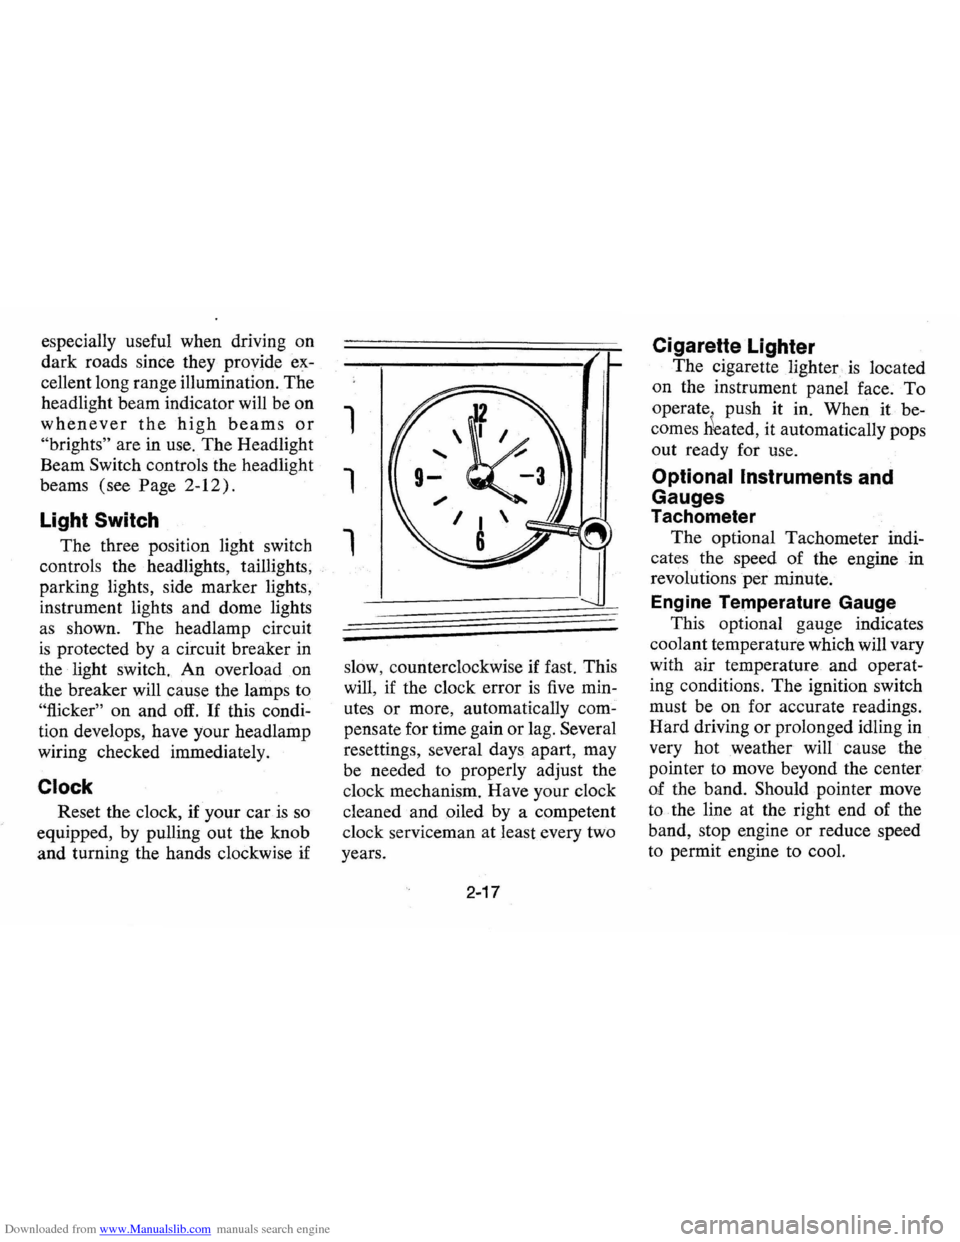
Clock
Reset the clock, if your car is so
equipped, by pulling out the knob
and turning the hands clockwise if
1
1
1
slow, counterclockwise if fast. This
will,
if the clock error is five min
utes
or more, automatically com
pensate for time gain or lag. Several
resettings, several days apart, may
be needed to properly adjust the
clock mechanism. Have your clock
cleaned and oiled by a competent
clock serviceman at least every two
years.
2-17
Cigarette Lighter
The cigarette lighter is located
on the instrument panel
face. To
operate . push it in. When it be
comes
Heated, it automatically pops
out ready for use.
Optional Instruments and
Gauges
Tachometer
The optional Tachometer indi
cates the speed of the engine in
revolutions
per minute.
Engine Temperature Gauge
This optional gauge indicates
coolant temperature which will vary
with air temperature and operat
ing conditions.
The ignition switch
must be on for accurate readings.
Hard driving
or prolonged idling in
very hot weather will cause the
pointer to move beyond the center
of the band. Should pointer move
to the line at the right end of the
band, stop engine or reduce speed
to permit engine to cool.
Page 44 of 87
Downloaded from www.Manualslib.com manuals search engine The optional rear quarter win
dows of the sedan and Hatchback
coupe models may be opened or
closed with finger operated
swing
ing latches.
Headlamp Reminder Buzzer
The optional headlamp reminder
buzzer provides an audible warning
that the main light switch
is in one
of the
"on" positions, either park
ing lights or headlights.
The reminder buzzer
is actuated
only when the ignition switch
is
turned to "OFF" or "LOCK" posi
tion.
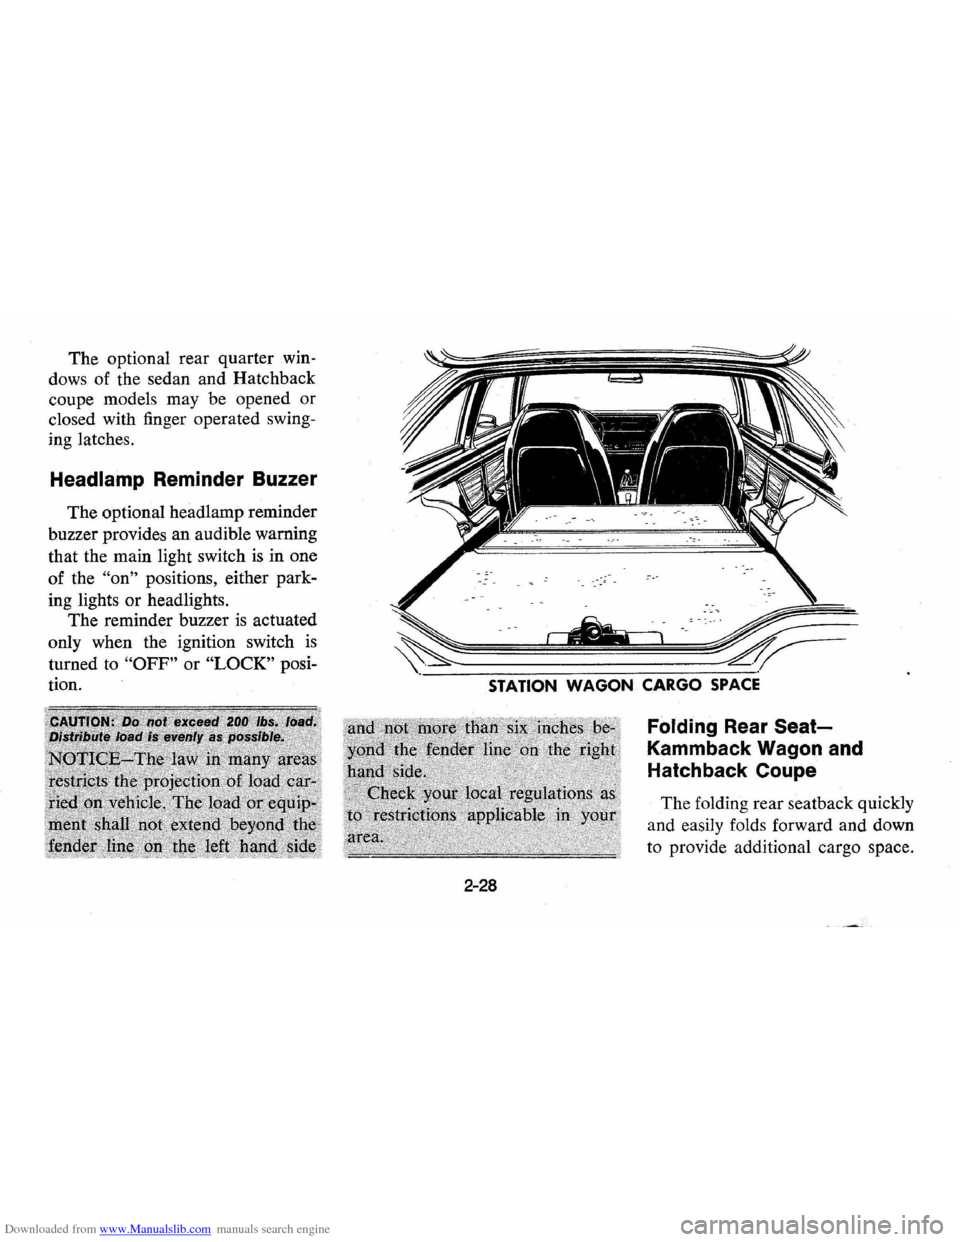
STATION WAGON CARGO SPACE
2-28
Folding Rear Seat
Kammback Wagon and
Hatchback Coupe
The folding rear seatback quickly
and easily folds forward and down
to provide additional cargo space.
Page 46 of 87
Downloaded from www.Manualslib.com manuals search engine In Case of Emergency
Four Way Hazard
Warning
Flasher
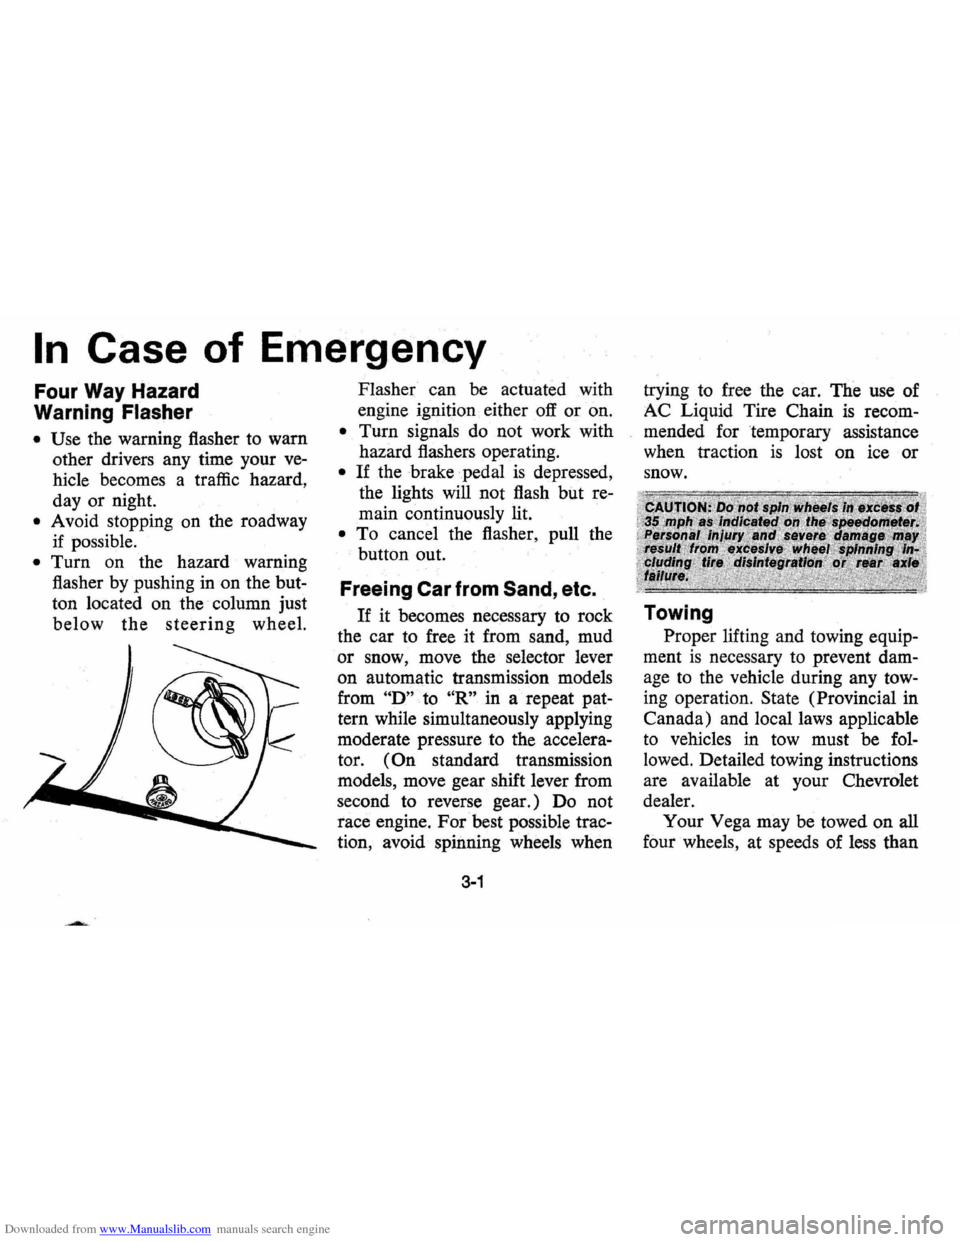
• Use the warning flasher to warn
other drivers any time your
ve
hicle becomes a traffic hazard,
day or night.
• A void stopping on the roadway
if possible.
• Turn on the hazard warning
flasher by pushing
in on the but
ton located on the column just
below the steering wheel. Flasher
can
be actuated with
engine ignition either
off or on.
• Turn signals do not work with
hazard flashers operating.
• If the brake pedal is depressed,
the lights will not flash but
re
main continuously lit.
• To cancel the flasher, pull the
button out.
Freeing Car from Sand, etc.
If it becomes necessary to rock
the car to free it from sand, mud
or snow, move the selector lever
on automatic transmission models
from
"D" to "R" in a repeat pat
tern while simultaneously applying
moderate pressure
to the accelera
tor.
(On standard transmission
models, move gear shift lever from
second to reverse gear.) Do not
race engine. For best possible trac
tion, avoid· spinning wheels when
3-1
trying to free the car. The use of
AC Liquid Tire Chain
is recom
mended for temporary assistance
when traction
is lost on ice or
snow.
Towing
Proper lifting and towing equip
ment
is necessary to prevent dam
age to the vehicle during any tow
ing operation. State (Provincial in
Canada) and local laws applicable
to vehicles in tow must be
fol
lowed. Detailed towing instructions
are available at your Chevrolet
dealer. Your Vega may be towed on
all
four wheels, at speeds of less · than