Page 27 of 86

When setting off, apply the brakes a few times to dry out any water
on the brake linings.
Cleaning the Windows
The windows may be cleaned with alcohol or with special
commercial products. Silicone based products are not recommended.
Pivot the windscreen wiper blades to the front and clean them with
a little soapy water without putting pressure on the rubber edges.
Metal Decorative Components
Wash in suds or water to which a little detergent such as Teepol has
been added (2.5 to 3.0 cu. in. per gallon or 10 ro 15 ccm per litre), \
preceded and followed by a thorough rinsing with clean water.
The embellishers in particular should be washed very often since, in
time, mud might damage the surface so that repolishing may
become necessary.
AFter drying with a chamois leather, it is recommended that a
product like "ABEL PROTEGE CHROME", or other proprietary
chrome-polishes, be applied as a protection for the polished metal
finish.
Spots of Tar on the Bodywork
These should be removed as soon as possible.
Do not scrape off and do not use petrol or a spot remover for cloth,
but a special tar remover, such as "ABEL", or other proprietary tar
removers.
Polishing the Paintwork
Polishing is not recommended for metallic paintwork, because of
the risk of rings appearing.
On the other hand, for non-metallic paintwork, it is recommended
to carry out polishing at the end of Winter. For this, the body must
be perfectly clean and dry.
Page 33 of 86
MINOR REPAIRS
Replacing a Wheel
TOOL KIT
The spare wheel and jack, the starting handle, and the wooden block
are positioned in the boot (trunk).
REMOVAL (Fig. 37 and 38)
Engage fully the handbrake
Position the wooden block under the wheel directly diagonally
opposite the one which is to be changed. If the road is on a slope,
wedge the wheel on the downward side.
Unlock but do not slacken the three wheel nuts with the wheel brace.
Place the base of the jack well under the car and turned slightly
towards the wheel to be changed, so as to avoid contact with the
bodywork in the final stage of jacking.
Engage lifting arm (1) fully into socket (2) (these sockets are
situated under the front and rear doors).
Turn the operating screw (3) clockwiase by hand until the jack is in
firm contact.
Fig. 37 Fig. 38
37 - Replacing a front wheel 1 - Lifting arm2 - Support3 - Screw
38 - Replacing a rear wheel
Page 38 of 86
Fig. 41
Headlamps
1 - Connector
3-4 - Holding springs 5 - Bulb flange
Fig. 42
Headlamps
1-2 - Locating lugs
3-4 - White plastic buttons Fig. 43
Front side lamps 1 - Socket
SIDE AND TAIL LAMPS
Front bulbs (Fig. 43): 12 V - 4 W - BA 9S T 8/4
These bulbs are placed directly in the reflectors of the lamp units (1)\
.
Pull the socket, turning it slightly.
Tail lamps (Fig. 44): 12 V - 5 W - R 19/5
The bulbs (1) combined in the covers, include the brake and
direction indicator lamps.
To remove the covers, unscrew the two screws.
Direction indicators: 12 V - 21 W - P 25/1
FRONT: Remove the cover, unscrew the two screws.
REAR: See "Tail Lamps" (Fig. 44 - Mark 2).
Brake lamps: 12 V - 21 W - P 25/1
See "Tail Lamps" (Fig. 44 - Mark 3).
Page 39 of 86
Rear number plate lamps:
These bulbs are also used for the "Tail Lamps".
Interior lamp: 12 V - 7 W - BA 15 S
Press the cover lightly on both sides and pull it downwards.
Fig. 44
Rear lamps
1 - Tail and number plate lamp 2 - Direction indicators3 - Brake lamp
[Contents] [Notices] [Important Points] [Driving] [Maintenance] [Minor Repairs] [Miscellaneous Information]
Page 40 of 86
MINOR REPAIRS
Replacing a Fuse, The Battery
REPLACING A FUSE
Before fitting a new fuse, it is necessary to discover the cause of the \
incident, and have it rectified.
The 8 fuses protecting the circuit (5 fuses of 16 amps and 3 of 10
amps) are found inside two boxes situated under the bonnet on the
scuttle.
Pull off the fuse box cover, and replace the fuse with one of the
same amperage.
UPPER FUSE BOX (Item A)
Fig. 45
Fuse boxes
Green marking (10 A) Yellow marking (16 A)
LH side and tail lamps
(and rear number plate lamps) Brake lamps
Interior lamp
Hazard warning device
Red marking (10 A) Blue marking (16 A)
Page 45 of 86

MINOR REPAIRS
Starting using the starting handle
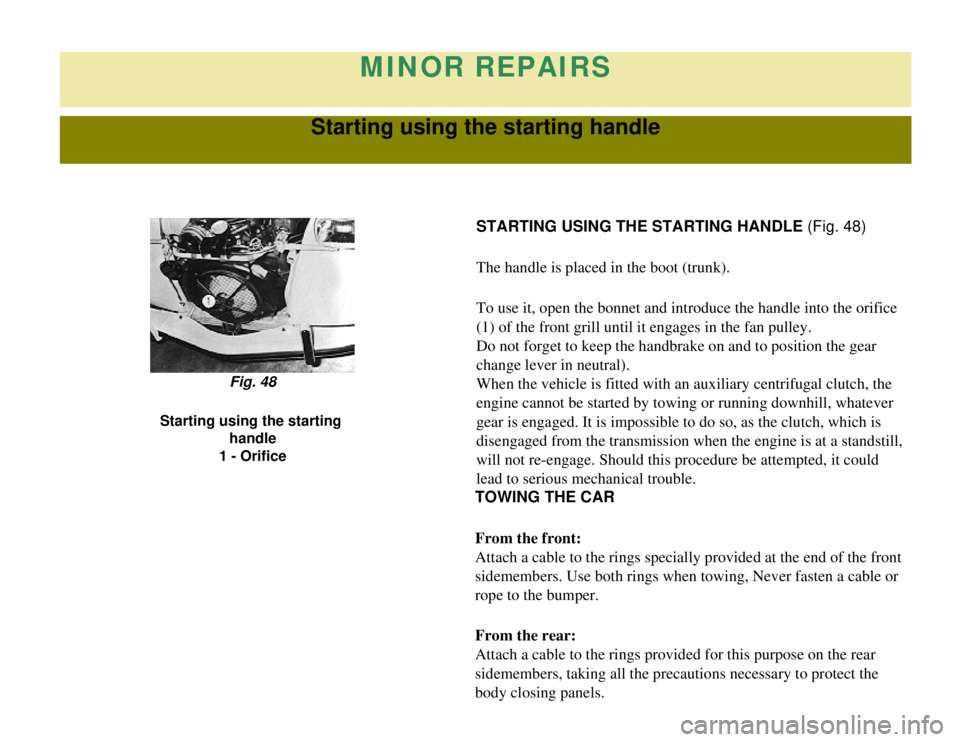
STARTING USING THE STARTING HANDLE (Fig. 48)
The handle is placed in the boot (trunk).
To use it, open the bonnet and introduce the handle into the orifice
(1) of the front grill until it engages in the fan pulley.
Do not forget to keep the handbrake on and to position the gear
change lever in neutral).
When the vehicle is fitted with an auxiliary centrifugal clutch, the
engine cannot be started by towing or running downhill, whatever
gear is engaged. It is impossible to do so, as the clutch, which is
disengaged from the transmission when the engine is at a standstill,
will not re-engage. Should this procedure be attempted, it could
lead to serious mechanical trouble.
Fig. 48
Starting using the starting handle
1 - Orifice
TOWING THE CAR
From the front:
Attach a cable to the rings specially provided at the end of the front
sidemembers. Use both rings when towing, Never fasten a cable or
rope to the bumper.
From the rear:
Attach a cable to the rings provided for this purpose on the rear
sidemembers, taking all the precautions necessary to protect the
body closing panels.
Page 49 of 86

MISCELLANEOUS INFORMATION
Running-in, servicing, guarantee, running costs, towing a trailer, vehicle identification, replacement parts
RUNNING-IN
During the first 1,200 miles (2,000 kilometres), avoid over-revving,
and do not let the needle reach the coloured marks of the
corresponding speed ranges, before changing gear. Also avoid
during this period:
-harsh acceleration,
-fierce braking (the brake linings must be run in),
-long journeys at constant speed,
-labouring the engine at too low a speed.
SERVICING AND GUARANTEE
At the time of delivery, you will be given a "Maintenance Guide",
with a "Guarantee Card" and a 600 miles (1,000 km) "Servicing
Certificate".
On completion of the first 600 miles (1,000 km), any Citroën dealer\
,
whether he supplied the vehicle or not, will service the car, free-of-
charge, on presentation of this "Maintenance Guide".
It is particularly important that the oil filter cartridge, which has to\
comply to the standard regulations, should be of the type
recommended by Citroën.
Only the cost of the materials used will be charged for.
The dealer will keep the Servicing Certificate and sign the
Guarantee Card.
Page 50 of 86

This card must be signed for you to benefit from the guarantee.
INFLUENCE OF DRIVING TECHNIQUES ON RUNNING
COSTS
The manner in which a car is driven affects its running costs,
particularly as far as fuel, oil, and tyre expenses are concerned.
Running costs increase notably with:
-speed,
-frequent and prolonged use of low gears,
-accelerating and braking too often or too fiercely,
unnecessary use of the accelerator pedal,
-leaving the choke out,
-taking bends at high speeds,
-tyre inflated to incorrect pressures.
Oil consumption, which varies a great deal with the use of the car,
is also influenced when running in the engine, and you are advised
to pay particular attention to this point as well as to the oil change
section in the Maintenance Guide.
TOWING A TRAILER
If you intend to tow a caravan or trailer, consult your Citroën deale\
r
first, who will give you all the necessary advice, especially in so far \
as the legal requirements are concerned.
The maximum towing weights are, in France:
- Trailer without brake: 270 kg (595 lbs)
- Trailer with overrun brake: 400 kg (881 lbs)
IDENTIFICATION
Positions
Manufacturer's plate:Under the bonnet on the scuttle panel, RH
side.