1974 CHEVROLET CAMARO recommended oil
[x] Cancel search: recommended oilPage 48 of 85
Downloaded from www.Manualslib.com manuals search engine which have proven of real value in
maintaining a good paint finish.
When using a tar and road oil re
mover, be certain it
is safe for use
on acrylic painted surfaces.
Protection of Exterior
Bright
Metal Parts
Bright metal parts should be
cleaned regularly to maintain lus
ter. Washing with water
is all that
is usually required. However, G.M.
Chrome Polish may be used on
CHROME or STAINLESS STEEL
trim if necessary.
Use special care with ALU
MINUM trim. Never use auto or
chrome polish, steam
or any caustic
soap to clean aluminum.
A coating of wax, rubbed to a
high polish,
is recommended for all
bright metal parts.
Cleaning White Sidewall
Tires
Use a tire cleaner which will not
harm aluminum trim. A stiff brush
may be used with the cleaner to
remove road grime and dirt from
white sidewall tires.
Cleaning the Optional
Vinyl
Top
The top should be washed fre
quently with neutral soap suds,
lukewarm water and a brush with
soft bristles. Rinse top with
suffi
cientquantities of clear water to re
move all traces of soap.
45
If the top requires additional
cleaning after using soap and water,
a mild foaming cleanser
can be
used. Rinse the whole top with
water; then apply a mild foaming
type cleanser on an area of approx
imately two square feet.
Scrub area
with a small soft bristle hand brush,
adding water
as necessary until the
cleanser foams to a soapy consis
tency. Remove the first accumu
lated soilage with a cloth
or sponge
before it can be ground into the top
material. Apply additional cleanser
to the area and scrub until the top
is clean. Care must be exercised to
keep the cleanserfrom running onto
body finish
as it may cause streaks
if allowed
to run down and dry.
After the entire top has been
cleaned, rinse generously with clear
water to remove all traces of
cleanser. Do not use volatile cleaner
or household bleaching agents on
the top material.
Page 51 of 85
Downloaded from www.Manualslib.com manuals search engine provide excellent engine pro
tection.
See your Chevrolet dealer for ad
vice on the frequency of oil and
filter changes under unusual driv
ing conditions.
The above recommendations ap
ply to the first change
as well as
subsequent oil changes. The oil
change interval for your Camaro
engine
is based on the use of SE oils
and quality oil filters.
Oil change in
tervals longer than those listed
above will seriously reduce engine
life and may affect Chevrolet obli
gation under the provisions of the
New Vehicle Warranty.
A high quality SE oil was in
stalled in your engine at the fac
tory. It
is not necessary to change
this factory-installed oil prior to the
recommended normal change pe
riod. However, check the oil level
more frequently during the break
in period since higher oil consump- tion
is normal
until the piston rings
become seated.
NOTE: Non-detergent and other
low quality oils are specifically
Recommended Viscosity
not recommended. Only the use
of
SE engine oils and proper oil
and filter change intervals assure
you of continued proper lubrica
tion of your Camaro engine.
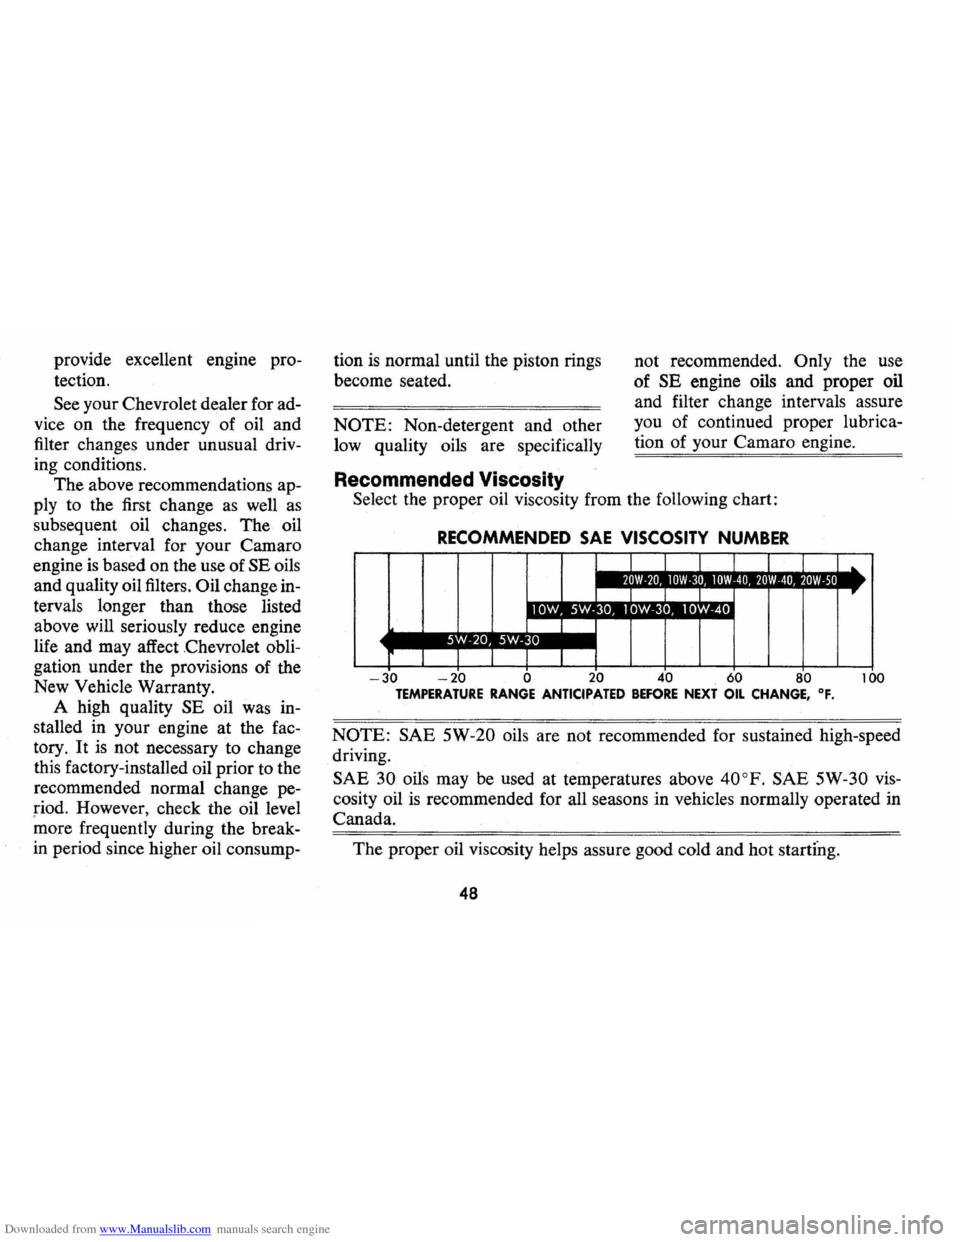
Select the proper oil viscosity from the following chart:
RECOMMENDED SAE VISCOSITY NUMBER
L 1 ..
1
_.LIl'I,."I_IIl'I'.II_IIl'I'J • ,1_,,1 'l'Irl!.I. IIl'J'611_ ~ ~ ~ .. ...
I I
J 1 I
-30 -20 0 20 40 60 80 100 TEMPERATURE RANGE ANTICIPATED BEFORE NEXT OIL CHANGE, OF.
NOTE: SAE 5W-20 oils are not recommended for sustained high-speed
driving.
SAE
30 oils may be used at temperatures above 40oP. SAE 5W-30 vis
cosity oil is recommended for all seasons in vehicles normally operated in
Canada.
The proper oil viscosity helps assure good cold and hot startfng.
48
Page 52 of 85
Downloaded from www.Manualslib.com manuals search engine Checking Oil Level
The engine oil should be main
tained at proper level. The best
time to check it
is before operating
the engine or
as the last step in a
fuel stop. This will allow the oil ac
cumulation in the engine to drain
back in the crankcase.
To check
the level, remove the oil guage rod
(dip stick), wipe it clean and rein
sert
it firmly for an accurate read
ing. The oil gauge rod
is marked
"FULL" and "ADD." The oil level
should be maintained in the safety
margin, neither going above the
"FULL" line nor below the "ADD"
line. Reseat the gauge firmly after
taking the reading.
Supplemental Engine Oil
Additives
The regular use of supplemental
additives
is specifically not recom
mended and will increase operat
ing costs. However, supplemental additives
are available that can
effectively and economically solve
certain specific problems without
causing other difficulties.
For ex
ample, if higher detergency
is re
quired to reduce varnish and
sludge deposits resulting from
some unusual operational diffi
culty, a thoroughly tested and ap
proved additive -
"Super Engine
Oil Supplement" -is available at
your Chevrolet dealer.
In the event
of an operational problem, consult
your dealer for advice before
us
ing supplemental additives.
Drive Belts
Every 6,000 miles or 4 months
inspect drive belts for wear , fray
ing, cracking , and tension. Belts
which are in poor condition should
be replaced immediately.
Check tension by applying mod
erate thumb pressure midway be
tween pulleys.
If the center-to-
49
center distance between pulleys is
13 to 16 inches, the belt should
deflect
1;2 inch . If the center-to
center distance
is 7 to 10 inches,
the belt should deflect
1;4 inch.
Loose belts should be retensioned
to give the correct deflection.
It is recommended that belts be
replaced every 24 months or
24,000
miles , whichever occurs first.
Air Cleaner
CAUTIOH:Donot remo.vElfhe f1ngl,,~ al,. cleaner unlesstempo,ary removall$.nec~ essarrdur;ng repair ormaintenal1ce ot the vehicle; When t"ealrC/f1aneri$/~emoved backtlringcan cause tire in the engine
compartment. .',' . '
Flame Arrester -Every 12,000
miles-Clean the arrester (located
in the base of the air cleaner) with
kerosene or a suitable solvent. Dry
with compressed air.
Rear Axle
Standard -Every 4 months or
6,000 miles, whichever occurs
Page 57 of 85
Downloaded from www.Manualslib.com manuals search engine tory with a high-quality, inhibited,
year-around coolant that meets the
standards of General Motors
Spe
cification 1899-M. This coolant
solution provides freezing protec
tion to
-20oP (-35°P in Can
ada), and it has been formulated to
be used for two full calendar years
or
24,000 miles, whichever first
occurs, of normal operation with
out replacement, provided the
proper concentration of coolant is
maintained.
Cooling System Care
The radiator cap should not be
removed to check coolant level.
Check the coolant level visually in
the 'see thru' coolant recovery tank
at least
as frequently as engine oil
changes. Level should be at the
"full cold" mark on the recovery
tank when the system
is cold. At
normal operating temperature the
coolant should be at the
"full hot"
mark on the recovery tank. Add sufficient
coolant to the recovery
tank.
Use a 50/50 mixture of high
quality ethylene glycol antifreeze
and water for coolant additions.
If
regular additions are required, see
your dealer for a cooling system
check.
NOTE: If recommended quality
antifreeze
is used, supplemental in
hibitors or additives claiming to
provide increased capability are
not necessary. They may be detri
mental to the efficient operation of
the system, and represent an un
necessary operating expense.
Every year, the cooling system
should be serviced
as follows:
1. Wash
radiator cap and filler
neck with clean water.
2. Check coolant for proper level
and freeze protection.
3. Pressure test system and radia-
54
tor cap for proper pressure hold
ing capacity (15 psi) .
If re
placement of cap
is required, use
the special AC cap designed for
coolant recovery systems, speci
fied for your model.
4. Tighten hose clamps and inspect
all hoses. Replace hoses when
ever swollen, checked or other
wise deteriorated.
5. Clean frontal area of radiator
core and air conditioning con
denser.
Replace hoses every 24 months
or 24,000 miles or earlier if
checked, swollen or otherwise de
teriorated. Every two years
or 24,-
000 miles, whichever first occurs,
the cooling system should be
flushed and refilled using the fol
lowing recommended procedure:
1. Remove radiator cap when
engine is cool by:
• Slowly rotating cap counter-
Page 71 of 85
Downloaded from www.Manualslib.com manuals search engine valve moves freely and is not stuck . (Don 't mistake normal spring
tension for a stuck valve.) Top the side of the carburetor sharply several times with a light tool such as a screwdriver handle or pliers. Replace the air cleaner and attempt to start the engine in the normal manner. IE) If the cor will start but stalls when hot or has a rough idle,
you can suspect a faulty IDLE ADJUSTMENT, a malfunctioning AUTOMATIC CHOKE or on extremely dirty and blocked AIR CLEANER ELEMENT. Replace paper element air cleaner if necessary. Idle' adjustment or automatic choke service (other than that outlined in paragraph 0 above) should be performed by your Chevrolet Dealer. If the above Fuel System checks and the checks suggested under the Electrical System following do not correct the malfunction, it is recommended that you return to your Authorized Chevrolet Dealer for further checks, adjustments or repairs.
ELECTRICAL SYSTEM • If, when the ignition key is turned to "Start", the engine will not
turn over, you have good reason to suspect electrical trouble. NOTE: Never remove Delcotron bat lead without first disconnecting
baHery ground cable.
, (F) When there is no response at all to attempts to start the car, check the obvious-your AUTOMATIC TRANSMISSION SELECTOR LEVER must be in Neutral or Park position (manucil transmission
must have clutch depressed all the way to floor) before the engine can be started. Turning the IGNITION SWITCH rapidly back and forth several times will sometimes correct a poor internal switch contact. (G) The BATTERY may be discharged. If so, lights will be dim and the horn will have a poor tone if it will blow at all. Usually a garage recharge will be necessary to return the bottery to operation. Occasionally, however, a long drive will recharge the battery.
68
NOTE: If the battery is determined to be dead, and for no apparent reason, have your Authorized Chevrolet Dealer check the
baHery, the GENERATOR and the VOLTAGE REGULATOR.
GENERATOR trouble should already have been indicated by the generator indicator light on the instrument panel.
POOR BATTERY CONNECTIONS may be suspected if the car has operated properly a short time before and now not even the horn will operate. Check both ends of both battery cables. If the connections are corroded, a cor may sometimes be restored to operation by removing all cable ends, scraping all contacting surfaces clean with a pen knife, and reassembling. If the cables are broken, they must be replaced. The power supply should now be restored unless the battery is dead.
(H) If, however, the lights and horn work properly but the starter will still not turn over, check the STARTER connections. A "dick" from the starter solenoid indicates that the wiring to the starter is properly installed. If the wiring seems to be clean and tightly installed, the trouble is probably in the starter itself and should be referred to your Authorized Chevrolet Dealer.
When the engine will "turn over" but will not start, the following
items may be checked along with the Fuel Systems Checks listed
previously.
(I) With a clean dry cloth, wipe the ceramic portions of the spark plugs dry. In particularly damp or rainy weather dampness may be the cause of not starting, especially when the engine is cold.
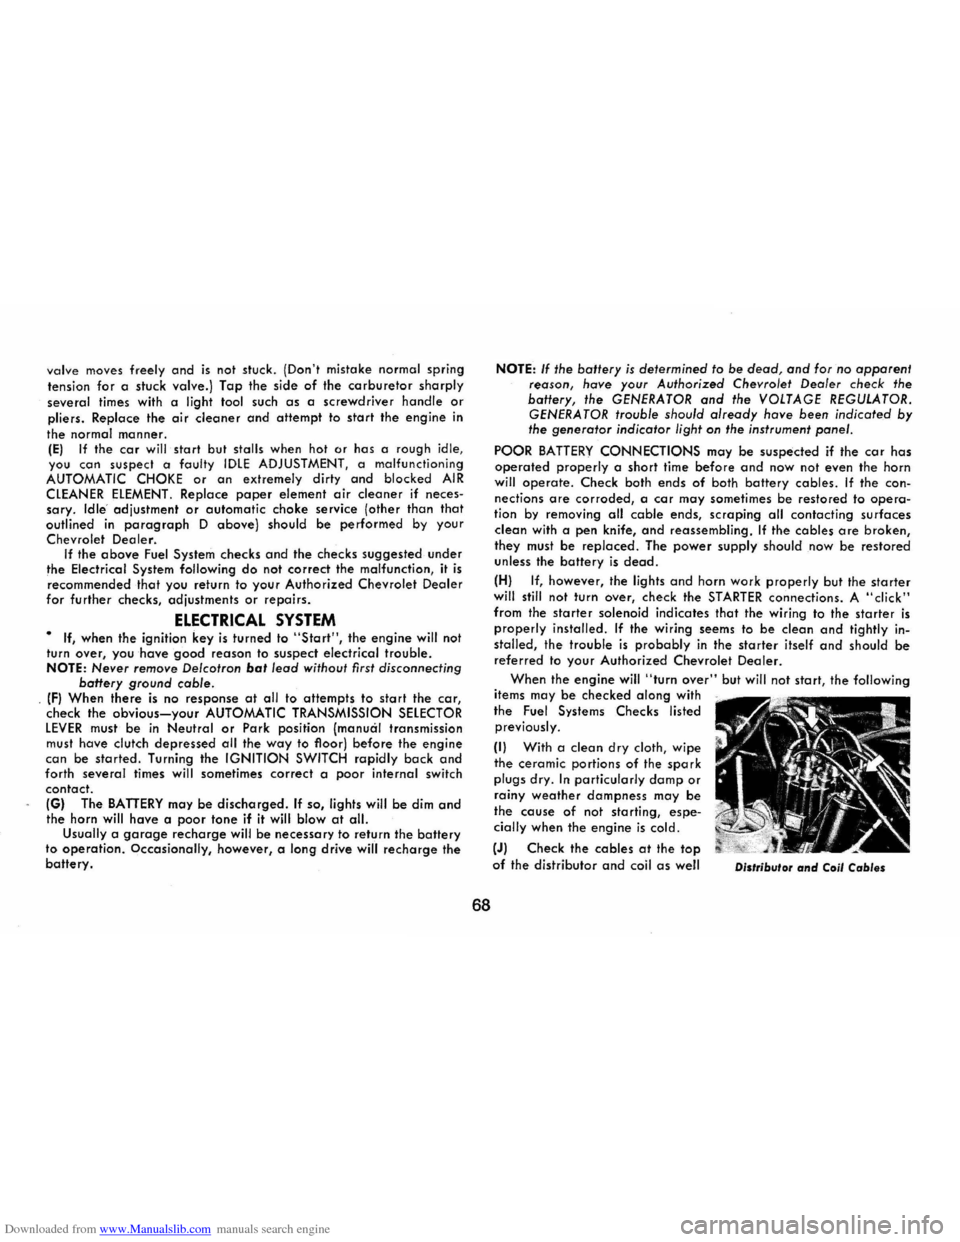
(J) Check the cables at the top of the distributor and coil as well Distributor and Coil Cables
Page 75 of 85
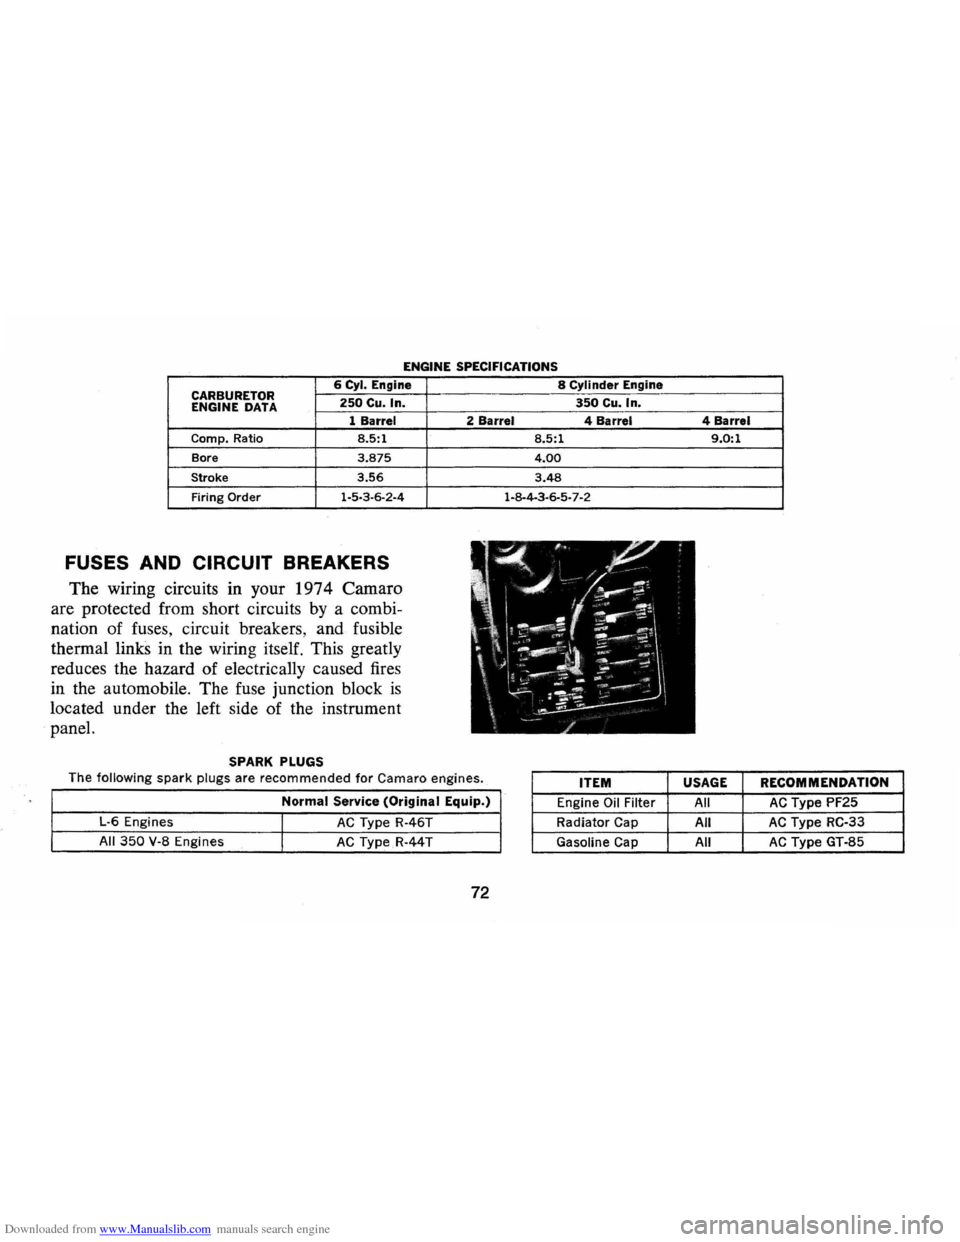
Downloaded from www.Manualslib.com manuals search engine ENGINE SPECIFICATIONS
6 Cyl. Engine 8 Cylinder Engine CARBURETOR 250 Cu. In. 350 Cu. In.
ENGINE DATA
1 Barrel 2 Barrel 4 Barrel
Camp. Ratio 8.5:1
Bore 3.875
Stroke 3.56
Firing
Order 1·5·3·6-2-4
FUSES AND CIRCUIT BREAKERS
The wiring circuits in your 1974 Camaro
are protected from short circuits by a combi
nation of fuses, circuit breakers, and fusible
thermal
linkS in the wiring itself. This greatly
reduces the hazard of electrically caused fires
in the automobile. The fuse junction block
is
located under the left side of the instrument
panel.
SPARK PLUGS
The
following spark plugs are recommended for Camaro engines.
Normal Service (Original Equip.)
L-G Engines I AC Type R-4GT
All
350 V-8 Engines I AC TypeR-44T
72
8.5:1
4.00
3.48
1-8-4-3-6-5-7-2
ITEM
Engine Oil Filter
Radiator Cap
Gasoline Cap 4
Barrel
9.0:1
USAGE RECOMMENDATION
All AC Type PF25
All
AC Type RC-33
All
AC Type GT-85
Page 76 of 85
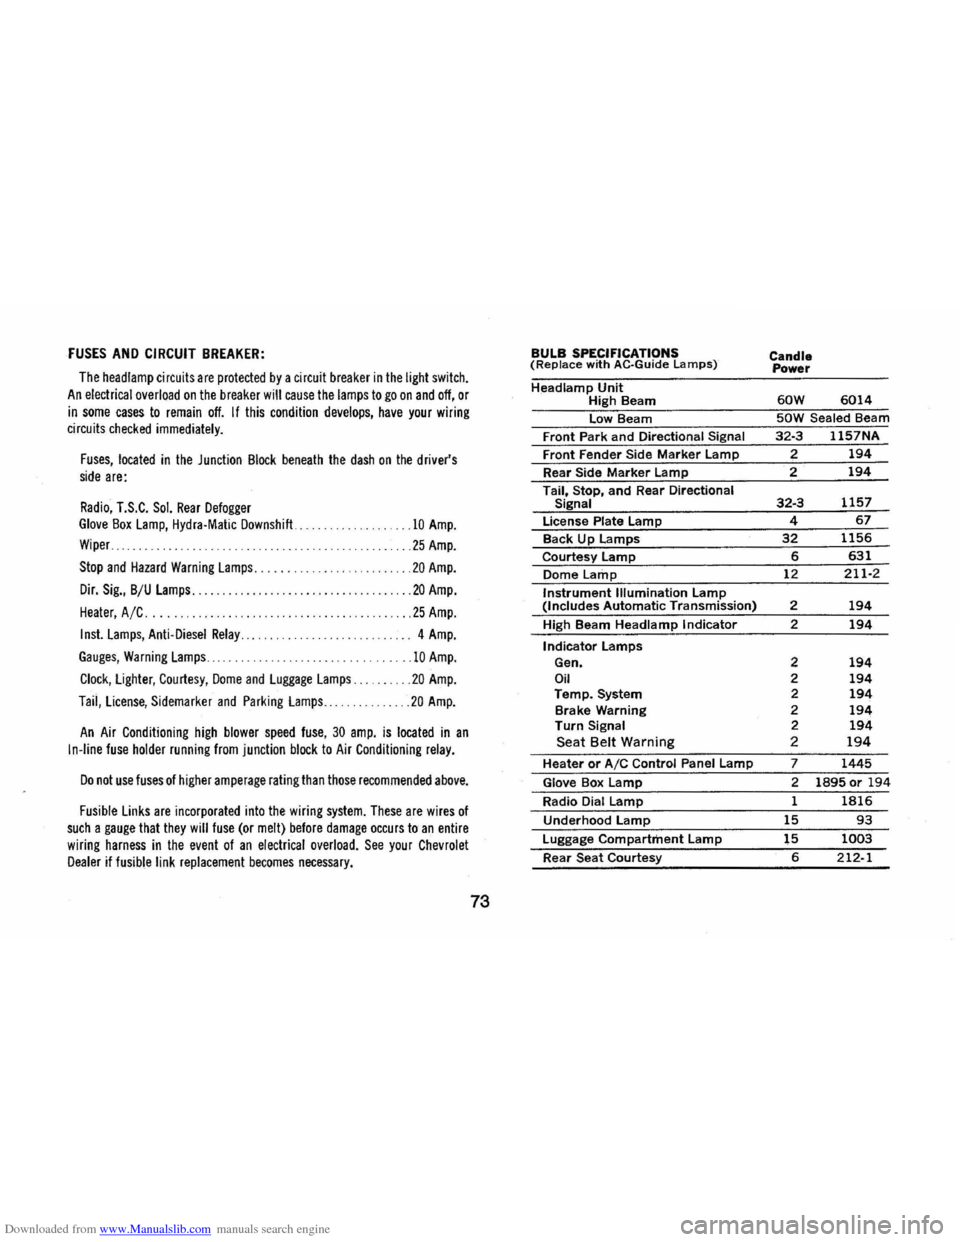
Downloaded from www.Manualslib.com manuals search engine FUSES AND CIRCUIT BREAKER:
The head lamp circuit s are protected by a circuit breaker in the light switch.
An electrical overload on the breaker will cause the lamps to go on and off, or
in some cases to remain off. If this condition develops, have your wiring circuits checked immediately.
Fuses, located in the Junction Block beneath the dash on the driver's side are:
Radio, T.S.C. Sol. Rear Defogger Glove Box Lamp, Hydra·Matic Downshift ...
Wiper ..
.10 Amp.
... 25 Amp.
Stop and Hazard Warning Lamps. . . . . . ... . ........ 20 Amp.
Dir. Sig., B/U Lamps........... ............. ... .. . ... 20 Amp.
Heater, A /C .... . .25 Amp.
Inst. Lamps, Anti-Diesel Relay............. ....... . .. 4 Amp.
Gauges, Warning Lamps ......................... 10 Amp.
Clock, Lighter, Courtesy, Dome and Luggage Lamps. . .20 Amp.
Taii, License, Sidemarker and Parking Lamps ... ..... 20 Amp.
An Air Conditioning high blower speed fuse, 30 amp. is located in an
In-line fuse holder running from junction block to Air Conditioning relay.
Do not use fuses of higher amperage rating than those recommended above.
Fusible Links are incorporated into the wiring system. These are wires of such a gauge that they will fuse (or melt) before damage occurs to an entire
wiring harness in the event of an electrical overload. See your Chevrolet Dealer if fusible link replacement becomes necessary.
73
BULB SPECIFICATIONS (Replace with AC·Guide Lamps)
Headlamp Unit High Beam
low Beam
Front Park
and Directional Signal
Front Fender Side Marker lamp
Rear Side Marker lamp
Tail, Stop, and Rear Directional Signal
license Plate lamp
Back Up lamps
Courtesy lamp
Dome Lamp
Instrument Illumination lamp (Includes Automatic Transmission)
High Beam
Headlamp Indicator
Indicator lamps Gen. Oil Temp. System
Brake Warning
Turn Signal Seat Belt Warning
Heater or AIC Control Panel lamp
Glove Box lamp
Radio Dial lamp
Underhood lamp
luggage Compartment lamp
Rear Seat Courtesy
Candle
Power
60W 6014
50W Sealed Beam
32·3 1157NA
? 194
2 194
32·3 1157
4 67
32 1156
6 631
12 211·2
2 194
2 194
2 194 2 194 2 194 2 194 2 194 2 194
7 1445
2 1895 or 194
1 1816
15 93
15 1003
6 212-1
Page 81 of 85
Downloaded from www.Manualslib.com manuals search engine INDEX
Accessory Drive Belts. . . . . . . . . . . . . . . .. 49 Accessory Position, Steering
Column Lock. . . . . . . . . . . . . . . . . . . . .. 14 Acrylic Lacquer ...................... 44 Adjusters, Automatic Brake. . . . . . . . . . .. 22 Air Circulation. . . . . . . . . . . . . . . . . . . . . .. 28 Air Cleaner. . . . . . . . . . . . . . . . . . . . . . . . .. 49 Air Conditioning
Maintenance. . . . . . . . . . . . . . . . . . . . . .. 53 Air Inlets, Ventilating System. . . . . . . . .. 28 Ammeter ............................ 26
Antenna ............................. 34 Anti-freeze (See Cooling System) ........ 53 Anti-Spin Differential. . . . . . . . . . . . . . . .. 35 Anti-Theft Key Buzzer System .......... 14 Anti-Theft Steering Column Lock ....... 14 Appearance Care ..................... 41 Ash Trays. . . . . . . . . . . . . . . . . . . . . . . . . .. 23 Automatic Brake Adjusters. . . . . . . . . . .. 22 Automatic Transmissions
Fluid Check ........................ 50 Fluid Recommendations ............. 50 Maintenance. . . . . . . . . . . . . . . . . . . . . .. 50 -Operation ...... _ ... _ ...... _ ........ 16 Starter Safety Switch _ . . . . . . . . . . . . . .. 15 Axle Rear Flu!? Level. ....................... 49 Mamtenance. . . . . . . . . . . . . . . . . . . . . .. 49 Ball Joints. . . . . . . . . . . . . . . . . . . . . . . . . .. 51 Battery
Emergency Starting ................. 37 Fluid Level. . . . . . . . . . . . . . . . . . . . . . .. 63 Gas Caution. . . . . . . . . . . . . . . . . . . . . .. 38 Specifications. . . . . . . . . . . . . . . . . . . . . .. 70
Bearings, Front Wheel. . . . . . . . . . . . . . . .. 52 Before Driving Your Camaro.......... 3
Belted Tires. . . . . . . . . . . . . . . . . . . . . . . . .. 56 Belts
Engine Drive. . . . . . . . . . . . . . . . . . . . . .. 49 Lap ............................... 7 Shoulder........................... 7
Body Identification Number ............ 70 Brakes
D.riying Through Deep Water. . . . . . .. 21 Lmmgs ............................ 21 Maintenance. . . . . . . . . . . . . . . . . . . . . .. 52 Master Cylinder Level. .............. 52 Parking Brake. . . . . . . . . . . . . . . . . . . . .. 21 Pedal Travel ....................... 22
Power. ............................ 21 Self-Adjusting. . . . . . . . . . . . . . . . . . . . .. 22
Trailer ............................ 11 Warning Light. .................... 25 Break-In Period
Cars Pulling Trailers. . . . . . . . . . . . . . .. 11 New Car .......................... 2
Bright Metal Cleaning ................. 45 "Brights" Headlamp Indicator .......... 26 Buckles, Seat Belt. . . . . . . . . . . . . . . . . . . . . 7
Bulbs and Fuses. . . . . . . . . . . . . . . . . . . . . . 73 Bumper Jack
Operation.. . . . . . . . . . . . . . . . . . . . . . . .. 39 Stowage ........................... 39 Buzzer
Key Reminder. . . . . . . . . . . . . . .. . . . . .. 14 Cap, Filler
Engine Oil. ................... .47, IBC
Gasoline ....................... 46, IBC
Radiator. . . . . . . . . . . . . . . . . . . . . . . . . .. 39 Capacities. . . . . . . . . . . . . . . . . . . . . . . . . .. 70 Carbon Monoxide Caution.. . . . . . . . . . .. 13 Carpet Care .......................... 41
78
Carrier, Infant Safety.... . . . . . . . . . . . . .. 9
Changing Wheels and Tires. . . . . . . . . . .. 39 Charging System Indicator Light. .... : .. 25 Chassis Maintenance. . . . . . . . . . . . . . . . .. 51 Child Restraint
Cars Not Equipped With Special Child Restraints. . . . . . . . .. 9
Child Safety Seat. . . . . . . . . . . . . . . . . .. 9
Infant Safety Carrier .... ; . . . . . . . . . .. 9
Chrome Protection .................... 45 Cigarette Lighter ..................... 28 Circuit Breakers, Headlamps. . . . . . . . . .. 73 Cleaning
Carpet Care. . . . . . . . . . . . . . . . . . . . . . .. 41 Exterior Finish and Trim. . . . . . . . . . .. 44
Fabric and Interior Trim. . . . . . . . . . .. 42
Solvents Recommended .......... , ... 41 Spot Removal. . . . . . . . . . . . . . . . . . . . .. 42
Vinyl Top. . . . . . . . . . . . . . . . . . . . . . . .. 45 Clock ............................... 28 Clutch Maintenance. . . . . . . . . . . . . . . . . . . . . .. 50 Pedal Adjustment. . . . . . . . . . . . . . . . . .. 22 Coat Hooks. . . . . . . . . . . . . . . . . . . . . . . . .. 4
Cold Weather Starting ................. 15 Compartment Glove............................. 3 Luggage........................... 3
Complaint Procedure .................. 74 Conditioner, Air ...................... 31 Controlled Differential. . . . . . . . . . . . . . .. 35 Controls ............................. 14 Cooling System Care .............................. 53 Coolant Recommendation. . . . . . . . . .. 53 Overheating Caution. . . . . . . . . . . . . . .. 39 Cowl Air Inlets ....................... 29