1973 CHEVROLET MONTE CARLO ESP
[x] Cancel search: ESPPage 4 of 86
Downloaded from www.Manualslib.com manuals search engine YOUR CAR'S FIRST
FEW HUNDRED MILES OF DRIVING
You can operate your new car
from its very first mile without ad
hering to a formal
"break-in" sched
ule. However, during the first
few
hundred miles of driving you can,
by observing a
few simple precau
tions, add to the future performance
and economy of your car.
It is recommended that your
speed during the first 500 miles
be confined to a maximum of
60
M.P.H., but do not drive for ex
tended periods at
anyone constant
speed, either fast
or slow. Dur
ing this period, avoid full throttle
starts and, if possible, avoid hard
stops especially during the first
200
miles of operation since brake mis-
2
use during this period will destroy
much future brake efficiency.
Always drive at moderate speed
until the engine has completely
warmed up.
If you plan to use your new car
for trailer hauling see additional
information on page 11.
Page 7 of 86
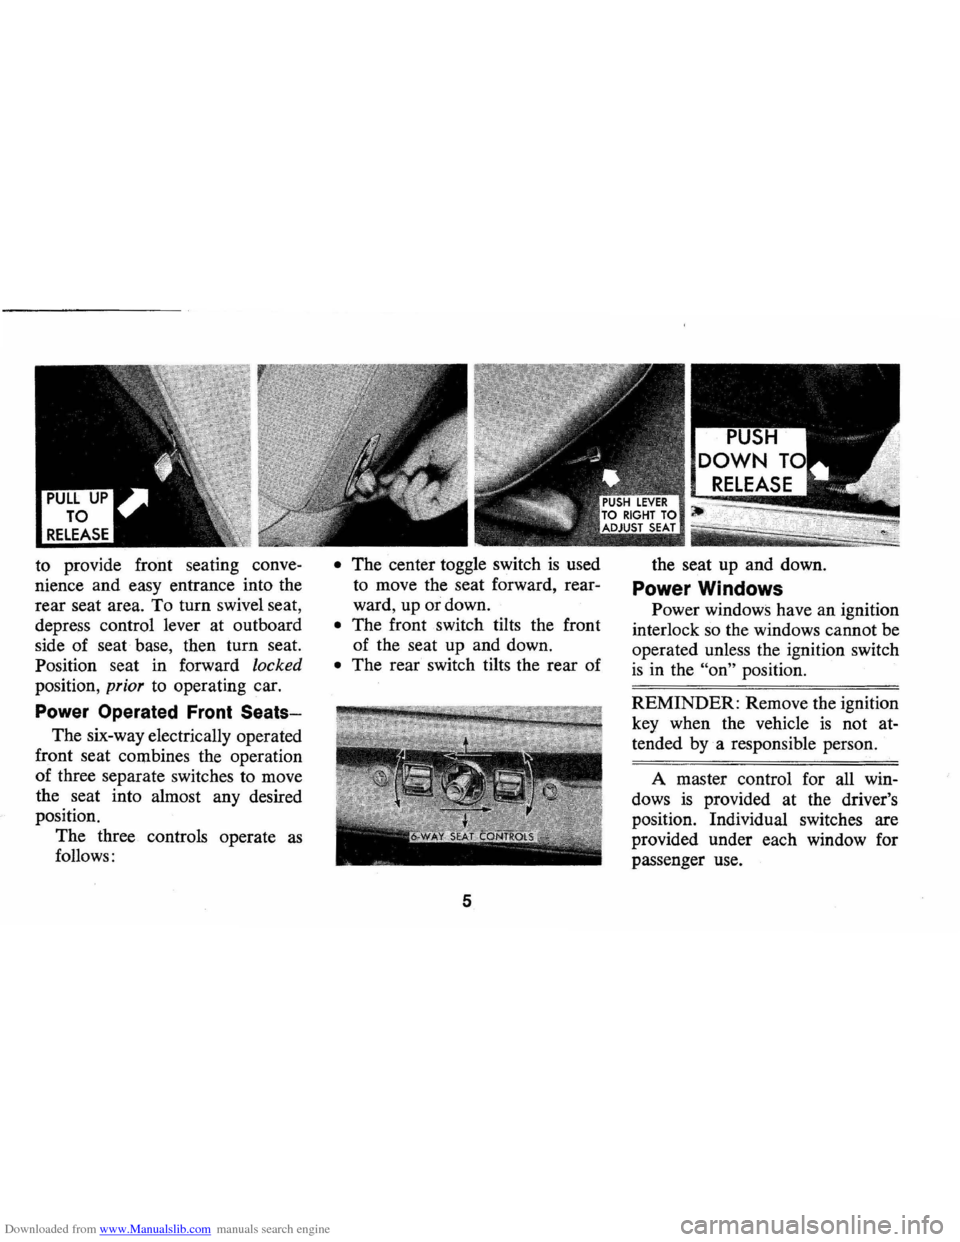
Downloaded from www.Manualslib.com manuals search engine to provide front seating conve
nience and easy entrance into the
rear seat area. To turn swivel seat,
depress control lever at outboard
side of seat base, then turn seat.
Position seat in forward
locked
position, prior to operating car.
Power Operated Front Seats-
The six-way electrically operated
front seat combines the operation
of three separate switches to move
the seat into almost any desired
position.
The three controls operate
as
follows:
• The center toggle switch is used
to move the seat forward, rear
ward, up or down.
• The front switch tilts the front
of the seat up and down.
• The rear switch tilts the rear of
5
the seat up and down.
Power Windows
Power windows have an ignition
interlock so the windows cannot be
operated unless the ignition switch
is in the "on" position.
REMINDER: Remove the ignition
key when the vehicle
is not at
tended
bya responsible person.
A master control for all win
dows
is provided at the driver's
position. Individual switches are
provided under each window for
passenger use.
Page 15 of 86
Downloaded from www.Manualslib.com manuals search engine •
Operation in Foreign Countries
Your Monte Carlo is designed
to operate on fuel of approximately
91 research octane number or
higher, sold in the United States
and Canada.
If you plan to operate your
Monte Carlo outside the continen
tal limits of the United States
or
Canada, there is a possibility that
the best fuels available in some
countries are so low in anti-knock
quality that excessive knocking and
serious engine damage may result
from their use. To minimize this
possibility, write to Chevrolet Divi-sion,
Service Department, Detroit,
Michigan 48202,
(or in Canada
write to General Motors of Can
ada Limited,
Owner Relations De
partment, Oshawa, Ontario),
giving:
• The vehicle identification num
ber ( on plate
on instrument
panel ahead of the steering
wheel and visible through the
windshield, or from registration
slip
or title).
• The country or countries in
which you plan to traveL
You will be furnished informa-
13
tion on the quality of fuels avail
able in the countries in which you
plan to traveL
It is recommended
that you not operate your Monte
Carlo in any country not having
fuels meeting the requirements of
your Chevrolet engine. Engine
modifications are not available to
compensate for low anti-knock
quality fuels. Operation of your car
under conditions of continuous
or
excessive knocking constitutes mis
use of the engine for which the
Chevrolet Division
is not responsi
ble under the terms of the Chev
rolet New Vehicle Warranty.
Page 18 of 86
Downloaded from www.Manualslib.com manuals search engine 2. Place transmission selector
in uP" or uN" (UP" preferred).
A starter safety switch prevents
starter operation while the trans
mission selector
is in any drive
position.
(If it is necessary to
re-start the engine with the car
moving, place the selector lever
in
"N".)
3. Depress accelerator pedal and
activate starter
as outlined be
low for different conditions.
• Cold Engine -Fully de
press
accelerator pedal and
slowly release.
With foot off
the pedal, crank the engine
by turning the ignition key
to the Start position-release
when engine starts.
If engine starts, but fails to
run, repeat this procedure.
When engine is running
smoothly (approximately 30
seconds), the idle speed may
be reduced by slightly de- pressing
the accelerator pedal
and then slowly releasing.
• Warm Engine -Depress ac
celerator
pedal about halfway
and hold while cranking the
engine.
• Extremely Cold Weather
(Below 0° F.) Or After Car
Has Been Standing
Idle
Several
Oays-
Fully depress and release
accelerator pedal two or three
times before cranking the
engine.
With foot off the ac
celerator pedal,
crank the
engine by turning the key to
the Start position and release
when engine starts.
Manual Transmission Models
1. Apply parking brake and shift
16
transmission to neutral.
2.
Hold clutch pedal to floor
throughout the starting proce
dure.
A starter interlock pre
vents starter operation when
clutch
is not fully depressed.
(Select the proper gear position
before releasing the clutch pedal.)
3. Operate accelerator pedal and
starter
as outlined in step 3
(under Automatic Transmission
Models).
Engine Flooded
Depress accelerator pedal aJ;ld
hold to floor while starting until
engine
is cleared of excess fuel
and
is running smoothly. Never
"pump" the accelerator pedal.
Warm-Up
Always let the engine idle for
20 to 30 seconds after starting
and drive at moderate speeds for
several miles, especially during
cold weather.
Page 24 of 86
Downloaded from www.Manualslib.com manuals search engine your foot from the accelerator.
If control button is not fully de
pressed, when changing speed
setting,
. the car will resume your
previously selected speed.
To disengage system, lightly de
press brake pedal or fully de
press the control button.
Horn
The hom on your Monte Carlo
is actuated · by firmly pressing on
the pad in the center of the steering
wheel. As a good motorist, use of the
horn should be kept at a minimum.
However, acquaint yourself
as soon
as possible with this function of
your car, should it ever become
necessary to give a warning to a
pedestrian
or another motorist.
Holding Car on an Upgrade
When stopped on an upgrade,
maintain your position by apply
ing the brakes. Never hold the
car in place by accelerating en-gine
with transmission in gear.
This could cause damage by over
heating the transmission (auto
matic)
or clutch (manual).
Parking Your Car
Always engage the parking
brake and place the automatic
transmission selector lever in
"Park" position when leaving your
car unattended. Also with auto
matic transmissions, never park
for prolonged periods with engine
idling and transmission in gear,
especially if your car
is equipped
with air conditioning. This prac
tice
is detrimental to the trans
mission, due to overheating.
NOTE: For operation of hazard flasher, see page 41, in Section "In Case of Emergency."
22
Page 30 of 86
Downloaded from www.Manualslib.com manuals search engine • Stopping distances may be
greater.
• Greater pedal effort may be
required .
• Pedal travel may be greater.
3.
Tryout braking operation by
starting and stopping on road
shoulder -then:
• If you judge such operation
to be safe , proceed cautious
ly
at a s afe speed to nearest
dealer for repair.
• Or have car towed to dealer
for repair.
Continued operation of the car
in this condition
is dangerous.
Headlight Beam Indicator
Light
The headlights of your car have
high and low beams to provide
ybu
with proper night-time visibility
for most driving conditons . The
"low" beams are used during most
city driving. The "high" beams are especially
useful when driving
on
dark roads since they provide ex
cellent long range illumination.
The headlight beam indicator will
be on whenever the high beams
or
"brights" are in use. The Headlight
Beam Switch controls the headlight
beams (see
Page 24).
Light Switch
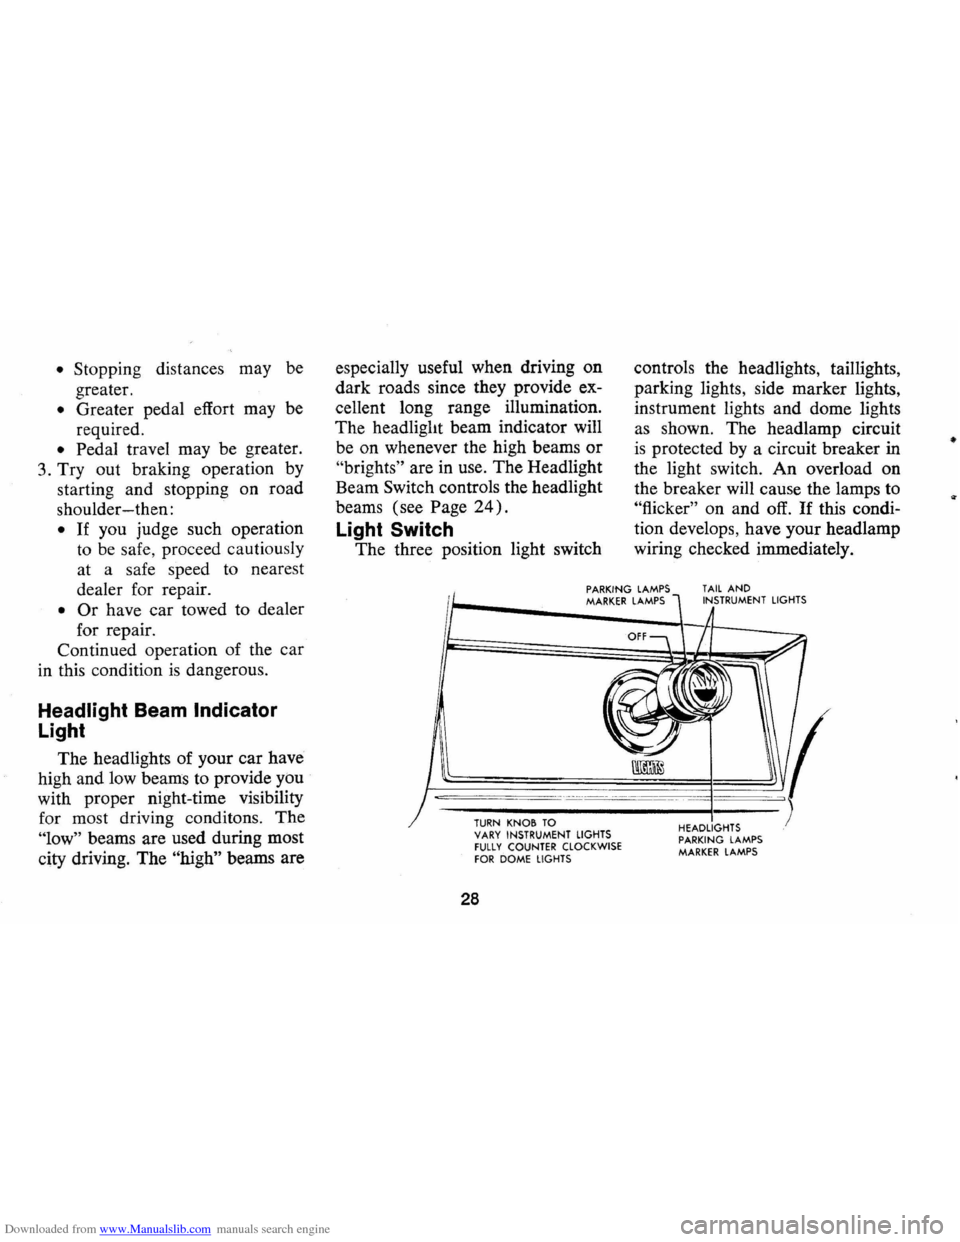
The three position light switch controls
the headlights, taillights,
parking lights, side marker lights,
instrument lights and dome lights
as shown. The headlamp circuit
is protected by a circuit breaker in
the light switch. An overload on
the breaker will cause the lamps to
"flicker" on and off. If this condi
tion develops, have your headlamp
wiring checked immediately.
PARKING LAMPS MARKER LAMPS TAIL AND INSTRUMENT LIGHTS
--,---.---~------ -- --------
TURN KNOB TO VARY INSTRUMENT LIGHTS fULLY COUNTER CLOCKWISE fOR DOME LIGHTS
28
HEADLIGHTS PARKING LAMPS MARKER LAMPS
•
Page 52 of 86
Downloaded from www.Manualslib.com manuals search engine SERVICE AND MAINTENANCE
The time or mileage intervals
on the following
pages are in
tended as a guide for establishing
regular maintenance and lubrica
tion periods for your car. Sus
tained heavy duty or high speed
operations
or operation under
adverse conditions may necessi
tate more frequent servicing.
To
determine specific recommenda
tions for conditions under which
Fuel
Requirements
Your Monte Carlo is designed
to operate
on a good quality fuel
of approximately
91 Research Oc
tane Number or higher , commonly
sold in the United States and
Canada.
Use of a fuel which is too
low in anti-knock quality will re- you
use your car, consult your
Authorized Chevrolet Dealer.
Maintenance Schedule
For owner convenience, a sepa
rate maintenance folder has been
provided with your car which con
tains a complete schedule and
brief explanation of the safety,
suIt in
"spark knock", a metallic
rapping noise generated during the
combustion process. It should be
noted that Research Octane Num
ber does not completely describe
fuel octane quality. Therefore , if
you hear knock in your engine you
may wish to try a different gaso
line.
If knocking persists consult
your authorized Chevrolet dealer.
In any case, continuous
or exces-
50
emission control, lubrication and
general maintenance it requires.
The maintenance folder informa
tion
is supplemented by this sec
tion of the Owner 's Manual,
as
well as the separate emission con
trol systems folder also furnished
with your car. Read all three pub
lications for a full understanding
of vehicle maintenance require
ments.
sive knocking may result in engine
damage and constitutes misuse of
the engine for which Chevrolet
Motor Division
is not responsible
under the terms of the New Ve
hicle Warranty.
General Motors recommends the
use of unleaded or low-lead
(0 to
0.5 grams per gallon) gasolines
to minimize emissions of hydro
carbons and particulates.
If un-
Page 61 of 86
Downloaded from www.Manualslib.com manuals search engine 3. If radiator is not equipped
with a drain valve start to
drain system
as follows:
a. With engine stopped , insert
one end of a 5-foot length
of
% inch tubing into the
filler neck until it touches
the bottom of the radiator.
b. Insert any type of large
syringe into the open end
of the tubing and initiate
the siphoning process by
squeezing and releasing the
ball.
c. Completely drain radiator
coolant through the siphon
tube. (To speed this
oper
ation, the drain plugs in
block can also be removed.)
d. Remove tubing (install
block drain plugs,
if re
moved) and add sufficient
water to
fill system.
4. Close drain valve (install
block drain plugs,
if removed)
if so equipped and add
suffi
cient water to fill system.
5 . Run engine, drain and refill
the system,
as described in
steps
1, 2, 3, and 4, a suffi
cient number of times until
the drained liquid
is nearly
colorless.
6. Allow system to drain com
pletely and then close radia
tor drain valve tightly if so
equipped (Install block drain
plugs,
if removed.)
7. Remove recovery cap leaving
hoses in place. Remove
cool
ant recovery tank and empty
of fluid. Plush tank with clean
water, drain and reinstall.
8. Add sufficient ethylene glycol
coolant, meeting GM
specifi
cation 1899-M, to provide the
required freezing and corro-
59
sion protection-at least a 44
percent solution
(_200P). Pill
radiator to the base of the
radiator filler neck and add
sufficient coolant to the
re
covery tank to raise level to
the
"PULL HOT" mark. Re
install recovery tank cap.
9. Run engine, with radiator cap
removed, until normal
operat
ing temperature is reached.
(Radiator upper hose becomes
hot.)
10. With engine idling, add cool
ant until level reaches bottom
of filler neck and install
radi
ator cap making certain ar
rows line up with overflow
tube.
It is the owner's responsibility
to keep the freeze protection at a
level commensurate with the
tem
peratures which may occur in the
area of vehicle operation.