1973 CHEVROLET MONTE CARLO lights
[x] Cancel search: lightsPage 5 of 86
Downloaded from www.Manualslib.com manuals search engine BEFORE DRIVING YOUR MONTE CARLO
DRIVER CHECKLIST
Before Entering Car
1. See that windows , mirrors and
lights are clean.
2 . Visually note inflation condition
of tires.
3. Check that area to rear is clear
if about to back up.
Before Driving Off
1. Lock all doors.
2. Position seat and adjust head
restraints.
3. Adjust inside and outside mir
rors.
4 . Fasten seat belts.
5. Check that warning bulbs light
when key
is turned to start posi
tion.
6 . Release parking brake (and see
that brake warning light turns
off). 7
. Be sure you understand your
car and how to operate it safely.
Keys
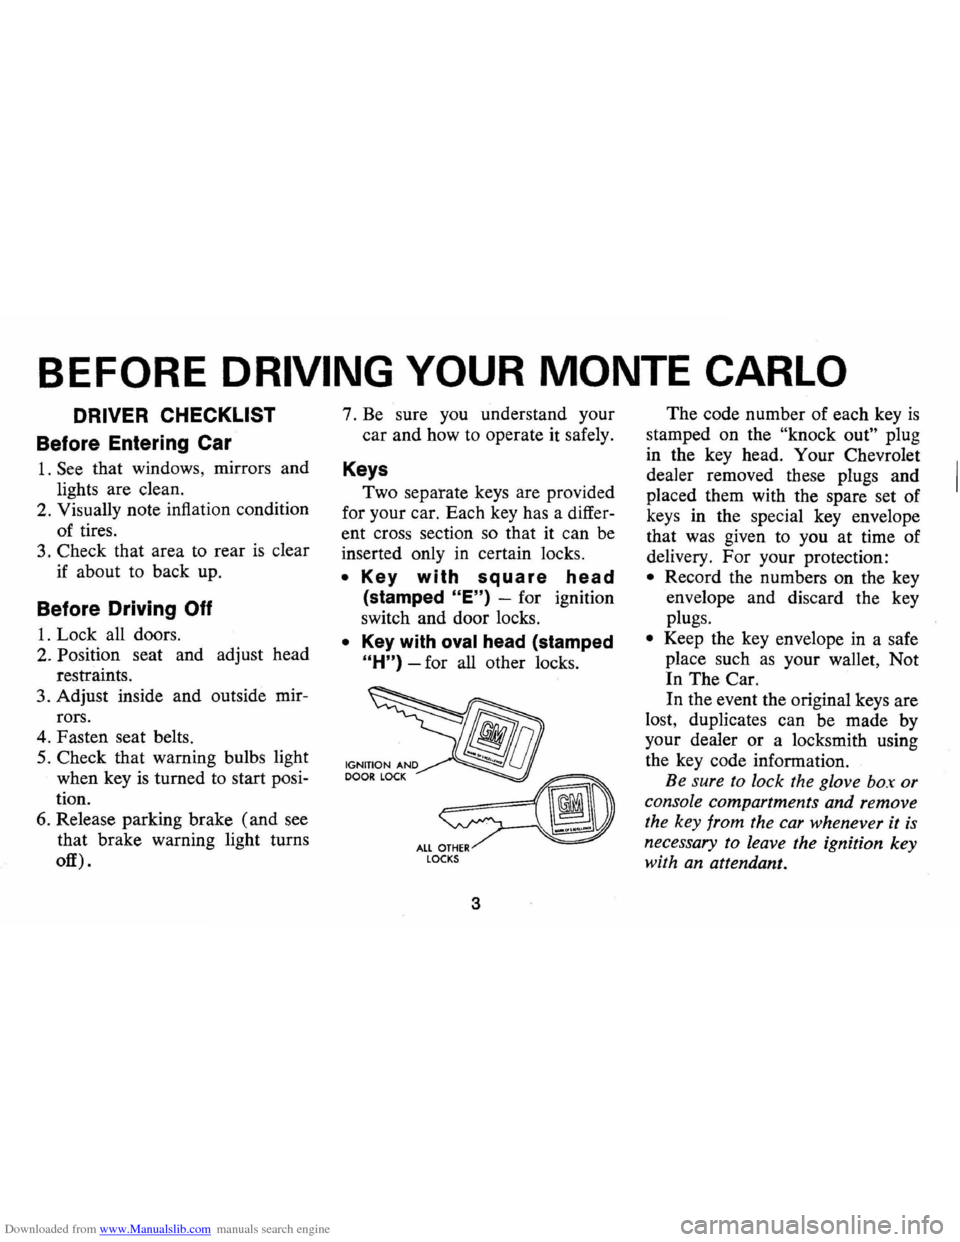
Two separate keys are provided
for your car. Each key has a differ
ent cross section so that it can be
inserted only
in certain locks.
• Key with square head
(stamped "E") -for ignition
switch and door locks.
• Key with oval head (stamped
"H") -for all other locks.
fib
~ ALL OTHER LOCKS
3
The code number of each key is
stamped on the "knock out" plug
in the key head. Your Chevrolet
dealer removed these plugs and
placed them with the spare set of
keys in the special key envelope
that was given to you at time of
delivery. For your protection:
• Record the numbers on the key
envelope and discard the key
plugs.
• Keep the key envelope in a safe
place such
as your wallet, Not
In The Car.
In the event the original keys are
lost, duplicates can be made by
your dealer or a locksmith using
the key code information.
Be sure to lock the glove box or
console compartments and remove
the key from the car whenever it
is
necessary to leave the ignition key
with an attendant.
Page 8 of 86
Downloaded from www.Manualslib.com manuals search engine Inside Rearview Mirrors
Switch mirror to night position to
reduce glare from following
headlights.
To raise or lower, grasp mirror
and exert sufficient pressure by
pushing
or pulling to move mirror
up
or down.
Occupant Restraint Belts
Lap and shoulder belts provide
added security and comfort for you
and your passengers.
Proper use
and care of these belts
will assure
continuance of this security.
lap Belts
• Adjust front seat to satisfaction
of driver and sit erect and well
back in seat.
• In a single motion, pull webbing
across lap far enough to permit
inserting metal latch plate end
of lap belt into the buckle, until
a snap
is heard. If not pulled
out far enough to reach, let belt
rewind into the retractor to re
lease lock mechanism ,
so belt
6
can be pulled out to the proper
length.
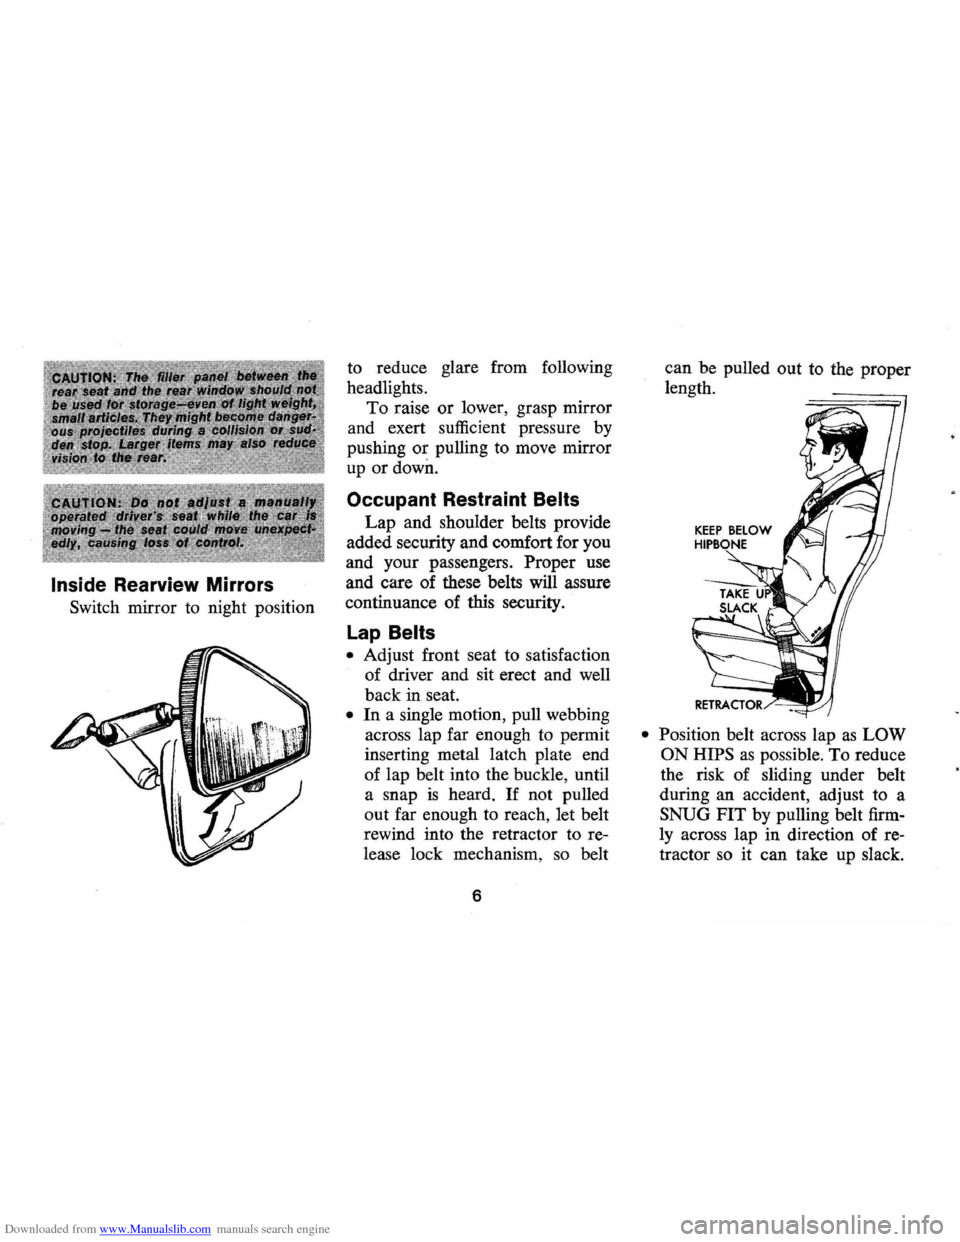
• Position belt across lap as LOW
ON HIPS
as possible. To reduce
the risk of sliding under belt
during an accident, adjust to a
SNUG FIT by pulling belt firm
ly across lap in direction of re
tractor
so it can take up slack.
Page 27 of 86
Downloaded from www.Manualslib.com manuals search engine INSTRUMENTS AND CONTROLS
o STANDARD
o OPTIONAL
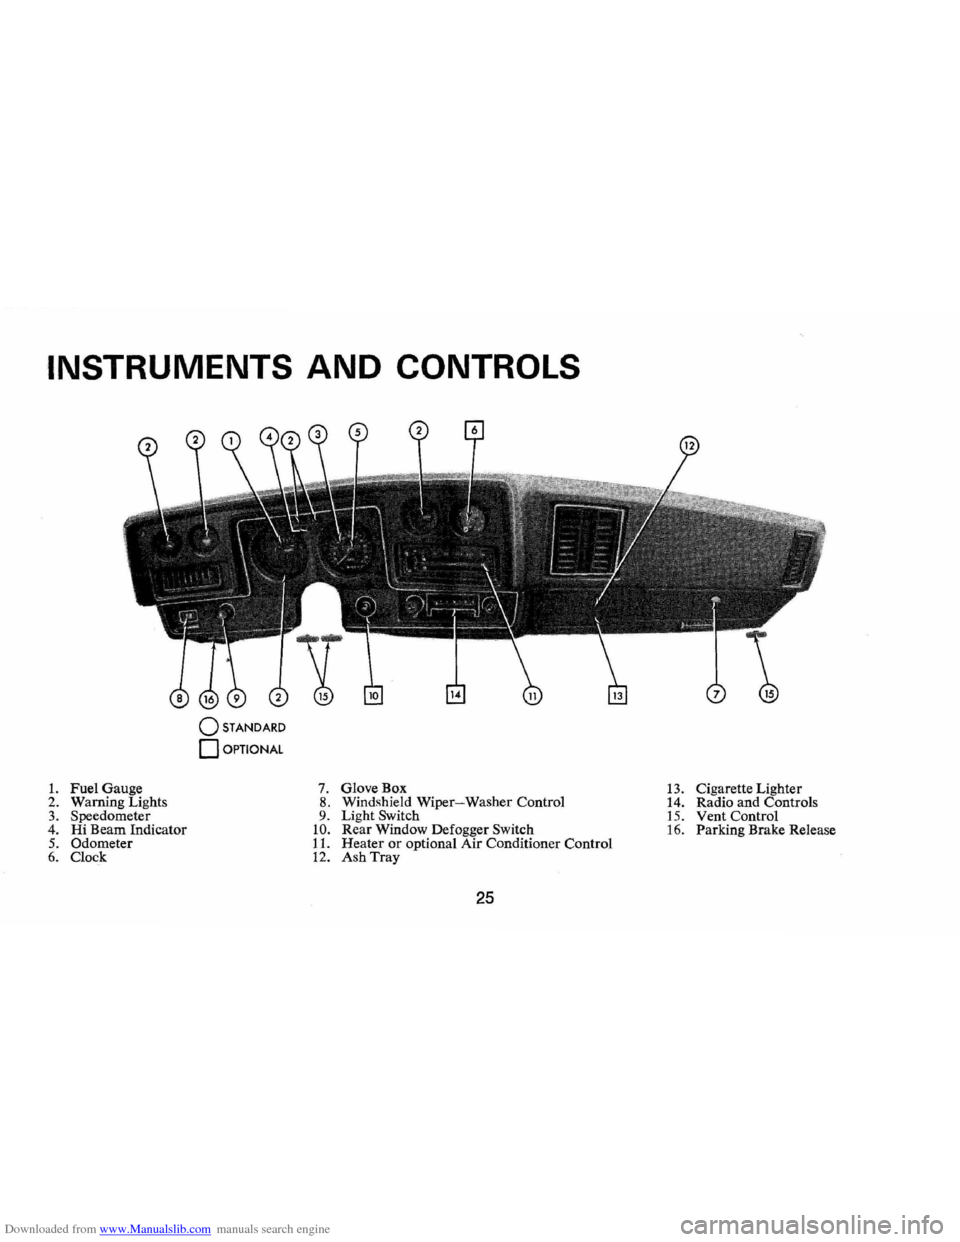
1. Fuel Gauge 7. GloveBox 13. Cigarette Lighter
2. Warn ing Lights 8. Windshield Wiper-Washer Control
14. Radio and Controls 3. Speedometer 9. Light Switch 15. Vent Control 4. Hi Beam Indicator 10. Rear Window Defogger Switch 16. Parking Brake Release 5. Odometer 11. Heater or optional Air Conditioner Control 6. Clock 12. Ash Tray
25
Page 28 of 86
Downloaded from www.Manualslib.com manuals search engine Instruments
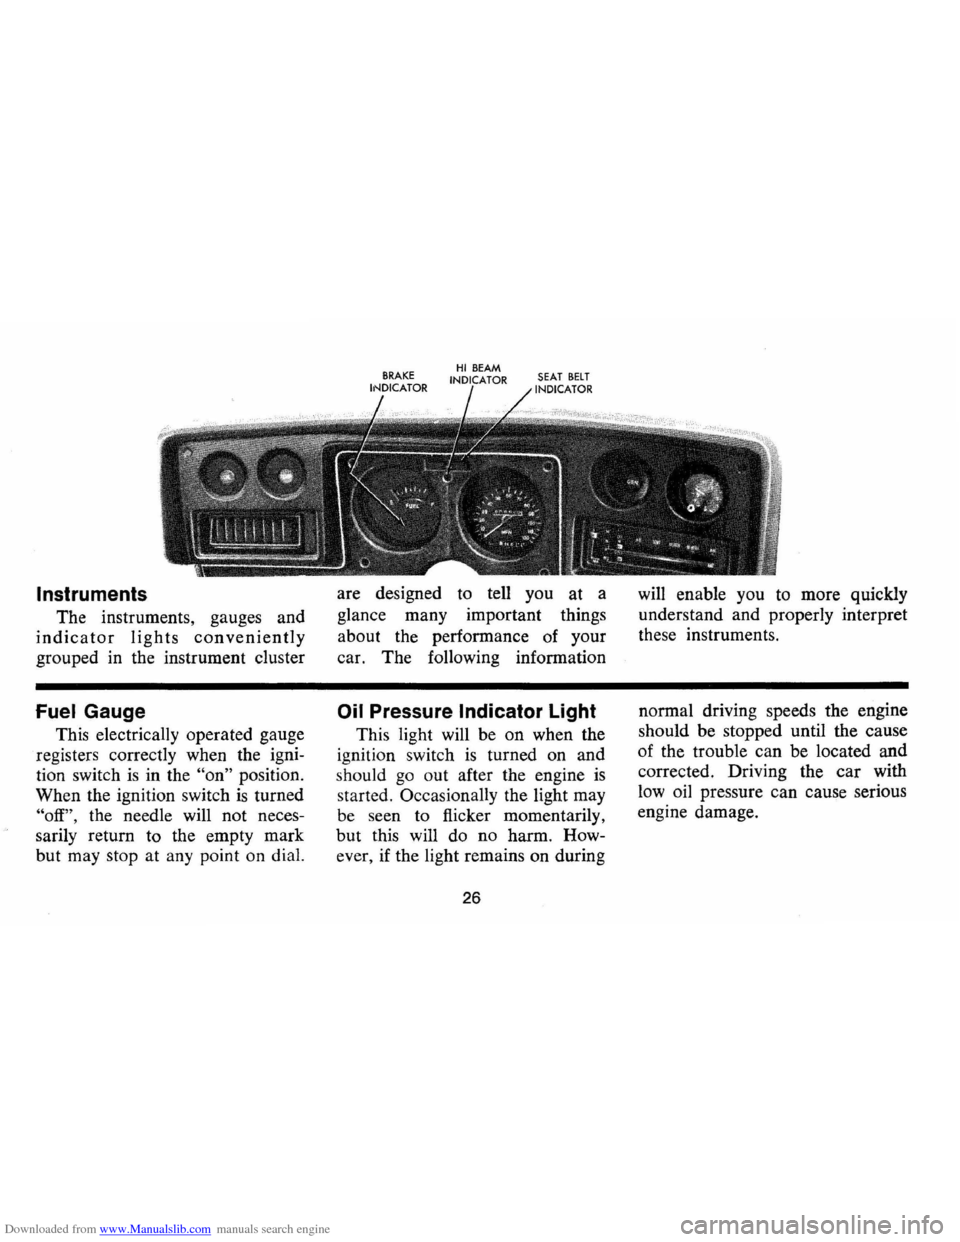
The instruments, gauges and
indicator lights conveniently
grouped in the instrument cluster
Fuel Gauge
This electrically operated gauge
registers correctly when the igni
tion switch
is in the "on" position.
When the ignition switch
is turned
"off", the needle will not neces
sarily return to the empty mark
but may stop at any point on dial. are
designed to tell you at a
glance many important things
about the performance of your
car. The foIlowing information
Oil Pressure Indicator Light
This light will be on when the
ignition switch
is turned on and
s hould
go out after the engine is
started. OccasionaIly the light may
be seen to flicker momentarily,
but this will do no harm. How
ever , if the light remains on during
26
will enable you to more quickly
understand and properly interpret
these instruments .
normal driving speeds the engine
should be stopped until the cause
of the trouble ca n be located and
corrected. Driving the
car with
low oil pressure can cause serious
engine damage.
Page 30 of 86
Downloaded from www.Manualslib.com manuals search engine • Stopping distances may be
greater.
• Greater pedal effort may be
required .
• Pedal travel may be greater.
3.
Tryout braking operation by
starting and stopping on road
shoulder -then:
• If you judge such operation
to be safe , proceed cautious
ly
at a s afe speed to nearest
dealer for repair.
• Or have car towed to dealer
for repair.
Continued operation of the car
in this condition
is dangerous.
Headlight Beam Indicator
Light
The headlights of your car have
high and low beams to provide
ybu
with proper night-time visibility
for most driving conditons . The
"low" beams are used during most
city driving. The "high" beams are especially
useful when driving
on
dark roads since they provide ex
cellent long range illumination.
The headlight beam indicator will
be on whenever the high beams
or
"brights" are in use. The Headlight
Beam Switch controls the headlight
beams (see
Page 24).
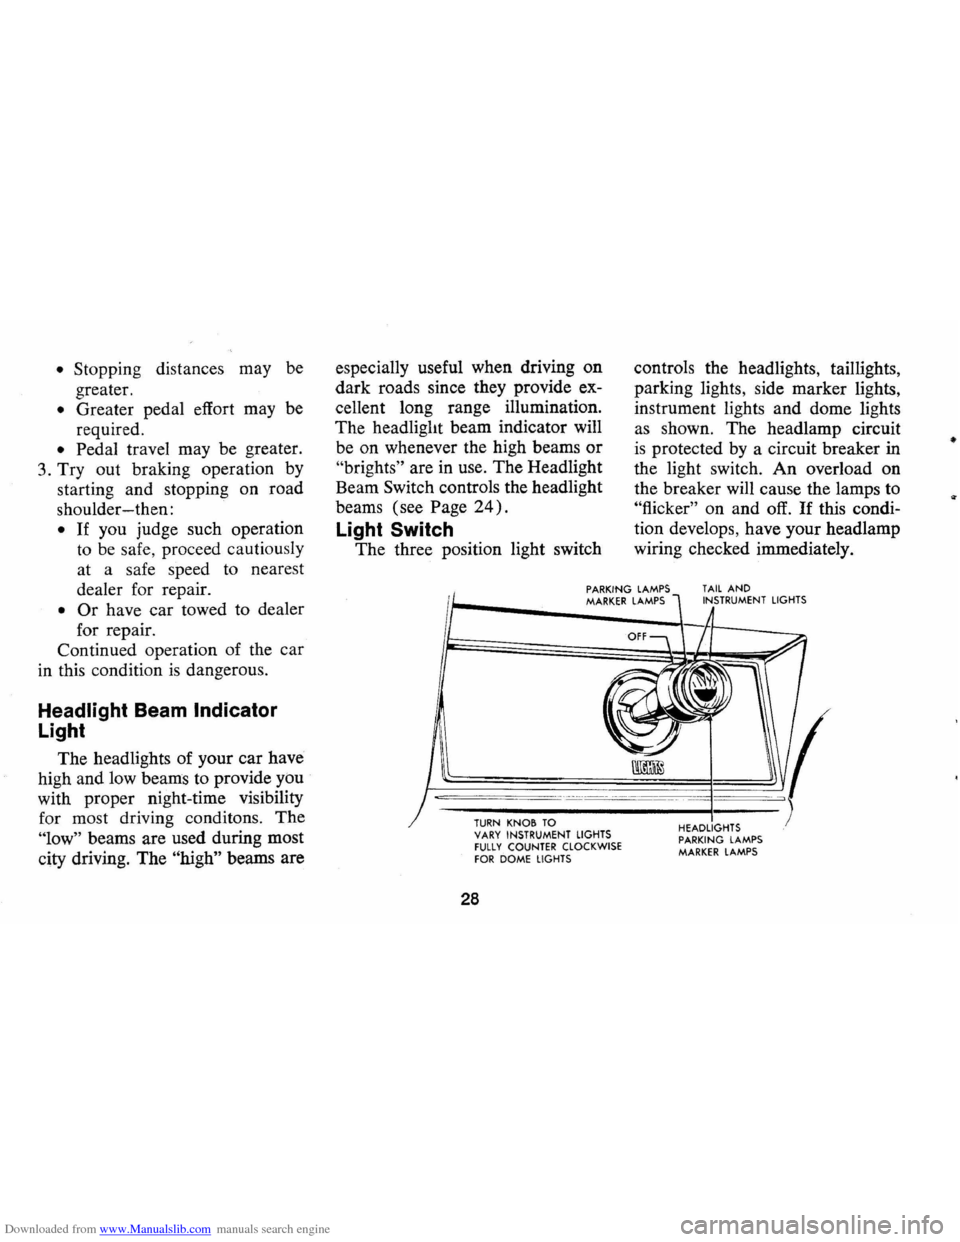
Light Switch
The three position light switch controls
the headlights, taillights,
parking lights, side marker lights,
instrument lights and dome lights
as shown. The headlamp circuit
is protected by a circuit breaker in
the light switch. An overload on
the breaker will cause the lamps to
"flicker" on and off. If this condi
tion develops, have your headlamp
wiring checked immediately.
PARKING LAMPS MARKER LAMPS TAIL AND INSTRUMENT LIGHTS
--,---.---~------ -- --------
TURN KNOB TO VARY INSTRUMENT LIGHTS fULLY COUNTER CLOCKWISE fOR DOME LIGHTS
28
HEADLIGHTS PARKING LAMPS MARKER LAMPS
•
Page 43 of 86
Downloaded from www.Manualslib.com manuals search engine I n Case of Emergency
Four Way Hazard
Warning
Flasher
• Use the warning flasher to warn
other drivers any time your
ve
hicle becomes a traffic hazard,
day
or night.
• Avoid stopping on the roadway
if possible.
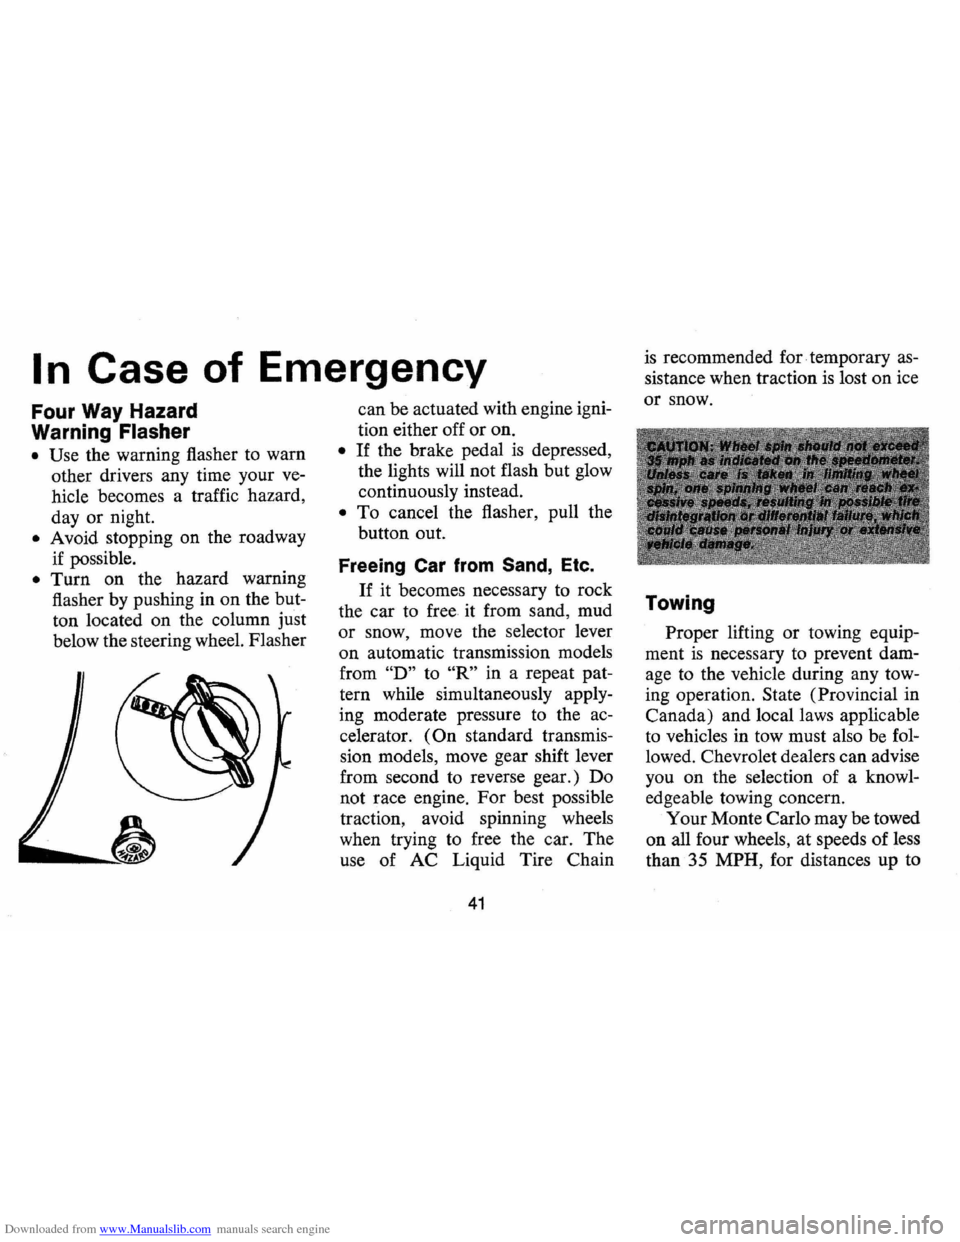
• Turn on the hazard warning
flasher by pushing in on the but
ton located on the column
just
below the steering wheel. Flasher
---~
can be actuated with engine igni
tion either off or on.
• If the brake pedal is depressed,
the lights will not flash but glow
continuously instead.
• To cancel the flasher, pull the
button out.
Freeing Car from Sand, Etc.
If it becomes necessary to rock
the car to free it from sand, mud
or snow, move the selector lever
on automatic transmission models
from
"D" to "R" in a repeat pat
tern while simultaneously apply
ing moderate pressure
to the ac
celerator.
(On standard transmis
sion models, move gear shift lever
from second to reverse gear.) Do
not race engine. For best possible
traction, avoid spinning wheels
when trying to free the car. The
use of AC Liquid Tire Chain
41
is recommended for. temporary as
sistance when traction is lost on ice
or snow.
Towing
Proper lifting or towing equip
ment
is necessary to prevent dam
age to the vehicle during any tow
ing operation.
State (Provincial in
Canada) and local laws applicable
to vehicles in tow must also be fol
lowed. Chevrolet dealers can advise
you on the selection of a knowl
edgeable towing concern.
Your Monte Carlo may be towed
on all four wheels, at speeds of less
than 35 MPH, for distances up to
Page 45 of 86

Downloaded from www.Manualslib.com manuals search engine or property damage. All General
Motors cars have negative-ground
electrical systems and can be used
to jump start one another.
If you
cannot determine how the other
vehicle
is grounded (by checking
specifications in the owner's man
ual, etc.) we recommend that you
attempt no jump starting with that
vehicle.
Jump Starting with
Auxiliary (Booster) Battery
Both booster and discharged
battery should be treated carefully
when using jumper cables. Follow
exactly the procedure outlined be
low, being careful not to cause
sparks:
1.
Set parking brake and place
automatic transmission in
"PARK" (neutral for manual
transmission).
Turn off lights,
heater and other electrical loads. 2.
Remove vent caps from both
the booster and the discharged
batteries. Lay a cloth over the
open vent wells of each battery.
These two actions help reduce
the explosion hazard always
present in either battery when
connecting
"live" booster bat
teries to
"dead" batteries.
3. Attach one end of one jumper
cable to the positive terminal of
the booster battery (identified
by a red color,
"+" or "P" on
the battery case, post or clamp)
and the other end of same cable
to positive terminal of discharged
battery. Do
NOT permit cars to
touch each other,
as this could
'establish a ground connection
and counteract the benefits of
this procedure.
4. Attach one end of the remaining
negative cable to the negative
terminal (black color,
"-" or
"N") of the booster battery, and
43
the other end to the' de1cotron
mounting bracket (see illustra
tion) of your 1973 Monte Carlo
(do not connect directly to neg
ative post of dead battery) -
taking care that clamps from
one cable do not inadvertently
touch the clamps on the other
cable. Do not lean over the
battery when making this con
nection.
Reverse this sequence exactly
when removing the jumper cables.
Re-install vent caps and throw
cloths away
as the cloths may have
corrosive acid on them.
Page 72 of 86

Downloaded from www.Manualslib.com manuals search engine as a screwdriver handle or pliers. Replace the oir cleaner and attempt to start the engine in the normal manner. (E) If the car will start but stalls when hot or has a rough idle, you can suspect a faulty IDLE ADJUSTMENT, a malfunctioning AUTOMATIC CHOKE or an extremely dirty and blocked AIR CLEANER ELEMENT. Replace paper element air cleaner if necessary. Idle adjustment or automatic choke service (other than that outlined in paragraph 0 above) should be performed by your Chevrolet
Dealer. If the above Fuel System checks and the checks suggested under
the Electrical System following do not correct the malfunction, it is recommended that you turn to your Authorized Chevrolet Dealer
for further checks, adjustments or repairs. ELECTRICAL SYSTEM If when the ignition key is turned to "Start", the engine will not turn' over, yOu have good reason to suspect electrical trouble. NOTE: Never'remove Delcotron bat lead without first disconnecting battery ground cable. IF) When there is no response at all to attempts to start the car,
check the obvious-your AUTOMATIC TRANSMISSION SELECTOR LEVER must be in Neutral or Park position (manual transmission
must have clutch depressed all the way to floor) before the engine
can be starfed. Turning the IGNITION SWITCH rapidly back and forth several times will sometimes correct a poor internal switch
contact.
(GI The BATTERY may be discharged. If so, lights will be dim and the horn will have a poor tone if it will blow at all.
Usually a garage recharge will be necessary to return the battery to operation. Occasionally, however, a long drive will recharge the battery. . , •
NOTE: If the baHery is determined to be dead, and for no apparent reason, have your :Aflthori~ed Chevrolet Dealer check the baHery, the GENERATOR and the VOLTAGE REGULATOR.
GENERATOR trouble shqiJld already have been indicated by
69
the generator indicator light on the instrument panel.
POOR BATTERY CONNECTIONS may be suspected if the car has operated properly a short time before and now not even the horn will operate. Check both ends of both battery cables. If the connections are corroded, a car may sometimes be restored to operation by removing all cable ends, scraping all contacting surfaces
clean with a pen knife, and reassembling. If the cables are broken,
they must be replaced. The power supply should now be restored unless-the battery is dead.
(HI If, however, the lights and horn work properly but the starter will still not turn over, check the STARTER connections. A "click" from the starter solenoid indicates that the wiring to the starter is properly installed. If the wiring seems to be clean and tightly installed, the trouble is probably in the starter itself and should be referred to your Authorized Chevrolet Dealer.
When the engine will "turn over" but will not start, the following
items may be checked along with the Fuel Systems Checks listed previously.
(II With a clean dry cloth wipe the ce-amic portions of the spark plugs dry. In particularly damp or rainy weather dampness may be the cause of not starting, espe
cially when the engine is cold.
(JI Check the cables at the top
of the distributor and coil as well as each spark plug cable for
tightness.
(KI If the car will still not start,
check for spark at the spark plugs in the following manner: Pull one of the spark plug
wires off its spark plug. Insert a
short piece of bare wire (such as Distributor and Coli Cables