1973 CHEVROLET MONTE CARLO ECO mode
[x] Cancel search: ECO modePage 4 of 86
Downloaded from www.Manualslib.com manuals search engine YOUR CAR'S FIRST
FEW HUNDRED MILES OF DRIVING
You can operate your new car
from its very first mile without ad
hering to a formal
"break-in" sched
ule. However, during the first
few
hundred miles of driving you can,
by observing a
few simple precau
tions, add to the future performance
and economy of your car.
It is recommended that your
speed during the first 500 miles
be confined to a maximum of
60
M.P.H., but do not drive for ex
tended periods at
anyone constant
speed, either fast
or slow. Dur
ing this period, avoid full throttle
starts and, if possible, avoid hard
stops especially during the first
200
miles of operation since brake mis-
2
use during this period will destroy
much future brake efficiency.
Always drive at moderate speed
until the engine has completely
warmed up.
If you plan to use your new car
for trailer hauling see additional
information on page 11.
Page 18 of 86
Downloaded from www.Manualslib.com manuals search engine 2. Place transmission selector
in uP" or uN" (UP" preferred).
A starter safety switch prevents
starter operation while the trans
mission selector
is in any drive
position.
(If it is necessary to
re-start the engine with the car
moving, place the selector lever
in
"N".)
3. Depress accelerator pedal and
activate starter
as outlined be
low for different conditions.
• Cold Engine -Fully de
press
accelerator pedal and
slowly release.
With foot off
the pedal, crank the engine
by turning the ignition key
to the Start position-release
when engine starts.
If engine starts, but fails to
run, repeat this procedure.
When engine is running
smoothly (approximately 30
seconds), the idle speed may
be reduced by slightly de- pressing
the accelerator pedal
and then slowly releasing.
• Warm Engine -Depress ac
celerator
pedal about halfway
and hold while cranking the
engine.
• Extremely Cold Weather
(Below 0° F.) Or After Car
Has Been Standing
Idle
Several
Oays-
Fully depress and release
accelerator pedal two or three
times before cranking the
engine.
With foot off the ac
celerator pedal,
crank the
engine by turning the key to
the Start position and release
when engine starts.
Manual Transmission Models
1. Apply parking brake and shift
16
transmission to neutral.
2.
Hold clutch pedal to floor
throughout the starting proce
dure.
A starter interlock pre
vents starter operation when
clutch
is not fully depressed.
(Select the proper gear position
before releasing the clutch pedal.)
3. Operate accelerator pedal and
starter
as outlined in step 3
(under Automatic Transmission
Models).
Engine Flooded
Depress accelerator pedal aJ;ld
hold to floor while starting until
engine
is cleared of excess fuel
and
is running smoothly. Never
"pump" the accelerator pedal.
Warm-Up
Always let the engine idle for
20 to 30 seconds after starting
and drive at moderate speeds for
several miles, especially during
cold weather.
Page 21 of 86
Downloaded from www.Manualslib.com manuals search engine Driving with Manual Transmissions
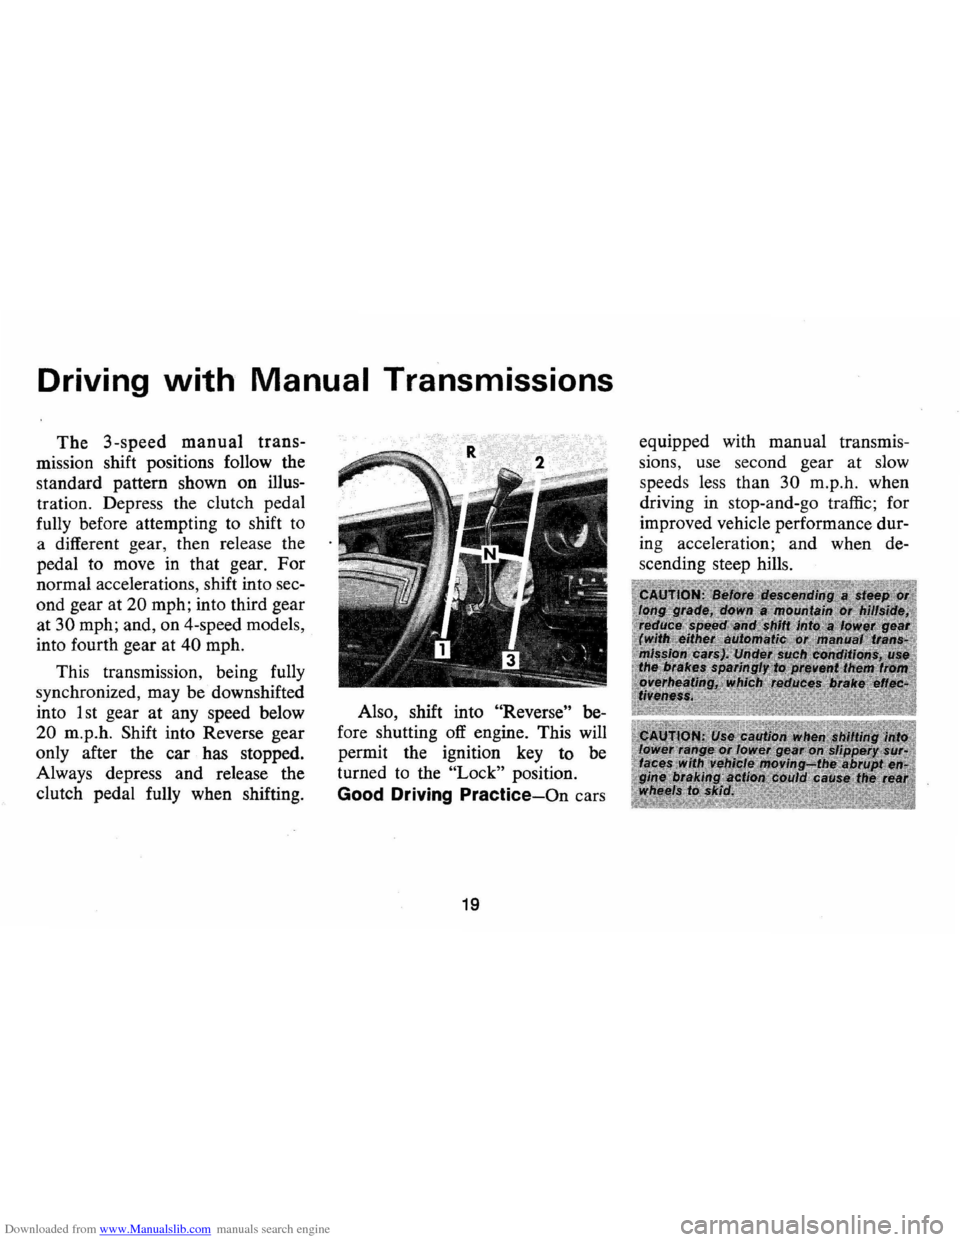
The 3-speed manual trans
mission shift positions follow the
standard pattern shown on illus
tration. Depress the clutch pedal
fully before attempting to shift
to
a different gear, then release the
pedal to move in that gear.
For
normal accelerations, shift into sec
ond gear at
20 mph; into third gear
at
30 mph; and, on 4-speed models,
into fourth gear at
40 mph.
This transmission, being fully
synchronized, may be downshifted
into 1 st gear
at any speed below
20 m.p.h. Shift into Reverse gear
only after the car has stopped.
Always depress and release the
clutch pedal fully when shifting. Also,
shift into
"Reverse" be
fore shutting
off engine. This will
permit the ignition key to be
turned to the
"Lock" position.
Good Driving Practice-On cars
19
equipped with manual transmis
sions, use second gear at slow
speed s less than
30 m.p .h. when
driving in stop-and-go traffic; for
improved vehicle performance dur
ing acceleration; and when de
s cending steep hills.
Page 38 of 86
Downloaded from www.Manualslib.com manuals search engine Temperature (Lower Lever)
The temperature lever allows a
selection of air temperature from
Cold at the far left to Hot
at the far
right. When the temperature lever
is in the COLD position the system
will provide the coldest air possible.
When the temperature lever
is
moved to the right (toward HOT) ,
the system will operate on outside
air.
Selector (Upper Lever)
This lever provides a selection of
systems available to handle various
heating and cooling requirements
throughout the year. The Selector
lever has four
(4) major opera
tional
positions-"Off," "Air Condi
tioning," "Vent" and "Heating."
The "Air Conditioning" and "Heat
ing"
groups have several positions
which improve the effectiveness of the
system for various demands.
OFF-The system operates on low
blower regardless of fan switch po
sition with air discharged into
ve
hicle through heater outlet.
A/C-Air from the passenger com
partment
is recirculated through
the system with some outside air
and discharged from the upper out
lets when the temperature lever
is
in Full COLD or extreme left. If
the Temperature lever is moved
right to the first stop or further, the
system will automatically go on
outside air. The
AIC position, with
Temp. lever in Full
COLD, is used
when maximum cooling
is required
under conditions of high tempera
ture and humidity. High fan speed
is automatically attained in this
position .
36
A/C (with Temp lever right to first
stop) -Outside air
is passed
through the system and discharged
through the upper outlets. This po
sition
is recommended for most air
conditioning situations because of
reduced blower noise and reduction
of cigarette smdke within the
ve
hicle. Fan speed may be varied as
required.
VENT -Outside air is passed
through the system and discharged
from the upper and lower outlets.
This position
is provided for cool
to moderate weather when refrig
eration
is not required.
HEATER-Outside air
is delivered
through the heater outlet and with
some air through the defroster out
lets. Temperature may be adjusted
as required. This position is recom-
Page 43 of 86
Downloaded from www.Manualslib.com manuals search engine I n Case of Emergency
Four Way Hazard
Warning
Flasher
• Use the warning flasher to warn
other drivers any time your
ve
hicle becomes a traffic hazard,
day
or night.
• Avoid stopping on the roadway
if possible.
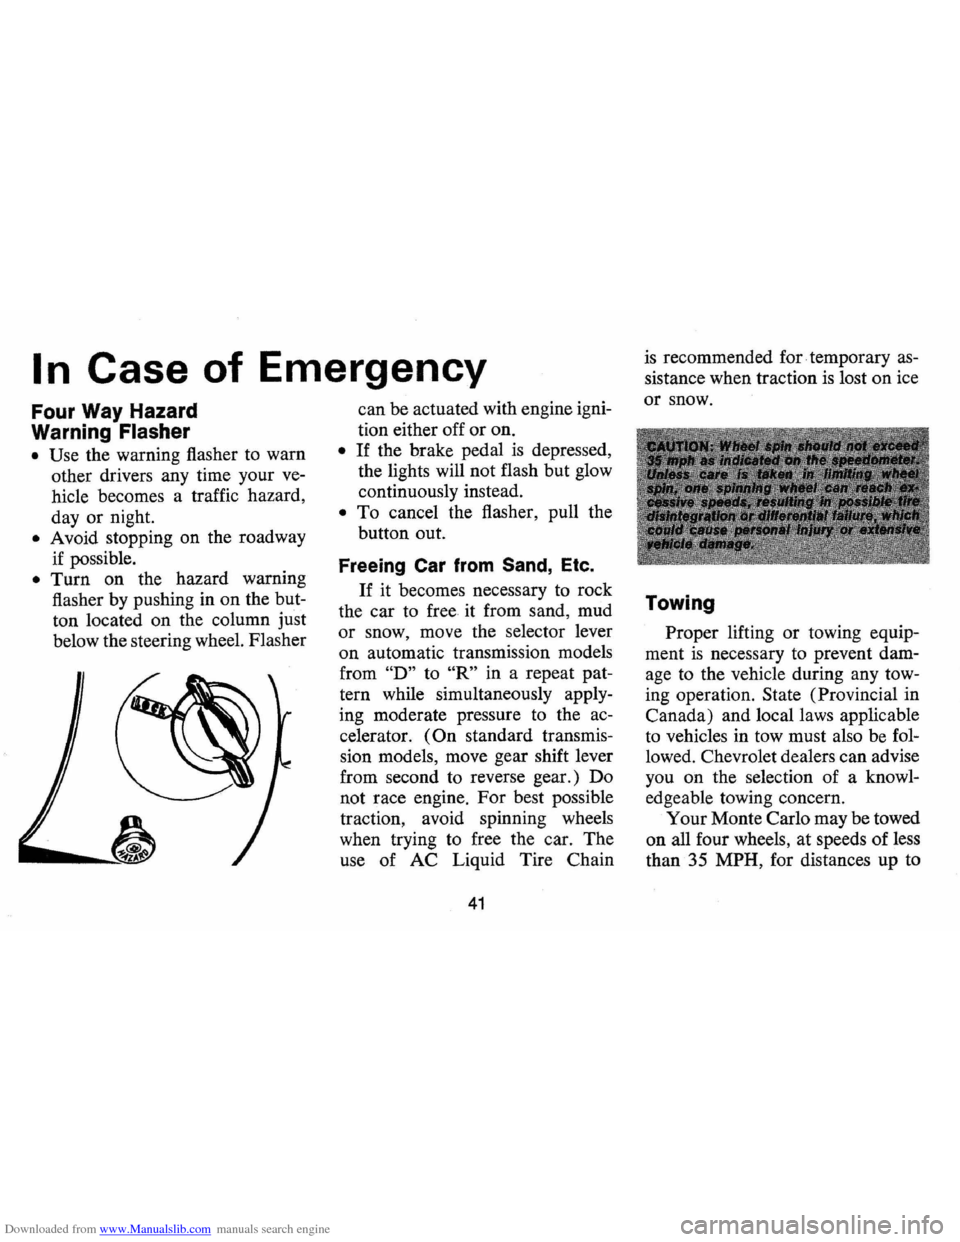
• Turn on the hazard warning
flasher by pushing in on the but
ton located on the column
just
below the steering wheel. Flasher
---~
can be actuated with engine igni
tion either off or on.
• If the brake pedal is depressed,
the lights will not flash but glow
continuously instead.
• To cancel the flasher, pull the
button out.
Freeing Car from Sand, Etc.
If it becomes necessary to rock
the car to free it from sand, mud
or snow, move the selector lever
on automatic transmission models
from
"D" to "R" in a repeat pat
tern while simultaneously apply
ing moderate pressure
to the ac
celerator.
(On standard transmis
sion models, move gear shift lever
from second to reverse gear.) Do
not race engine. For best possible
traction, avoid spinning wheels
when trying to free the car. The
use of AC Liquid Tire Chain
41
is recommended for. temporary as
sistance when traction is lost on ice
or snow.
Towing
Proper lifting or towing equip
ment
is necessary to prevent dam
age to the vehicle during any tow
ing operation.
State (Provincial in
Canada) and local laws applicable
to vehicles in tow must also be fol
lowed. Chevrolet dealers can advise
you on the selection of a knowl
edgeable towing concern.
Your Monte Carlo may be towed
on all four wheels, at speeds of less
than 35 MPH, for distances up to
Page 55 of 86
Downloaded from www.Manualslib.com manuals search engine drain back in the crankcase. To
check the level, remove the oil
gauge rod (dip stick), wipe
it
clean and reinsert it firmly for an
accurate reading. The oil gauge
rod is marked "FULL" and
"ADD." The oil level should be
maintained in the safety margin,
neither going above the
"FULL"
line nor below the "ADD" line.
Reseat the gauge firmly after tak
ing the reading.
Supplemental Engine Oil
Additives
The regular use of supplemental
additives
is specifically not recom
mended and will increase operat
ing costs. However, supplemental
additives are available that can
effectively and economically solve
certain specific problems without
causing other difficulties. For
example, if higher detergency is
required to reduce varnish and
sludge deposits resulting from some unusual
operational difficulty, a
thoroughly tested and approved
additive
- "Super Engine Oil Sup
plement " -
is available at your
Chevrolet dealer.
In the event of
an operational problem, consult
your dealer for advice before using
supplemental additives.
Drive Belts
Every 6,000 miles or 4 months
-inspect drive belts for wear,
fraying, cracking, and tension.
Belts which are in poor condition
should be replaced immediately.
Check tension by applying
moderate thumb pressure midway
between pulleys.
If the center-to
center distance · between pulleys
is
13 to 16 inches, the belt should
deflect
1/2 inch. If the center-to
center distance
is 7 to 10 inches ,
the belt should deflect
~ inch.
Loose belts should be retensioned
to give the correct deflection.
It
is recommended that belts be
53
replaced every 24 months or 24,000
miles, whichever occurs first.
Flame Arrester -Every 12,000
miles-Clean the arrester (located
in the base of the air cleaner) with
kerose:le or a suitable solvent. Dry
with compressed air.
Air Cleaner
Rear
Axle
Standard-Every 4 months or
6,000 miles, whichever occurs first,
check lubricant level and add lubri
cant, if necessary, to
fill to level of
filler plug hole.
Use SAE 80 or
SAE 90 GL-5 Gear Lubricant.
(For vehicles normally operated in
Canada use
SAE 80 GL-5 Gear
Lubricant.)
Positraction -Drain and refill
after
12,000 miles. Then maintain
Page 60 of 86
Downloaded from www.Manualslib.com manuals search engine and in the radiator at least as fre
quently
as engine oil changes.
NOTE: Do not remove radiator
cap when coolant
is hot and under
pressure.
Level should be at the
"FULL
COLD"
mark on the recovery tank
and at the bottom of the radiator
filler neck when the system
is cold.
During normal warm weather op
eration the coolant should be at
the
"FULL HOT" mark on the re
covery tank.
If the recovery tank is
empty or coolant is below the
"FULL COLD" mark the radiator
level should be checked and cool
ant added to the radiator and re
covery tank
as needed. Use a 50/50
mixture of high-quality ethylene gly
col antifreeze and water for coolant
additions.
If regular additions are
required see your dealer for a cool
ing system check.
NOTE: If recommended quaIily
antifreeze is used, supplemental in
hibitors or additives claiming to
provide increased capability are
not necessary. They may be detri
mental
to the efficient operation of
the system, and represent an un
necessary operating expense.
Every year, the cooling system
should be serviced
as follows:
1 . Wash radiator cap and filler
neck with clean water.
2. Check coolant for proper
level and freeze protection.
3. Pressure test system and radi
ator cap for proper pressure
holding capacity (15 psi).
If
replacement of cap is re
quired, use the special AC
cap designed for coolant re
covery systems, specified for
your car model.
4. Tighten hose clamps and in
spect all hoses. Replace hoses
58
whenever swollen, checked or
otherwise deteriorated.
5. Clean frontal area of radiator
core and air conditioning
condenser.
Every two years or
24,000 miles,
whichever first occurs, the cooling
system should be flushed and re
filled using the following recom
mended procedure:
1. Run engine, with radiator cap
removed, until normal operat
ing temperature
is reached
and upper radiator hose
is hot
(indicates thermostat
is open.)
2. Stop engine and open radiator
drain valve to drain coolant.
(To speed this operation, the
drain plugs in the block can
also be removed.)