1973 CHEVROLET CAMARO window
[x] Cancel search: windowPage 6 of 84
Downloaded from www.Manualslib.com manuals search engine BEFORE DRIVING YOUR CAMAR 0
DRIVER CHECKLIST
Before Entering Car
1. See that windows, mirrors and
lights are clean.
2. Visually note inflation condition
of tires.
3. Check that area to rear is clear
if about to back up.
Before Driving Off
1. Lock all doors.
2. Position seat.
3 . Adjust inside and outside mirrors.
4. Fasten seat belts.
5. Check that warning bulbs light
when key
is turned to start
position.
6. Release parking brake (and
see
that brake warning light turns
off) .
7. Be sure you understand your car
and how to operate it safely.
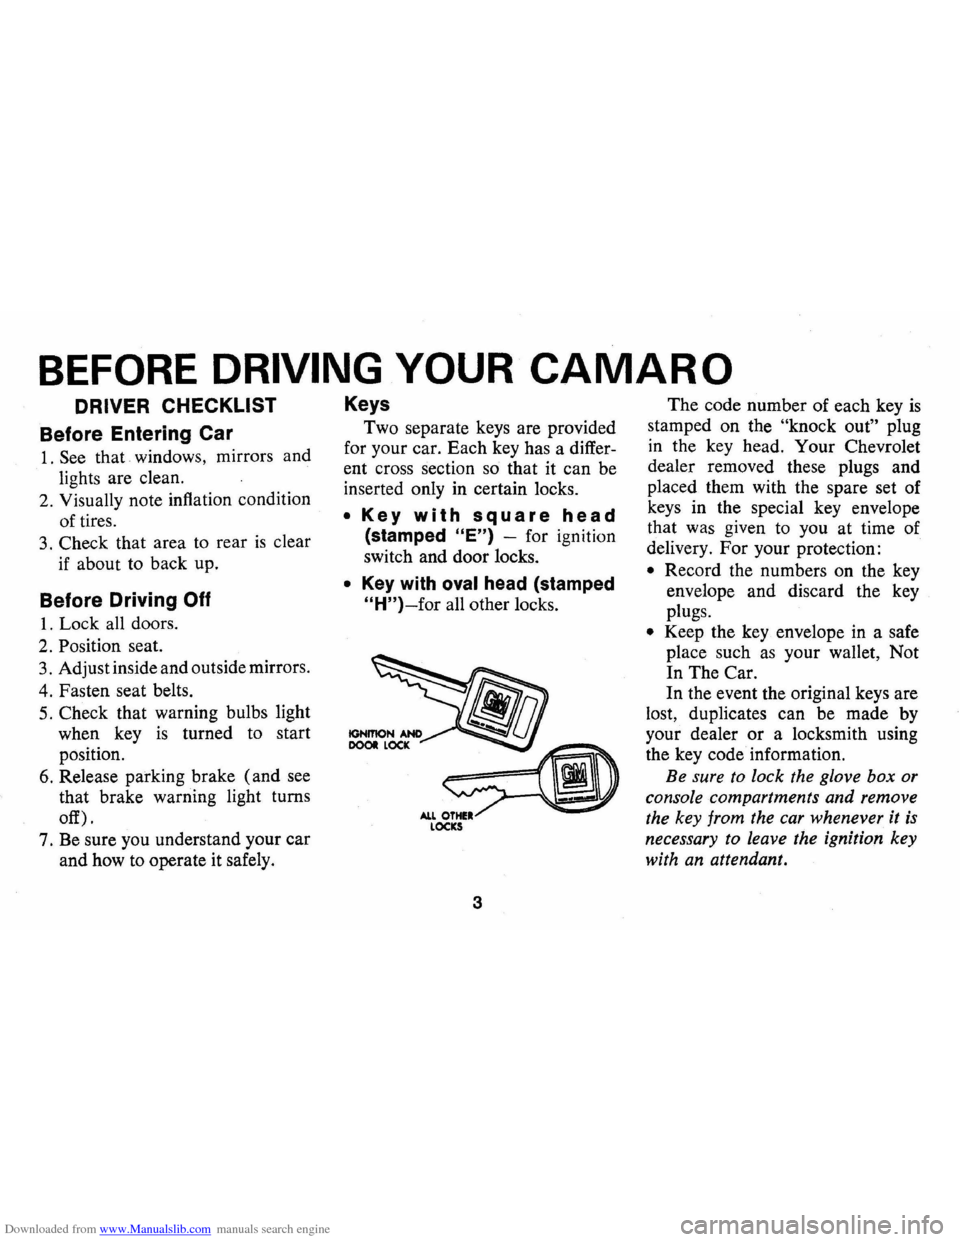
Keys
Two separate keys are provided
for your car. Each key has a differ
ent cross section
so that it can be
inserted only in certain locks.
• Key with square head
(stamped "E") -for ignition
switch and door locks.
• Key with oval head (stamped
"H")-for all other locks.
3
The code number of each key is
stamped on the "knock out" plug
in the key head. Your Chevrolet
dealer removed these plugs and
placed them with the spare set of
keys in the special key envelope
that was given to you at time of
delivery. For your protection:
• Record the numbers on the key
envelope and discard the key
plugs.
• Keep the key envelope in a safe
place such
as your wallet, Not
In The Car.
In the event the original keys are
lost, duplicates can be made by
your dealer
or a locksmith using
the key code information.
Be sure
to lock the glove box or
console compartments and remove
the key from the car whenever it
is
necessary to leave the ignition key
with an attendant.
Page 9 of 84
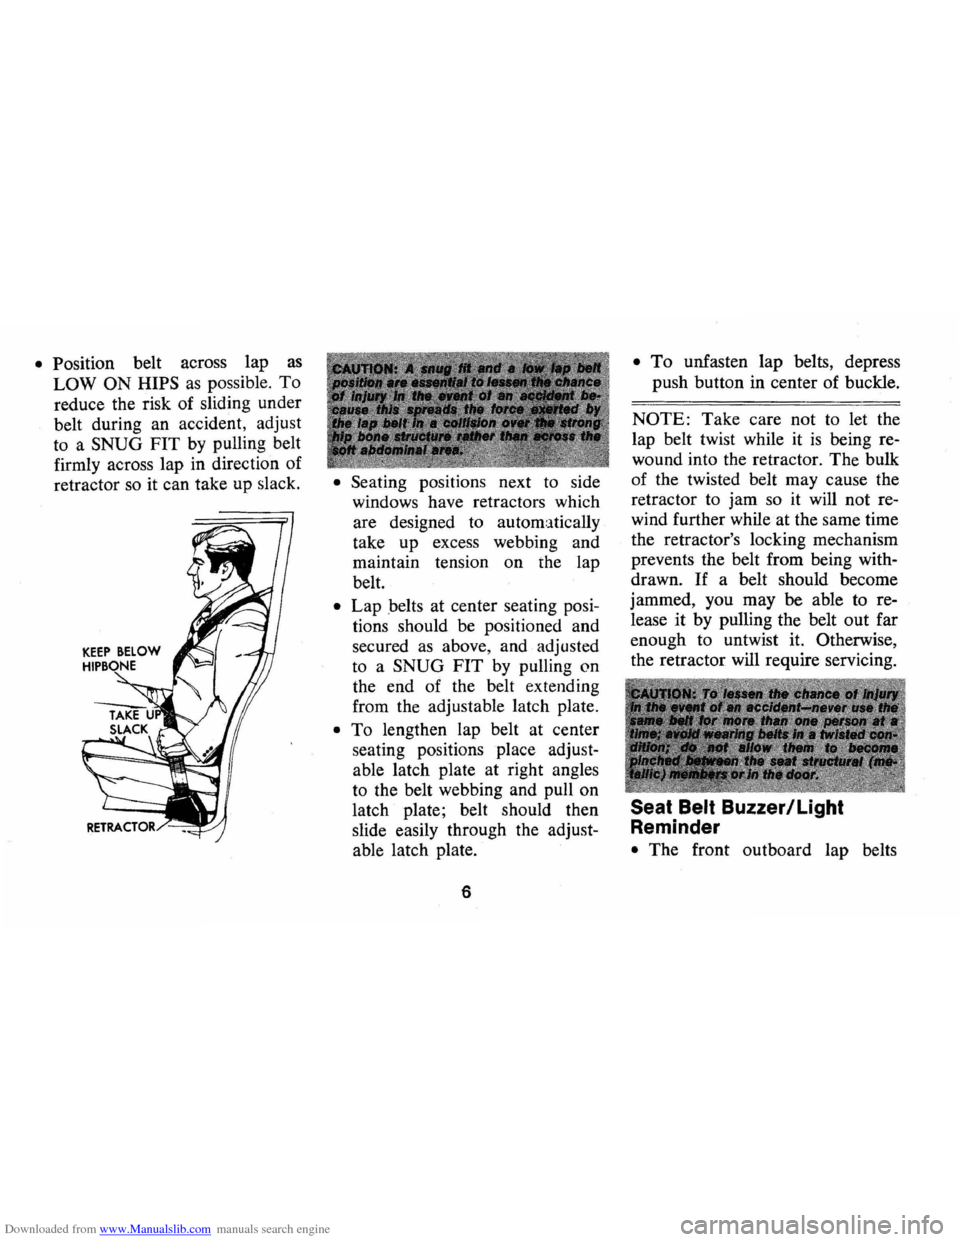
Downloaded from www.Manualslib.com manuals search engine • Position belt across lap as
LOW ON HIPS as possible. To
reduce the risk of sliding under
belt during an accident, adjust
to a
SNUG FIT by pulling belt
firmly across lap in direction
of
retractor so it can take up slack. • Seating posItIOns next to side
windows have retractors which
are designed to automatically
take up excess webbing and
maintain tension on the lap
belt.
• Lap belts at center seating posi
tions should be positioned and
secured as above, and adjusted
to a
SNUG FIT by pulling on
the end of the belt extending
from the adjustable latch plate.
• To lengthen lap belt at center
seating positions place adjust
able latch plate at right angles
to the belt webbing and pull on
latch plate; belt should then
slide easily through the adjust
able latch plate.
6
• To unfasten lap belts, depress
push button
in center of buckle.
NOTE: Take care not to let the
lap belt twist while it
is being re
wound into the retractor.
The bulk
of the twisted belt may cause the
retractor to jam so it will not re
wind further while at the same time
the retractor's locking mechanism
prevents the belt from being with
drawn.
If a belt should become
jammed, you may be able to re
lease
it by pulling the belt out far
enough to untwist it. Otherwise,
the retractor will require servicing.
Seat Belt Buzzer/Light
Reminder
• The front outboard lap belts
Page 10 of 84
Downloaded from www.Manualslib.com manuals search engine (those next to side windows)
are linked to a buzzer and light
which remind occupants to fas
ten seat belts.
• On cars with automatic trans
missions, or manual transmis
sions with steering column
mounted shift levers, the buzzer
and light are designed to come
on when the ignition switch
is
on, the transmission selector is
in a forward drive position, and
the driver's or right front pas
senger's lap belt
is not fastened.
• On manual transmission cars
with floor mounted shift con
trols the reminders are designed
to come on when the ignition
switch
is on, the driver's or
right front passenger's lap belt
is not fastened and the transmis
sion
is in any gear position, ex
cept that they do not come
on
when the parking brake is en
gaged.
NOTE: The right front seat con
tains a weight detector which
is
designed to activate the buzzer
and light whenever
a. nominal
weight
is placed on the seat. The
weight detector cannot distinguish
between a passenger and any item
of luggage or cargo, therefore such
items should be placed elsewhere
in the car, preferably
in the trunk.
If seat belt system or reminder
system does not work
as described,
see your dealer for information
and assistance.
Shoulder Belts
• When properly worn with a lap
belt, a shoulder belt can provide
important additional protection
against impact with the car in
terior by restraining forward
motion of the upper torso in a
collision. This
is particularly
true in the case of a frontal im
pact, which
is the most frequent
7 type
of accident.
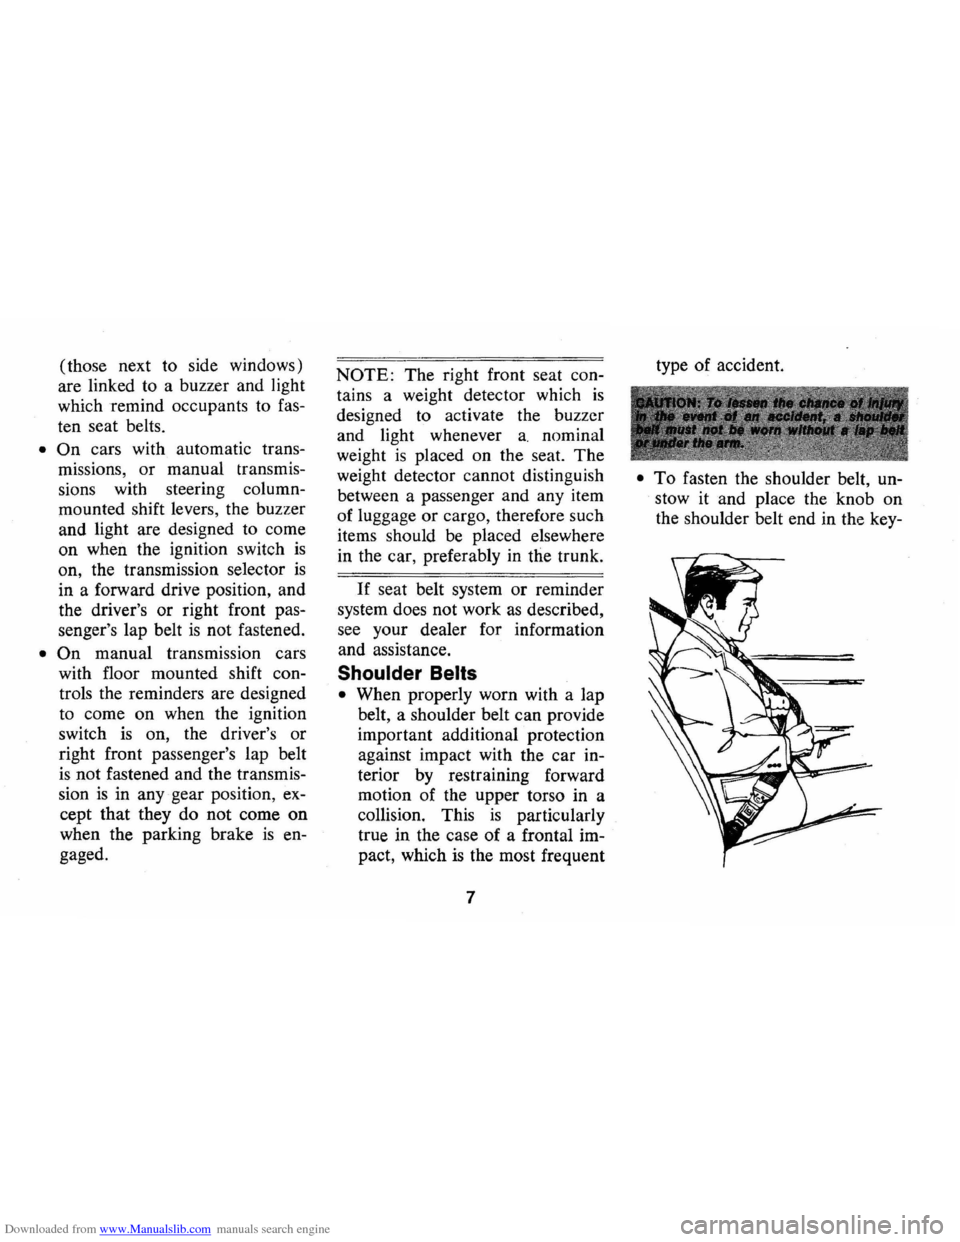
• To fasten the shoulder belt, un
stow it and place the knob on
the shoulder belt end in the key-
Page 12 of 84
Downloaded from www.Manualslib.com manuals search engine • Keep sharp edges and damaging
objects away from belts.
• Replace belts if cut, weakened,
frayed, or subjected to collision
loads.
• Check that anchor mounting
bolts are tight.
• Have questionable parts re
placed.
• Keep seat belts clean and dry.
• Clean only with mild soap solu
tion and lukewarm water.
• Do not bleach or dye belts since
this may severely weaken belts.
Child Restraint
Children in automobiles · should
be restrained to lessen the risk of
injury in accidents, sudden stops
or other hazardous situations.
General Motors dealers offer re
straint systems designed specific
ally for use with infants. In using
any infant or child restraint
sys
tem, read and comply with all in- stallation
and usage instructions.
All unused seat belts near the
child should be stowed properly to
help prevent them from striking
him in the event of an accident.
Lap belts and shoulder belts with
out storage provisions should have
buckles latched and belts adjusted
to remove slack.
Cars Not Equipped With
Special Child Restraints
If a child is traveling in a vehi
cle not equipped with a General
Motors
inf~mt restraint or other
safe infant or child restraint
sys
tem, . the following precautions
should be taken:
1. Infants unable to sit up by
themselves should be restrained
by placing them in a covered,
padded bassinet which
is placed
crossways in the vehicle (width
wise) on the rear seat. The bas
sinet should be securely re
strained with the regular vehi-
9
cle seat belts. An alternate me
thod
is to position the bassinet
so that it rests against the back
of the front seat, again cross
ways in the vehicle.
2. Children able to sit up by them
selves should be placed on a
seat and lap belted, preferably
in the rear seat. Never allow a
child to stand or kneel on any
seat.
If the child cannot see out
the car windows he should sit
on a firm cushion with the reg
ular lap belt restraining him at
the hips. The cushion should be
as firm as practical and just
high enough to enable the child
to look horizontally out of the
car windows. The use of the
cushion should be discontinued
as soon as the child is old
enough to see out of the car
windows without it.
3. General Motors recommends
that children be restrained
Page 15 of 84
Downloaded from www.Manualslib.com manuals search engine STARTING AND OPERATING
Engine Exhaust Gas Caution (Carbon Monoxide)
Avoid inhaling exhaust gases because
they contain carbon monoxide, which by
itsel# is colorless and odorless. Carbon
monoxide
Is a dangerous gas that can
cause unconsciousness and is potentially
lethal.
1# at any time you suspect that exhaust
fumes
are entering the passenger com
partment, have the cause determined and
corrected
as soon as possible. 1# you
must drive under these conditions, drive
only with
all windows fully open.
The best protection against carbon
monoxide entry Into the
car body Is a
properly maintained engine exhaust sys
tem, car body and body ventilation system.
It is recommended that the exhaust sys
tem and body Is Inspected by a competent
mechanic:
• Each time the vehicle Is raised for 011
change.
• Whenever a change Is noticed In the
sound
of the exhaust system.
• Whenever the exhaust system, under
body or rear of the vehicle Is damaged.
See your Maintenance Schedule folder
for Inspection procedure.
To allow proper operation of the car's
ventilation system, keep front ventilation
Inlet grille clear
of snow, leaves or other
obstruction
at all times.
SITTING
IN A PARKED CAR WITH
ENGINE RUNNING FOR AN EXTENDED
PERIOD IS NOT RECOMMENDED.
Do not run engine In confined areas such as garages any more than needed
to move vehicle in or out of area. When
vehicle Is stopped In an UNCONFINED
area with the engine running for any more
than
a short period, adjust heating or cooling system to force outside air Into
car as follows:
12
1. On cars not equipped with air condi
tioning, set fan to medium or high
speed and upper control lever to any
position except OFF.
2. On cars equipped with air conditionIng, set tan to medium or high speed
and upper control lever
to any position except OFF or MAX.
The trunk lid should be closed while
driving
to help prevent inadvertently
drawing exhaust gases into the
car. It Is
unwise to drive at high speeds tor long
durations with the trunk
lid open. How
ever, if for some reason the trunk must
remain open
tor a period while moving,
or electrical wiring or other cable con
nections to a trailer must pass through
the seal between trunk
lid and body, the
tollowing precautions should be observed:
• Close all windows.
• Adjust heating or cooling system to
force outside air into car as described
in items 1 and 2 above
but with tan set
at high speed.
• On cars equipped with outside air vents
in or under Instrument panel, open
vents tUlly.
Page 25 of 84
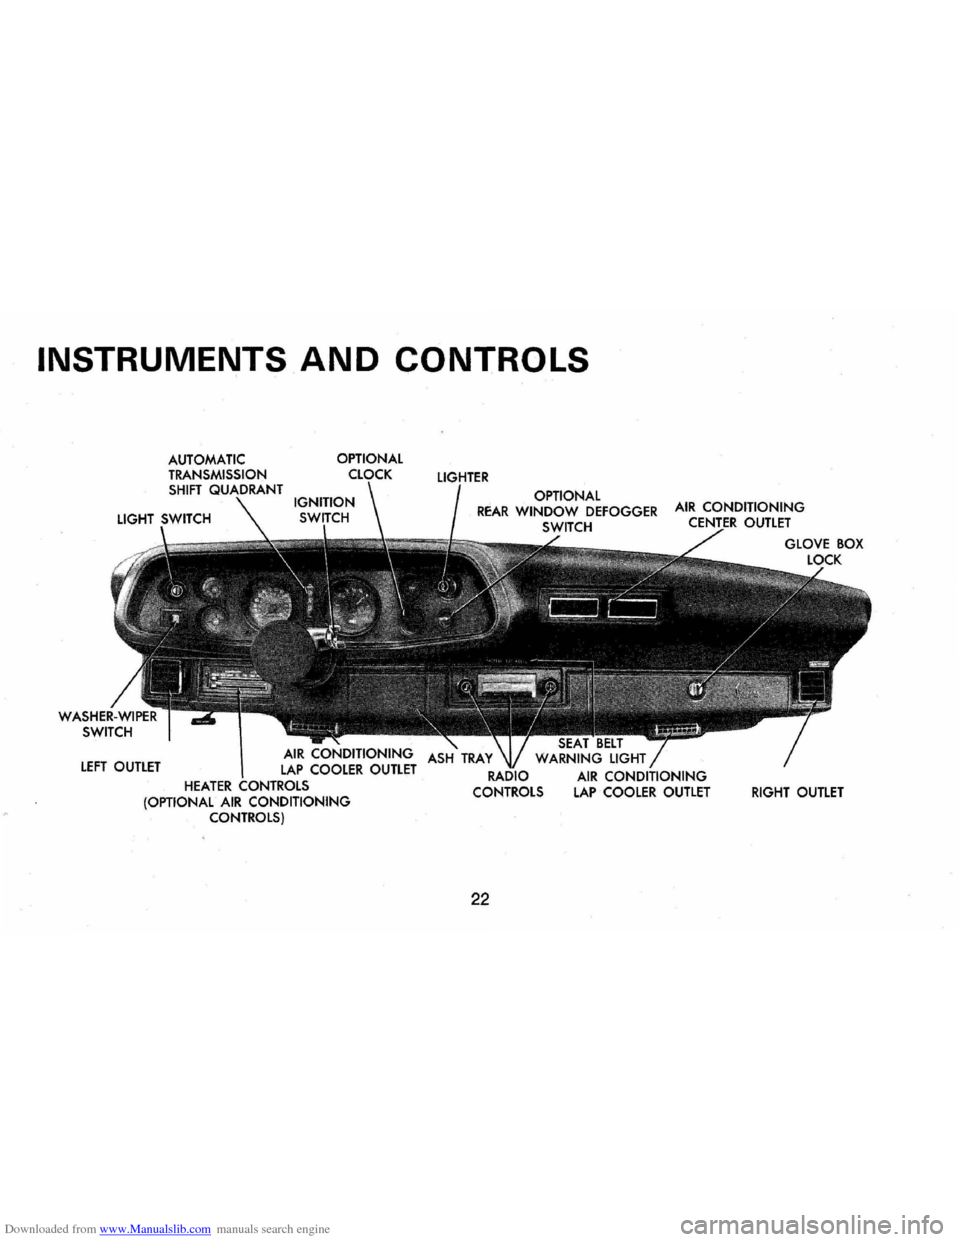
Downloaded from www.Manualslib.com manuals search engine INSTRUMENTS AND CONTROLS
OPTIONAL
LEFT OUTLET
HEATER (OPTIONAL AIR CONDITIONING CONTROLS) OPTIONAL
REAR WINDOW DEFOGGER SWITCH
22
WARNING LIGHT
AIR CONDITIONING LAP COOLER OUTLET RIGHT OUTLET
Page 31 of 84
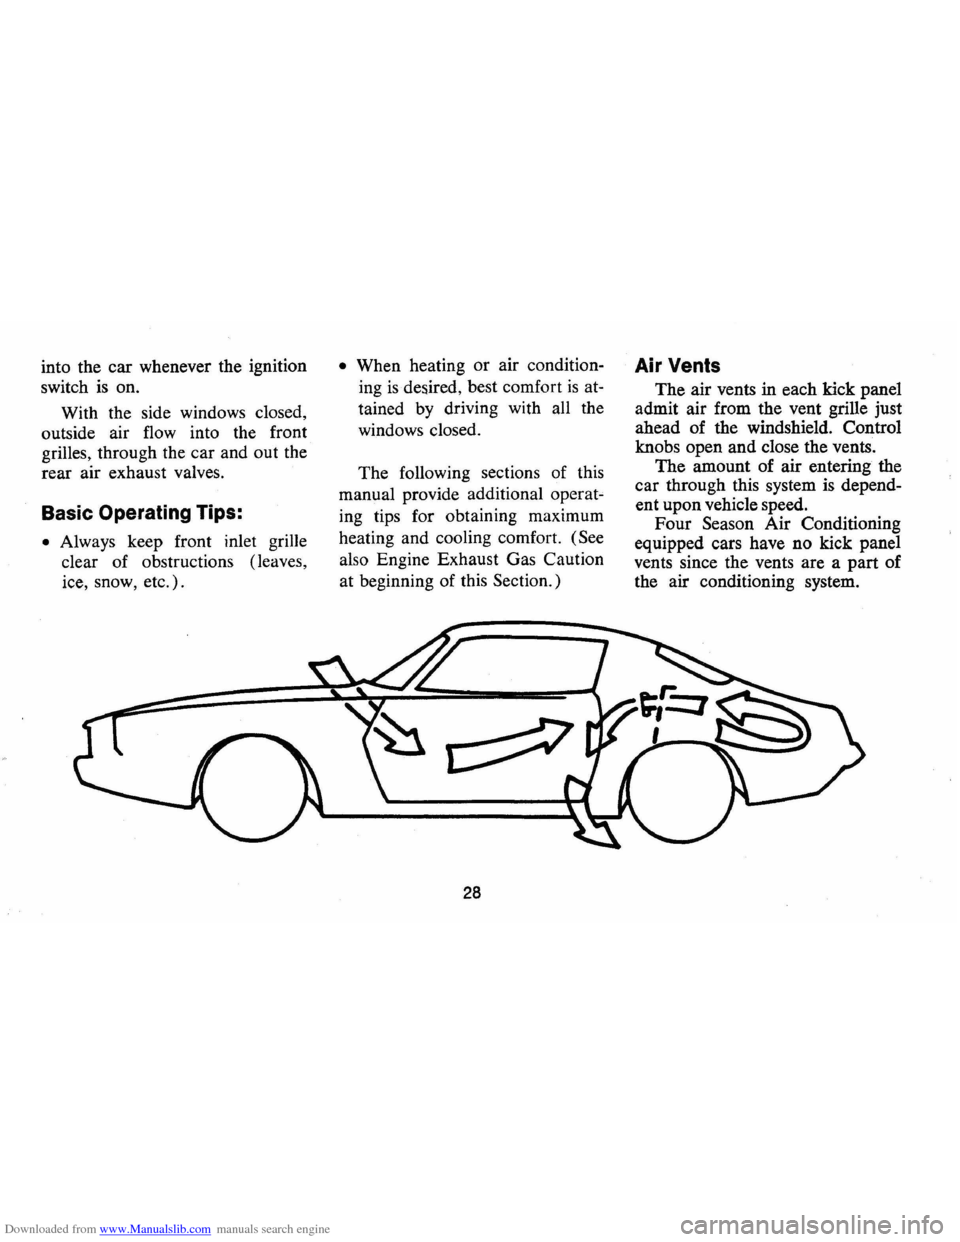
Downloaded from www.Manualslib.com manuals search engine into the car whenever the ignition
switch
is on.
With the side windows closed,
outside air flow into the front
grilles, through the car and out the
rear air exhaust valves.
Basic Operating Tips:
• Always keep front inlet grille
clear of obstructions (leaves,
ice, snow, etc.).
• When heating or air condition
ing
is desired, best comfort is at
tained by driving with all the
windows closed.
The following sections of this
manual provide additional operat
ing tips for obtaining maximum
heating and cooling comfort.
(See
also Engine Exhaust Gas Caution
at beginning of this Section.)
28
Air Vents
The air vents in each kick panel
admit air from the vent grille just
ahead of the windshield. Control
knobs open and close the vents.
The amount of air entering the
car through this system
is depend
ent upon vehicle speed.
Four Season Air Conditioning
equipped cars have no kick panel
vents since the vents are a part of
the air conditioning system.
Page 32 of 84
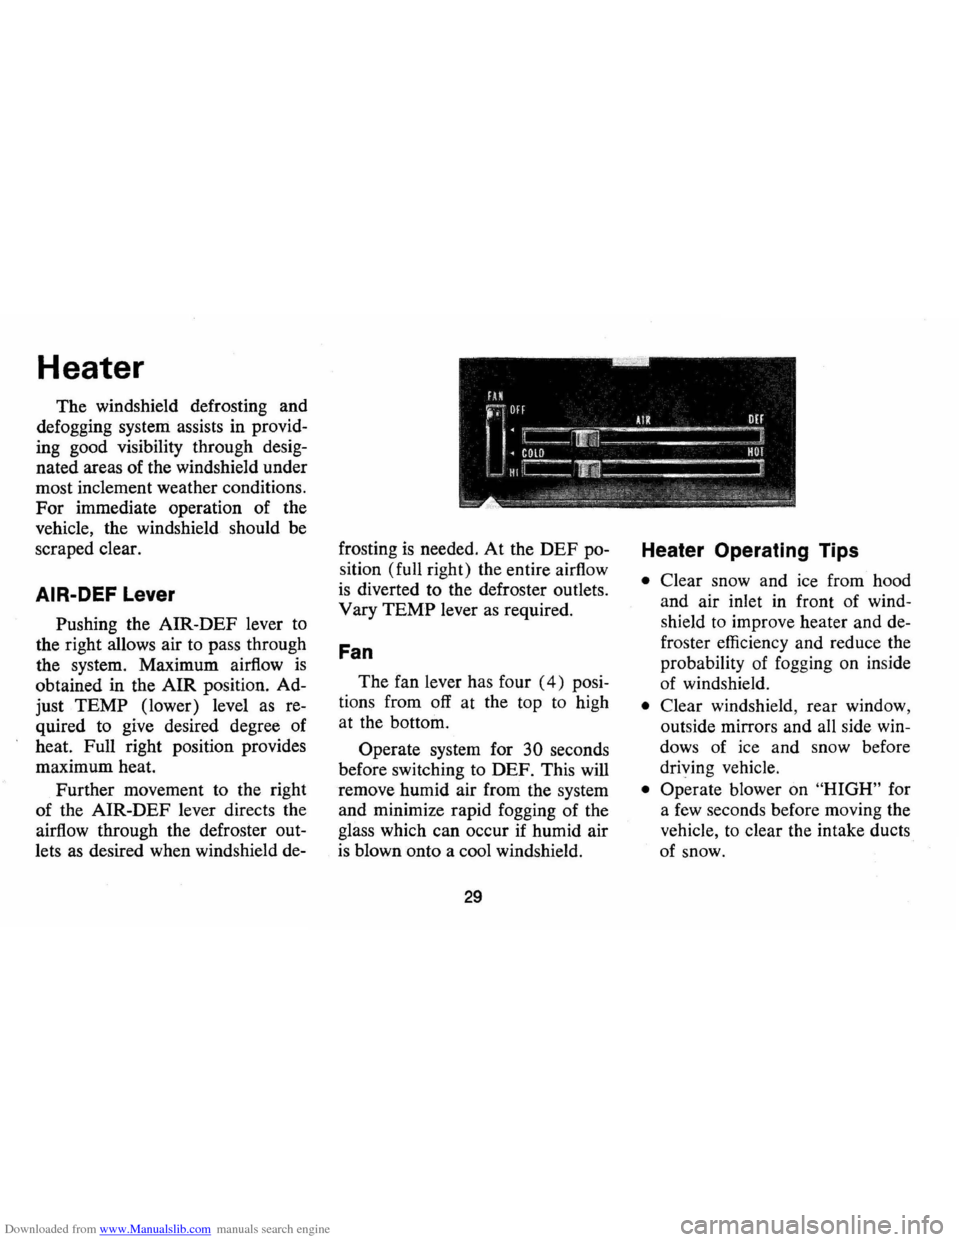
Downloaded from www.Manualslib.com manuals search engine Heater
The windshield defrosting and
defogging system assists in provid
ing good visibility through desig
nated areas of the windshield under
most inclement weather conditions.
For immediate operation of the
vehicle, the windshield should be
scraped clear.
AIR-DEF Lever
Pushing the AIR-DEF lever to
the right allows air to pass through
the system. Maximum airflow
is
obtained in the AIR position. Ad
just
TEMP (lower) level as re
quired to give desired degree of
heat. Full right position provides
maximum heat.
Further movement to the right
of the AIR-DEF lever directs the
airflow through the defroster out
lets as desired when windshield de-frosting
is needed. At the DEF po
sition (full right) the entire airflow
is diverted to the defroster outlets.
Vary
TEMP lever as required.
Fan
The fan lever has four (4) posi
tions from off at the top
to high
at the bottom.
Operate system for
30 seconds
before switching to DEF. This will
remove humid air from the system
and minimize rapid fogging of the
glass which can occur if humid air
is blown onto a cool windshield.
29
Heater Operating Tips
• Clear snow and ice from hood
and air inlet
in front of wind
shield to improve heater and de
froster efficiency and reduce the
probability of fogging on inside
of windshield.
• Clear windshield, rear window,
outside mirrors and all side win
dows of ice and snow before
driving vehicle.
• Operate blower on "HIGH" for
a
few seconds before moving the
vehicle, to clear the intake ducts
of snow.