1971 CHEVROLET CAMARO tow
[x] Cancel search: towPage 8 of 88
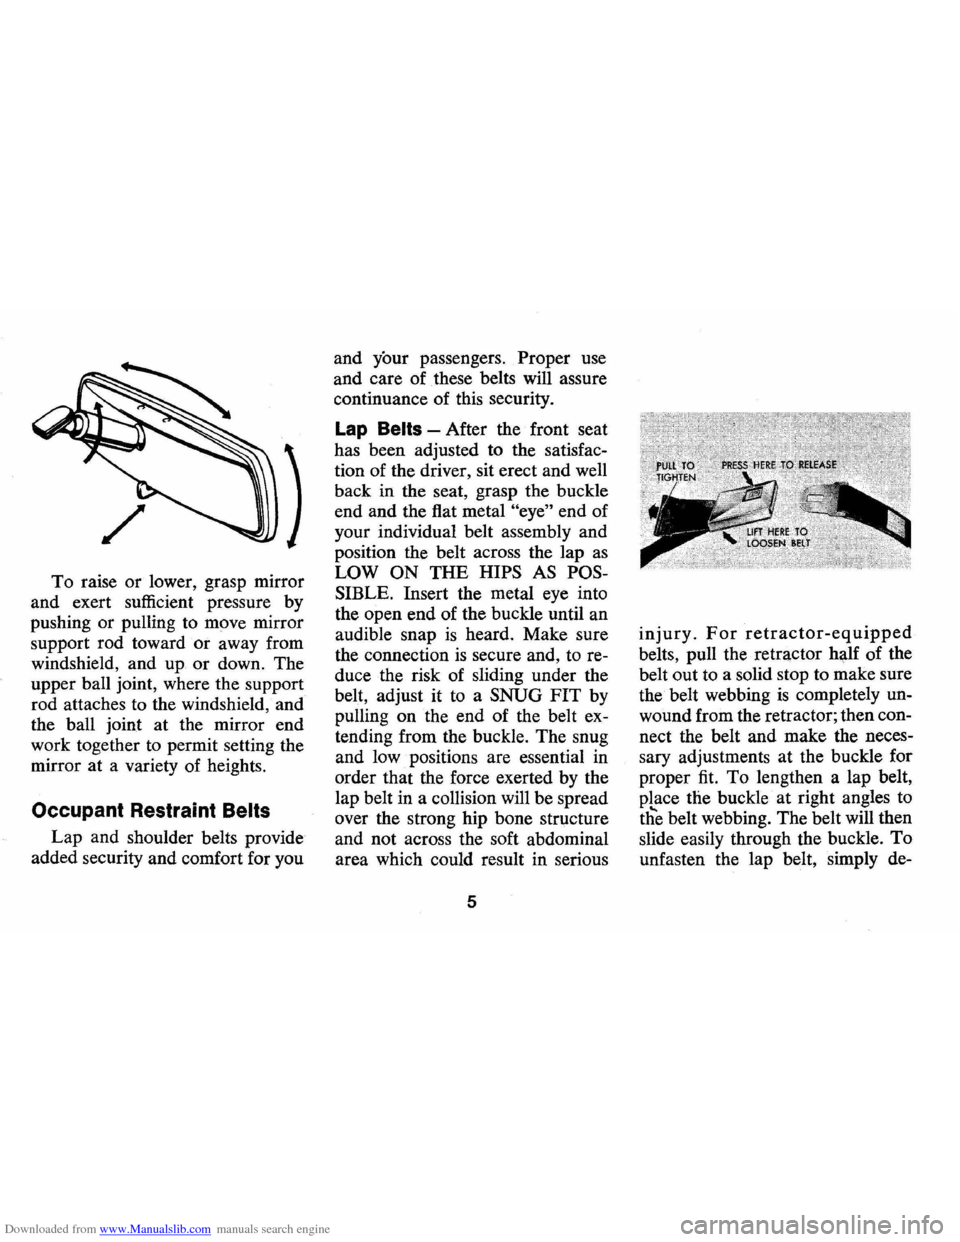
Downloaded from www.Manualslib.com manuals search engine To raise or lower, grasp mirror
and exert sufficient pressure by
pushing or pulling to move mirror
support rod toward
or away from
windshield, and up
or down. The
upper ball joint, where the support
rod attaches to the windshield, and
the ball joint at the mirror end
work together to permit setting the
mirror at a variety of heights.
Occupant Restraint Belts
Lap and shoulder belts provide
added security and comfort for you and
your passengers. Proper use
and care of these belts will assure
continuance of this security.
Lap Belts -After the front seat
has been adjusted to the satisfac
tion of the driver, sit erect and well
back in the seat, grasp the buckle
end and the flat metal
"eye" end of
your individual belt assembly and
position the belt across the lap
as
LOW ON THE HIPS AS POS
SIBLE. Insert the metal eye into
the open end of the buckle until an
audible snap
is heard. Make sure
the connection
is secure and, to re
duce the risk of sliding under the
belt, adjust it to a SNUG
FIT by
pulling on the end of the belt ex
tending from the buckle. The snug
and low positions are essential in
order that the force exerted by the
lap belt in a collision will be spread
over the strong hip bone structure
and not across the soft abdominal
area which could result in serious
5
injury. For retractor-equipped
belts, pull the retractor hl;tlf of the
belt out to a solid stop to make sure
the belt webbing
is completely un
wound from the retractor; then con
nect the belt and make the neces
sary adjustments at the buckle for
proper
fit. To lengthen a lap belt,
pLace the buckle at right angles to
the belt webbing. The belt will then
slide easily through the buckle.
To
unfasten the lap belt, simply de-
Page 11 of 88
Downloaded from www.Manualslib.com manuals search engine Child Restraint
Children in automobiles should
be restrained to lessen the risk of
injury in accidents, sudden
s~ops or
other driving conditions . General
Motors has designed an
"INFANT
SAFETY CARRIER" specifically
for infants and a
"CHILD SAFETY
SEAT"
specifically for small chil
dren which are available from your
Che~rolet dealer. The Carrier and
Child
Seat are designed to utilize
lap belts in your 1971 Camaro.
The General Motors Infant
Safety
Carrier and the Child Safety Seat
must be used only in passenger ve
hicle seats equipped with lap belts.
They
must be used only on front or
rear seats which do not fold or on
folding seats equipped with a latch
to hold the seat back upright
(Stan
dard on 1967 and later model GM
passenger vehicles) .
In using either
Carrier or Child
Seat, read and
comply with all installation and usage
instructions.
Do ?ot place
more than one child at a tIme In the
Carrier or Child
Seat. · The Carrier
is designed for use only with infants
weighing up to
20 pounds. The
Child
Seat is designed for use only
by children weighing up to 30
pounds and who are able to sit up
by themselves. All unused seat belts
near the Carrier or Child Seat
should be stowed properly to help
prevent them from striking the
child in the event of a sudden stop
or collision. Shoulder belts should
be stowed in any special storage
convenience provision provided.
Lap belts and shoulder belts
with
out storage provisions should have
buckles latched and belts adjusted
to remove slack.
Cars Not Equipped With
Special Child Restraints
If a child is traveling in a vehicle
not equipped with a General
8
Motors Infant Safety Carrier or
Child Safety Seat, the following
precautions should be taken:
1. Children should be placed in
the rear seat. Never allow a
child to stand
or kneel on any
seat.
2. Infants . unable to sit up by
themselves should be restrained
by placing them in a covered,
padded bassinet
whi~h is pl~ced
crossways in the vehlcle (wldth
wise) on the rear seat. The bas
sinet should be securely re
strained with the regular ve
hicle seat belts. An alternate
method
is to position the bas
sinet so that it rests against the
back of the front seat, again
crossways in the vehicle.
3. When a child
is old enough to
sit up by himself in a
~ar, he
should sit on a firm cushion and
use the conventional lap belt to
restrain him at the hips. The
Page 12 of 88
Downloaded from www.Manualslib.com manuals search engine cushion should be as firm as
practical and just high enough
to enable the child to look
hori
zontally out of the car windows.
4. The use of the cushion should
be discontinued
as soon as the
child
is old enough to see out of
the car windows without it.
Trailer Hauling
Since passenger cars are designed
and intended to
be used primarily
as passenger conveyances, towing
a trailer will affect handling,
dura
bility and economy. Maximum
safety and· satisfaction depends
upon proper use of correct equip
ment and avoiding overloads and
other abusive operation .
The maximum loaded trailer
weight which you can pull with 5
. Do not
use shoulder belts on
children shorter than approxi
mately 4 feet 7 inches
in height.
6. General Motors recommends
that children be restrained when
riding. However, if conditions
require that a child must stand,
he should stand on the floor di-
your Camaro depends on what
special equipment has been in
stalled on your car. We do not rec
ommend pulling any trailer unless
the car
is properly equipped. In
formation on trailer hauling capa
bilities, special equipment required,
and optional equipment offered by
Chevrolet
is available from your
Chevrolet Dealer or by writing
Chevrolet Motor Division, Detroit,
9
rectly behind the front seat.
This
will minimize the possi
bility of his being thrown from
the rear
compartment during a.
sudden stop. This method
should be used only if more
complete restraint cannot be
used.
Michigan 48202.
Usage of bumper hitches
is not
recommended; however, rental
in
stallations may be made if in accord
with proper installation and usage
instructions of a reputable trailer
rental agency. Axle mounted
hitches should not be used.
To assist in attaining good
han
dling of the car-trailer combina
tion, it
is important that the trailer
Page 13 of 88
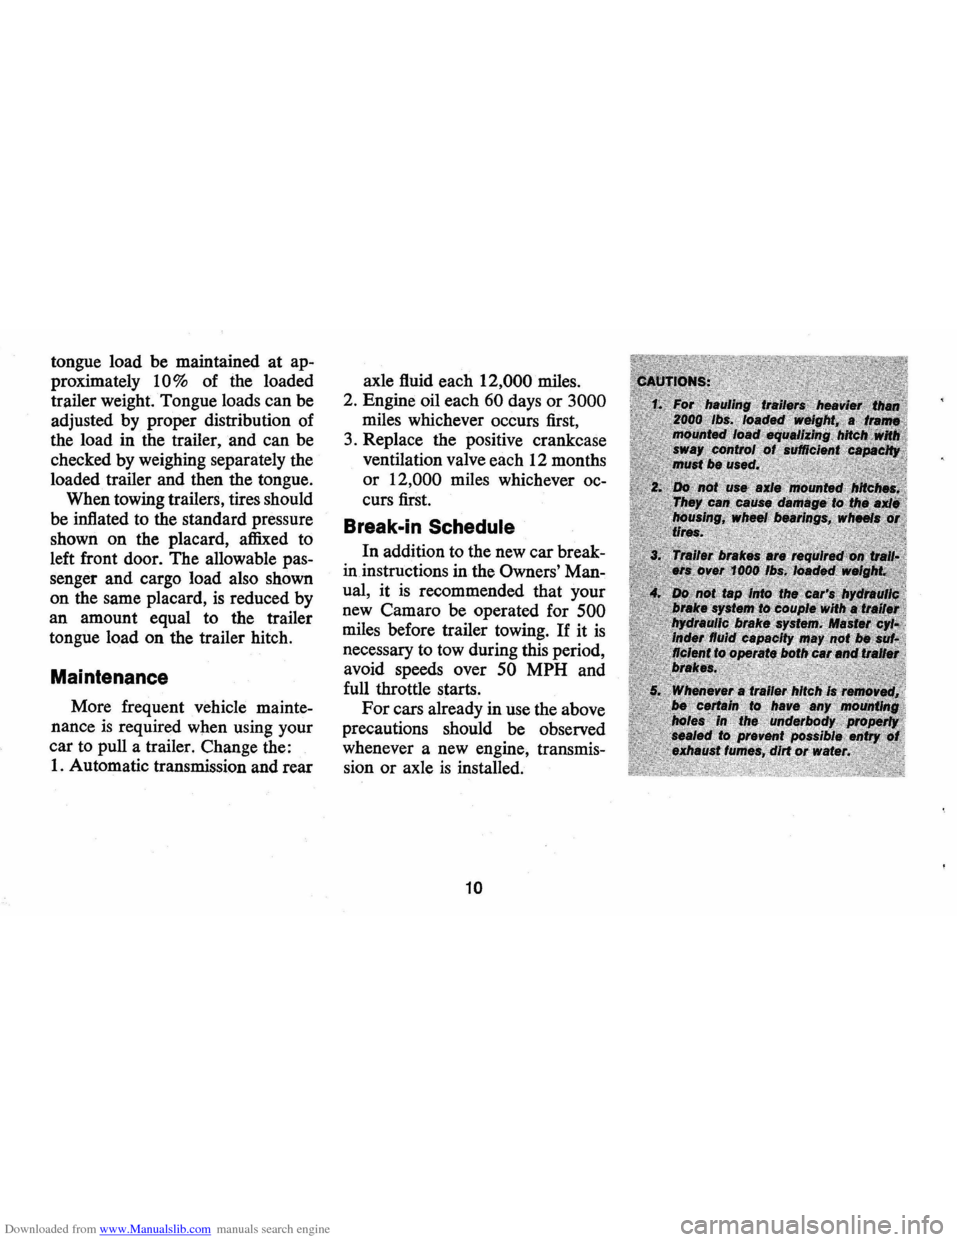
Downloaded from www.Manualslib.com manuals search engine tongue load be maintained at ap
proximately
10% of the loaded
trailer weight. Tongue loads can be
adjusted by proper distribution of
the load in the trailer, and can be
checked by weighing separately the
loaded trailer and then the tongue.
When towing trailers, tires should
be inflated to the standard pressure
shown
on the placard, affixed to
left front door. The allowable pas
senger and cargo load also shown
on the same placard,
is reduced by
an amount equal to the trailer
tongue load on the trailer hitch.
Maintenance
More frequent vehicle mainte
nance
is required when using your
car to pull a trailer. Change the:
1. Automatic transmission and rear axle
fluid each
12,000 miles.
2. Engine oil each
60 days or 3000
miles whichever occurs first,
3. Replace the positive crankcase
ventilation valve each 12 months
or 12,000 miles whichever oc
curs first.
Break .. in Schedule
In addition to the new car break
in instructions in the
Owners' Man
ual,
it is recommended that your
new Camaro be operated for
500
miles before trailer towing. If it is
necessary to tow during this period,
avoid speeds over
50 MPH and
full throttle starts.
For cars already in use the above
precautions should be observed
whenever a new engine, transmis
sion
or axle is installed.
10
Page 15 of 88

Downloaded from www.Manualslib.com manuals search engine STEERING COLUMN CONTROLS
Anti-Theft Steering
Column Lock
The anti-theft lock, located on the
right side of the steering column,
has
five positions:
• Accessory -Permits operation
of electrical accessories when
en
gine is not running. To engage,
push key in and
tum toward you
( counterclockwise) .
• Lock-Normal parking position.
Locks ignition and provides
added theft protection by pre
venting normal operation of
steering wheel and shift controls.
Key cannot be returned to
"lock"
position and removed until trans
mission is placed in "park"
(automatic transmission models)
or in reverse on manual
trans
mission models.
• Off-Permits turning engine off
without locking steering wheel
and shift controls.
12
• Run -Normal operating posi
tion.
• Start -Permits engagement of
starter.
NOTE: The anti-theft steering column lock is not a substitute lor the parking brake.
Always set the parking brake when leaving the car unaHended.
When parking-
• Always let go 01 steering wheel belore turning ignition key to lock position.
• When parking on a hill with wheels
turned toward curb, be sure car has
come to complete stop belore turning
key to lock position.
Turning wheels
after car has stopped "winds up" steering system, which can
result in a "spring back" 01 the steering
wheel when the steering column lock is
released. As a lurther precaution, never
reach through the steering wheel lor any
reason.
'"
When leaving your car unaHended, • Set parking brake. ·
• Place automatic transmission selector
in Park (Reverse tor manual transmission). . • Turn key to LOCK position. • Remove key (the buzzer will remind
you).
• Lock all doors.
Page 25 of 88

Downloaded from www.Manualslib.com manuals search engine • Stopping distances may be
greater.
• Greater pedal et!ort may be re
quired.
• Pedal travel may be greater.
3. Try out
brak~ operation by
starting and stopping on road
shoulder-then:
• If you judge such operation to be
safe, proceed cautiously at re
duced speed to nearest dealer for
repair.
• Have car towed to dealer for re
pair.
• Continued operation of the car
in this condition
is dangerous.
Headlight Beam Indicator
Light
The headlights of your car have
high and low beams to provide you with
proper night-time visibility
during all driving conditions.
The
"low" beams are used during most
city driving. The
"high" beams are
especially useful when driving on
dark roads since they provide ex
cellent long range illumination.
The headlight beam indicator will
be on whenever the
high beams or
"brights" are in use. The Headlight
Beam Switch controls the headlight
beams (see
Page 32).
Light Switch
The three position light switch
controls the headlights, taillights,
parking lights, side marker lights,
instrument lights and dome lights
as shown. The headlamp circuit is
protected by a circuit breaker in the
light switch.
An overload on the
breaker will cause the lamps to
"flicker" on and ot!. If this condi
tion develops, have your headlamp
wiring checked immediately.
PARKING LAMPS MARKER LAMPS TAIL AND INSTRUMENT
LIGHTS
TURN KNOB TO
VARY INSTRUMENT LIGHTS fULLY COUNTER CLOCKWISE FOR DOME LIGHTS
22
HEADLIGHTS PARKING LAMPS MARKER LAMPS
Page 29 of 88
Downloaded from www.Manualslib.com manuals search engine vehicle, to clear the intake ducts
of snow.
• Keep all windows and vents
closed to reduce dust, road and
wind noise and uncomfortable
drafts.
• For most satisfactory heater op
eration and air circulation, oper
ate fan on low or medium speeds
for normal operation and high
speed for quick warm-up and
during extremely low tempera
tures.
• For adequate rear seat heating,
the area beneath the front seat
must not be blocked by carpet
ing, rags, paper
or other mate
rial and fan should operate on
high blower.
• For additional summer ventila
tion move the
AIR lever to mid
position and the
DEFROSTER
lever to DE-ICE. If greater air
flow is desired, move the FAN
lever down to operate the three-
Rear Window Defroster
To insure clear vision through
the rear window during inclement
weather, the Rear Window De
froster has become established
as a
popular accessory. This unit draws in
air from the passenger compart
ment and directs it against the back
window to remove frost or mois
ture. Its blower has a two-speed
control switch on the instrument
panel.
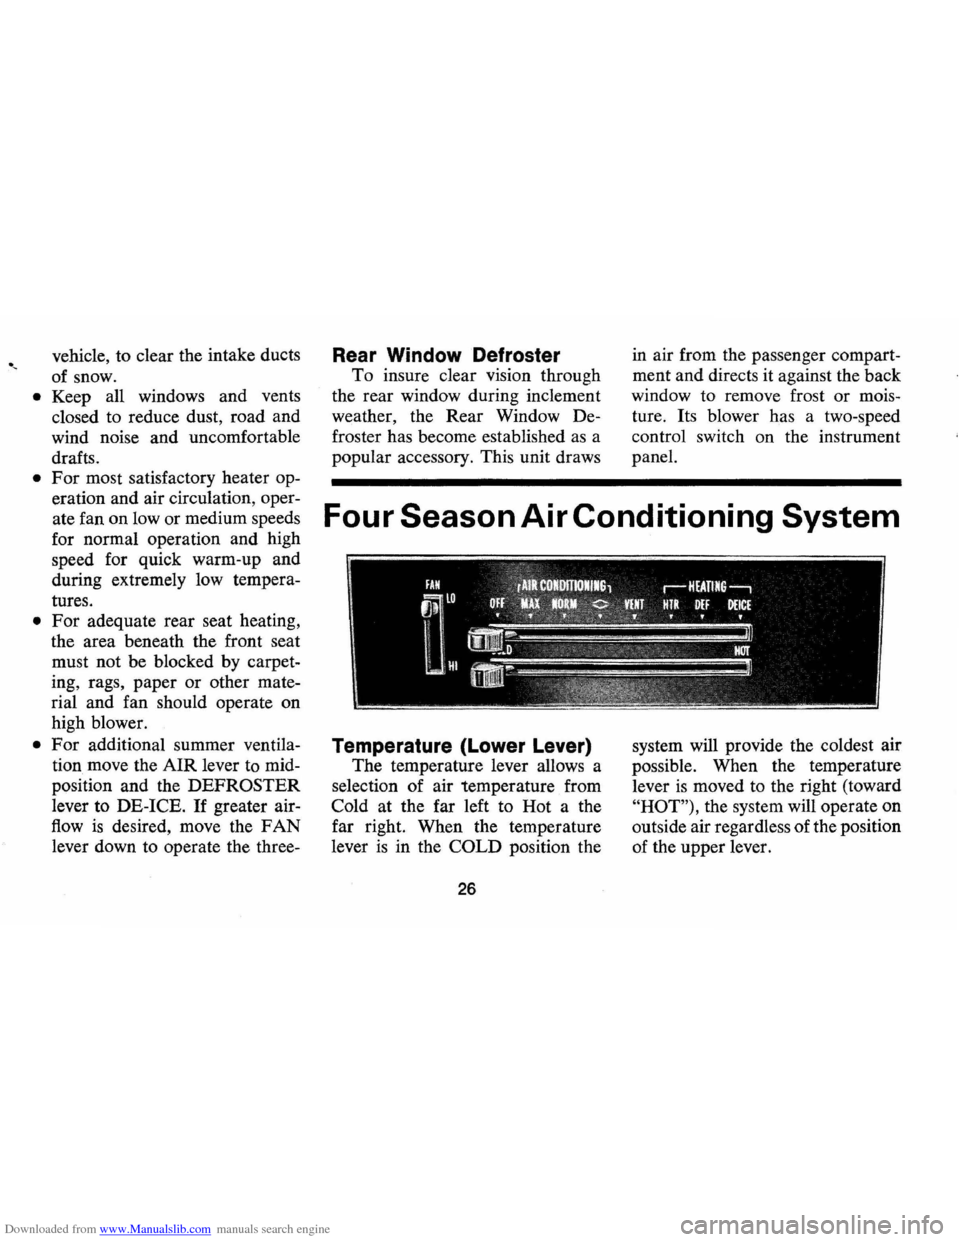
Four Season Air Conditioning System
Temperature (Lower Lever)
The temperature lever allows a
selection of air temperature from
Cold at the far left to Hot a the
far right. When the temperature
lever
is in the COLD position the
26
system will provide the coldest air
possible . When the temperature
lever
is moved to the right (toward
"HOT"), the system will operate on
outside air regardless of the position
of the upper lever.
Page 41 of 88

Downloaded from www.Manualslib.com manuals search engine I n Case of Emergency
Four Way Hazard
Warning
Flasher
• Use the warning flasher to warn
other drivers any time your
ve
hicle becomes a traffic hazard,
day or night.
• Avoid stopping on the roadway
if possible.
• Turn on the hazard warning
flasher, with engine ignition off
or on, by pushing in on the but
ton located just below the steer
ing wheel.
• If the brake pedal is depressed,
the lights will not flash
but will
glow continuously instead.
• To cancel the flasher, pull the
button outward.
"Rocking" Car
If it becomes necessary to rock
the car to free it from sand, mud or
snow, move the selector lever
from
"D" to "R" in a repeat pattern
while simultaneously applying
moderate pressure to the accelera
tor. Do not race engine. A void
spinning wheels when trying to free
car.
Towing
Proper lifting or towing equip
ment
is necessary to prevent dam
age to the vehicle during any tow
ing operation. Detailed towing in
formation is available at your
dealer and has been provided to
tow truck operators responsible for
movement of disabled or locked
ve
hicles. State and local laws appli
cable to vehicles in tow must also
be followed.
Your Camaro may be towed on
all four wheels, at speeds of less
than 35 MPH, for distances up to
38
50 miles, provided driveIine, axle
and transmission are otherwise nor
mally operable.
For such towing,
parking brake must be released,
and transmission must be in neu
tral (ignition lock turned to
OFF
position). Attachments must be to
main structural members of the car,
not to bumpers or bracketing,
Safety chains or cables should be
used. Remember that power steer
ing assist will not be available when
engine
is inoperative.
Emergency Starting
• Never tow the car to start
because the surge forward when
the engine starts could cause a
collision with the tow vehicle.
• Engines in vehicles with auto
matic transmissions cannot be
started by pushing the car.