1971 CHEVROLET CAMARO Parts
[x] Cancel search: PartsPage 3 of 88
Downloaded from www.Manualslib.com manuals search engine A WORD TO CAMARO OWNERS ...
This manual has been prepared to acquaint you with the operation and maintenance of your Camaro, and to provide
important safety information. We urge you to read it carefully and follow the recommendations contained to help
assure the most enjoyable and trouble-free operation of your vehicle.
When it comes to service, remember that your Chevrolet dealer knows your vehicle best and is interested in your
complete satisfaction . Return to him for Guardian Maintenance Service and any other assistance you may require.
To assist dealers in handling your needs, Chevrolet maintains a number of Zone Offices throughout the country.
Should you have a problem that cannot be handled through normal channels, follow the procedure presented on page
71 of this manual under the heading, "Owner Relations".
Regarding warranty, your Camara, when purchased new is covered by the Chevrolet New Vehicle Warranty and the
Policy on Chevrolet Owner Service. Complete details will be found in the 1971 Chevrolet New Vehicle Warranty and Policy on Owner Service folder which was given to you by your dealer at the time of new car delivery.
We would like to take this opportunity to thank you for choosing a Chevrolet product-and assure you of our continuing
interest in your motoring pleasure and satisfaction. Chevrolet Motor Division
FOR MAXIMUM PERFORMANCE AND ECONOMY I OM I " I G I KEEP YOUR GMCAR ALL GM. SPECIFY GENERAL _ Uui~~De ~Jco MOTORS PARTS IDENTIFIED BY ONE OF THESE ~ TRADE-MARKS:
Page 10 of 88

Downloaded from www.Manualslib.com manuals search engine tion against impact with the car in
terior
by restraining forward mo
tion of the upper torso in a colli
sion. This
is primarily true in case
of frontal impacts, which are the
most frequent type of accident. Shoulder
belts are fastened and
unfastened in the same manner
as
lap belts. A shoulder belt should
have sufficient slack to insert a fist's
width between your chest and the
belt. This can be checked by insert
ing a clenched
fist between the belt
and your chest with thumb against
chest and back of hand facing up
ward.
Releasing Belts -To release the
belts, simply depress the release tab
or button located
in the center of
the buckle.
7
Seat Belt Inspection
And Care (All)
• Keep sharp edges and damaging
objects away from belts.
• Periodically inspect belts,
buckles, retractors, and anchors
for damage that could lessen the
effectiveness of the restraint
system.
• Have questionable parts re
placed.
• Replace belts if cut, weakened,
frayed,
or subjected to collision
loads.
• Check that anchor mounting
bolts are tight to the floor.
• Keep seat belts clean and dry.
• Clean only with mild soap solu
tion and lukewarm water.
• Do not bleach or dye belts since
this may severely weaken belts.
Page 34 of 88
Downloaded from www.Manualslib.com manuals search engine FLOOR CONTROLS
Braking System
The service brake system is de
signed for braking performance
under a wide range of driving con
ditions even when the vehicle
is
loaded to its full rated vehicle load.
Power Brakes
• Cars with power brakes can
make two or more brake stops
using reserve power assist after
the engine
is off.
• When reserve power is ex
hausted, the vehicle can still be
stopped by applying greater
force to the pedal.
Parking Brake
• To set parking brake, fully de
press foot pedal at far left side.
• For maximum holding power,
depress regular brake pedal with
the other foot at the same time.
• To release parking brake, pull
"BRAKE RELEASE" lever on
lower left instrument panel.
• Never drive car with parking
brake set
as this may overheat or
otherwise damage rear brakes.
REMINDER: Brake pedal travel
should not be obstructed by im
proper floor mats or other interfer
ing material under the pedal.
NOTE: "Riding the brake" by rest
ing your foot on the brake pedal
when not intending to brake can
cause abnormally high brake tem
peratures, excessive lining wear
and possible damage to the brakes.
31
REMINDER: Brake linings should
be inspected for wear by a qualified
mechanic at least once a year
or
every 12,000 miles, whichever oc
curs first. More frequent inspec
tions should be made if driving con
ditions in your area, such
as traffic
or terrain, or techniques of indi
vidual drivers result in frequent
brake applications. Your Chevrolet
dealer
is best qualified to advise you
as to how often this inspection
should be performed. When brakes
require relining, use those Genuine
General Motors
Parts specifically
recommended for your car, and
Delco, brake fluid as required.
Automatic Brake Adjusters
• Brakes on this car are self-adjust
ing, designed to eliminate peri
odic brake adjustments.
Page 37 of 88
Downloaded from www.Manualslib.com manuals search engine Safety Maintenance Schedule" on the inside of the
glove box door
as illustrated.
The schedule lists the various safety checks to be
performed at regularly scheduled intervals,
as well
as some of the other important vehicle maintenance
requirements. You are urged to check
off each item
on the schedule after the operation has been per
formed. Following are further details on the safety
check items:
Checks To Be Made At Oil Change Intervals
(4 months or 6,000 miles, whichever comes
first)
• Brake Lines and Hoses -Check for proper at
tachments, leaks, cracks, chafing, deterioration,
etc. Any questionable parts noted should be re
placed or repaired immediately.
• Fluid Levels-Check level of fluid in brake master
cylinder, power steering pump, radiator, engine,
axle and transmission. Any significant
loss could
mean that a malfunction
is developing in the sys
tem and corrective action should be taken imme
diately.
On cars with disc brakes, a low fluid level
in the front brake master cylinder reservoir could
34
also be an indicator that disc brake pads need
replacing.
• Front and Rear Suspension and Steering Sys
tem-Check for damaged or missing parts, or parts
showing visible signs of excessive wear or lack of
lubrication. Questionable parts should be replaced
by a qualified mechanic without delay.
• Exhaust System -Check complete exhaust sys
tem and nearby body areas and trunk lid for
broken, damaged, missing or mispositioned parts,
open seams, holes, loose connections
or other de
terioration which could permit exhaust fumes to
seep into the trunk or passenger compartment. Any
defects should be corrected immediately. To help
insure continued integrity, exhaust system pipes
rearward of the
muffler must be replaced whenever
a new
muffler is installed.
• Tires and Wheels -Check tires for excessive
wear, nails, cuts or other damage. Make certain
wheels are not bent
~nd wheel nuts are tight. Un
even or abnormal tire wear may indicate the need
for alignment service. Check tire inflation pressure
at least monthly, or more often
if daily visual
inspection indicates the need.
Page 38 of 88
Downloaded from www.Manualslib.com manuals search engine TREAD STILL GOOD
-
TREAD
WORN OUT
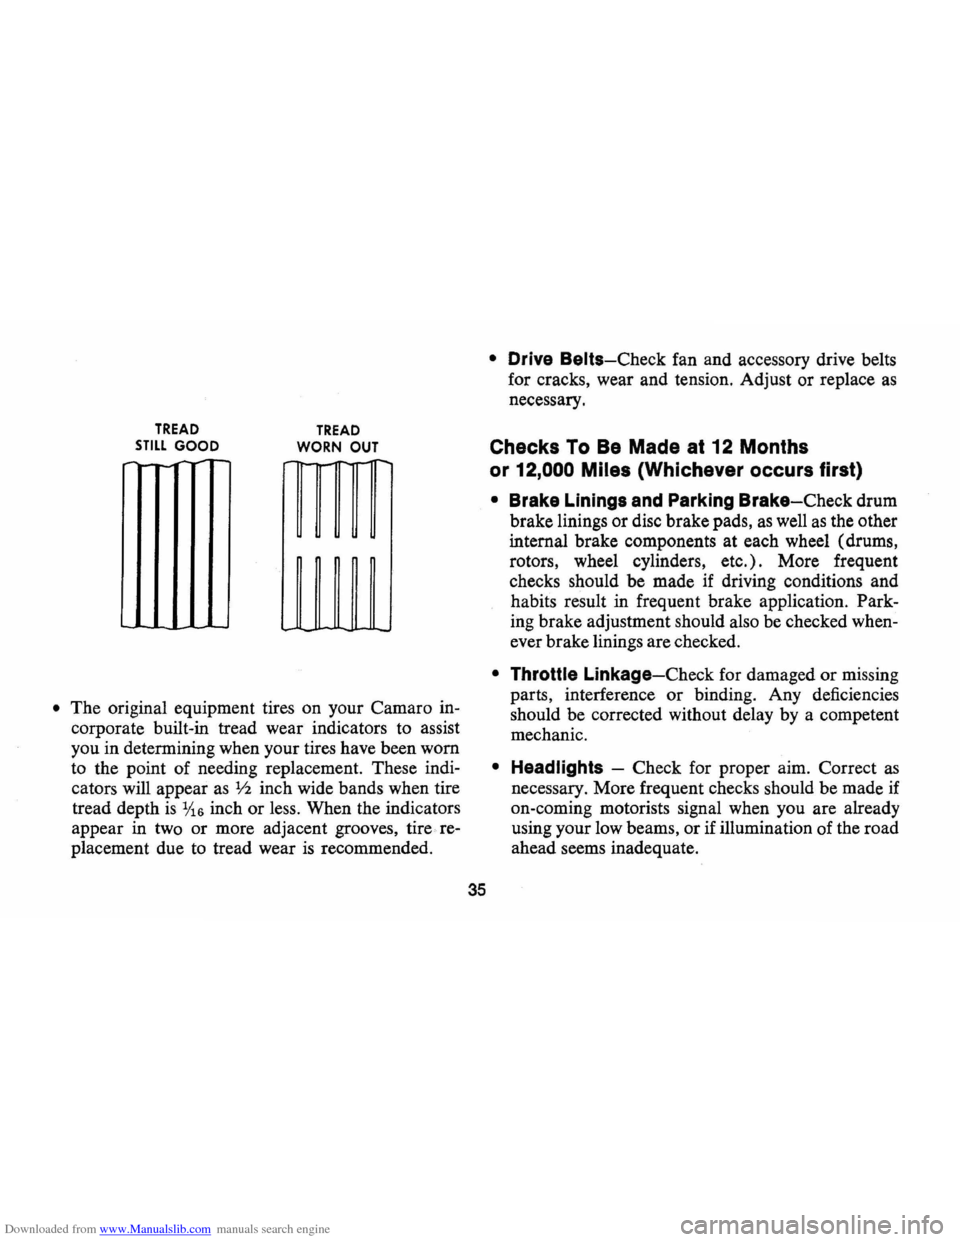
• The original equipment tires on your Camaro in
corporate built-in tread wear indicators to assist
you in detennining when your tires have been worn
to the point of needing replacement. These indi
cators will appear
as V2 inch wide bands when tire
tread depth
is 1;16 inch or less. When the indicators
appear in two or more adjacent grooves, tire re
placement due to tread wear
is recommended.
35
• Drive Belts-Check fan and accessory drive belts
for cracks, wear and tension. Adjust or replace
as
necessary.
Checks To Be Made at 12 Months
or
12,000 Miles (Whichever occurs first)
• Brake Linings and Parking Brake-Check drum
brake linings or disc brake pads,
as well as the other
internal brake components at each wheel (drums,
rotors, wheel cylinders, etc.) . More frequent
checks should be made if driving conditions and
habits result in frequent brake application. Park
ing brake adjustment should also be checked when
ever brake linings are checked.
• Throttle Linkage-Check for damaged or missing
parts, interference or binding. Any deficiencies
should be corrected without delay by a competent
mechanic.
• Headlights -Check for proper aim. Correct as
necessary. More frequent checks should be made if
on-coming motorists signal when you are already
using your low beams, or if illumination of the road
ahead seems inadequate.
Page 40 of 88

Downloaded from www.Manualslib.com manuals search engine lights, turn signals, backup lamps, and hazard
warning flashers. Have someone observe operation
of each light while you activate the controls.
• Starter Safety Switch (Automatic Transmis
sion Cars)
CAUTION: Before making the following check, be sure to have a clear distance ahead and behind the car, set the parking brake and firmly apply the foot brake. Do not depress accelerator pedal. Be prepared to turn ott ignition switch immediately if engine should start.
Check starter safety switch by placing the transmis
sion in each of the driving gears while attempting to
start the engine. The starter should operate only in the
Park ("P") or Neutral ("N") positions.
• Starter Interlock (Manual Transmission Cars)
-To check a manual transmission equipped car,
depress the clutch halfway, place the transmission
in neutral, and attempt to start.
The starter should
operate only when clutch
is fully depressed.
• Transmission Shift Indicator-Check to be sure
shift indicator accurately indicates the shift posi
tion selected.
• Horn-Blow the horn occasionally to be sure that
it works.
37
• Seat Back LatcheS-Check to see that seat bac k
latches are holding by pulling forward on the seat
back top.
• Rearview Mirrors and Sun Visors-Check that
friction joints are properly adjusted so mirrors and
sun visors stay in the selected position.
• Door LatcheS-Check for positive closing, la tch
ing and locking.
• Hood Latches-Check to make sure hood closes
firmly . Check also for broken , d amaged or missing
parts which might prevent secure latching.
• Fluid LeakS-Check for fuel, water, oil or other
fluid leaks by observing the ground beneath the
vehicle after it has been parked for a while . (Water
dripping from air conditioning system after use
is
normal). If gasoline fumes are noticed at any time,
the cause should be determined
and corrected with
out delay because of the possibility of fire.
• Exhaust System-See engine exhaust gas caution
at beginning of starting and operating section of
this manual for suggested driver observations and
checks.
Page 46 of 88

Downloaded from www.Manualslib.com manuals search engine POSITIVE CRANKCASE
VENTILATION (PCV)
~F"'FILnREDAIR --+ B = BLOW BY GASES :lI." HB ~COMBUSTlBlEMIXTURE
pey
VALVE
OPERATION: All General Motors gasoline engine
powered vehicles are equipped with Positive
Crank
case Ventilation-a system which permits no crank
case emissions to be discharged into the atmosphere.
To function properly, the system depends on the
43
PCV Valve which returns blow-by gases to the com
bustion chamber where they are burned.
MAINTENANCE: This valve must be clean in
order to maintain efficient engine operation.
An
inspection of the ventilation filter should be
made at the first oil change
(4 months or 6,000
miles, whichever occurs first). At each subse
quent oil change, the ventilation filter
should
be inspected and replaced if necessary. Re
place filter at least every 24,000 miles. Under
normal driving conditions, the PCV Valve should
be replaced every 24 months or 24,000 miles,
whichever occurs first, and
all hoses and fit·
tings
should be inspected and cleaned or re
placed, as necessary. Replace the PCV Valve
and inspect related parts every 12 months or
12,000 miles when the vehicle is used in a ser
vice requiring more frequent engine oil change
as covered on page 53.
NOTE: Emission control systems in this section are Illustrated on V-8 engines; systems on 4 and 6 cylinder engines are similar.
Page 52 of 88
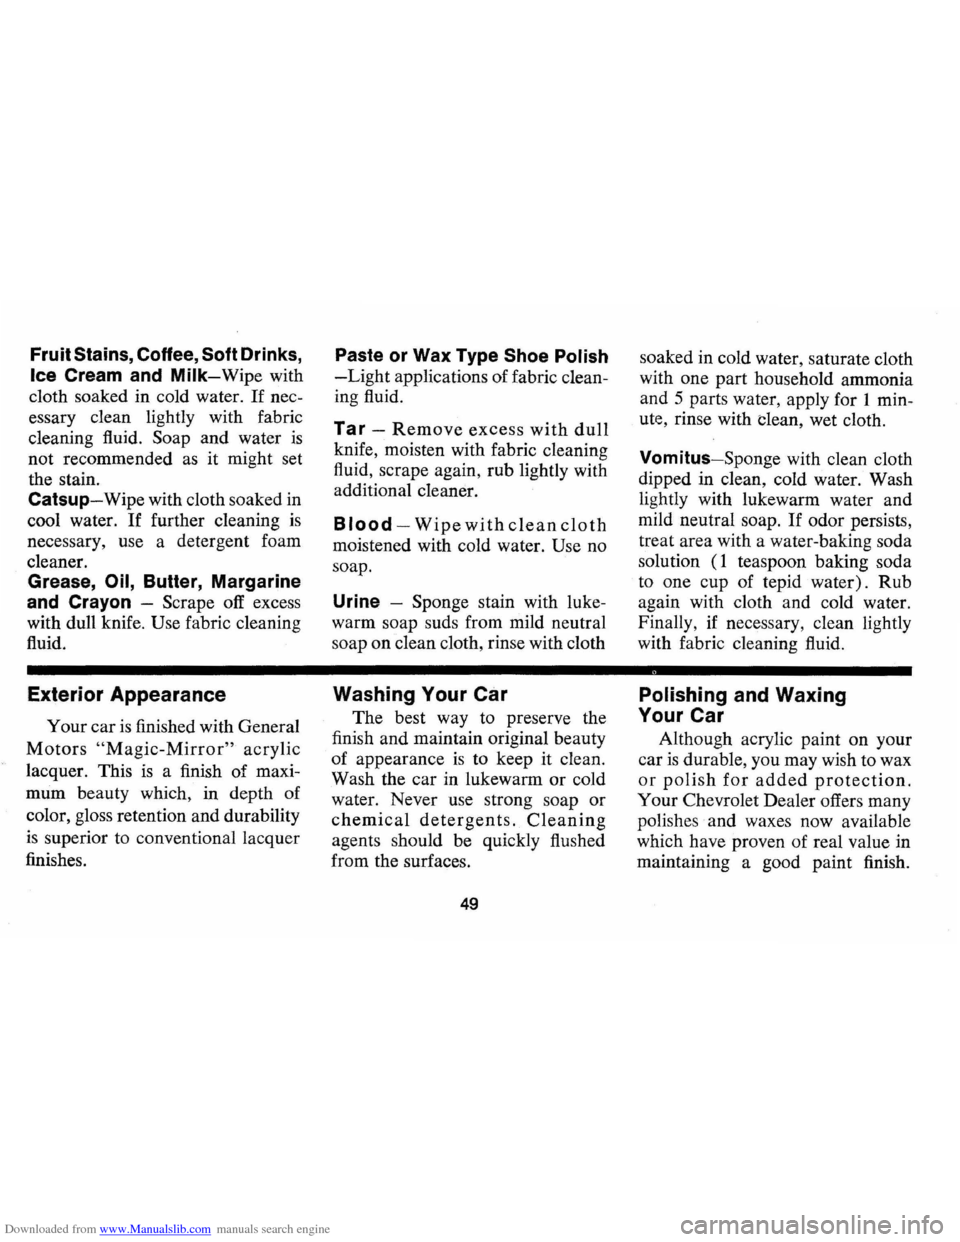
Downloaded from www.Manualslib.com manuals search engine Fruit Stains, Coffee, Soft Drinks,
Ice Cream and Milk-Wipe with
cloth soaked in cold water.
If nec
essary clean lightly with fabric
cleaning fluid.
Soap and water is
not recommended as it might set
the stain.
Catsup-Wipe with cloth soaked in
cool water.
If further cleaning is
necessary, use a detergent foam
cleaner.
Grease, Oil, Butter, Margarine
and Crayon -
Scrape off excess
with dull knife.
Use fabric cleaning
fluid.
Exterior Appearance
Your car is finished with General
Motors "Magic-Mirror" acrylic
lacquer. This is a finish of maxi
mum beauty which, in depth of
color, gloss retention and durability
is superior to conventional lacquer
finishes.
Paste or Wax Type Shoe Polish
-Light applications of fabric clean
ing fluid.
Tar -Remove excess with dull
knife, moisten with fabric cleaning
fluid, scrape again, rub lightly with
additional cleaner.
Blood -Wipe with clean cloth
moistened with cold water. Use no
soap.
Urine -Sponge stain with luke
warm soap suds from mild neutral
soap on clean cloth, rinse with cloth
Washing Your Car
The best way to preserve the
finish and maintain original beauty
of appearance
is to keep it clean .
Wash the car in lukewarm
or cold
water. Never use strong soap or
chemical detergents. Cleaning
agents should be quickly flushed
from the surfaces.
49
soaked in cold water, saturate cloth
with one part household ammonia
and 5 parts water, apply for 1 min
ute, rinse with
clean, wet cloth.
Vomitus-Sponge with clean cloth
dipped in clean, cold water. Wash
lightly with lukewarm water and
mild neutral soap.
If odor persists,
treat area with a water-baking soda
solution (1 teaspoon baking soda
to one cup of tepid water). Rub
again with cloth and cold water.
Finally,
if necessary, clean lightly
with fabric cleaning fluid.
Polishing and Waxing
Your Car
Although acrylic paint on your
car
is durable, you may wish to wax
or polish for added protection.
Your Chevrolet Dealer offers many
polishes and waxes now available
which have proven of real value in
maintaining a good paint finish.