1969 FORD MUSTANG service indicator
[x] Cancel search: service indicatorPage 257 of 413

05-02-03
General Clutch Service
05-02-03
in the direction of the face runout
arrow and its center line is parallel to
the center line of the face runout
arrow.
18.
Determine the amount of the
face runout on the B arrow scale.
19.
The value of the circular line
beneath the amount of face runout
will be the desired reading. If the
reading is in excess of 0.014 inch the
housing alignment is unacceptable.
20.
Remove the Dia-L-lgner gauge
from the flywheel housing.
21.
Install the spark plugs and con-
nect the wires.
ENGINE IN VEHICLE
Since any change in face alignment
will change bore alignment, it may be
possible to correct bore alignment by
changing face alignment. Face align-
ment can be changed by shimming be-
tween the flywheel housing and en-
gine.
Fig. 4 shows the type of shim
which can be fabricated.
Not more than 0.010 inch thickness
shims may be used between the fly-
wheel housing and engine. If a 0.010-
inch shim will not bring face and bore
alignment within limits, replace the
flywheel housing.
The shim required is one half the
maximum (—) indicator reading, and
should be located at the point of max-
imum minus (—) indicator reading.
If both the bore and face alignment
are out of limits, shim between the
flywheel housing and engine to bring
face alignment within limits. Check
the bore alignment.
If the bore alignment is out of lim-
its and the face alignment is within
limits,
shim the flywheel housing to
the limit of face misalignment and
check the bore alignment. If it is not
within limits, replace the housing.
ENGINE OUT OF VEHICLE
The same procedure to correct
alignment may be used with the en-
gine out of the vehicle or in the vehi-
cle,
up to the point of replacing the
flywheel housing. If the bore align-
ment cannot be brought within limits
by shimming, follow this procedure:
dure:
1.
Remove the flywheel housing
from the engine and remove the dowel
pins.
Install the flywheel housing and
tighten the attaching bolts.
2.
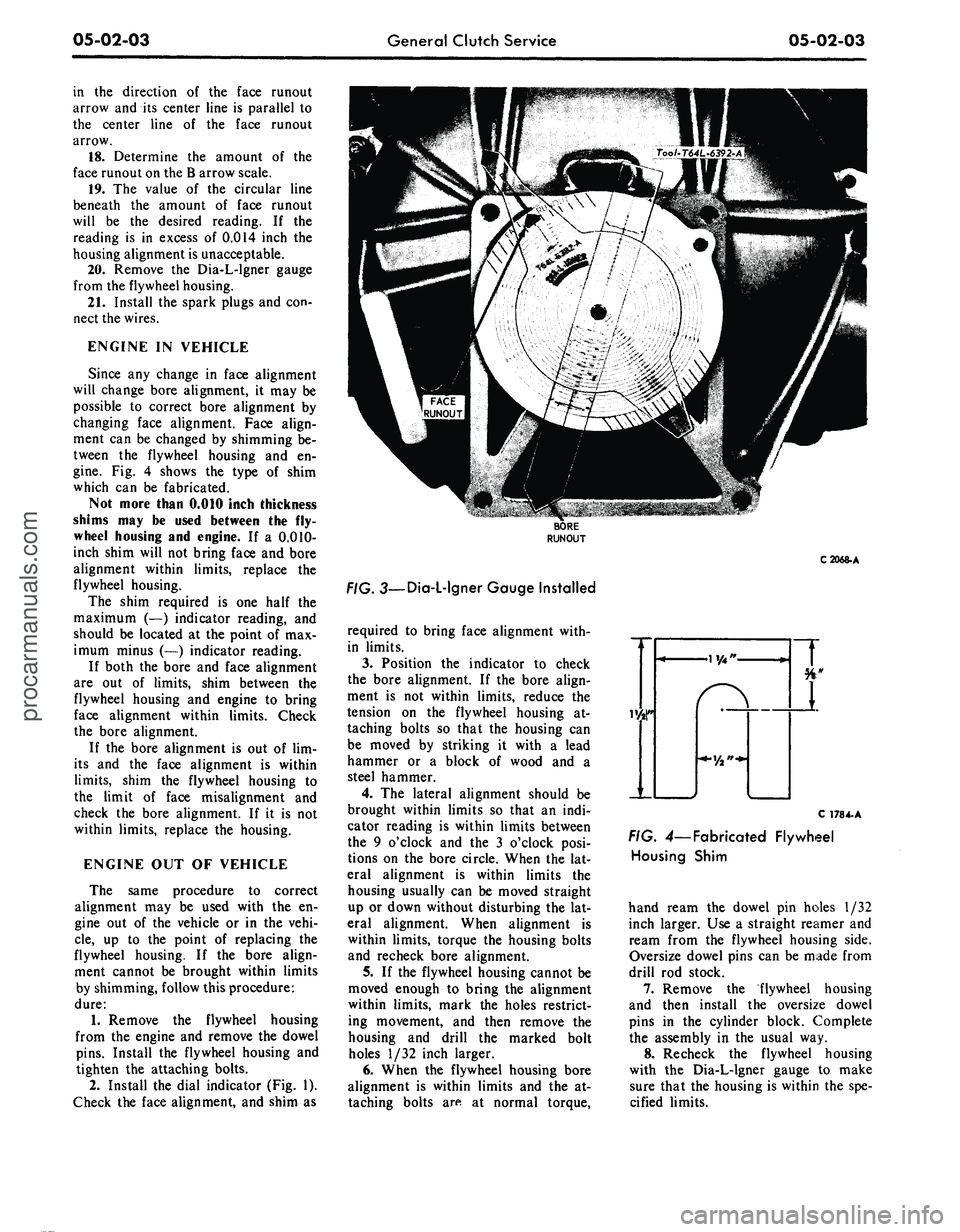
Install the dial indicator (Fig. 1).
Check the face alignment, and shim as
C2068-A
. 3—Dia-L-lgner Gauge Installed
required to bring face alignment with-
in limits.
3.
Position the indicator to check
the bore alignment. If the bore align-
ment is not within limits, reduce the
tension on the flywheel housing at-
taching bolts so that the housing can
be moved by striking it with a lead
hammer or a block of wood and a
steel hammer.
4.
The lateral alignment should be
brought within limits so that an indi-
cator reading is within limits between
the 9 o'clock and the 3 o'clock posi-
tions on the bore circle. When the lat-
eral alignment is within limits the
housing usually can be moved straight
up or down without disturbing the lat-
eral alignment. When alignment is
within limits, torque the housing bolts
and recheck bore alignment.
5.
If the flywheel housing cannot be
moved enough to bring the alignment
within limits, mark the holes restrict-
ing movement, and then remove the
housing and drill the marked bolt
holes 1/32 inch larger.
6. When the flywheel housing bore
alignment is within limits and the at-
taching bolts are at normal torque,
C 178 4-A
FIG. 4— Fabricated Flywheel
Housing Shim
hand ream the dowel pin holes 1/32
inch larger. Use a straight reamer and
ream from the flywheel housing side.
Oversize dowel pins can be made from
drill rod stock.
7.
Remove the flywheel housing
and then install the oversize dowel
pins in the cylinder block. Complete
the assembly in the usual way.
8. Recheck the flywheel housing
with the Dia-L-lgner gauge to make
sure that the housing is within the spe-
cified limits.procarmanuals.com
Page 303 of 413

07-01-12
General Transmission Service
07-01-12
the transmission,
any
metal particles
or clutch plate
or
band material that
may have been carried into
the
cooler
should
be
removed from
the
system
by
flushing
the
cooler
and
lines before
the transmission
is put
back into serv-
ice.
In no
case should
an
automatic
transmission having
a
clutch
or
band
failure
or
other internal trouble result-
ing
in
fluid contamination,
be put
back into service without first flushing
the transmission
oil
cooler.
To flush
the oil
cooler, follow
the
instruct!
on >
provided with
the
Rotun-
da Automatic Transmission Torque
Converter
and
Cooler Cleaner
LRE-
60081.
INSPECTION
TURBINE
AND
STATOR
END
PLAY CHECK
A special tool
(Fig. 19)
must
be
used
to
check
the
condition
of the
converter. This special tool
is
used
to
check
the
turbine
and
stator
end
play
and
the
operation
of the
one-way
sta-
tor clutch.
CRUISE-O-MATIC
Too/-T58L-7902-A
C-4 AND C-6 TRANSMISSION
Tool-T59P.7902.Bor 7937-B
ON C-4 AND C-6 TRANSMISSION
Tool-T64L-7902-A
D
1499-E
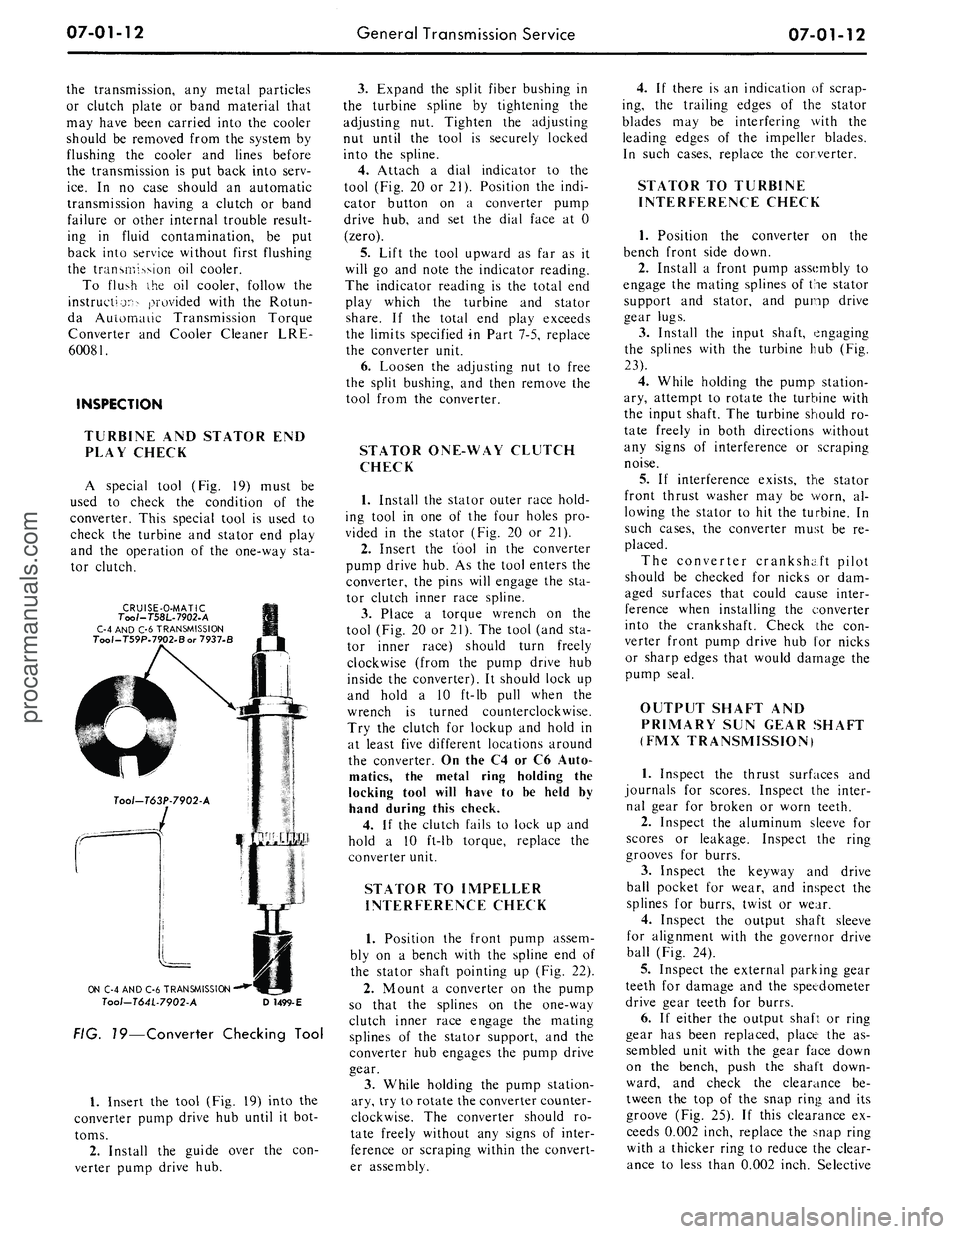
FIG. 19—Converter Checking Tool
1.
Insert
the
tool (Fig.
19)
into
the
converter pump drive
hub
until
it
bot-
toms.
2.
Install
the
guide over
the con-
verter pump drive
hub.
3.
Expand
the
split fiber bushing
in
the turbine spline
by
tightening
the
adjusting
nut.
Tighten
the
adjusting
nut until
the
tool
is
securely locked
into
the
spline.
4.
Attach
a
dial indicator
to the
tool (Fig.
20 or
21). Position
the
indi-
cator button
on a
converter pump
drive
hub, and set the
dial face
at 0
(zero).
5.
Lift
the
tool upward
as far as it
will
go and
note
the
indicator reading.
The indicator reading
is the
total
end
play which
the
turbine
and
stator
share.
If the
total
end
play exceeds
the limits specified
in
Part 7-5, replace
the converter unit.
6. Loosen
the
adjusting
nut to
free
the split bushing,
and
then remove
the
tool from
the
converter.
STATOR ONE-WAY CLUTCH
CHECK
1.
Install
the
stator outer race hold-
ing tool
in one of the
four holes
pro-
vided
in the
stator (Fig.
20 or 21).
2.
Insert
the
tool
in the
converter
pump drive hub.
As the
tool enters
the
converter,
the
pins will engage
the sta-
tor clutch inner race spline.
3.
Place
a
torque wrench
on the
tool (Fig.
20 or
21).
The
tool (and
sta-
tor inner race) should turn freely
clockwise (from
the
pump drive
hub
inside
the
converter).
It
should lock
up
and hold
a 10
ft-lb pull when
the
wrench
is
turned counterclockwise.
Try
the
clutch
for
lockup
and
hold
in
at least five different locations around
the converter.
On
the
C4
or C6
Auto-
matics,
the
metal ring holding
the
locking tool will have
to be
held
by
hand during this check.
4.
If the
clutch fails
to
lock
up and
hold
a 10
ft-lb torque, replace
the
converter unit.
STATOR
TO
IMPELLER
INTERFERENCE CHECK
1.
Position
the
front pump assem-
bly
on a
bench with
the
spline
end of
the stator shaft pointing
up
(Fig.
22).
2.
Mount
a
converter
on the
pump
so that
the
splines
on the
one-way
clutch inner race engage
the
mating
splines
of the
stator support,
and the
converter
hub
engages
the
pump drive
gear.
3.
While holding
the
pump station-
ary, try
to
rotate the converter counter-
clockwise.
The
converter should
ro-
tate freely without
any
signs
of
inter-
ference
or
scraping within
the
convert-
er assembly.
4.
If
there
is an
indication
of
scrap-
ing,
the
trailing edges
of the
stator
blades
may be
interfering with
the
leading edges
of the
impeller blades.
In such cases, replace
the
converter.
STATOR
TO
TURBINE
INTERFERENCE CHECK
1.
Position
the
converter
on the
bench front side down.
2.
Install
a
front pump assembly
to
engage
the
mating splines
of
the
stator
support
and
stator,
and
pump drive
gear lugs.
3.
Install
the
input shaft, engaging
the splines with
the
turbine
hub (Fig.
23).
4.
While holding
the
pump station-
ary, attempt
to
rotate
the
turbine with
the input shaft.
The
turbine should
ro-
tate freely
in
both directions without
any signs
of
interference
or
scraping
noise.
5.
If
interference exists,
the
stator
front thrust washer
may be
worn,
al-
lowing
the
stator
to hit the
turbine.
In
such cases,
the
converter must
be re-
placed.
The converter crankshaft pilot
should
be
checked
for
nicks
or dam-
aged surfaces that could cause inter-
ference when installing
the
converter
into
the
crankshaft. Check
the con-
verter front pump drive
hub for
nicks
or sharp edges that would damage
the
pump seal.
OUTPUT SHAFT
AND
PRIMARY
SUN
GEAR SHAFT
(FMX TRANSMISSION)
1.
Inspect
the
thrust surfaces
and
journals
for
scores. Inspect
the
inter-
nal gear
for
broken
or
worn teeth.
2.
Inspect
the
aluminum sleeve
for
scores
or
leakage. Inspect
the
ring
grooves
for
burrs.
3.
Inspect
the
keyway
and
drive
ball pocket
for
wear,
and
inspect
the
splines
for
burrs, twist
or
wear.
4.
Inspect
the
output shaft sleeve
for alignment with
the
governor drive
ball (Fig.
24).
5.
Inspect
the
external parking gear
teeth
for
damage
and the
speedometer
drive gear teeth
for
burrs.
6.
If
either
the
output shaft
or
ring
gear
has
been replaced, place
the as-
sembled unit with
the
gear face down
on
the
bench, push
the
shaft down-
ward,
and
check
the
clearance
be-
tween
the top of the
snap ring
and its
groove
(Fig. 25).
If
this clearance
ex-
ceeds 0.002 inch, replace
the
snap ring
with
a
thicker ring
to
reduce
the
clear-
ance
to
less than 0.002 inch. Selectiveprocarmanuals.com