2024 PEUGEOT 308 radio controls
[x] Cancel search: radio controlsPage 7 of 280

5
Overview
1.Exterior lighting controls/Direction indicators/
Instrument panel display page/Service
indicator
2. Wiper controls/Screenwash/Trip computer
3. Automatic gearbox control paddles
4. Speed limiter/Cruise control/Adaptive cruise
control/Drive Assist Plus or Drive Assist 2.0
controls
A. Increase/Decrease the speed setting
Display and adjustment of the distance
setting to the vehicle in front (Adaptive cruise
control)
B. Select/Deselect the Cruise control
Select/Deselect the Adaptive cruise control/
Drive Assist Plus
C. Start/Pause the Speed limiter or Cruise
control with the speed setting saved
Confirmation of vehicle restart after automatic
stop (Adaptive cruise control with Stop&Go
function)
D. Select/Deselect the Speed limiter
E. Activation of the Speed limiter or Cruise
control with the speed setting saved
Use the speed suggested by the Road signs
recognition function
5. Horn/Driver front airbag
6. Audio system setting controls
F. Press: Display favourite radio stations/media
Up/Down: previous/next radio/media/
smartphone selection
Press: validation of a selection
G. Increase/Decrease the volume H.
Pick up/Hang up
Access to the Phone application's call log
I. Short press: system voice commands
Long press: smartphone voice commands
Side control bar
1. LED technology headlamps beam height
adjustment
2. Motorised tailgate
3. Heated windscreen
4. Heated steering wheel
5. Opening the fuel filler flap
6. Temperature pre-conditioning operation
indicator lamp
Centre control bars
1. Automatic air conditioning system controls/
HOME button
or
i-Toggles/HOME button
2. Audio system controls
3. Shortcuts for driving aids
4. Access to the Climate application
5. Windscreen and front windows demisting
6. Recirculation of interior air
7. Rear screen de-icing
8. Switching automatic air conditioning off
9. Hazard warning lamps
Page 63 of 280

61
Ease of use and comfort
39.Front armrest with storage (depending on
version)
Front USB socket (depending on version)
10. Rear USB sockets (depending on version)
Sun visor
► With the ignition on, raise the concealing
flap; depending on the version, the mirror is
illuminated automatically.
This sun visor is also equipped with a ticket
holder.
Glove box
► To open the glove box, lift the handle.
With the ignition on, the glove box is lit when
open.
Depending on version, it contains an adjustable
ventilation nozzle, distributing the same
conditioned air as the vents in the passenger
compartment.
Never drive with the glove box open
when a passenger is at the front. It may
cause injury during sharp deceleration!
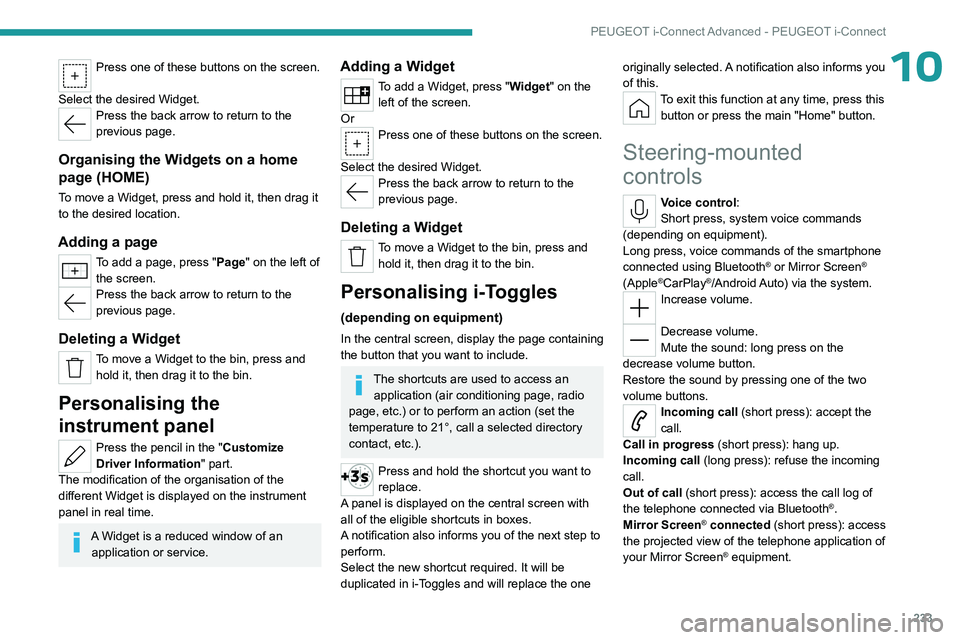
12 V accessory socket
► Plug in a 12 V accessory (with a maximum
rated power of 120 W) using a suitable adapter.
Observe the maximum power rating to
avoid damaging the accessory.
The connection of an electrical device not approved by PEUGEOT, such as a
USB charger, may adversely affect the
operation of vehicle electrical systems,
causing faults such as poor radio reception or
interference with displays in the screens.
USB sockets
These symbols determine the type of use of a USB socket:
Power supply and recharging.
Likewise, plus exchange of multimedia
data with the audio system.
Likewise, plus use of smartphone
applications with the touch screen.
USB sockets allow the connection of a portable
device.
The USB socket located at the front of the centre console also
allows a smartphone to be connected by Android
Auto
® or CarPlay®, enabling certain smartphone
applications to be used on the touch screen.
For best results, use a cable made or approved
by the device manufacturer.
These applications can be managed using the
steering-mounted controls or the audio system
controls.
When the USB socket is used, the
portable device charges automatically.
While charging, a message is displayed if the
power drawn by the portable device exceeds
the current supplied by the vehicle.
For more information about how to use this
equipment, refer to the sections describing
the audio and telematics systems.
Page 231 of 280

229
PEUGEOT i-Connect Advanced - PEUGEOT i-Connect
10PEUGEOT i-Connect
Advanced - PEUGEOT
i-Connect
GPS navigation -
Applications - Multimedia
audio system - Bluetooth
®
telephone
The functions and settings described
vary according to the version and
configuration of the vehicle, and according to
the country of sale.
For safety reasons and because they
require continued attention on the part of
the driver, the following operations must be
carried out with the vehicle stationary and
the ignition on:
–
Pairing the smartphone with the system via
Bluetooth®.
–
Using the smartphone.
–
Connecting to Mirror Screen
(Apple®CarPlay® or Android Auto).
–
Changing the system settings and
configuration.
The message Energy economy mode is displayed when the system is about to go
into standby.
For more information on Energy economy
mode, refer to the "Practical information"
section.
The AM radio selection mode is not available on electric vehicles.
Warning
Navigation is a driving aid. It cannot
replace the driver. All guidance instructions
should be carefully checked by the user.
By using the navigation, you accept the
following terms and conditions:
https://www.tomtom.com/en_gb/legal/
eula-automotive/?388448
First steps
The system starts when the ignition is switched on.
Short press, ignition off: system on/off.
Short press, ignition on: mute/restore sound.
Long press, ignition on: start standby mode
(mute sound, screens and clock display off).
Rotation: volume adjustment.
Information
This system gives access to the following
elements: –
Audio equipment and telephone controls with
display of associated information.
–
Connected services and display of associated
information.
–
Navigation system controls and display
of associated information (depending on
equipment).
–
V
oice recognition (depending on equipment).
–
T
ime and outside temperature.
–
Heating/air conditioning system controls and
reminders of settings.
–
Settings for driving aid functions, comfort
and safety functions, extended head-up display
(depending on equipment and version), audio
equipment and digital instrument panel.
–
Settings for functions specific to rechargeable
hybrid vehicles.
–
Settings for functions specific to electric
vehicles.
–
Display of visual manoeuvring aid functions.
–
Interactive handbook.
–
V
ideo tutorials (e.g. screen management,
driving aids, voice recognition).
Upper banner
Certain information is displayed permanently in
the upper banner of the touch screen:
–
Outside temperature from the vehicle's
sensors (associated with a blue symbol if there is
a risk of ice).
–
T
emperature setting reminder for the air
conditioning on the driver's and passenger sides.
–
Charge level of the connected smartphone.
Page 235 of 280

233
PEUGEOT i-Connect Advanced - PEUGEOT i-Connect
10Press one of these buttons on the screen.
Select the desired Widget.
Press the back arrow to return to the
previous page.
Organising the Widgets on a home
page (HOME)
To move a Widget, press and hold it, then drag it
to the desired location.
Adding a page
To add a page, press "Page" on the left of the screen.
Press the back arrow to return to the
previous page.
Deleting a Widget
To move a Widget to the bin, press and hold it, then drag it to the bin.
Personalising the
instrument panel
Press the pencil in the "Customize
Driver Information" part.
The modification of the organisation of the
different Widget is displayed on the instrument
panel in real time.
A Widget is a reduced window of an application or service.
Adding a Widget
To add a Widget, press "Widget" on the left of the screen.
Or
Press one of these buttons on the screen.
Select the desired Widget.
Press the back arrow to return to the
previous page.
Deleting a Widget
To move a Widget to the bin, press and hold it, then drag it to the bin.
Personalising i-Toggles
(depending on equipment)
In the central screen, display the page containing
the button that you want to include.
The shortcuts are used to access an application (air conditioning page, radio
page, etc.) or to perform an action (set the
temperature to 21°, call a selected directory
contact, etc.).
Press and hold the shortcut you want to
replace.
A panel is displayed on the central screen with
all of the eligible shortcuts in boxes.
A notification also informs you of the next step to
perform.
Select the new shortcut required. It will be
duplicated in i-Toggles and will replace the one originally selected. A notification also informs you
of this.
To exit this function at any time, press this
button or press the main "Home" button.
Steering-mounted
controls
Voice control:
Short press, system voice commands
(depending on equipment).
Long press, voice commands of the smartphone
connected using Bluetooth
® or Mirror Screen®
(Apple®CarPlay®/Android Auto) via the system.Increase volume.
Decrease volume.
Mute the sound: long press on the
decrease volume button.
Restore the sound by pressing one of the two
volume buttons.
Incoming call (short press): accept the
call.
Call in progress (short press): hang up.
Incoming call (long press): refuse the incoming
call.
Out of call (short press): access the call log of
the telephone connected via
Bluetooth
®.
Mirror Screen® connected (short press): access
the projected view of the telephone application of
your Mirror Screen
® equipment.
Page 242 of 280

240
PEUGEOT i-Connect Advanced - PEUGEOT i-Connect
If the device has already been connected to the
system via Bluetooth®, select the device settings
from the list of known devices and choose
Android Auto as the wireless connection mode.
The subsequent automatic connection of the
smartphone requires activation of Bluetooth
® on
your device.
As soon as the connection is established, press this button to display the " Android
Auto" interface.
To initiate the smartphone voice commands, press and hold the steering-
mounted control button.
Media
Changing source
Press the "Media" application.
Press this button to change source (radio,
audio streaming via a USB socket,
Bluetooth
® or Mirror Screen®).
Selecting a radio station
Press the "Media" application.
In the list, select the "Player" tab.
Press one of the buttons to
perform an automatic search for
radio stations.
Or
Move the slider to manually search for
frequencies up or down.
Or
Press this button.
Enter the frequency values using the
virtual keypad.
Press this button to confirm.
A list of stations is available by pressing the
“Stations” tab.
Press “Mute” to activate/deactivate the
sound.
Radio reception may be affected by the
use of electrical equipment not approved
by the Brand, such as a charger with USB
socket connected to the 12
V socket.
The exterior environment (hills, buildings,
tunnels, basement car parks, etc.) may block
reception, including in RDS mode. This
phenomenon is normal in the propagation
of radio waves and does not indicate any
malfunction of the system.
Storing a radio station
Select a station.Press the "Media" application.
In the list, select the "Player” tab.
Press the "Radio Favorites" button.
Storing takes place via a short or long
press on one of these buttons, or a long
press on an existing favourite radio station,
which will be replaced.
Press this button to return to the previous
page.
Automatic search for radio stations
Via the "Media" application.Press the "Media" application.
In the list, select the "Stations" tab.
The search is carried out automatically.
Using the steering-mounted
controls, press and hold this
button.
The search is carried out automatically.
Activating radio station tracking
The system changes frequency automatically to
obtain better reception.
Press the "Media" application.
In the list, select the "Settings” tab.
Activate “Radio Station Tracking”.
The lighting of the slider confirms that the
function is activated.
Page 243 of 280

241
PEUGEOT i-Connect Advanced - PEUGEOT i-Connect
10Changing the waveband
Press the "Media" application.
In the list, select the "Player" tab.
Press this button to change the waveband
(FM - AM - DAB) according to the country
of sale.
Activating traffic announcements
This function gives priority to listening to Traffic
announcements alert messages. To be active,
this function needs good reception of a radio
station that transmits this type of message.
While traffic information is being broadcast, the
current radio station is automatically interrupted
so that the message can be heard. Normal radio
listening resumes as soon as the message is
finished.
Press the "Media" application.
In the list, select the "Settings” tab.
Activate “Traffic Announcement (TA)”.
The lighting of the slider confirms that the
function is activated.
Audio streaming
The streaming function allows you to listen to
the audio stream coming from the smartphone(s)
connected via Bluetooth
®, USB (iPod® type) or
Mirror Screen®.
First adjust the volume on the portable device (to
a high level).
Then adjust the volume of the system.
If playback does not start, it may be necessary to
start the audio playback from the smartphone.
Control is from the portable device or by using
the system's touch buttons.
Once connected in streaming mode, the
smartphone is considered to be a media
source.
Playing a track
Press the "Media" application.
If several devices are connected, press
this button to select one.
Once the device is connected, browsing through
the files is possible by pressing the
"Playlist" or
"Library"
button.
Short press: go to the previous/
next track.
Long press: fast-forward/rewind in a track.
Repeat the current title or the list of
selected titles.
Random track playback.
Sound deactivation/reactivation.
Configuring audio and radio
settings
Audio settings can be accessed in 2 different
ways.
Via the Media application
Press the "Media" application.
In the list, select the "Settings" tab.
Or
Via the Settings application
Press the "Settings" application.
In the list, select the "Audio and Radio " tab.
It is possible to configure:
–
Sound Settings.
–
Radio Settings.
–
V
olume Settings.
Information and advice
The system supports USB Mass Storage devices
or Apple® devices via the USB sockets. The
adapter cable is not supplied.
Devices are managed using the audio system
controls.
The system will only play audio files with ".wma,
.aac,
.flac, .ogg, .mp3" file extensions, at bit rates
between 32 Kbps and 320 Kbps.
It also supports VBR (Variable Bit Rate) mode.
No other file types (".mp4", etc.) can be read.
".wma" files must be of the WMA 9 standard.
The supported sampling rates are 32, 44 and
48 KHz.