2024 PEUGEOT 308 door lock
[x] Cancel search: door lockPage 93 of 280
91
Safety
5It is recommended that children travel
on the rear seats of the vehicle:
–
"rearward facing" up to the age of 3.
–
"forward facing" over the age of 3.
Make sure that the seat belt is correctly
positioned and tightened.
For child seats with a support leg, ensure that
the support leg is in firm and steady contact
with the floor.
An incorrectly installed child seat in a vehicle compromises the child's safety in
the event of an accident.
Ensure that there is no seat belt or seat belt
buckle under the child seat, as this could
destabilise it.
Remember to fasten the seat belts or the
child seat harness keeping the slack relative
to the child's body to a minimum, even for
short journeys.
When installing a child seat using the seat
belt, ensure that the seat belt is tightened
correctly on the child seat and that it secures
the child seat firmly on the vehicle seat. If
the passenger seat is adjustable, move it
forwards if necessary.
Remove the head restraint before
installing a child seat with a backrest on a
passenger seat.
Ensure that the head restraint is stored or
attached securely to prevent it from being
thrown around the vehicle in the event of
sharp braking. Refit the head restraint once
the child seat has been removed.
Installing a booster seat
The chest part of the seat belt must be
positioned on the child's shoulder without
touching the neck.
Ensure that the lap part of the seat belt
passes correctly over the child's thighs.
Use a booster seat with a backrest, equipped
with a belt guide at shoulder level.
Additional protections
To prevent accidental opening of the
doors and rear windows, use the "Child lock".
Take care not to open the rear windows by
more than one third.
To protect young children from the sun's rays,
fit side blinds on the rear windows.
As a safety measure, do not leave:
–
A
child alone and unsupervised inside a
vehicle.
–
A
child or an animal in a vehicle which is
exposed to the sun, with the windows closed.
–
The keys within reach of children inside the
vehicle.
Child seat at the rear
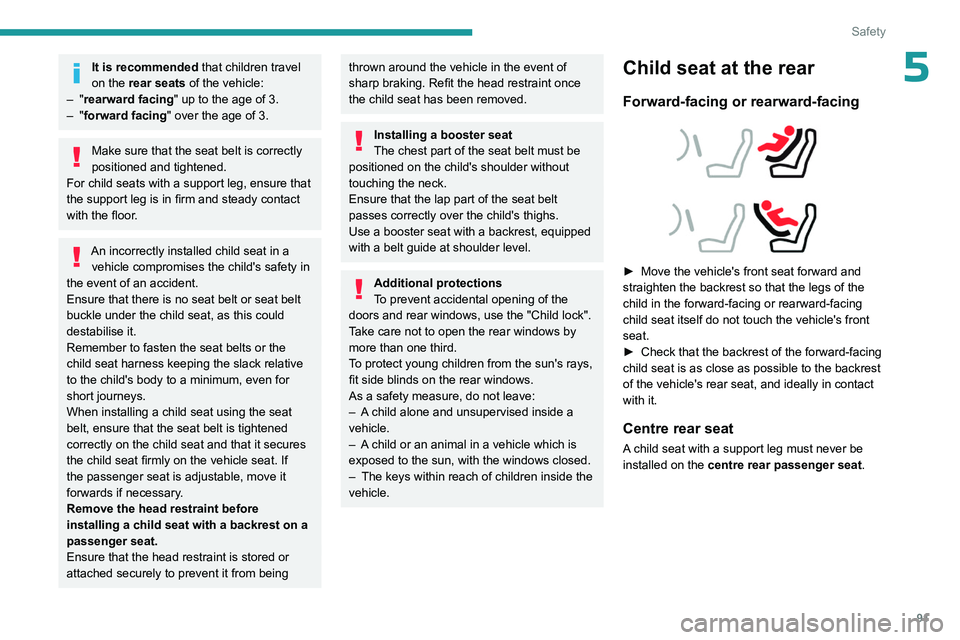
Forward-facing or rearward-facing
► Move the vehicle's front seat forward and
straighten the backrest so that the legs of the
child in the forward-facing or rearward-facing
child seat itself do not touch the vehicle's front
seat.
►
Check that the backrest of the forward-facing
child seat is as close as possible to the backrest
of the vehicle's rear seat, and ideally in contact
with it.
Centre rear seat
A child seat with a support leg must never be
installed on the centre rear passenger seat .
Page 99 of 280

97
Safety
5
KeySeat position where the installation of a
child seat is forbidden.
Front passenger airbag
deactivated.
Front passenger airbag activated.
Seat position suitable for the installation
of a child seat secured using the seat belt and universally approved "rearward facing"
and/or "forward facing"
(U) for all sizes and
weight groups.
Seat position suitable for the installation
of a child seat secured using the seat belt
and universally approved "forward facing"
(UF) for groups 1, 2 and 3, or dedicated to
children between 76 and 150
cm in size only.
Seat position authorised for the
installation of an i-Size child seat.
Seat position not suitable for the
installation of a child seat with support
leg.
Presence of a Top Tether anchorage
point at the rear of the backrest,
authorising the installation of an universal
ISOFIX child seat .
"Rearward facing" ISOFIX child seat:
–
R1
: ISOFIX child seat for a baby.
–
R2
: ISOFIX reduced size child seat.
–
R3
: ISOFIX large size child seat.
"Forward facing" ISOFIX child seat:
–
F2X
: ISOFIX child seat for toddlers.
–
F2
: ISOFIX reduced height child seat.
–
F3
: ISOFIX full height child seat.
Booster child seat:
–
B2
: reduced width booster seat.
–
B3
: full width booster seat.
Seat position where the installation of an
ISOFIX child seat is forbidden. For seat adjustments, refer to the summary table
"Installing universal, ISOFIX and i-Size child
seats
".
Manual child lock
The system prevents a rear door from being
opened using its interior handle.
The control is located on the edge of each rear
door (indicated by a marking on the bodywork).
Activation/Deactivation
► To activate, turn the built-in key fully:
• T o the right on the left-hand rear door.
•
T
o the left on the right-hand rear door.
►
T
o deactivate, turn it in the opposite direction.
Page 103 of 280
101
Driving
6activation of the rechargeable hybrid system
(confirmed by an audible signal).
To exit Park mode, wait for the READY indicator lamp to come on.
By default, the system starts in Electric mode.
Depending on certain parameters (battery
charge level or outside temperature), the system
determines whether it is necessary to start the
petrol engine.
It is possible to change the driving mode at any
time using the mode selector.
When the vehicle starts in electric mode,
it makes no noise.
Pay particular attention to pedestrians and
cyclists who may not hear the vehicle coming
despite the pedestrian horn.
Switching off
► Deactivate cruise control alone or Drive
Assist Plus (depending on version).
►
Immobilise the vehicle using the parking
brake.
►
With a
manual gearbox, ideally put the gear
lever into neutral.
►
With an
automatic gearbox, ideally select
mode
P or N.
►
Press the
START/STOP button.
►
For rechargeable hybrid vehicles, before
leaving the vehicle, check that the READY
indicator lamp is switched off.
The automatic gearbox locks in mode P.
In some circumstances, it is necessary to turn
the steering wheel to lock the steering column.
If the vehicle is not immobilised, the
engine will not stop.
With the engine off, the braking and
steering assistance systems are also cut
off - risk of loss of control of the vehicle!
Never leave your vehicle with the
electronic key still inside.
Starting/Switching off
electric vehicles
Starting
The drive selector must be in mode P.
► Fully depress the brake pedal and briefly
press the
START/STOP button.
►
Keep the foot on the brake pedal until the
READY
indicator lamp comes on and an audible
signal is emitted, indicating that the vehicle is
ready to drive.
►
With the foot on the brake, select the
mode
D/B or R.
►
Release the brake pedal, then accelerate.
On starting, the instrument panel lights up and
the power indicator cursor moves to the "neutral"
position.
The steering column automatically
unlocks (you may hear a sound and feel the
steering wheel move).
Switching off
► Press the START/STOP button.
Before exiting the vehicle, check that:
–
The drive selector is in mode P
.
–
The READY indicator lamp is off.
If the driver's door is opened while the
required conditions for stopping are not
satisfied, an audible signal is emitted,
accompanied by the display of a warning
message.
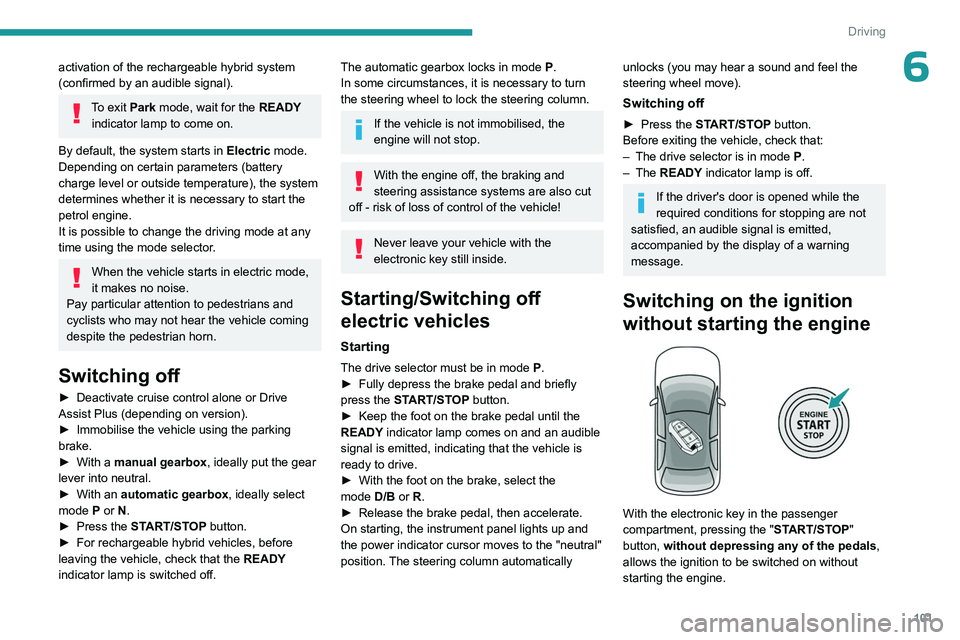
Switching on the ignition
without starting the engine
With the electronic key in the passenger
compartment, pressing the " START/STOP"
button, without depressing any of the pedals ,
allows the ignition to be switched on without
starting the engine.
Page 104 of 280
102
Driving
► Press this button again to switch off the
ignition and allow the vehicle to be locked.
Key not detected
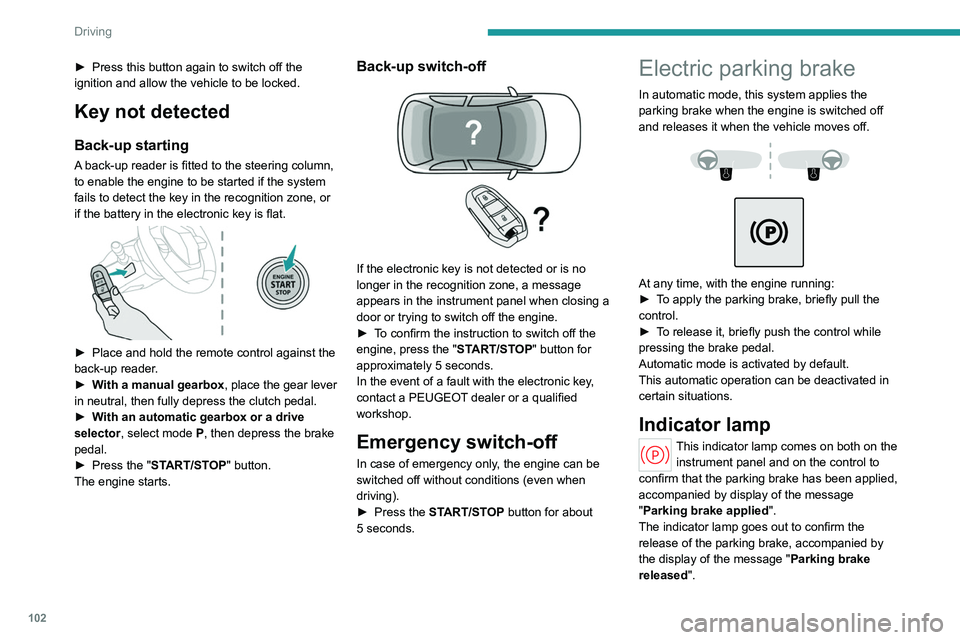
Back-up starting
A back-up reader is fitted to the steering column,
to enable the engine to be started if the system
fails to detect the key in the recognition zone, or
if the battery in the electronic key is flat.
► Place and hold the remote control against the
back-up reader .
►
W
ith a manual gearbox, place the gear lever
in neutral, then fully depress the clutch pedal.
►
W
ith an automatic gearbox or a drive
selector, select mode
P, then depress the brake
pedal.
►
Press the "
START/STOP" button.
The engine starts.
Back-up switch-off
If the electronic key is not detected or is no
longer in the recognition zone, a message
appears in the instrument panel when closing a
door or trying to switch off the engine.
►
T
o confirm the instruction to switch off the
engine, press the " START/STOP" button for
approximately 5
seconds.
In the event of a fault with the electronic key,
contact a PEUGEOT dealer or a qualified
workshop.
Emergency switch-off
In case of emergency only, the engine can be
switched off without conditions (even when
driving).
►
Press the
START/STOP button for about
5
seconds.
Electric parking brake
In automatic mode, this system applies the
parking brake when the engine is switched off
and releases it when the vehicle moves off.
At any time, with the engine running:
► T o apply the parking brake, briefly pull the
control.
►
T
o release it, briefly push the control while
pressing the brake pedal.
Automatic mode is activated by default.
This automatic operation can be deactivated in
certain situations.
Indicator lamp
This indicator lamp comes on both on the instrument panel and on the control to
confirm that the parking brake has been applied,
accompanied by display of the message
"Parking brake applied".
The indicator lamp goes out to confirm the
release of the parking brake, accompanied by
the display of the message " Parking brake
released ".
Page 106 of 280
104
Driving
Automatic application
With the vehicle stationary, the parking brake
is applied automatically when the engine is
switched off.
It is not applied automatically if the
engine stalls or enters STOP mode with
Stop & Start.
In automatic mode, the parking brake
can be manually applied or released at
any time using the control.
Special cases
Immobilising the vehicle with the
engine running
To immobilise the vehicle with the engine
running, briefly pull the control.
Parking the vehicle with the brake
released
In very cold conditions (ice), applying the
parking brake is not recommended.
To immobilise the vehicle, engage a gear or
place the chocks against one of the wheels.
With an automatic gearbox or drive
selector, mode P is automatically
selected when the ignition is switched off. The
wheels are blocked.
For more information on Free-wheeling, refer
to the corresponding section.
With an automatic gearbox or a drive
selector, if you open the driver's door
while mode N is engaged, an audible signal
will sound and mode P will be engaged. The
audible signal stops when the driver's door is
closed.
Deactivating automatic
operation
In some situations, for example when it is
extremely cold or when towing (e.g. caravan,
breakdown), it may be necessary to deactivate
automatic operation of the system.
►
Start the engine.
►
Use the control to apply the parking brake, if
it is released.
►
T
ake your foot fully off the brake pedal.
►
Push the control for 10 to a maximum of
15
seconds.
►
Release the control.
►
Depress and hold the brake pedal.
►
Pull the control for 2
seconds.
This indicator lamp on the instrument panel comes on to confirm deactivation of
the automatic functions.
►
Release the control and the brake pedal. From this point onwards, only the manual
functions, using the control, allow the parking
brake to be applied and released.
►
Follow this procedure again to reactivate
automatic operation (confirmed by the indicator
lamp on the instrument panel going out).
Emergency braking
If depressing the brake pedal fails to provide
effective braking or in exceptional circumstances
(e.g.
driver unwell, assisted driving), the vehicle
can be braked by sustained pulling on the
electric parking brake control. Braking continues
for as long as the control is kept pulled, and
ceases when the control is released.
The ABS and DSC systems stabilise the vehicle
during emergency braking.
If emergency braking malfunctions, the message
"Parking brake fault" will be displayed on the
instrument panel.
If the ABS and DSC systems
malfunction, indicated by lighting
one or both warning lamps on the instrument
panel, the vehicle’s stability is no longer ensured.
►
In this case, ensure the vehicle's stability by
successive and repeated "pull-release" actions
on the electric parking brake control until the
vehicle comes to a complete stop.
Page 173 of 280
171
Practical information
7For a full charge, follow the charging procedure
without interrupting it, until it stops automatically.
Charging may be performed either immediately
(by default) or deferred.
Deferred charging is set via the touch
screen or the MYPEUGEOT APP
application.
When the vehicle is connected, the following
information is displayed on the instrument panel:
–
T
raction battery charge status (%).
–
Remaining range (miles or km).
–
Estimated charging time (calculation may take
a few seconds).
–
Charging speed (miles or km gained per hour).
After the instrument panel has been put into
standby mode, this information can be displayed
again by unlocking the vehicle or opening a door
.
It is also possible to monitor the charging
progress using the MYPEUGEOT APP
application.
For more information on Remotely
operable additional functions , refer to the
corresponding section.
Lounge mode
When the vehicle is connected, it is
possible to switch on the ignition and use
certain functions such as the audio and
telematics system and the air conditioning
system for several hours.
Low charging / Driving
Driving when the charge level of the
traction battery is too low can lead to the
vehicle breaking down and can lead to
accidents or serious injuries. ALWAYS make
sure the traction battery has a sufficient
charge level.
Low charging / Parking
If the outside temperature is negative,
it is recommended not to park your vehicle
outside for several hours at a low charging
(less than 20%).
Vehicle in storage for more than
1 month
In the event of a long period of non-use of
the vehicle (beyond 4
weeks) without the
possibility of charging when restarting, the
self-discharge may make it impossible to
restart if the traction battery charge level
is a low or very low, especially at negative
ambient temperatures. ALWAYS make sure
that the traction battery has a charge between
20% and 40% if you do not plan to use your
vehicle for several weeks.
Do not connect the charging cable.
Always park the vehicle in a place with
temperatures between -10°C and 30°C
(parking in a place with extreme temperatures
can damage the traction battery).
Refer to the 12 V battery/Accessory
batteries section for the battery disconnection
procedure.
Precautions
Before charging
Depending on the context:
►
Have a professional check that the
electrical system to be used complies with
applicable standards and is compatible with
the vehicle.
►
Have a professional electrician install
a dedicated domestic power socket or
accelerated charging unit (W
allbox)
compatible with the vehicle.
Use the charging cable supplied with the
vehicle.
For more information, contact a PEUGEOT
dealer or a qualified workshop.
During charging
As a safety measure, the engine will
not start if the charging cable is plugged into
the connector on the vehicle. A warning is
displayed on the instrument panel.
While charging is in progress, unlocking the
vehicle will cause the charging to stop.
If no action is taken on one of the openings
(door or boot) or on the charging nozzle, the
vehicle will lock again after 30 seconds and
charging will resume automatically.
Page 175 of 280
173
Practical information
7► Follow the accelerated charging unit
(W allbox) user instructions.
►
Remove the protective cover from the
charging nozzle.
►
Insert the nozzle into the vehicle's charging
connector
.
The start of charging is confirmed by the flashing
of the green light guides in the flap.
If this is not the case, charging has not
started; restart the procedure ensuring that all
connections are properly established.
The red indicator lamp in the flap comes on to
indicate that the nozzle is locked.
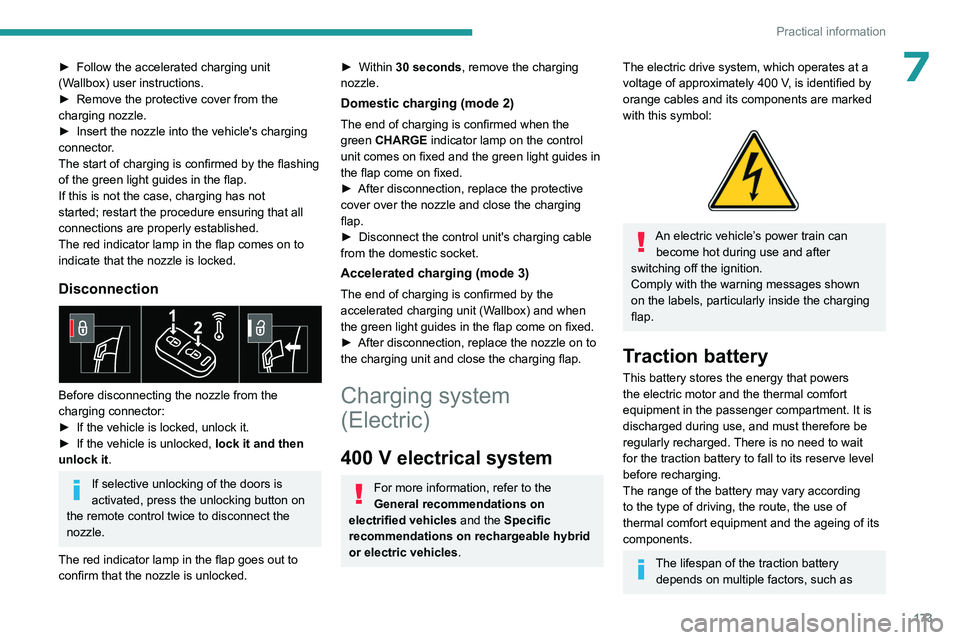
Disconnection
Before disconnecting the nozzle from the
charging connector:
►
If the vehicle is locked, unlock it.
►
If the vehicle is unlocked, lock it and then
unlock it .
If selective unlocking of the doors is
activated, press the unlocking button on
the remote control twice to disconnect the
nozzle.
The red indicator lamp in the flap goes out to
confirm that the nozzle is unlocked.
► Within 30 seconds, remove the charging
nozzle.
Domestic charging (mode 2)
The end of charging is confirmed when the
green CHARGE indicator lamp on the control
unit comes on fixed and the green light guides in
the flap come on fixed.
►
After disconnection, replace the protective
cover over the nozzle and close the charging
flap.
►
Disconnect the control unit's charging cable
from the domestic socket.
Accelerated charging (mode 3)
The end of charging is confirmed by the
accelerated charging unit (Wallbox) and when
the green light guides in the flap come on fixed.
►
After disconnection, replace the nozzle on to
the charging unit and close the charging flap.
Charging system
(Electric)
400 V electrical system
For more information, refer to the
General recommendations on
electrified vehicles and the Specific
recommendations on rechargeable hybrid
or electric vehicles.
The electric drive system, which operates at a
voltage of approximately 400 V, is identified by
orange cables and its components are marked
with this symbol:
An electric vehicle’s power train can become hot during use and after
switching off the ignition.
Comply with the warning messages shown
on the labels, particularly inside the charging
flap.
Traction battery
This battery stores the energy that powers
the electric motor and the thermal comfort
equipment in the passenger compartment. It is
discharged during use, and must therefore be
regularly recharged. There is no need to wait
for the traction battery to fall to its reserve level
before recharging.
The range of the battery may vary according
to the type of driving, the route, the use of
thermal comfort equipment and the ageing of its
components.
The lifespan of the traction battery depends on multiple factors, such as
Page 176 of 280
174
Practical information
climatic conditions, distance travelled and
how often it has been fast-charged.
Charging connectors and
indicator lamps
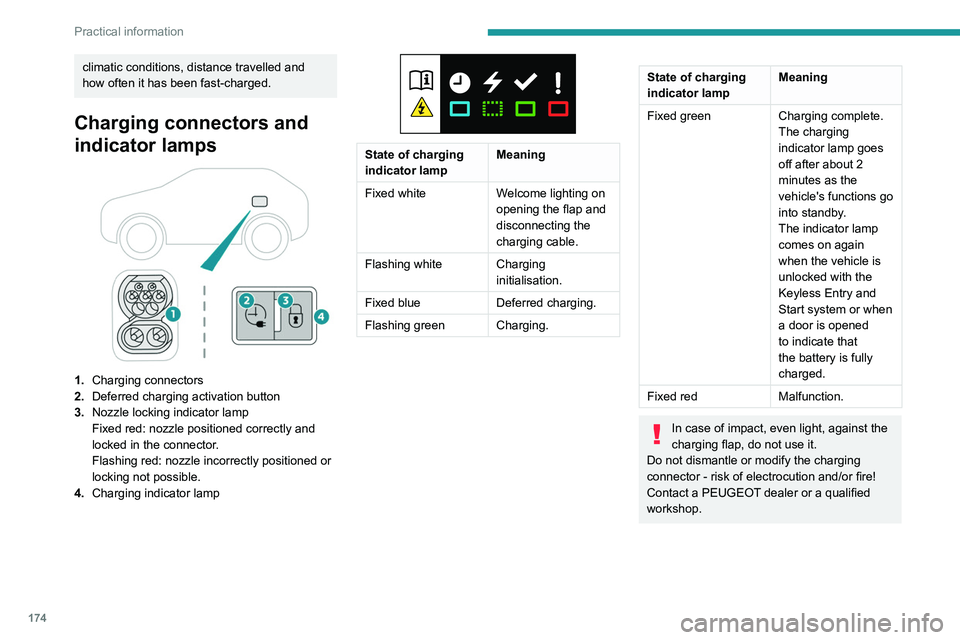
1.Charging connectors
2. Deferred charging activation button
3. Nozzle locking indicator lamp
Fixed red: nozzle positioned correctly and
locked in the connector.
Flashing red: nozzle incorrectly positioned or
locking not possible.
4. Charging indicator lamp
State of charging
indicator lamp Meaning
Fixed white Welcome lighting on
opening the flap and
disconnecting the
charging cable.
Flashing white Charging initialisation.
Fixed blue Deferred charging.
Flashing green Charging.
State of charging
indicator lamp Meaning
Fixed green Charging complete.
The charging
indicator lamp goes
off after about 2
minutes as the
vehicle's functions go
into standby.
The indicator lamp
comes on again
when the vehicle is
unlocked with the
Keyless Entry and
Start system or when
a door is opened
to indicate that
the battery is fully
charged.
Fixed red Malfunction.
In case of impact, even light, against the
charging flap, do not use it.
Do not dismantle or modify the charging
connector - risk of electrocution and/or fire!
Contact a PEUGEOT dealer or a qualified
workshop.