2024 GMC SIERRA Truck weight
[x] Cancel search: Truck weightPage 33 of 440

GMC Sierra/Sierra Denali 2500 HD/3500 HD Owner Manual (GMNA-
Localizing-U.S./Canada-16908340) - 2024 - CRC - 12/7/22
Keys, Doors, and Windows 31
Alternate Method
When applying any load to the tailgate,
distribute the weight evenly across the
width of the tailgate. This applies to all
tailgate types.
.Use a load-distributing member (1).
.Secure the ramp to the bumper (2).
Transporting Items That Can
Catch Fire
{Warning
To avoid personal injury and/or vehicle
damage when transporting items that
can catch fire, such as leaves, mulch, hay,
or cardboard, in the truck bed:
.Make sure items are securely
contained inside the truck bed. Never
allow them to hang over the sides or
fall in between the truck bed and
the cab.
.Never place items between the cab
and the truck bed. They could touch
hot exhaust parts and ignite.
{Warning
Keep cigarettes, sparks, and other ignition
sources away from the area between the
bed of the truck and cab. They could fall
onto the fuel system below and start a
fire. You or others could be injured
and/or the vehicle damaged.
Power Assist Steps
{Warning
To avoid personal injury or property
damage, before entering or exiting the
vehicle, be sure the power assist step is
fully extended. Do not step on the power
assist step while it is moving. Never place
hands or other body parts between the
extended power assist step and the
vehicle.
If equipped, the power assist steps will
deploy when the door is opened and
automatically retract three seconds after the
door is closed. The power assist steps will
retract immediately if the vehicle starts
moving. Check the step position before
exiting the vehicle.
Disable the power assist steps before jacking
or placing any object under the vehicle.
Too much ice buildup may prevent
deployment of the power assist steps. If this
happens, disable the power assist steps,
clear the ice, then enable the assist steps
and confirm normal function prior to use.
Page 214 of 440

GMC Sierra/Sierra Denali 2500 HD/3500 HD Owner Manual (GMNA-
Localizing-U.S./Canada-16908340) - 2024 - CRC - 12/13/22
212 Driving and Operating
Example 3
1. Vehicle Capacity Weight for Example 3= 453 kg (1,000 lb)
2. Subtract Occupant Weight @ 91 kg (200 lb) × 5 = 453 kg (1,000 lb)
3. Available Cargo Weight = 0 kg (0 lb)
Refer to the Tire and Loading
Information label for specific
information about the vehicle's capacity
weight and seating positions. The
combined weight of the driver,
passengers, accessories, and cargo
should never exceed the vehicle's
capacity weight. Certification/Tire Label
Label Example
A vehicle-specific Certification/Tire label
is attached to the center pillar (B-pillar).
The label may show the size of the
vehicle's original tires and the inflation
pressures needed to obtain the gross
weight capacity of the vehicle. This is
called Gross Vehicle Weight
Rating (GVWR). The GVWR includes the
weight of the vehicle, all occupants, and
cargo.
The Certification/Tire label also may
show the maximum weights for the
front and rear axles, called Gross AxleWeight Rating (GAWR). To determine
the actual loads on the front and rear
axles, weigh the vehicle at a weigh
station. Your dealer can help with this.
Be sure to spread the load equally on
both sides of the centerline.
The Certification/Tire label may also
contain important information about
the Front Axle Reserve Capacity.
{Warning
In the case of a sudden stop or
collision, things carried in the bed of
your truck could shift forward and
come into the passenger area,
injuring you and others. If you put
things in the bed of your truck, you
should make sure they are properly
secured.
Caution
Overloading the vehicle may cause
damage. Repairs would not be covered by
the vehicle warranty. Do not overload the
vehicle.
Page 216 of 440
GMC Sierra/Sierra Denali 2500 HD/3500 HD Owner Manual (GMNA-
Localizing-U.S./Canada-16908340) - 2024 - CRC - 12/13/22
214 Driving and Operating
* Equipment Maximum Weight
Ladder Rack and
Cargo340 kg (750 lb)
Cross Toolbox and
Cargo 181 kg (400 lb)
Side Boxes and
Cargo 113 kg per side
(250 lb per side)
* The combined weight for all
rail-mounted equipment should not
exceed 454 kg (1,000 lb).
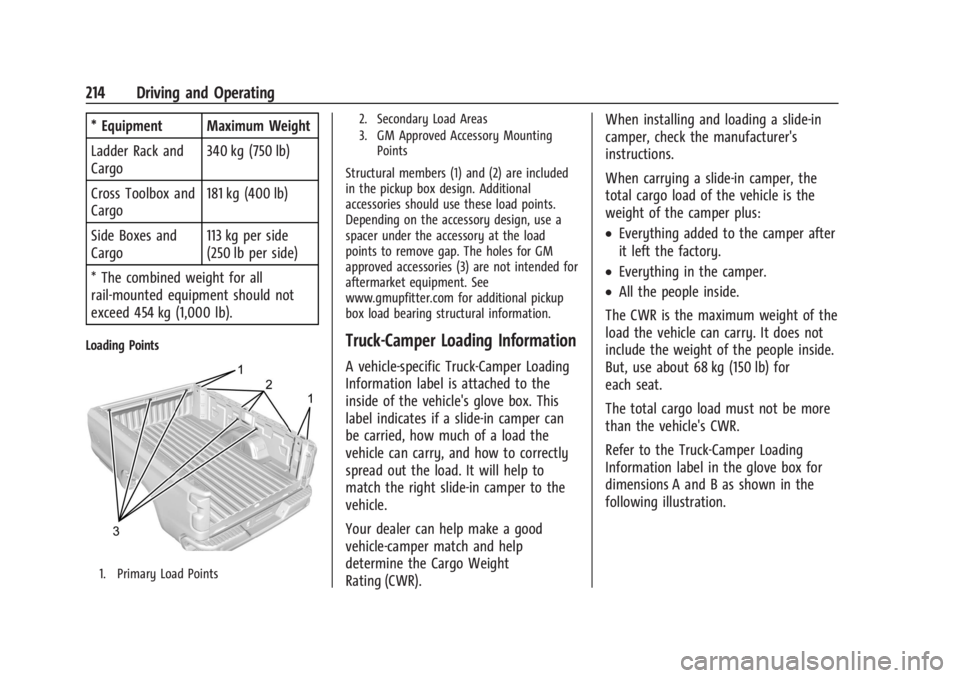
Loading Points
1. Primary Load Points 2. Secondary Load Areas
3. GM Approved Accessory Mounting
Points
Structural members (1) and (2) are included
in the pickup box design. Additional
accessories should use these load points.
Depending on the accessory design, use a
spacer under the accessory at the load
points to remove gap. The holes for GM
approved accessories (3) are not intended for
aftermarket equipment. See
www.gmupfitter.com for additional pickup
box load bearing structural information.
Truck-Camper Loading Information
A vehicle-specific Truck-Camper Loading
Information label is attached to the
inside of the vehicle's glove box. This
label indicates if a slide-in camper can
be carried, how much of a load the
vehicle can carry, and how to correctly
spread out the load. It will help to
match the right slide-in camper to the
vehicle.
Your dealer can help make a good
vehicle-camper match and help
determine the Cargo Weight
Rating (CWR). When installing and loading a slide-in
camper, check the manufacturer's
instructions.
When carrying a slide-in camper, the
total cargo load of the vehicle is the
weight of the camper plus:
.Everything added to the camper after
it left the factory.
.Everything in the camper.
.All the people inside.
The CWR is the maximum weight of the
load the vehicle can carry. It does not
include the weight of the people inside.
But, use about 68 kg (150 lb) for
each seat.
The total cargo load must not be more
than the vehicle's CWR.
Refer to the Truck-Camper Loading
Information label in the glove box for
dimensions A and B as shown in the
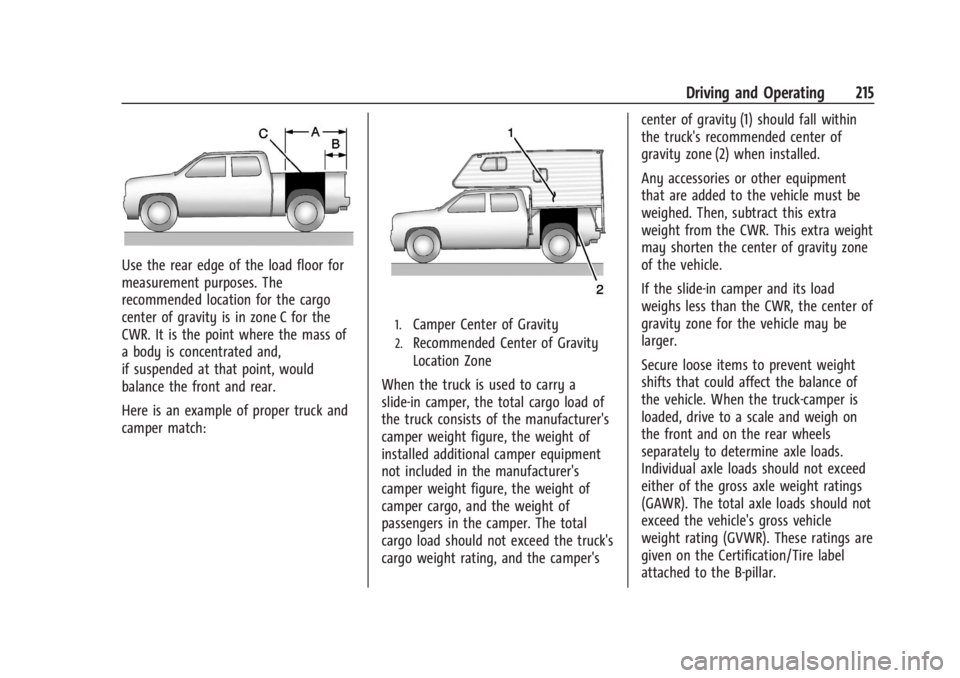
following illustration.
Page 217 of 440
GMC Sierra/Sierra Denali 2500 HD/3500 HD Owner Manual (GMNA-
Localizing-U.S./Canada-16908340) - 2024 - CRC - 12/13/22
Driving and Operating 215
Use the rear edge of the load floor for
measurement purposes. The
recommended location for the cargo
center of gravity is in zone C for the
CWR. It is the point where the mass of
a body is concentrated and,
if suspended at that point, would
balance the front and rear.
Here is an example of proper truck and
camper match:
1.Camper Center of Gravity
2.Recommended Center of Gravity
Location Zone
When the truck is used to carry a
slide-in camper, the total cargo load of
the truck consists of the manufacturer's
camper weight figure, the weight of
installed additional camper equipment
not included in the manufacturer's
camper weight figure, the weight of
camper cargo, and the weight of
passengers in the camper. The total
cargo load should not exceed the truck's
cargo weight rating, and the camper's center of gravity (1) should fall within
the truck's recommended center of
gravity zone (2) when installed.
Any accessories or other equipment
that are added to the vehicle must be
weighed. Then, subtract this extra
weight from the CWR. This extra weight
may shorten the center of gravity zone
of the vehicle.
If the slide-in camper and its load
weighs less than the CWR, the center of
gravity zone for the vehicle may be
larger.
Secure loose items to prevent weight
shifts that could affect the balance of
the vehicle. When the truck-camper is
loaded, drive to a scale and weigh on
the front and on the rear wheels
separately to determine axle loads.
Individual axle loads should not exceed
either of the gross axle weight ratings
(GAWR). The total axle loads should not
exceed the vehicle's gross vehicle
weight rating (GVWR). These ratings are
given on the Certification/Tire label
attached to the B-pillar.
Page 284 of 440
GMC Sierra/Sierra Denali 2500 HD/3500 HD Owner Manual (GMNA-
Localizing-U.S./Canada-16908340) - 2024 - CRC - 12/13/22
282 Driving and Operating
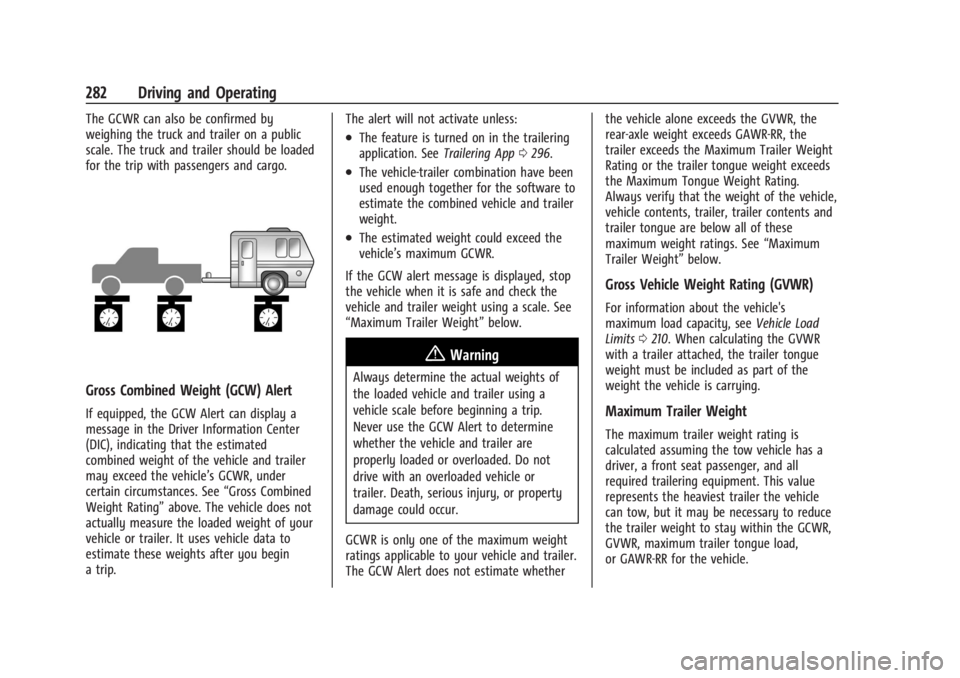
The GCWR can also be confirmed by
weighing the truck and trailer on a public
scale. The truck and trailer should be loaded
for the trip with passengers and cargo.
Gross Combined Weight (GCW) Alert
If equipped, the GCW Alert can display a
message in the Driver Information Center
(DIC), indicating that the estimated
combined weight of the vehicle and trailer
may exceed the vehicle’s GCWR, under
certain circumstances. See“Gross Combined
Weight Rating” above. The vehicle does not
actually measure the loaded weight of your
vehicle or trailer. It uses vehicle data to
estimate these weights after you begin
a trip. The alert will not activate unless:
.The feature is turned on in the trailering
application. See
Trailering App0296.
.The vehicle-trailer combination have been
used enough together for the software to
estimate the combined vehicle and trailer
weight.
.The estimated weight could exceed the
vehicle’s maximum GCWR.
If the GCW alert message is displayed, stop
the vehicle when it is safe and check the
vehicle and trailer weight using a scale. See
“Maximum Trailer Weight” below.
{Warning
Always determine the actual weights of
the loaded vehicle and trailer using a
vehicle scale before beginning a trip.
Never use the GCW Alert to determine
whether the vehicle and trailer are
properly loaded or overloaded. Do not
drive with an overloaded vehicle or
trailer. Death, serious injury, or property
damage could occur.
GCWR is only one of the maximum weight
ratings applicable to your vehicle and trailer.
The GCW Alert does not estimate whether the vehicle alone exceeds the GVWR, the
rear-axle weight exceeds GAWR-RR, the
trailer exceeds the Maximum Trailer Weight
Rating or the trailer tongue weight exceeds
the Maximum Tongue Weight Rating.
Always verify that the weight of the vehicle,
vehicle contents, trailer, trailer contents and
trailer tongue are below all of these
maximum weight ratings. See
“Maximum
Trailer Weight” below.
Gross Vehicle Weight Rating (GVWR)
For information about the vehicle's
maximum load capacity, see Vehicle Load
Limits 0210. When calculating the GVWR
with a trailer attached, the trailer tongue
weight must be included as part of the
weight the vehicle is carrying.
Maximum Trailer Weight
The maximum trailer weight rating is
calculated assuming the tow vehicle has a
driver, a front seat passenger, and all
required trailering equipment. This value
represents the heaviest trailer the vehicle
can tow, but it may be necessary to reduce
the trailer weight to stay within the GCWR,
GVWR, maximum trailer tongue load,
or GAWR-RR for the vehicle.
Page 287 of 440
GMC Sierra/Sierra Denali 2500 HD/3500 HD Owner Manual (GMNA-
Localizing-U.S./Canada-16908340) - 2024 - CRC - 12/13/22
Driving and Operating 285
Gooseneck Hitch
A gooseneck hitch is designed to be coupled
to a special hitch leveraging a hitch ball, and
is mounted over the rear axle in the
truck bed.
Fifth-Wheel Hitch
A fifth-wheel hitch is mounted over the rear
axle in the truck bed, and leverages a
hinged plate—the same type of hitch
leveraged by semi trucks. Generally,
fifth-wheel hitches accommodate large
trailers with as many as one, two, or three
axles.
Always use the correct hitch equipment for
your vehicle. Crosswinds, large trucks going
by, and rough roads can affect the trailer
and the hitch. Proper hitch equipment for your vehicle
helps maintain control of the vehicle-trailer
combination. Many trailers can be towed
using a weight-carrying hitch which has a
coupler latched to the hitch ball, or a tow
eye latched to a pintle hook. Other trailers
may require a weight-distributing hitch that
uses spring bars to distribute the trailer
tongue weight between your vehicle and
trailer axles. Fifth-wheel and gooseneck
hitches may also be used. See
“Maximum
Trailer Tongue Weight” underTrailer Towing
0 280 for weight limits with various hitch
types.
Avoid sharp turns when using a step-bumper
hitch to prevent damage. Make wider turns
to prevent contact between your trailer and
your bumper. Consider using mechanical sway controls
with any trailer. Ask a trailering professional
about sway controls or refer to the trailer
manufacturer's recommendations and
instructions.
Weight-Distributing Hitch and
Adjustment
A weight-distributing hitch may be useful
with some trailers. Use the following
guidelines to determine if a
weight-distributing hitch should be used.
Page 288 of 440
GMC Sierra/Sierra Denali 2500 HD/3500 HD Owner Manual (GMNA-
Localizing-U.S./Canada-16908340) - 2024 - CRC - 12/13/22
286 Driving and Operating
VehicleMaximum Trailer Weight Weight Distributing Hitch Hitch Distribution
2500/3500 Up to 9 080 kg (20,000 lb) Not Required* 25%
*Weight distributing hitch required on vehicles equipped with On/Off Road (OOR) and Mud Terrain (MT) tires with trailers over 10,000 lbs.
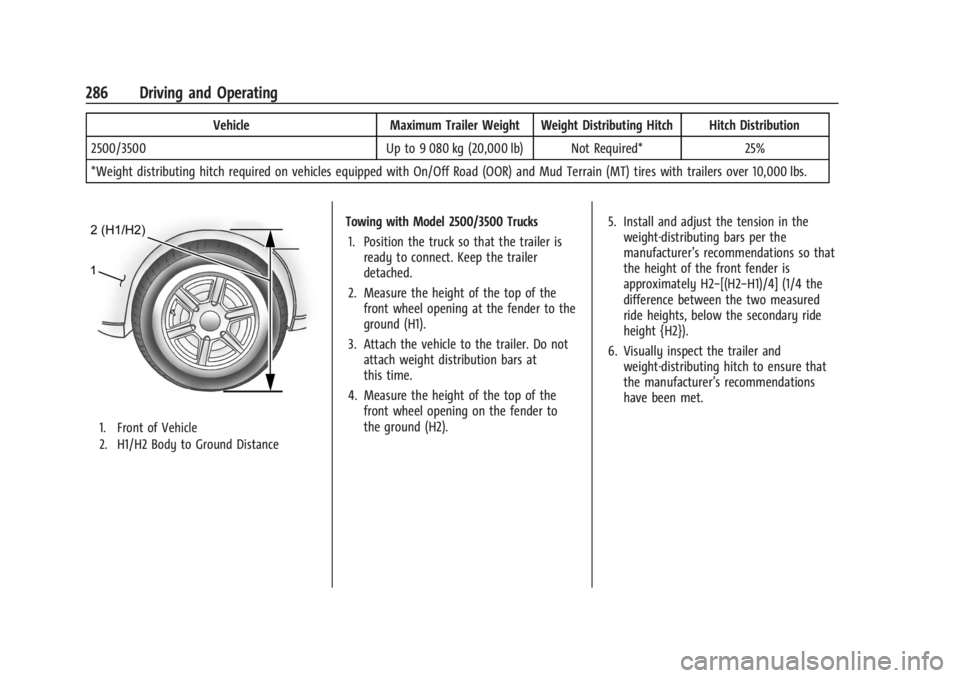
1. Front of Vehicle
2. H1/H2 Body to Ground Distance
Towing with Model 2500/3500 Trucks 1. Position the truck so that the trailer is ready to connect. Keep the trailer
detached.
2. Measure the height of the top of the front wheel opening at the fender to the
ground (H1).
3. Attach the vehicle to the trailer. Do not attach weight distribution bars at
this time.
4. Measure the height of the top of the front wheel opening on the fender to
the ground (H2). 5. Install and adjust the tension in the
weight-distributing bars per the
manufacturer’s recommendations so that
the height of the front fender is
approximately H2−[(H2−H1)/4] (1/4 the
difference between the two measured
ride heights, below the secondary ride
height {H2}).
6. Visually inspect the trailer and weight-distributing hitch to ensure that
the manufacturer’s recommendations
have been met.
Page 309 of 440
GMC Sierra/Sierra Denali 2500 HD/3500 HD Owner Manual (GMNA-
Localizing-U.S./Canada-16908340) - 2024 - CRC - 12/13/22
Driving and Operating 307
The plow the vehicle can carry depends on
many things, such as:
.The options the vehicle came with, and
the weight of those options.
.The weight and number of passengers to
be carried.
.The weight of items added to the vehicle,
like a tool box or truck cap.
.The total weight of any additional cargo
to be carried.
To safely carry a snow plow on the vehicle:
.With a snow plow attached, the engine
coolant temperature gauge may show a
higher temperature than while driving
without one. The snow plow could block
the airflow to the radiator. This could be
more noticeable as vehicle speed
increases. At speeds above 72 km/h
(45 mph), this may cause the engine
coolant to overheat. Move or angle the
snow plow blade to allow increased
airflow to the radiator.
.To increase the airflow, move the snow
plow blade position.
.If driving more than 24 km/h (15 mph),
angle the plow blade position.
.Make sure the weight on the front and
rear axles does not exceed the axle rating
for each.
.Follow the snowplow manufacturer’s
recommendations for any rear ballast that
may be required. Rear ballast may be
required to ensure a proper front and rear
weight distribution ratio even though the
actual weight at the front axle may be
less than the front axle rating.
.The snowplow manufacturer or installer
can assist in determining the amount of
rear ballast required to ensure that the
vehicle with the attached snowplow does
not exceed the GVW rating, the front and
rear axle ratings, or the front and rear
weight distribution ratio (refer to the GM
Upfitter Manual).
Front axle reserve capacity is the difference
between the Front Gross Axle Weight
Rating (GAWR) and the front axle weight of
the vehicle with full fuel, passengers, and
any other cargo. This is the amount of
weight that can be added to the front axle
before reaching the Front GAWR. To calculate the amount of weight any front
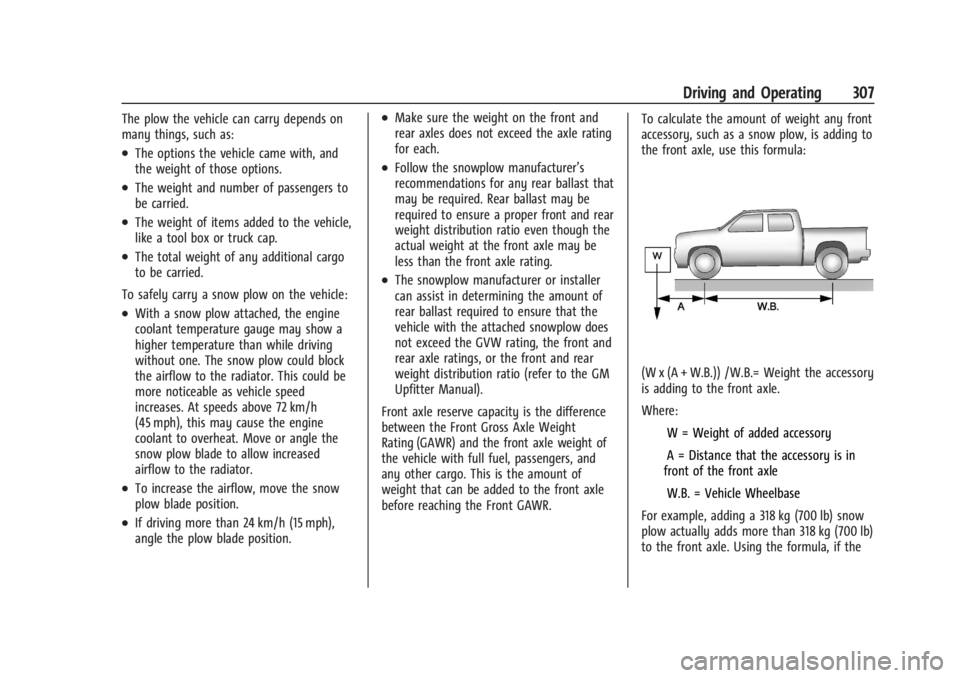
accessory, such as a snow plow, is adding to
the front axle, use this formula:
(W x (A + W.B.)) /W.B.= Weight the accessory
is adding to the front axle.
Where:
IW = Weight of added accessory
IA = Distance that the accessory is in
front of the front axle
IW.B. = Vehicle Wheelbase
For example, adding a 318 kg (700 lb) snow
plow actually adds more than 318 kg (700 lb)
to the front axle. Using the formula, if the