2024 GMC SIERRA DENALI ignition
[x] Cancel search: ignitionPage 330 of 440
GMC Sierra/Sierra Denali 2500 HD/3500 HD Owner Manual (GMNA-
Localizing-U.S./Canada-16908340) - 2024 - CRC - 12/7/22
328 Vehicle Care
Extended Storage: Remove the black,
negative (−) cable from the battery or use a
battery trickle charger.
Negative Battery Cable Disconnection
{Warning
Before disconnecting the negative battery
cable, turn off all features, turn the
ignition off, and remove the key,
if equipped, from the vehicle. If this is
not done, you or others could be injured,
and the vehicle could be damaged.
Caution
If the battery is disconnected with the
ignition on or the vehicle in Retained
Accessory Power (RAP), the OnStar
back-up battery will be permanently
discharged and will need to be replaced.
1. Make sure the lamps, features, and accessories are turned off.
2. Turn the vehicle off and remove the key, if equipped.
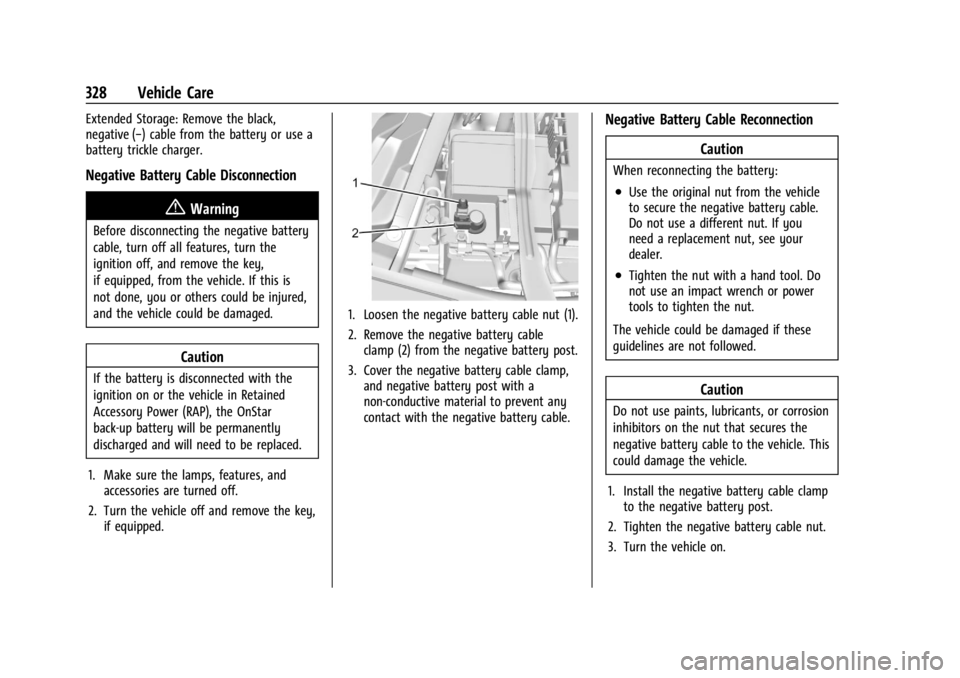
1. Loosen the negative battery cable nut (1).
2. Remove the negative battery cableclamp (2) from the negative battery post.
3. Cover the negative battery cable clamp, and negative battery post with a
non-conductive material to prevent any
contact with the negative battery cable.
Negative Battery Cable Reconnection
Caution
When reconnecting the battery:
.Use the original nut from the vehicle
to secure the negative battery cable.
Do not use a different nut. If you
need a replacement nut, see your
dealer.
.Tighten the nut with a hand tool. Do
not use an impact wrench or power
tools to tighten the nut.
The vehicle could be damaged if these
guidelines are not followed.
Caution
Do not use paints, lubricants, or corrosion
inhibitors on the nut that secures the
negative battery cable to the vehicle. This
could damage the vehicle.
1. Install the negative battery cable clamp to the negative battery post.
2. Tighten the negative battery cable nut.
3. Turn the vehicle on.
Page 332 of 440
GMC Sierra/Sierra Denali 2500 HD/3500 HD Owner Manual (GMNA-
Localizing-U.S./Canada-16908340) - 2024 - CRC - 12/7/22
330 Vehicle Care
General Motors LLC, and is not limited to
any particular part, component or system of
the vehicle manufactured by General Motors
LLC. Defects in design, assembly or in any
part, component or system of the vehicle as
manufactured by General Motors LLC, which,
at the time it left General Motors LLC’s
control, caused noise emissions to exceed
Federal standards, are covered by this
warranty for the life of the vehicle.
TAMPERING WITH NOISE CONTROL
SYSTEM PROHIBITED
Federal law prohibits the following acts or
the causing thereof:1. The removal or rendering inoperative by any person, other than for purposes of
maintenance, repair, or replacement, of
any device or element of design
incorporated into any new vehicle for
the purpose of noise control prior to its
sale or delivery to the ultimate purchaser
or while it is in use; or
2. the use of the vehicle after such device or element of design has been removed
or rendered inoperative by any person. Among those acts presumed to constitute
tampering are the acts listed below.
Insulation:
Removal of the noise shields or any
undercab insulation.
Engine:
Removal or rendering engine speed
governor, if so equipped, inoperative so as
to allow engine speed to exceed
manufacturer specifications.
Modification of the engine control system or
calibration.
Fan and Drive:
.Removal of fan clutch or rendering clutch
inoperative.
.Removal of the fan shroud.
Air Intake:
.Removal of air cleaner silencer.
.Reversing air cleaner cover.
Exhaust:
.Removal of muffler, catalytic converter,
and/or resonator.
.Removal of exhaust pipes and exhaust
pipe clamps.
Automatic Transmission Shift Lock
Control Function Check
(Mechanical Shifter)
{Warning
When you are doing this inspection, the
vehicle could move suddenly. If the
vehicle moves, you or others could be
injured.
1. Before starting this check, be sure there is enough room around the vehicle.
It should be parked on a level surface.
2. Apply the parking brake. Be ready to apply the regular brake immediately if
the vehicle begins to move.
3. With the engine off, turn the ignition on, but do not start the engine. Without
applying the regular brake, try to move
the shift lever out of P (Park) with
normal effort. If the shift lever moves
out of P (Park), contact your dealer for
service.
Page 341 of 440
GMC Sierra/Sierra Denali 2500 HD/3500 HD Owner Manual (GMNA-
Localizing-U.S./Canada-16908340) - 2024 - CRC - 12/7/22
Vehicle Care 339
FusesUsage
6 –
7 ELM 4 –Electronic
Lighting Module 4
8 –
9 –
10 ELM 6 –Electronic
Lighting Module 6
11 BCM 3 –Body Control
Module 3
12 Rear Window Defogger
13 Washer Front
14 –
15 –
16 –
17 IECL 1
19 DC/AC Inverter
20 IECR 2 (LD)/EBCM2 (HD) 21 –
22 IECL 2
24 Fuel Heater (DSL) Fuses
Usage
25 EBCM 1 –Electronic
Brake Control Module 1
26 –
27 Horn
28 Parking Lamp Mirror/ Grill (LD)/Parking Lamp
Left (HD)
29 Parking Lamp Right (HD)
30 ELM 3 –Electronic
Lighting Module 3
31 ELM 1 –Electronic
Lighting Module 1
32 –
33 Not R/C
34 Radars (LD) 37 MISC IP Headliner Ignition
38 Seat Fan Ignition
39 Trailer Ignition Module
40 Misc Ignition 41 Trailer Parking Lamp Fuses
Usage
42 Tail Lamp Left (HD)
44 DEFC/ICCM Ignition (LD/ HD)/FTZM Ignition (HD)
45 Secondary Axle Motor
46 Engine Control Module Ignition
47 –
48 –
49 Transmission Auxiliary Oil Pump (LD)
50 A/C Clutch 51 Transfer Case Control Module
52 Front Wiper
53 Center High-Mounted Stop Lamp
54 Tail Lamp Right (HD) 55 Trailer Back-up Lamp
56 SADS (LD)/Fuel Tank Zone Module 2 (HD)
57 TTPM/SBZA
58 Starter Motor (LD)
Page 354 of 440

GMC Sierra/Sierra Denali 2500 HD/3500 HD Owner Manual (GMNA-
Localizing-U.S./Canada-16908340) - 2024 - CRC - 12/7/22
352 Vehicle Care
the air pressure in the tires and transmit the
tire pressure readings to a receiver located
in the vehicle.
When a low tire pressure condition is
detected, the TPMS illuminates the low tire
pressure warning light located on the
instrument cluster. If the warning light
comes on, stop as soon as possible and
inflate the tires to the recommended
pressure shown on the Tire and Loading
Information label. SeeVehicle Load Limits
0 210.
A message to check the pressure in a
specific tire displays in the Driver
Information Center (DIC). The low tire
pressure warning light and the DIC warning
message come on at each ignition cycle
until the tires are inflated to the correct
inflation pressure. If the vehicle has DIC
buttons, tire pressure levels can be viewed. For additional information and details about
the DIC operation and displays, see
Driver
Information Center (DIC) (Base Level) 0131 or
Driver Information Center (DIC) (Uplevel)
0 133.
The low tire pressure warning light may
come on in cool weather when the vehicle is
first started, and then turn off as the vehicle
is driven. This could be an early indicator
that the air pressure is getting low and
needs to be inflated to the proper pressure.
A Tire and Loading Information label shows
the size of the original equipment tires and
the correct inflation pressure for the tires
when they are cold. See Vehicle Load Limits
0 210, for an example of the Tire and
Loading Information label and its location.
Also see Tire Pressure 0350.
The TPMS can warn about a low tire
pressure condition but it does not replace
normal tire maintenance. See Tire Inspection
0 356, Tire Rotation 0357, and Tires0345.
Caution
Tire sealant materials are not all the
same. A non-approved tire sealant could
damage the TPMS sensors. TPMS sensor
(Continued)
Caution (Continued)
damage caused by using an incorrect tire
sealant is not covered by the vehicle
warranty. Always use only the GM
approved tire sealant available through
your dealer or included in the vehicle.
TPMS Malfunction Light and Message
The TPMS will not function properly if one
or more of the TPMS sensors are missing or
inoperable. When the system detects a
malfunction, the low tire pressure warning
light flashes for about one minute and then
stays on for the remainder of the ignition
cycle. A DIC warning message also displays.
The malfunction light and DIC warning
message come on at each ignition cycle
until the problem is corrected. Some of the
conditions that can cause these to come
on are:
.One of the road tires has been replaced
with the spare tire. The spare tire does
not have a TPMS sensor. The malfunction
light and the DIC message should go off
after the road tire is replaced and the
sensor matching process is performed
successfully. See "TPMS Sensor Matching
Process" later in this section.
Page 356 of 440

GMC Sierra/Sierra Denali 2500 HD/3500 HD Owner Manual (GMNA-
Localizing-U.S./Canada-16908340) - 2024 - CRC - 12/7/22
354 Vehicle Care
.There is a malfunction in the TPMS.
.There is a malfunction in the horn or turn
signal lamps.
.The TPMS sensor identification code is not
registered to the system.
.The TPMS sensor battery is low.
If the tire fill alert does not operate due to
TPMS interference, move the vehicle about
1 m (3 ft) back or forward and try again.
If the tire fill alert feature is not working,
use a tire pressure gauge.
TPMS Sensor Matching Process
Use this TPMS Sensor Matching Process if
your vehicle is equipped with dual rear
wheels:
Each TPMS sensor has a unique
identification code. The identification code
needs to be matched to a new tire/wheel
position after rotating the vehicle’s tires or
replacing one or more of the TPMS sensors.
Also, the TPMS sensor matching process
should be performed after replacing a spare
tire with a road tire containing the TPMS
sensor. The malfunction light and the DIC
message should go off at the next ignition
cycle. The sensors are matched to the tire/
wheel positions, using a TPMS relearn tool,
in the following order: driver side front tire, passenger side front tire, passenger side
outer rear tire, passenger side inner rear
tire, driver side outer rear tire, and driver
side inner rear tire. See your dealer for
service or to purchase a relearn tool.
A TPMS relearn tool can also be purchased.
See Tire Pressure Monitor Sensor Activation
Tool at www.gmtoolsandequipment.com or
call 1-800-GM TOOLS (1-800-468-6657).
There are two minutes to match the first
tire/wheel position, and five minutes overall
to match all six tire/wheel positions. If it
takes longer, the matching process stops
and must be restarted.
The TPMS sensor matching process is:
1. Set the parking brake.
2. Turn the ignition on without starting the vehicle.
3. Uplevel DIC Only: Make sure the Tire Pressure info page option is turned on.
The info pages on the DIC can be turned
on and off through the Options menu.
See Driver Information Center (DIC) (Base
Level) 0131 or
Driver Information Center (DIC) (Uplevel)
0 133. 4. If the vehicle has an uplevel DIC, use the
DIC controls on the right side of the
steering wheel to scroll to the Tire
Pressure screen under the DIC info page.
If the vehicle has a base level DIC, use
the trip odometer reset stem to scroll to
the Tire Pressure screen.
5. If the vehicle has an uplevel DIC, press and hold the thumbwheel located in the
center of the DIC controls on the right
side of the steering wheel.
If the vehicle has a base level DIC, press
and hold the trip odometer reset stem
for about five seconds. A message asking
if the process should begin should
appear. Select yes and press the trip
odometer reset stem to confirm the
selection.
The horn sounds twice to signal the
receiver is in relearn mode and the TIRE
LEARNING ACTIVE message displays on
the DIC screen.
6. Start with the driver side front tire.
7. Place the relearn tool against the tire sidewall, near the valve stem. Then press
the button to activate the TPMS sensor.
A horn chirp confirms that the sensor
identification code has been matched to
this tire and wheel position.
Page 380 of 440
GMC Sierra/Sierra Denali 2500 HD/3500 HD Owner Manual (GMNA-
Localizing-U.S./Canada-16908340) - 2024 - CRC - 12/7/22
378 Vehicle Care
Caution (Continued)
warranty. Whenever possible, turn off or
unplug all accessories on either vehicle
when jump starting.
4. Turn the ignition off on both vehicles. Unplug unnecessary accessories plugged
into the accessory power outlets. Turn
off the radio and all the lamps that are
not needed. This will avoid sparks and
help save both batteries. And it could
save the radio!
5. Open the hood on the other vehicle and locate the positive (+) and negative (−)
terminal locations on that vehicle.
{Warning
An electric fan can start up even when
the engine is not running and can injure
you. Keep hands, clothing, and tools
away from any underhood electric fan.
{Warning
Using a match near a battery can cause
battery gas to explode. People have been
hurt doing this, and some have been
blinded. Use a flashlight if you need
more light.
Battery fluid contains acid that can burn
you. Do not get it on you. If you
accidentally get it in your eyes or on
your skin, flush the place with water and
get medical help immediately.
{Warning
Fans or other moving engine parts can
injure you badly. Keep your hands away
from moving parts once the engine is
running.
6. Check that the jumper cables do not have loose or missing insulation. If they
do, you could get a shock. The vehicles
could be damaged too.
Before you connect the cables, here are
some basic things you should know.
Positive (+) will go to positive (+) or to a
remote positive (+) terminal if the vehicle has one. Negative (–) will go to a
heavy, unpainted metal engine part or to
a remote negative (–) terminal if the
vehicle has one.
Do not connect positive (+) to negative
(–) or you will get a short that would
damage the battery and maybe other
parts too. And do not connect the
negative (–) cable to the negative (–)
terminal on the dead battery because
this can cause sparks.
7. Connect one end of the red positive (+) cable to the discharged battery
positive (+) terminal.
8. Do not let the other end touch metal. Connect it to the good battery
positive (+) terminal. Use a remote
positive (+) terminal if the vehicle
has one.
9. Connect one end of the black negative (–) cable to the good battery negative
(–) terminal. Use a remote negative (–)
terminal if the vehicle has one.
Do not let the other end touch anything
until the next step.
10. Connect the other end of the negative (–) cable to the discharged battery
negative (–) grounding point.
Page 383 of 440
GMC Sierra/Sierra Denali 2500 HD/3500 HD Owner Manual (GMNA-
Localizing-U.S./Canada-16908340) - 2024 - CRC - 12/7/22
Vehicle Care 381
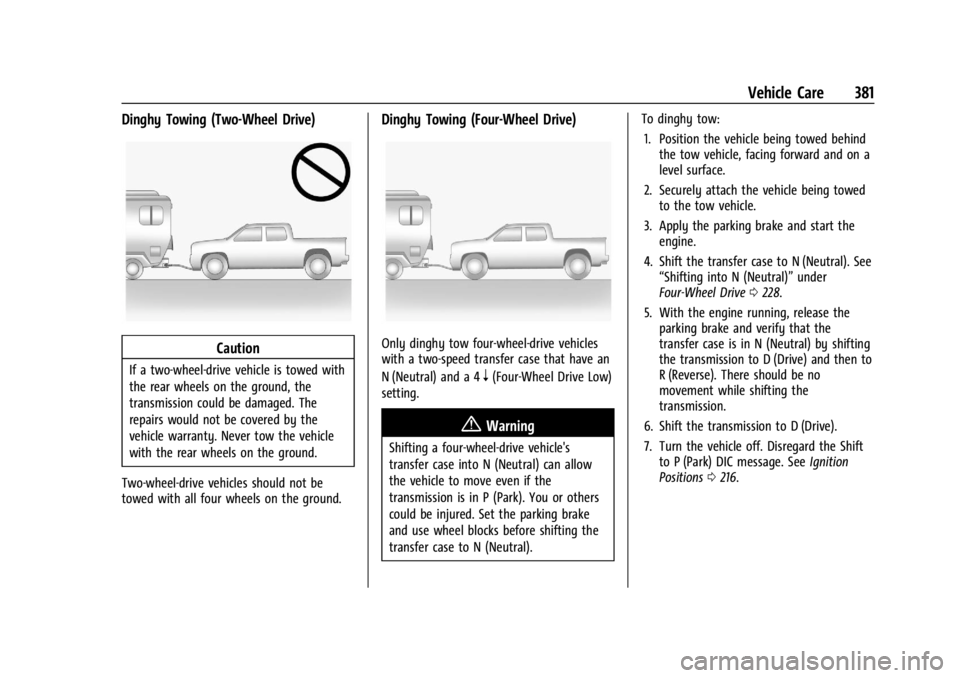
Dinghy Towing (Two-Wheel Drive)
Caution
If a two-wheel-drive vehicle is towed with
the rear wheels on the ground, the
transmission could be damaged. The
repairs would not be covered by the
vehicle warranty. Never tow the vehicle
with the rear wheels on the ground.
Two-wheel-drive vehicles should not be
towed with all four wheels on the ground.
Dinghy Towing (Four-Wheel Drive)
Only dinghy tow four-wheel-drive vehicles
with a two-speed transfer case that have an
N (Neutral) and a 4
n(Four-Wheel Drive Low)
setting.
{Warning
Shifting a four-wheel-drive vehicle's
transfer case into N (Neutral) can allow
the vehicle to move even if the
transmission is in P (Park). You or others
could be injured. Set the parking brake
and use wheel blocks before shifting the
transfer case to N (Neutral). To dinghy tow:
1. Position the vehicle being towed behind the tow vehicle, facing forward and on a
level surface.
2. Securely attach the vehicle being towed to the tow vehicle.
3. Apply the parking brake and start the engine.
4. Shift the transfer case to N (Neutral). See “Shifting into N (Neutral)” under
Four-Wheel Drive 0228.
5. With the engine running, release the parking brake and verify that the
transfer case is in N (Neutral) by shifting
the transmission to D (Drive) and then to
R (Reverse). There should be no
movement while shifting the
transmission.
6. Shift the transmission to D (Drive).
7. Turn the vehicle off. Disregard the Shift to P (Park) DIC message. See Ignition
Positions 0216.
Page 384 of 440
GMC Sierra/Sierra Denali 2500 HD/3500 HD Owner Manual (GMNA-
Localizing-U.S./Canada-16908340) - 2024 - CRC - 12/7/22
382 Vehicle Care
{Warning
To avoid death, serious injury,
or property damage, before dinghy
towing the vehicle, always disconnect and
secure the negative battery cable and
cover the negative battery post and cable
with a non-conductive material. If the
battery is left connected or the battery
cable contacts the post, the Electric
Parking Brake may activate during
towing, which could cause a crash.
8. Disconnect the negative (–) battery cable. See “Negative Battery Cable
Disconnection” inBattery - North
America 0327.
9. Shift the transmission to P (Park).
Caution
If the steering column is locked, vehicle
damage may occur.
10. Move the steering wheel to make sure the steering column is unlocked.
11. Keep the remote key outside of the vehicle and manually lock the doors.
Access the vehicle by using the key in
the door lock. See Door Locks022. Disconnecting the Towed Vehicle
Before disconnecting from the tow vehicle:
1. Park on a level surface. Secure the vehicle with wheel blocks.
2. Reconnect the negative (–) battery. See Battery - North America 0327.
3. Turn on the vehicle. With your foot off the brake pedal, press and hold ENGINE
START/STOP for five seconds until the
green light comes on in the button. See
Ignition Positions 0216.
4. Set the parking brake. See Electric
Parking Brake 0234.
5. Disconnect from the tow vehicle.
6. Shift the transmission to N (Neutral).
7. Shift the transfer case to 2
m(Two-Wheel
Drive High). When the shift to 2
m
(Two-Wheel Drive High) is complete, the
light in the instrument cluster will stop
flashing and stay lit. See
Four-Wheel-Drive Light 0125.
8. Start the engine. Check that the vehicle is in 2
m(Two-Wheel Drive High) by
starting the engine and shifting the
transmission to D (Drive) and then to
R (Reverse). There should be movement
of the vehicle while shifting. 9. Shift the transmission to P (Park) and
turn off the vehicle.
10. Release the parking brake and remove the wheel blocks.
11. Reset any lost presets.
The outside temperature display will
default to 0 °C (32 °F) but will reset with
normal usage.
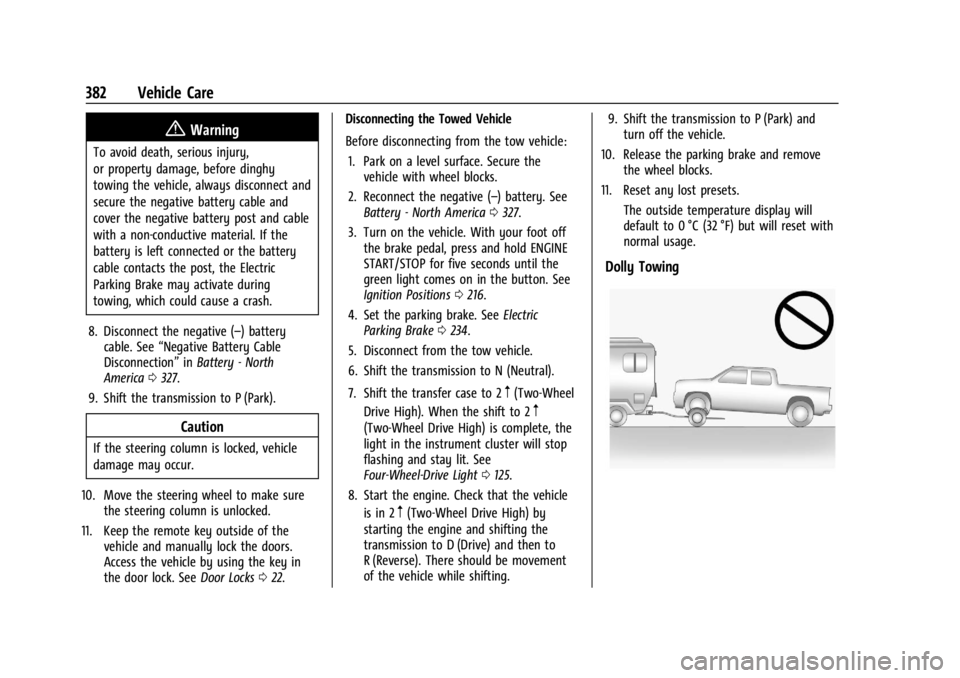
Dolly Towing