2024 FORD F650/750 steering wheel
[x] Cancel search: steering wheelPage 193 of 386
DRIVING THROUGH WATER
WARNING: Do not drive throughflowing or deep water as you may losecontrol of your vehicle.
Note:Driving through standing water cancause vehicle damage.
Note:Engine damage can occur if waterenters the air filter.
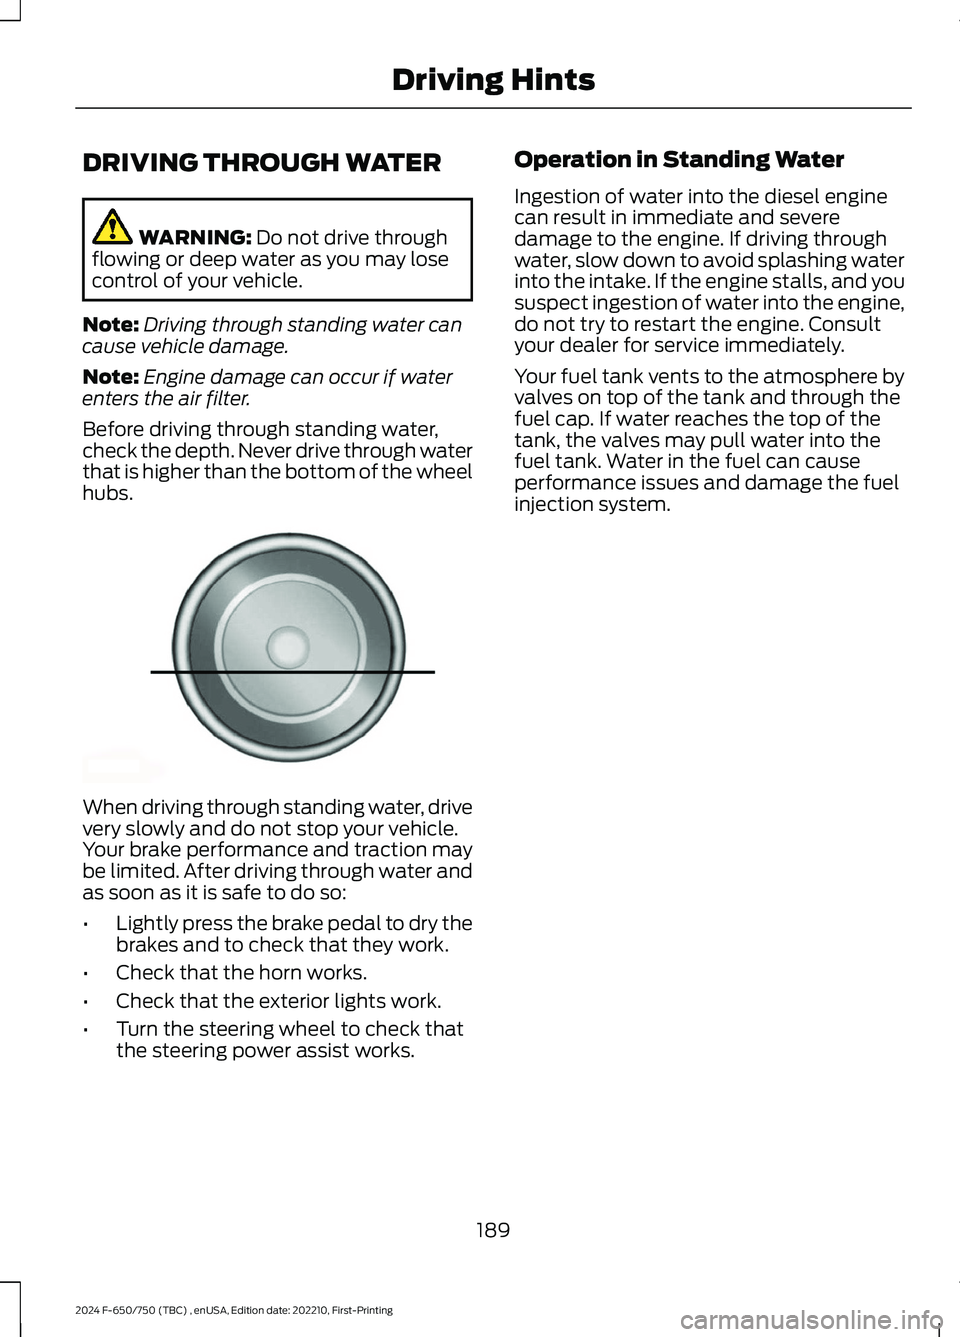
Before driving through standing water,check the depth. Never drive through waterthat is higher than the bottom of the wheelhubs.
When driving through standing water, drivevery slowly and do not stop your vehicle.Your brake performance and traction maybe limited. After driving through water andas soon as it is safe to do so:
•Lightly press the brake pedal to dry thebrakes and to check that they work.
•Check that the horn works.
•Check that the exterior lights work.
•Turn the steering wheel to check thatthe steering power assist works.
Operation in Standing Water
Ingestion of water into the diesel enginecan result in immediate and severedamage to the engine. If driving throughwater, slow down to avoid splashing waterinto the intake. If the engine stalls, and yoususpect ingestion of water into the engine,do not try to restart the engine. Consultyour dealer for service immediately.
Your fuel tank vents to the atmosphere byvalves on top of the tank and through thefuel cap. If water reaches the top of thetank, the valves may pull water into thefuel tank. Water in the fuel can causeperformance issues and damage the fuelinjection system.
189
2024 F-650/750 (TBC) , enUSA, Edition date: 202210, First-PrintingDriving HintsE176913
Page 217 of 386
VEHICLE INSPECTION
INFORMATION
To make sure your vehicle is ready tooperate, conduct a pre-trip inspection atthe beginning of each work period. Followthe steps listed in this section to verify aproper vehicle inspection procedure.
WARNING: Exercise great cautionwhen working on a vehicle equipped withan automatic fan clutch. The fan startsin motion only after the engine coolantreaches a predetermined temperatureor the refrigerant pressure (if equippedwith air conditioning) reaches apredetermined setting. The fan starts atthis point with no advance warning.Never reach near, or permit objects toprotrude into, the fan blade radius whilethe engine is running as this could resultin vehicle damage, personal injury ordeath.
WARNING: Do not operate thevehicle if any suspension conditionslisted in the following charts are evident.Loss of steering or suspension couldresult in property damage, personal injuryor death.
WARNING: If a wheel must bechanged, obtain expert tire service help.Mounting and un-mounting of tiresshould only be performed by a qualifiedtechnician using necessary safetyprocedures and equipment, otherwisethe result could be property damage,personal injury or death.
Note:Always make sure you apply theparking brake before starting the engine.
Engine compartment (with engine off)
Use the dipstick to verify the oil level is in the proper operatingrange. See Engine Oil Dipstick (page 227).Engine oil
Look through the plastic reservoir and verify the coolant levelis within the proper operating range. Do not remove thepressure cap until the coolant has cooled. See EngineCoolant Check (page 238).
Engine coolant
Verify that the fluid level is in the proper operating range. SeePower Steering Fluid Check (page 246).Power steering fluid
Remove the master cylinder caps and inspect the fluid level.See Brake Fluid Check (page 245).Brake fluid
213
2024 F-650/750 (TBC) , enUSA, Edition date: 202210, First-PrintingVehicle Inspection Guide
Page 219 of 386
Engine starting (with parking brake applied)
Check the gauge (diesel engine) or indicator light (gasolineengine) to verify the alternator is charging.Voltmeter
Inspect for excessive free play in the steering linkages. Thesteering wheel should have less than 2 in (5 cm) of free playat its rim.
Steering linkage free play
Verify the parking brake holds the vehicle by gently trying topull forward with the parking brake applied.Parking brake
Verify operation using the following procedure. Chock thewheels, if necessary. Push in the parking brake and, ontractors, push in the tractor parking brake knob:
Air brakes
1. Verify the air compressor or governor cutout pressure isapproximately 120 psi (827 kPa).
2. Turn off the engine, and then turn the key back to the onposition (without starting the engine).
3. Without the brake pedal applied, note the air pressure dropfor one minute. It should be less than 2 psi (14 kPa) for singlevehicles and 3 psi (21 kPa) for combination vehicles.
4. Press and hold the brake pedal with 90 psi (621 kPa) ormore. Make sure there is no more than a 3 psi (21 kPa) perminute leak for single vehicles and a 4 psi (28 kPa) minuteleak for combination vehicles.
5. Pump the brake pedal to deplete the system of air pressure.The warning light and tone should turn on at 57 psi (393 kPa).
6. Pump the brake pedal and make sure the parking brakeand trailer parking brake knobs pop out at 20 psi (138 kPa)or higher.
Verify that the fluid level is in the proper operating range. SeeAutomatic Transmission Fluid Check (page 243).Automatic transmissionfluid
Front of vehicle
Verify all exterior lights illuminate and are clean.Lights
Check headlights function on high and low beam.
Verify reflectors are clean, unbroken and of proper color (redon rear, amber elsewhere).
215
2024 F-650/750 (TBC) , enUSA, Edition date: 202210, First-PrintingVehicle Inspection Guide
Page 226 of 386
GENERAL INFORMATION
WARNING: Making modificationsto various parts, components andsystems of the vehicle, such as brake andsteering systems, can adversely affectthe quality, reliability and operation ofyour vehicle and could result in propertydamage, personal injury or death. Suchmodifications must be avoided.
WARNING: Failure to properlyperform maintenance and servicingprocedures could result in vehicledamage, personal injury or death.
WARNING: Take care whenperforming any maintenance, systemcheck or service on your vehicle. Someof the materials may also be hazardousif used, serviced or handled improperlyand could result in property damage,personal injury or death.
If the owner or operator of the vehicle is askilled technician and intends onperforming the vehicle maintenance andservice, he is strongly urged to purchase aservice manual.
Always use care when performing vehiclemaintenance, repairs or system checks.Improper or incomplete service could resultin your vehicle not working properly whichmay result in personal injury or damage toyour vehicle or equipment. It is theoperator’s responsibility to see that yourvehicle receives proper care andmaintenance. If you have any questionsabout performing service, have the servicedone by a qualified technician.
To help you service your vehicle, weprovide scheduled maintenanceinformation which makes tracking routineservice easy. See ScheduledMaintenance (page 325).
If your vehicle requires professional service,an authorized dealer can provide thenecessary parts and service. Check yourwarranty information to find out whichparts and services are covered.
Use only recommended fuels, lubricants,fluids and service parts conforming tospecifications. Motorcraft® parts aredesigned and built to provide the bestperformance in your vehicle.
Servicing Guidelines
WARNING: The use of inferior partscan adversely affect the quality andreliability of your vehicle and could resultin property damage, personal injury ordeath.
When servicing your vehicle:
•Always wear safety glasses for eyeprotection.
•Always set the parking brake or chockthe wheels.
•Always use support stands, not a jack,when working under a raised vehicle.
•Always turn off the ignition unless aprocedure requires the engine to berunning.
•Always avoid contact with hot metalparts. Allow the components to coolbefore working with, or around, them.
•Always operate the engine in awell-ventilated area.
•Do not wear loose-fitting clothing,hanging jewelry, watches or rings.
•Do not smoke.
•Do not work on the brakes or the clutchunless you take the proper precautionsto avoid inhaling friction material dust.
222
2024 F-650/750 (TBC) , enUSA, Edition date: 202210, First-PrintingMaintenance
Page 233 of 386
•Frequent low-speed operation, orconsistent heavy traffic less than25 mph (40 km/h).
•Operating in severe dust conditions.
•Operating the vehicle off road.
•Towing a trailer over 1,000 mi(1,600 km).
•Sustained, high-speed driving at thegross vehicle weight rating.
•Use of fuels with sulfur content otherthan ultra-low sulfur diesel (ULSD).
•Use of high-sulfur diesel fuel.
Only use engine oil that meets ourspecifications. See Capacities andSpecifications (page 291).
OIL CHANGE INDICATOR
RESET
Base Cluster
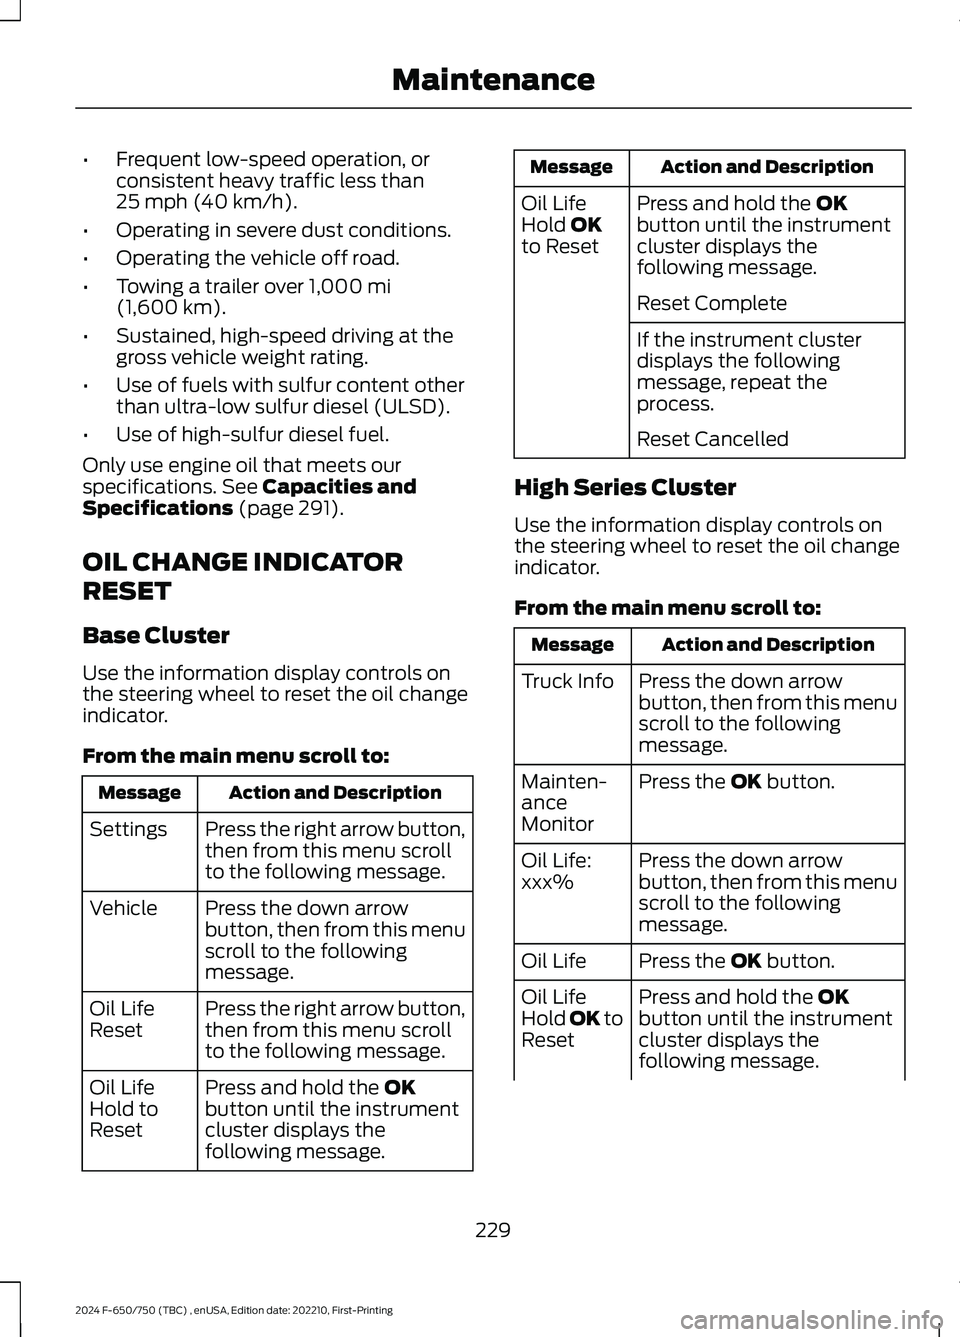
Use the information display controls onthe steering wheel to reset the oil changeindicator.
From the main menu scroll to:
Action and DescriptionMessage
Press the right arrow button,then from this menu scrollto the following message.
Settings
Press the down arrowbutton, then from this menuscroll to the followingmessage.
Vehicle
Press the right arrow button,then from this menu scrollto the following message.
Oil LifeReset
Press and hold the OKbutton until the instrumentcluster displays thefollowing message.
Oil LifeHold toReset
Action and DescriptionMessage
Press and hold the OKbutton until the instrumentcluster displays thefollowing message.
Oil LifeHold OKto Reset
Reset Complete
If the instrument clusterdisplays the followingmessage, repeat theprocess.
Reset Cancelled
High Series Cluster
Use the information display controls onthe steering wheel to reset the oil changeindicator.
From the main menu scroll to:
Action and DescriptionMessage
Press the down arrowbutton, then from this menuscroll to the followingmessage.
Truck Info
Press the OK button.Mainten-anceMonitor
Press the down arrowbutton, then from this menuscroll to the followingmessage.
Oil Life:xxx%
Press the OK button.Oil Life
Press and hold the OKbutton until the instrumentcluster displays thefollowing message.
Oil LifeHold OK toReset
229
2024 F-650/750 (TBC) , enUSA, Edition date: 202210, First-PrintingMaintenance
Page 250 of 386
For detailed interval information, seeScheduled Maintenance in your Owner'sManual or your local maintenance guide.
POWER STEERING FLUID
CHECK
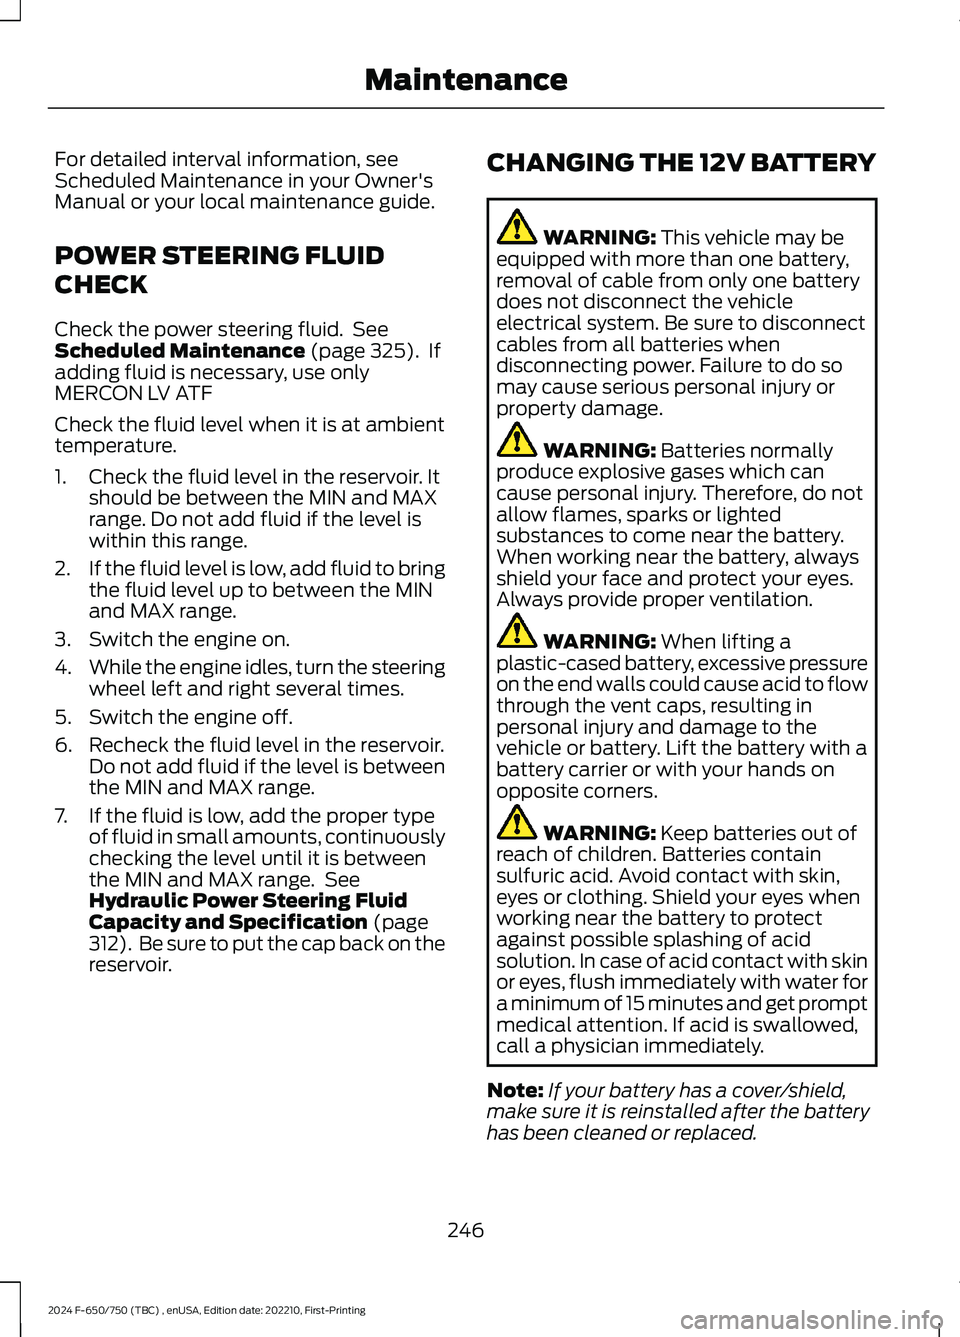
Check the power steering fluid. SeeScheduled Maintenance (page 325). Ifadding fluid is necessary, use onlyMERCON LV ATF
Check the fluid level when it is at ambienttemperature.
1.Check the fluid level in the reservoir. Itshould be between the MIN and MAXrange. Do not add fluid if the level iswithin this range.
2.If the fluid level is low, add fluid to bringthe fluid level up to between the MINand MAX range.
3.Switch the engine on.
4.While the engine idles, turn the steeringwheel left and right several times.
5.Switch the engine off.
6.Recheck the fluid level in the reservoir.Do not add fluid if the level is betweenthe MIN and MAX range.
7.If the fluid is low, add the proper typeof fluid in small amounts, continuouslychecking the level until it is betweenthe MIN and MAX range. SeeHydraulic Power Steering FluidCapacity and Specification (page312). Be sure to put the cap back on thereservoir.
CHANGING THE 12V BATTERY
WARNING: This vehicle may beequipped with more than one battery,removal of cable from only one batterydoes not disconnect the vehicleelectrical system. Be sure to disconnectcables from all batteries whendisconnecting power. Failure to do somay cause serious personal injury orproperty damage.
WARNING: Batteries normallyproduce explosive gases which cancause personal injury. Therefore, do notallow flames, sparks or lightedsubstances to come near the battery.When working near the battery, alwaysshield your face and protect your eyes.Always provide proper ventilation.
WARNING: When lifting aplastic-cased battery, excessive pressureon the end walls could cause acid to flowthrough the vent caps, resulting inpersonal injury and damage to thevehicle or battery. Lift the battery with abattery carrier or with your hands onopposite corners.
WARNING: Keep batteries out ofreach of children. Batteries containsulfuric acid. Avoid contact with skin,eyes or clothing. Shield your eyes whenworking near the battery to protectagainst possible splashing of acidsolution. In case of acid contact with skinor eyes, flush immediately with water fora minimum of 15 minutes and get promptmedical attention. If acid is swallowed,call a physician immediately.
Note:If your battery has a cover/shield,make sure it is reinstalled after the batteryhas been cleaned or replaced.
246
2024 F-650/750 (TBC) , enUSA, Edition date: 202210, First-PrintingMaintenance
Page 251 of 386

Note:Battery posts, terminals and relatedaccessories contain lead and leadcompounds. Wash hands after handling.
Note:Electrical or electronic accessoriesor components added to the vehicle by thedealer or the owner may adversely affectbattery performance and durability.
Your vehicle is equipped with a Motorcraftmaintenance-free battery which normallydoes not require additional water duringits life of service.
For longer, trouble-free operation, keep thetop of the battery clean and dry. Also,make certain the battery cables are alwaystightly fastened to the battery terminals.
If you see any corrosion on the battery orterminals, remove the cables from theterminals and clean with a wire brush. Youcan neutralize the acid with a solution ofbaking soda and water.
It is recommended that the negativebattery cable terminal be disconnectedfrom the battery if you plan to store yourvehicle for an extended period of time.
Because your vehicle’s engine iselectronically controlled by a computer,some control conditions are maintainedby power from the battery. When thebattery is disconnected or a new batteryis installed, the engine must relearn its idleand fuel trim strategy for optimumdriveability and performance. To begin thisprocess
1.With the vehicle at a complete stop,set the parking brake.
2.Put the gearshift in park (P) or neutral(N) and turn off all accessories.
3.Start the engine. Run the engine untilit reaches normal operatingtemperature.
4.Allow the engine to idle for at least oneminute.
5.Turn the air conditioning (if equipped)on and allow the engine to idle for atleast one minute.
6.Release the parking brake. With yourfoot on the brake pedal and with theair conditioning on, put the vehicle indrive (D) and allow the engine to idlefor at least one minute.
•If you do not allow the engine torelearn its idle trim, the idle qualityof your vehicle may be adverselyaffected until the idle trim iseventually relearned.
7.Drive the vehicle to complete therelearning process
•The vehicle may need to be driven10 mi (16 km) or more to relearn theidle and fuel trim strategy alongwith the ethanol content for flexiblefuel vehicles.
If the battery has been disconnected or anew battery has been installed, the clockand radio settings must be reset once thebattery is reconnected.
Always dispose of automotivebatteries in a responsible manner.Follow your local authorized standardsfor disposal. Call your local authorizedrecycling center to find out more aboutrecycling automotive batteries.
Battery Management System (IfEquipped)
The battery management system (BMS)monitors battery conditions and takesactions to extend battery life. If excessivebattery drain is detected, the system maytemporarily disable certain electricalfeatures to protect the battery. Thoseelectrical accessories affected include therear defrost, heated/cooled seats, climatecontrol fan, heated steering wheel, audioand navigation system. A message may beshown in the information displays to alert
247
2024 F-650/750 (TBC) , enUSA, Edition date: 202210, First-PrintingMaintenance
Page 263 of 386
AXLE INSPECTION
Front Axle
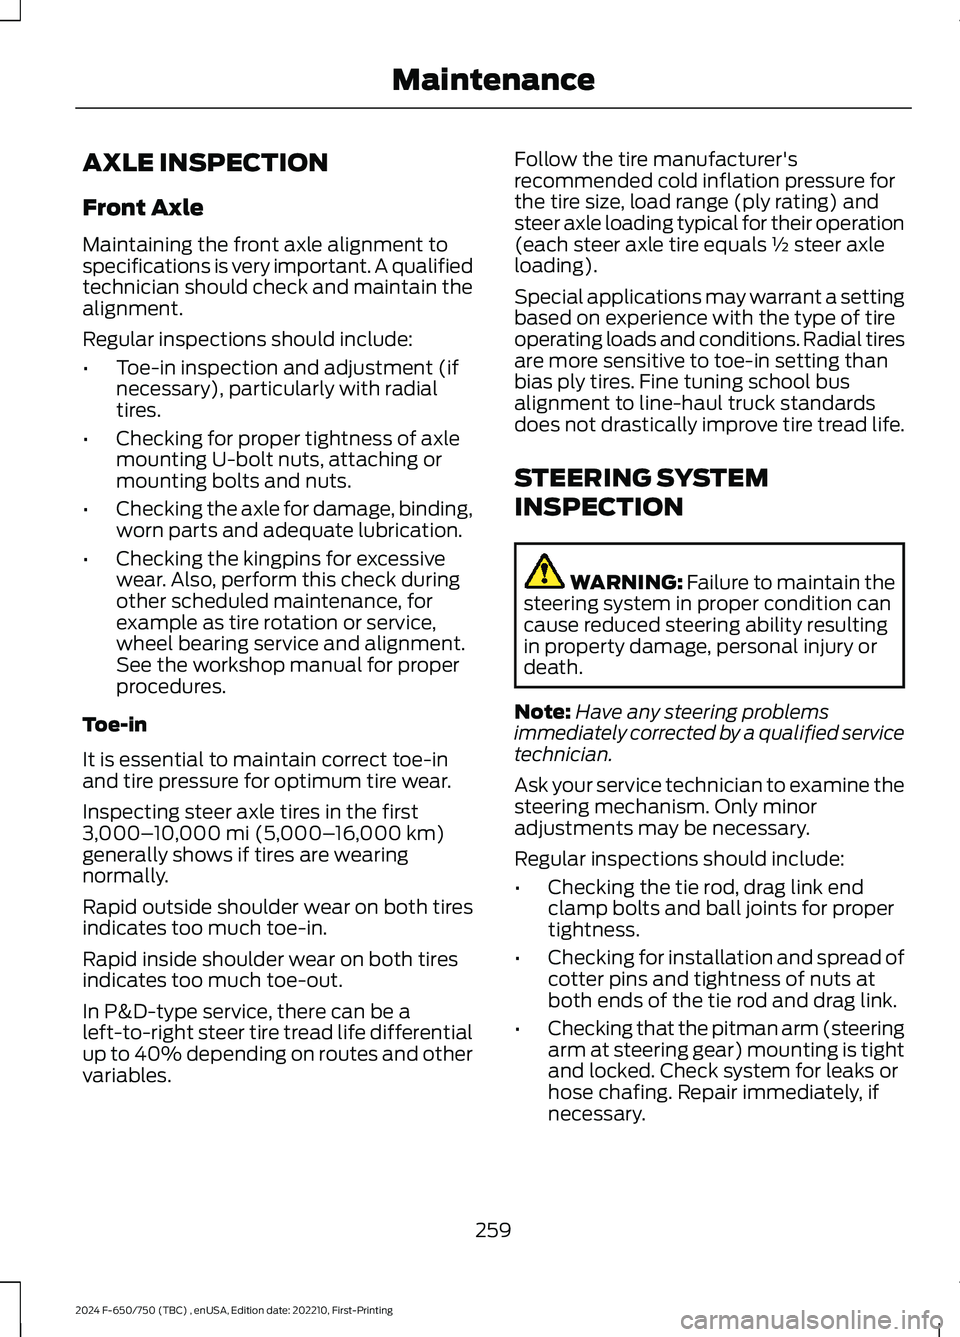
Maintaining the front axle alignment tospecifications is very important. A qualifiedtechnician should check and maintain thealignment.
Regular inspections should include:
•Toe-in inspection and adjustment (ifnecessary), particularly with radialtires.
•Checking for proper tightness of axlemounting U-bolt nuts, attaching ormounting bolts and nuts.
•Checking the axle for damage, binding,worn parts and adequate lubrication.
•Checking the kingpins for excessivewear. Also, perform this check duringother scheduled maintenance, forexample as tire rotation or service,wheel bearing service and alignment.See the workshop manual for properprocedures.
Toe-in
It is essential to maintain correct toe-inand tire pressure for optimum tire wear.
Inspecting steer axle tires in the first3,000–10,000 mi (5,000–16,000 km)generally shows if tires are wearingnormally.
Rapid outside shoulder wear on both tiresindicates too much toe-in.
Rapid inside shoulder wear on both tiresindicates too much toe-out.
In P&D-type service, there can be aleft-to-right steer tire tread life differentialup to 40% depending on routes and othervariables.
Follow the tire manufacturer'srecommended cold inflation pressure forthe tire size, load range (ply rating) andsteer axle loading typical for their operation(each steer axle tire equals ½ steer axleloading).
Special applications may warrant a settingbased on experience with the type of tireoperating loads and conditions. Radial tiresare more sensitive to toe-in setting thanbias ply tires. Fine tuning school busalignment to line-haul truck standardsdoes not drastically improve tire tread life.
STEERING SYSTEM
INSPECTION
WARNING: Failure to maintain thesteering system in proper condition cancause reduced steering ability resultingin property damage, personal injury ordeath.
Note:Have any steering problemsimmediately corrected by a qualified servicetechnician.
Ask your service technician to examine thesteering mechanism. Only minoradjustments may be necessary.
Regular inspections should include:
•Checking the tie rod, drag link endclamp bolts and ball joints for propertightness.
•Checking for installation and spread ofcotter pins and tightness of nuts atboth ends of the tie rod and drag link.
•Checking that the pitman arm (steeringarm at steering gear) mounting is tightand locked. Check system for leaks orhose chafing. Repair immediately, ifnecessary.
259
2024 F-650/750 (TBC) , enUSA, Edition date: 202210, First-PrintingMaintenance