2024 CHEVROLET SILVERADO length
[x] Cancel search: lengthPage 73 of 433
Chevrolet Silverado 2500 HD/3500 HD Owner Manual (GMNA-Localizing-U.
S./Canada/Mexico-16908339) - 2024 - CRC - 12/5/22
Seats and Restraints 71
Child Restraints
Older Children
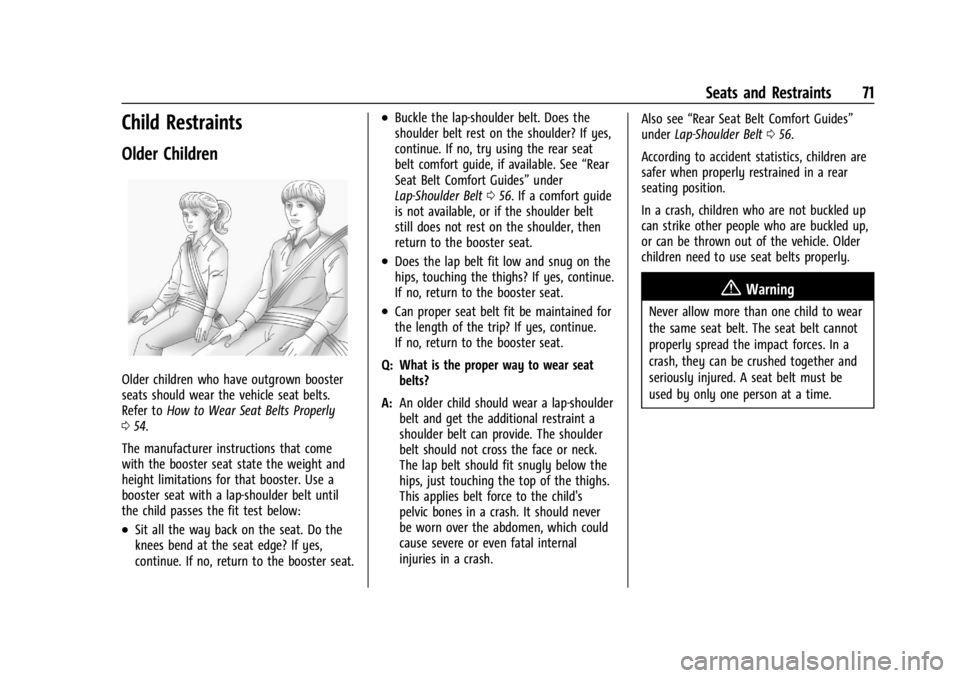
Older children who have outgrown booster
seats should wear the vehicle seat belts.
Refer toHow to Wear Seat Belts Properly
0 54.
The manufacturer instructions that come
with the booster seat state the weight and
height limitations for that booster. Use a
booster seat with a lap-shoulder belt until
the child passes the fit test below:
.Sit all the way back on the seat. Do the
knees bend at the seat edge? If yes,
continue. If no, return to the booster seat.
.Buckle the lap-shoulder belt. Does the
shoulder belt rest on the shoulder? If yes,
continue. If no, try using the rear seat
belt comfort guide, if available. See “Rear
Seat Belt Comfort Guides” under
Lap-Shoulder Belt 056. If a comfort guide
is not available, or if the shoulder belt
still does not rest on the shoulder, then
return to the booster seat.
.Does the lap belt fit low and snug on the
hips, touching the thighs? If yes, continue.
If no, return to the booster seat.
.Can proper seat belt fit be maintained for
the length of the trip? If yes, continue.
If no, return to the booster seat.
Q: What is the proper way to wear seat belts?
A: An older child should wear a lap-shoulder
belt and get the additional restraint a
shoulder belt can provide. The shoulder
belt should not cross the face or neck.
The lap belt should fit snugly below the
hips, just touching the top of the thighs.
This applies belt force to the child's
pelvic bones in a crash. It should never
be worn over the abdomen, which could
cause severe or even fatal internal
injuries in a crash. Also see
“Rear Seat Belt Comfort Guides”
under Lap-Shoulder Belt 056.
According to accident statistics, children are
safer when properly restrained in a rear
seating position.
In a crash, children who are not buckled up
can strike other people who are buckled up,
or can be thrown out of the vehicle. Older
children need to use seat belts properly.
{Warning
Never allow more than one child to wear
the same seat belt. The seat belt cannot
properly spread the impact forces. In a
crash, they can be crushed together and
seriously injured. A seat belt must be
used by only one person at a time.
Page 85 of 433
Chevrolet Silverado 2500 HD/3500 HD Owner Manual (GMNA-Localizing-U.
S./Canada/Mexico-16908339) - 2024 - CRC - 12/5/22
Seats and Restraints 83
seating position with belts and a top
tether. SeeSecuring Child Restraints
(With the Seat Belt in the Center Front
Seat) 093 or
Securing Child Restraints (With the Seat
Belt in the Rear Seat) 087 or
Securing Child Restraints (With the Seat
Belt in the Front Passenger Seat) 091.
If the child restraint manufacturer
recommends that the top tether be
attached, adjust the top tether to its full
length and attach it to the anchor. Refer
to the child restraint instructions and the
following steps:
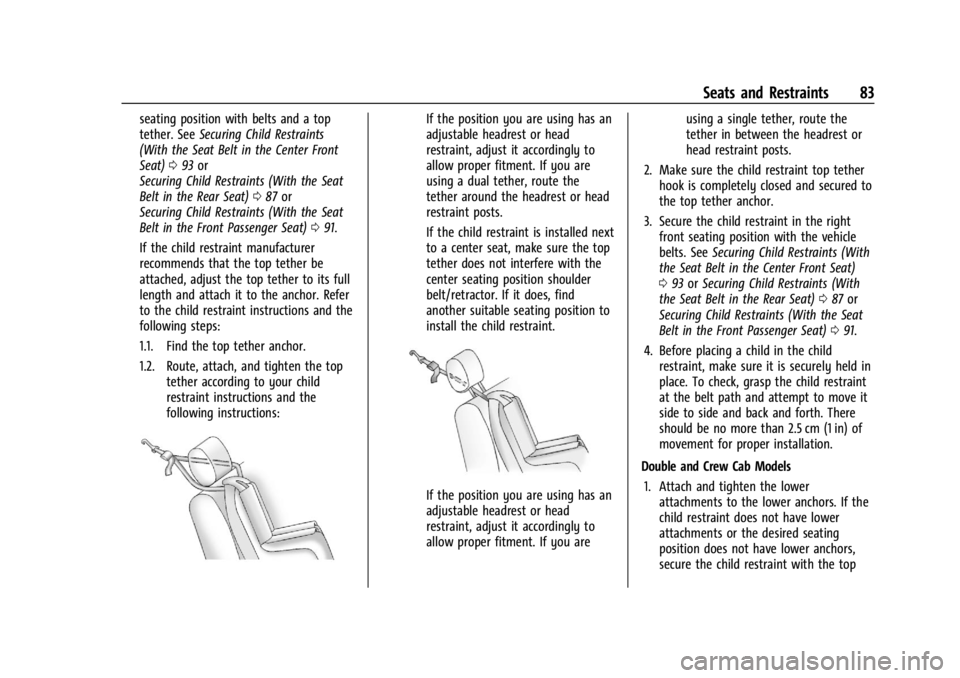
1.1. Find the top tether anchor.
1.2. Route, attach, and tighten the top tether according to your child
restraint instructions and the
following instructions:If the position you are using has an
adjustable headrest or head
restraint, adjust it accordingly to
allow proper fitment. If you are
using a dual tether, route the
tether around the headrest or head
restraint posts.
If the child restraint is installed next
to a center seat, make sure the top
tether does not interfere with the
center seating position shoulder
belt/retractor. If it does, find
another suitable seating position to
install the child restraint.
If the position you are using has an
adjustable headrest or head
restraint, adjust it accordingly to
allow proper fitment. If you are using a single tether, route the
tether in between the headrest or
head restraint posts.
2. Make sure the child restraint top tether hook is completely closed and secured to
the top tether anchor.
3. Secure the child restraint in the right front seating position with the vehicle
belts. See Securing Child Restraints (With
the Seat Belt in the Center Front Seat)
0 93 orSecuring Child Restraints (With
the Seat Belt in the Rear Seat) 087 or
Securing Child Restraints (With the Seat
Belt in the Front Passenger Seat) 091.
4. Before placing a child in the child restraint, make sure it is securely held in
place. To check, grasp the child restraint
at the belt path and attempt to move it
side to side and back and forth. There
should be no more than 2.5 cm (1 in) of
movement for proper installation.
Double and Crew Cab Models 1. Attach and tighten the lower attachments to the lower anchors. If the
child restraint does not have lower
attachments or the desired seating
position does not have lower anchors,
secure the child restraint with the top
Page 184 of 433
Chevrolet Silverado 2500 HD/3500 HD Owner Manual (GMNA-Localizing-U.
S./Canada/Mexico-16908339) - 2024 - CRC - 12/5/22
182 Infotainment System
.Wide Open Throttle–the number of
times the accelerator pedal was pressed
nearly all the way down.
.Forward Collision Alerts (if equipped) –
the number of times the driver was
notified when approaching a vehicle
ahead too quickly and at potential risk for
a crash.
.Forward Automatic Braking, also called
Automatic Emergency Braking (if
equipped) –the number of times the
vehicle detected that a forward collision
was imminent and applied the brakes.
.Reverse Automatic Braking (if equipped) –
the number of times the vehicle detected
that a rearward collision was imminent
and applied the brakes.
.Traction Control –the number of times
the Traction Control System activated to
reduce wheel spin or loss of traction.
.Stability Control –the number of events
which required the use of electronic
stability control.
.Antilock Braking System Active –The
number of Antilock Brake System
activations.
.Tailgating Alerts (if equipped) –the
number of times the driver was alerted
for following a vehicle ahead too closely. Report Card Data
Cumulative Data is saved for all trips until
the Report Card is reset or until the
maximum count is exceeded. If the
maximum count is exceeded for a Report
Card line item, that item will no longer be
updated in the Report Card until it is reset.
Each item will report a maximum of
1,000 counts. The distance driven will report
a maximum of 64 374 km (40,000 mi).
To delete Report Card data, do one of the
following:
.From the Report Card display, touch
Reset.
.Touch Clear PIN and All Teen Driver Keys
from the Teen Driver menu. This will also
unregister any Teen Driver keys and
delete the PIN.
Forgotten PIN
See your dealer to reset the PIN.
Trademarks and License
Agreements
FCC Information
See Radio Frequency Statement 0407.
"Made for iPhone," means that an electronic
accessory has been designed to connect
specifically to iPhone, and has been certified
by the developer to meet Apple
performance standards. Apple is not
responsible for the operation of this device
or its compliance with safety and regulatory
standards. Please note that the use of this
accessory with iPhone may affect wireless
performance. iPhone are trademarks of
Apple Inc., registered in the U.S. and other
countries.
Trial length and service availability may vary
by model, model year or trim. Service will
automatically stop at the end of your trial
subscription period unless you decide to
Page 216 of 433
Chevrolet Silverado 2500 HD/3500 HD Owner Manual (GMNA-Localizing-U.
S./Canada/Mexico-16908339) - 2024 - CRC - 12/12/22
214 Driving and Operating
{Warning
Do not plug in the engine block heater
while the vehicle is parked in a garage or
under a carport. Property damage or
personal injury may result. Always park
the vehicle in a clear open area away
from buildings or structures.
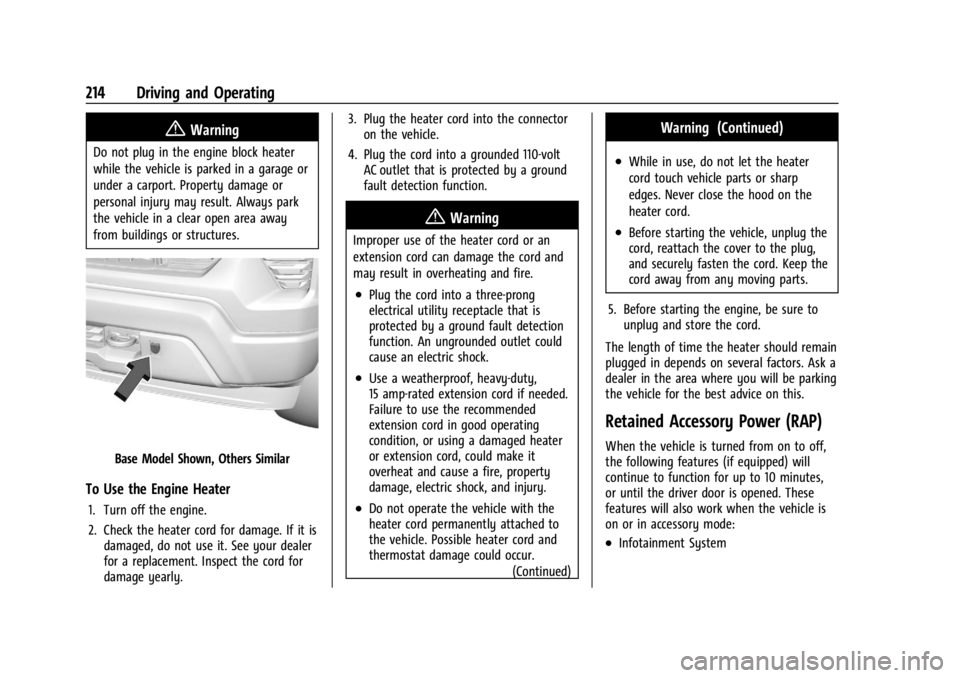
Base Model Shown, Others Similar
To Use the Engine Heater
1. Turn off the engine.
2. Check the heater cord for damage. If it isdamaged, do not use it. See your dealer
for a replacement. Inspect the cord for
damage yearly. 3. Plug the heater cord into the connector
on the vehicle.
4. Plug the cord into a grounded 110-volt AC outlet that is protected by a ground
fault detection function.
{Warning
Improper use of the heater cord or an
extension cord can damage the cord and
may result in overheating and fire.
.Plug the cord into a three-prong
electrical utility receptacle that is
protected by a ground fault detection
function. An ungrounded outlet could
cause an electric shock.
.Use a weatherproof, heavy-duty,
15 amp-rated extension cord if needed.
Failure to use the recommended
extension cord in good operating
condition, or using a damaged heater
or extension cord, could make it
overheat and cause a fire, property
damage, electric shock, and injury.
.Do not operate the vehicle with the
heater cord permanently attached to
the vehicle. Possible heater cord and
thermostat damage could occur.
(Continued)
Warning (Continued)
.While in use, do not let the heater
cord touch vehicle parts or sharp
edges. Never close the hood on the
heater cord.
.Before starting the vehicle, unplug the
cord, reattach the cover to the plug,
and securely fasten the cord. Keep the
cord away from any moving parts.
5. Before starting the engine, be sure to unplug and store the cord.
The length of time the heater should remain
plugged in depends on several factors. Ask a
dealer in the area where you will be parking
the vehicle for the best advice on this.
Retained Accessory Power (RAP)
When the vehicle is turned from on to off,
the following features (if equipped) will
continue to function for up to 10 minutes,
or until the driver door is opened. These
features will also work when the vehicle is
on or in accessory mode:
.Infotainment System
Page 234 of 433
Chevrolet Silverado 2500 HD/3500 HD Owner Manual (GMNA-Localizing-U.
S./Canada/Mexico-16908339) - 2024 - CRC - 12/12/22
232 Driving and Operating
Noise from the Electronic Brake Control
Module (EBCM) is normal when HDC is
active.
When HDC is activated, the initial HDC
speed is set to the current driving speed.
It can be increased or decreased by pressing
+RES or SET- on the steering wheel, or by
applying the accelerator or brake pedal. This
adjusted speed becomes the new set speed.
HDC will remain enabled between 30 and
60 km/h (19 and 37 mph); however, vehicle
speed cannot be set or maintained in this
range. HDC will automatically disable if the
vehicle speed is above 80 km/h (50 mph) or
above 60 km/h (37 mph) for at least
30 seconds.
5must be pressed again to re-enable HDC.
HDC may disable after an extended period
of use. If this happens, HDC will require
time to cool down. The length of time HDC
remains active depends on road conditions,
grade, set speed, vehicle loading, and
outside temperature.
When enabled, if the vehicle speed is above
30 km/h (19 mph) and below 60 km/h
(37 mph), a DIC message will display.
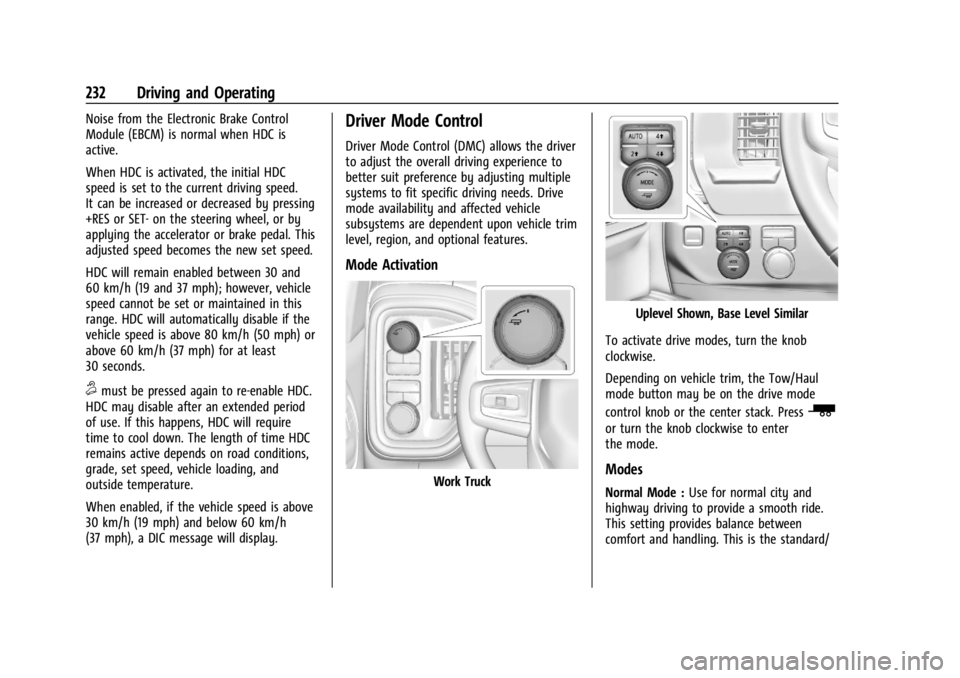
Driver Mode Control
Driver Mode Control (DMC) allows the driver
to adjust the overall driving experience to
better suit preference by adjusting multiple
systems to fit specific driving needs. Drive
mode availability and affected vehicle
subsystems are dependent upon vehicle trim
level, region, and optional features.
Mode Activation
Work Truck
Uplevel Shown, Base Level Similar
To activate drive modes, turn the knob
clockwise.
Depending on vehicle trim, the Tow/Haul
mode button may be on the drive mode
control knob or the center stack. Press
_
or turn the knob clockwise to enter
the mode.
Modes
Normal Mode : Use for normal city and
highway driving to provide a smooth ride.
This setting provides balance between
comfort and handling. This is the standard/
Page 255 of 433

Chevrolet Silverado 2500 HD/3500 HD Owner Manual (GMNA-Localizing-U.
S./Canada/Mexico-16908339) - 2024 - CRC - 12/12/22
Driving and Operating 253
when the Camera App is active. To
access this view when in a forward
gear above 12 km/h (8 mph), select
CAMERA on the infotainment
display and select Picture-in-Picture
Side View. The view can be closed
by selecting X, Home or Back.
Additional Views and Alerts
.Turn Signal Activated Views
Displays a rearward view of the left or
right side of the vehicle and trailer when
a trailer is connected. Views are provided
based on turn signal activation with the
right-side view being shown when the
right turn signal is active and the left side
view being shown when the left turn
signal is active. The feature can be
enabled or disabled.To view available
settings from the infotainment screen,
touch Settings > Vehicle > Collision/
Detection Systems. The view can be
closed early by selecting X, Home or Back.
A Trailer Length Indicator Overlay is
available in the Turn Signal Activated
Views when the trailer is relatively
straight behind the vehicle and a
compatible profile is configured and
selected via the Trailering App. The
overlay will not be visible when the position of the trailer is too far to the left
or right. The overlay can be enabled or
disabled. To view available settings from
the infotainment screen, touch Settings >
Vehicle > Collision/Detection Systems.
.Jack-Knife Detection and Alert
The vehicle may be equipped with
Jack-Knife Detection. The system will track
the position of the trailer relative to the
vehicle. As the front of the trailer
approaches the rear of the vehicle, a
warning or an alert will be displayed.
A warning indicates to the driver to
proceed with caution, an alert indicates
that a collision is imminent. Based on
vehicle equipment and user settings, the
visual warning or alert may be
accompanied by audible or safety alert
seat notifications. To view available
settings from the infotainment screen,
touch Settings > Vehicle > Collision/
Detection Systems.
.Trailer Angle Indicator
The vehicle may be equipped with a
Trailer Angle Indicator. The Trailer Angle
Indicator gives the driver a visual
representation of the trailer’s position
relative to the vehicle. (Available only in
Reverse, Guidelines On, Rear Trailering
Views).
{Warning
Use Hitch Guidance only to help back the
vehicle to a trailer hitch or, when
traveling above 12 km/h (8 mph), to
briefly check the status of your trailer. Do
not use for any other purpose, such as
making lane change decisions. Before
making a lane change, always check the
mirrors and glance over your shoulder.
Improper use could result in serious
injury to you or others.
HD Surround Vision with Trailer Camera
Provisions
If equipped, this feature provides additional
views to aid in trailering/towing. The
system shows multiple views in the
infotainment display using five cameras
mounted around the vehicle and up to two
additional accessory cameras that can be
mounted on or in a trailer. The front camera
is in the grille under the front emblem, the
side cameras are on the bottom of the
outside mirrors, the rear camera is in the
tailgate handle and the bed camera is
Page 265 of 433

Chevrolet Silverado 2500 HD/3500 HD Owner Manual (GMNA-Localizing-U.
S./Canada/Mexico-16908339) - 2024 - CRC - 12/12/22
Driving and Operating 263
warned of vehicles rapidly approaching this
area up to approximately 70 m (230 ft)
behind the vehicle.
Trailer Side Blind Zone Area (TSBZA)
If equipped, the TSBZA system is a
lane-changing aid that assists drivers with
avoiding crashes that occur with moving
vehicles in the side blind zone, or blind spot
areas. The trailer side blind zone area adds
the blind zone area along the side of a
trailer that the host vehicle is pulling.
When the vehicle is in a forward gear, the
left or right side mirror display will light up
if a moving vehicle is detected in that trailer
blind zone. If the turn signal is activated and
a vehicle is also detected on the same side,
the display will flash as an extra warning
not to change lanes. Since this system is
part of the Lane Change Alert system, read
the entire Lane Change Alert section before
using this feature.
{Warning
TSBZA does not alert the driver to
vehicles outside of the system detection
zones, pedestrians, bicyclists, or animals.
It may not provide alerts when changing(Continued)
Warning (Continued)
lanes under all driving conditions. Failure
to use proper care when changing lanes
may result in injury, death, or vehicle
damage. Before making a lane change,
always check mirrors, glance over your
shoulder, and use the turn signals.
TSBZA Detection Zones
1. SBZA Detection Zone
2. TSBZA Detection Zone
3. LCA Detection Zone
The Side Blind Zone Alert (SBZA) warning
area starts at approximately the middle of
the vehicle and goes back 5 m (16 ft). The
Trailer Side Blind Zone Alert (TSBZA) warning
area starts at approximately 3 m (10 ft) to
the trailing edge of the vehicle and goes
back up to 21 m (69 ft) behind the vehicle.
The maximum trailer length is 18 m (59 ft).
How the System Works
The LCA/TSBZA symbol lights up in the side
mirrors when the system detects a moving
vehicle in the next lane over that is in the
trailer side blind zone. This indicates it may
be unsafe to change lanes. Before making a
lane change, check the SBZA display, check
mirrors, glance over your shoulder, and use
the turn signals.
Left Side Mirror DisplayRight Side Mirror Display
When the vehicle is started, both outside
mirror LCA/TSBZA displays will briefly come
on to indicate the system is operating.
When the vehicle is in a forward gear, the
left- or right-side mirror display will light up
if a moving vehicle is detected in that blind
zone. If the turn signal is activated in the
same direction as a detected vehicle, this
display will flash as an extra warning not to
change lanes.
Page 294 of 433

Chevrolet Silverado 2500 HD/3500 HD Owner Manual (GMNA-Localizing-U.
S./Canada/Mexico-16908339) - 2024 - CRC - 12/12/22
292 Driving and Operating
TTPMS must learn the location of the
installed tire sensors to show correct air
pressure and temperature for each tire. To
set up, use one of the following options or
see a tire or trailer dealer for service. The
learning process must be repeated when the
trailer tires are rotated or replaced.
Tool Method: A TTPMS activation tool can
be purchased separately to learn the sensor
locations.
Manual Method: Without the tool, the air
pressure can be increased or decreased in
each tire for 10 seconds. Do not exceed the
maximum inflation pressure found on the
tire sidewalls. Make sure to readjust tire
pressure to the recommended level when
the process is complete.
Sensor Learning Steps
To complete the sensor-to-vehicle learn
process:1. Touch Start on the Learn Sensors screen. The horn chirps twice and the Learning
Active screen appears on the
infotainment screen.
2. Start with the driver side front trailer tire. 3. Activate the tool near the valve stem or
adjust the air pressure of this tire until
the horn chirps and all working vehicle
and trailer lights flash.
The process stops without saving the
sensor locations if this step takes more
than two minutes.
4. Move to the next tire and repeat Step 3 for each sensor. The horn chirps twice
when all sensors are completed.
5. Return to the vehicle to complete the setup.
Maintenance Reminders
To set up maintenance reminders, touch the
Trailer Maintenance icon. Follow the
on-screen prompts. The maximum number
of reminders is 50.
Towing Assist
To set up towing assist features,
if equipped, touch the towing assist icon.
1. Select the number of axles on the trailer.
2. Enter trailer dimensions as prompted.
Follow the on-screen instructions to
complete setup for available features. Certain trailer features require a compatible
trailer profile be configured and selected.
A compatible trailer is a box type trailer
(cargo, camper, etc.) with a conventional
hitch.
Transparent Trailer Setup
If equipped, a rear trailer camera must be
mounted on the trailer and electrically
connected to the vehicle before transparent
trailer feature can be used. See
Assistance
Systems for Parking or Backing 0247.
Follow the on-screen instructions to enter
trailer dimensions.
Trailer dimensions must be in range and
transparent trailer must be calibrated prior
to use: 1. If trailer dimensions are out of range, this feature will be unavailable.
2. Ensure rear trailer camera is connected.
3. Follow the on-screen instructions to drive forward to complete calibration.
Dimensions for a conventional hitch trailer:
.Trailer Length: 300 cm (118.1 in) –970 cm
(381.8 in). Measure from the center of the
coupler to the furthest rear point on the
trailer.