2024 CHEVROLET SILVERADO manual transmission
[x] Cancel search: manual transmissionPage 305 of 433
Chevrolet Silverado 2500 HD/3500 HD Owner Manual (GMNA-Localizing-U.
S./Canada/Mexico-16908339) - 2024 - CRC - 12/5/22
Vehicle Care 303
Vehicle Care
General Information
General Information . . . . . . . . . . . . . . . . . . . 304
California Perchlorate MaterialsRequirements . . . . . . . . . . . . . . . . . . . . . . . 304
Accessories and Modifications . . . . . . . . . 304
Vehicle Checks
Doing Your Own Service Work . . . . . . . . 305
Hood . . . . . . . . . . . . . . . . . . . . . . . . . . . . . . . . . . 305
Engine Compartment Overview . . . . . . . . 307
Engine Oil . . . . . . . . . . . . . . . . . . . . . . . . . . . . . 308
Engine Oil Life System . . . . . . . . . . . . . . . . . 310
Automatic Transmission Fluid . . . . . . . . . . 311
Engine Air Filter Life System . . . . . . . . . . . 311
Engine Air Cleaner/Filter . . . . . . . . . . . . . . . 312
Cooling System . . . . . . . . . . . . . . . . . . . . . . . . 313
Engine Overheating . . . . . . . . . . . . . . . . . . . . 315
Overheated Engine Protection Operating Mode . . . . . . . . . . . . . . . . . . . . . 317
Engine Fan . . . . . . . . . . . . . . . . . . . . . . . . . . . . . 317
Power Steering Fluid . . . . . . . . . . . . . . . . . . . 317
Washer Fluid . . . . . . . . . . . . . . . . . . . . . . . . . . 318
Brakes . . . . . . . . . . . . . . . . . . . . . . . . . . . . . . . . . 319
Brake Pad Life System . . . . . . . . . . . . . . . . . 319
Brake Fluid . . . . . . . . . . . . . . . . . . . . . . . . . . . . 320
Battery - North America . . . . . . . . . . . . . . . 321
Four-Wheel Drive . . . . . . . . . . . . . . . . . . . . . . 323
Front Axle . . . . . . . . . . . . . . . . . . . . . . . . . . . . . 323 Rear Axle . . . . . . . . . . . . . . . . . . . . . . . . . . . . . . 323
Noise Control System . . . . . . . . . . . . . . . . . . 323
Automatic Transmission Shift Lock
Control Function Check . . . . . . . . . . . . . . 324
Park Brake and P (Park) Mechanism
Check . . . . . . . . . . . . . . . . . . . . . . . . . . . . . . . . 325
Wiper Blade Replacement . . . . . . . . . . . . . 325
Glass Replacement . . . . . . . . . . . . . . . . . . . . . 325
Windshield Replacement . . . . . . . . . . . . . . 326
Gas Strut(s) . . . . . . . . . . . . . . . . . . . . . . . . . . . 326
Headlamp Aiming
Front Headlamp Aiming . . . . . . . . . . . . . . . 327
Bulb Replacement
Bulb Replacement . . . . . . . . . . . . . . . . . . . . . 327
Halogen Bulbs . . . . . . . . . . . . . . . . . . . . . . . . . 327
LED Lighting . . . . . . . . . . . . . . . . . . . . . . . . . . . 327
Headlamps, Front Turn Signal, Sidemarker, and Parking Lamps . . . . . . 327
Taillamps, Turn Signal, Stoplamps, and Back-Up Lamps . . . . . . . . . . . . . . . . . . . . . . 328
Center High-Mounted Stoplamp (CHMSL) and Cargo Lamp . . . . . . . . . . . . 329
License Plate Lamp . . . . . . . . . . . . . . . . . . . . 330
Electrical System
Electrical System Overload . . . . . . . . . . . . 330
Fuses and Circuit Breakers . . . . . . . . . . . . . 332
Engine Compartment Fuse Block . . . . . . . 332
Instrument Panel Fuse Block (Left) . . . . . 335 Instrument Panel Fuse Block (Right) . . . 337
Wheels and Tires
Tires . . . . . . . . . . . . . . . . . . . . . . . . . . . . . . . . . . 339
All-Season Tires . . . . . . . . . . . . . . . . . . . . . . . 340
Winter Tires . . . . . . . . . . . . . . . . . . . . . . . . . . . 340
All-Terrain Tires . . . . . . . . . . . . . . . . . . . . . . . . 341
Tire Sidewall Labeling . . . . . . . . . . . . . . . . . . 341
Tire Designations . . . . . . . . . . . . . . . . . . . . . . 342
Tire Terminology and Definitions . . . . . . 342
Tire Pressure . . . . . . . . . . . . . . . . . . . . . . . . . . 344
Tire Pressure Monitor System . . . . . . . . . 345
Tire Pressure Monitor Operation . . . . . . 346
Tire Inspection . . . . . . . . . . . . . . . . . . . . . . . . . 351
Tire Rotation . . . . . . . . . . . . . . . . . . . . . . . . . . . 351
When It Is Time for New Tires . . . . . . . . 353
Buying New Tires . . . . . . . . . . . . . . . . . . . . . 354
Different Size Tires and Wheels . . . . . . . . 355
Uniform Tire Quality Grading . . . . . . . . . 356
Wheel Alignment and Tire Balance . . . . 357
Wheel Replacement . . . . . . . . . . . . . . . . . . . 357
Tire Chains . . . . . . . . . . . . . . . . . . . . . . . . . . . . 358
If a Tire Goes Flat . . . . . . . . . . . . . . . . . . . . . 358
Tire Changing . . . . . . . . . . . . . . . . . . . . . . . . . 360
Full-Size Spare Tire . . . . . . . . . . . . . . . . . . . . 370
Jump Starting
Jump Starting - North America . . . . . . . . 370
Towing the Vehicle
Transporting a Disabled Vehicle . . . . . . . 373
Page 313 of 433
Chevrolet Silverado 2500 HD/3500 HD Owner Manual (GMNA-Localizing-U.
S./Canada/Mexico-16908339) - 2024 - CRC - 12/5/22
Vehicle Care 311
The oil life system can also be reset as
follows:1. Display the oil life percentage on the DIC. See Driver Information Center (DIC)
(Base Level) 0126 orDriver Information
Center (DIC) (Uplevel) 0128.
2. Fully press the accelerator pedal slowly three times within five seconds.
3. If the display changes to 100%, the system is reset.
If the vehicle has a CHANGE ENGINE OIL
SOON message and it comes back on when
the vehicle is started and/or the oil
life percentage is near 0%, the engine oil
life system has not been reset. Repeat the
procedure.
Automatic Transmission Fluid
When to Check and Change Automatic
Transmission Fluid
It is usually not necessary to check the
transmission fluid level. The only reason for
fluid loss is a transmission leak or
overheated transmission. This vehicle is not
equipped with a transmission fluid level
dipstick. There is a special procedure for
checking and changing the transmission fluid
in these vehicles. Because this procedure is difficult, this should be done at the dealer.
Contact the dealer for additional information
or the procedure can be found in the service
manual. See
Publication Ordering
Information 0406.
Caution
Use of the incorrect automatic
transmission fluid may damage the
vehicle, and the damage may not be
covered by the vehicle warranty. Always
use the correct automatic transmission
fluid. See Recommended Fluids and
Lubricants 0392.
Change the fluid and filter at the scheduled
maintenance intervals listed in Maintenance
Schedule 0388. Be sure to use the
transmission fluid listed in Recommended
Fluids and Lubricants 0392.
Engine Air Filter Life System
This feature provides the engine air filter’s
remaining life and best timing for a change.
The timing to change and engine air filter
depends on driving and environmental
conditions.
When to Change Engine Air Filter
When the Driver Information Center (DIC)
displays a message to replace the engine air
filter at the next oil change, follow this
timing.
When the DIC displays a message to replace
the engine air filter soon, replace the engine
air filter at the earliest convenience.
The system must be reset after the engine
air filter is changed.
If the DIC displays a message to check the
engine air filter system, see your dealer.
How to Reset Engine Air Filter Life
System
To reset:
1. Place the vehicle in P (Park).
2. Display the Air Filter Life on the DIC. See Driver Information Center (DIC) (Base
Level) 0126 orDriver Information Center
(DIC) (Uplevel) 0128.
3. Press
Ton the steering wheel, or press
the trip odometer reset stem if the
vehicle does not have the DIC controls,
to move to the Reset/Disable display
Page 318 of 433
Chevrolet Silverado 2500 HD/3500 HD Owner Manual (GMNA-Localizing-U.
S./Canada/Mexico-16908339) - 2024 - CRC - 12/5/22
316 Vehicle Care
If the decision is made not to lift the hood
when this warning appears, get service help
right away. SeeRoadside Assistance Program
0 402.
If the decision is made to lift the hood,
make sure the vehicle is parked on a level
surface.
Check to see if the engine cooling fans are
running. If the engine is overheating, the
fans should be running. If they are not, do
not continue to run the engine and have the
vehicle serviced.
If the engine or transmission detects an
impending hot fluid condition, then the
transmission may force upshifts to limit
temperatures. Downshifts may also be
prevented in this instance. Normal operation
may continue unless the display indicates
there is a hot condition and engine should
be idled.If Steam is Coming from the Engine
Compartment
{Warning
Steam and scalding liquids from a hot
cooling system are under pressure.
Turning the pressure cap, even a little,
can cause them to come out at high
speed and you could be burned. Never
turn the cap when the cooling system,
including the pressure cap, is hot. Wait
for the cooling system and pressure cap
to cool.
If No Steam is Coming from the Engine
Compartment
The ENGINE OVERHEATED STOP ENGINE or
the ENGINE OVERHEATED IDLE ENGINE
message, along with a low coolant
condition, can indicate a serious problem.
If there is an engine overheat warning, but
no steam is seen or heard, the problem may
not be too serious. Sometimes the engine
can get a little too hot when the vehicle:
.Climbs a long hill on a hot day.
.Stops after high-speed driving.
.Idles for long periods in traffic.
.Tows a trailer; see Trailer Towing0274.
If the ENGINE OVERHEATED STOP ENGINE or
the ENGINE OVERHEATED IDLE ENGINE
message appears with no sign of steam, try
this for a minute or so: 1. Turn the air conditioning off.
2. Turn the heater on to the highest temperature and to the highest fan
speed. Open the windows as necessary.
3. When it is safe to do so, pull off the road, shift to P (Park) or N (Neutral) and
let the engine idle.
If the temperature overheat gauge is no
longer in the overheat zone or an overheat
warning no longer displays, the vehicle can
be driven. Continue to drive the vehicle
slowly for about 10 minutes. Keep a safe
vehicle distance from the vehicle in front.
If the warning does not come back on,
continue to drive normally and have the
cooling system checked for proper fill and
function.
If the warning continues, pull over, stop, and
park the vehicle right away.
If there is still no sign of steam and the
vehicle is equipped with an engine driven
cooling fan, push down the accelerator until
the engine speed is about twice as fast as
Page 319 of 433
Chevrolet Silverado 2500 HD/3500 HD Owner Manual (GMNA-Localizing-U.
S./Canada/Mexico-16908339) - 2024 - CRC - 12/5/22
Vehicle Care 317
normal idle speed for at least five minutes
while the vehicle is parked. If the warning is
still there, turn off the engine and get
everyone out of the vehicle until it
cools down.
If there is no sign of steam, idle the engine
for five minutes while parked. If the warning
is still displayed, turn off the engine until it
cools down.
Overheated Engine Protection
Operating Mode
If an overheated engine condition exists and
the ENGINE POWER IS REDUCED message
displays, an overheat protection mode which
alternates firing groups of cylinders helps to
prevent engine damage. In this mode, a loss
in power and engine performance will be
noticed. This operating mode allows the
vehicle to be driven to a safe place in an
emergency. Driving extended distances and/
or towing a trailer in the overheat
protection mode should be avoided.
If the engine or transmission detects an
impending hot fluid condition, then the
transmission may force upshifts to limit
temperatures. Downshifts may also be
prevented in this instance. Normal operationmay continue unless the display indicates
there is a hot condition and engine should
be idled.
Caution
After driving in the overheated engine
protection operating mode, the engine oil
will be severely degraded. Any repairs
performed before the engine is cool may
cause engine damage. Allow the engine
to cool before attempting any repair.
Repair the cause of coolant loss, change
the oil, and reset the oil life system. See
Engine Oil
0308.
Engine Fan
If the vehicle has the Duramax diesel
engine, see the Duramax diesel supplement.
The vehicle has a clutched engine cooling
fan. When the clutch is engaged, the fan
spins faster to provide more air to cool the
engine. In most everyday driving conditions,
the fan is spinning slower and the clutch is
not fully engaged. This improves fuel
economy and reduces fan noise. Under
heavy vehicle loading, trailer towing, and/or
high outside temperatures, the fan speed
increases as the clutch more fully engages, so an increase in fan noise may be heard.
This is normal and should not be mistaken
as the transmission slipping or making extra
shifts. It is merely the cooling system
functioning properly. The fan will slow down
when additional cooling is not required and
the clutch partially disengages.
This fan noise may be heard when starting
the engine. It will go away as the fan clutch
partially disengages.
Power Steering Fluid
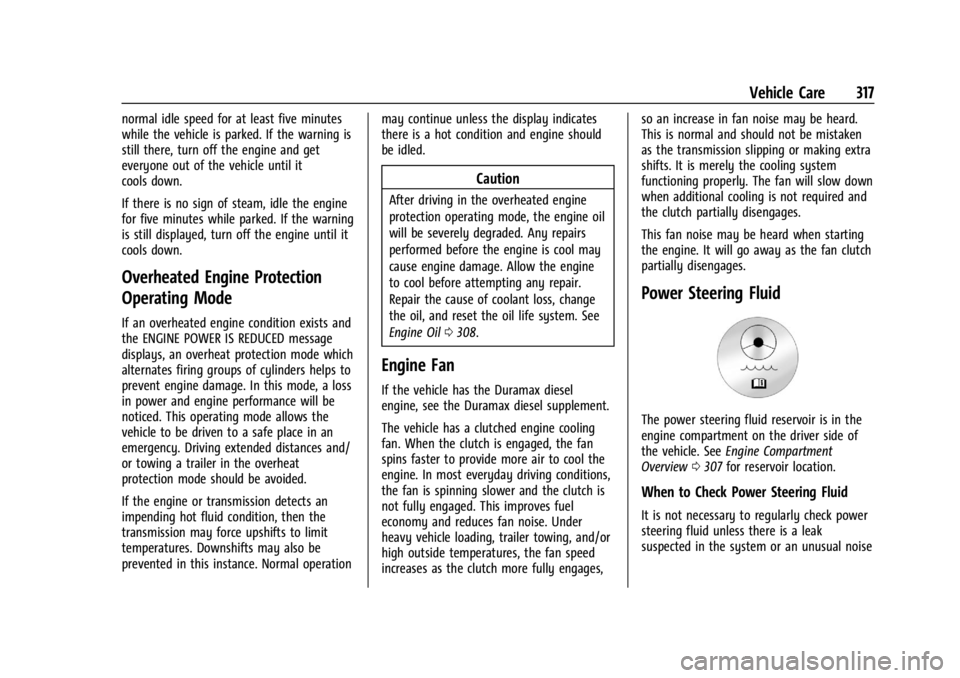
The power steering fluid reservoir is in the
engine compartment on the driver side of
the vehicle. See
Engine Compartment
Overview 0307 for reservoir location.
When to Check Power Steering Fluid
It is not necessary to regularly check power
steering fluid unless there is a leak
suspected in the system or an unusual noise
Page 326 of 433
Chevrolet Silverado 2500 HD/3500 HD Owner Manual (GMNA-Localizing-U.
S./Canada/Mexico-16908339) - 2024 - CRC - 12/5/22
324 Vehicle Care
General Motors LLC, and is not limited to
any particular part, component or system of
the vehicle manufactured by General Motors
LLC. Defects in design, assembly or in any
part, component or system of the vehicle as
manufactured by General Motors LLC, which,
at the time it left General Motors LLC’s
control, caused noise emissions to exceed
Federal standards, are covered by this
warranty for the life of the vehicle.
TAMPERING WITH NOISE CONTROL
SYSTEM PROHIBITED
Federal law prohibits the following acts or
the causing thereof:1. The removal or rendering inoperative by any person, other than for purposes of
maintenance, repair, or replacement, of
any device or element of design
incorporated into any new vehicle for
the purpose of noise control prior to its
sale or delivery to the ultimate purchaser
or while it is in use; or
2. the use of the vehicle after such device or element of design has been removed
or rendered inoperative by any person.
Among those acts presumed to constitute
tampering are the acts listed below. Insulation:
Removal of the noise shields or any
undercab insulation.
Engine:
Removal or rendering engine speed
governor, if so equipped, inoperative so as
to allow engine speed to exceed
manufacturer specifications.
Modification of the engine control system or
calibration.
Fan and Drive:.Removal of fan clutch or rendering clutch
inoperative.
.Removal of the fan shroud.
Air Intake:
.Removal of air cleaner silencer.
.Reversing air cleaner cover.
Exhaust:
.Removal of muffler, catalytic converter,
and/or resonator.
.Removal of exhaust pipes and exhaust
pipe clamps.
Automatic Transmission Shift Lock
Control Function Check
{Warning
When you are doing this inspection, the
vehicle could move suddenly. If the
vehicle moves, you or others could be
injured.
1. Before starting this check, be sure there is enough room around the vehicle.
It should be parked on a level surface.
2. Apply the parking brake. Be ready to apply the regular brake immediately if
the vehicle begins to move.
3. With the engine off, turn the ignition on, but do not start the engine. Without
applying the regular brake, try to move
the shift lever out of P (Park) with
normal effort. If the shift lever moves
out of P (Park), contact your dealer for
service.
Page 327 of 433
Chevrolet Silverado 2500 HD/3500 HD Owner Manual (GMNA-Localizing-U.
S./Canada/Mexico-16908339) - 2024 - CRC - 12/5/22
Vehicle Care 325
Park Brake and P (Park)
Mechanism Check
{Warning
When you are doing this check, the
vehicle could begin to move. You or
others could be injured and property
could be damaged. Make sure there is
room in front of the vehicle in case it
begins to roll. Be ready to apply the
regular brake at once should the vehicle
begin to move.
Park on a fairly steep hill, with the vehicle
facing downhill. Keeping your foot on the
regular brake, set the parking brake.
.To check the parking brake's holding
ability: With the engine running and the
transmission in N (Neutral), slowly remove
foot pressure from the regular brake
pedal. Do this until the vehicle is held by
the parking brake only.
.To check the P (Park) mechanism's holding
ability: With the engine running, shift to
P (Park). Then release the parking brake
followed by the regular brake.
Contact your dealer if service is required.
Wiper Blade Replacement
Windshield wiper blades should be replaced
periodically. See Maintenance Schedule
0 388.
Replacement blades come in different types
and are removed in different ways. For
proper type and length, see Maintenance
Replacement Parts 0393.
Caution
Allowing the wiper arm to touch the
windshield when no wiper blade is
installed could damage the windshield.
Any damage that occurs would not be
covered by the vehicle warranty. Do not
allow the wiper arm to touch the
windshield.
Front Wiper Blade Replacement
To replace the wiper blade:
1. Pull the wiper assembly away from the windshield.
2. Lift up on the latch in the middle of the
wiper blade where the wiper arm
attaches.
3. With the latch open, pull the wiper blade down toward the windshield far enough
to release it from the J-hooked end of
the wiper arm.
4. Remove the wiper blade.
5. Reverse Steps 1–3 for wiper blade replacement.
Glass Replacement
If the windshield or front side glass must be
replaced, see your dealer to determine the
correct replacement glass.
Page 336 of 433

Chevrolet Silverado 2500 HD/3500 HD Owner Manual (GMNA-Localizing-U.
S./Canada/Mexico-16908339) - 2024 - CRC - 12/5/22
334 Vehicle Care
FusesUsage
25 EBCM 1 –Electronic
Brake Control Module 1
26 –
27 Horn
28 Parking Lamp Mirror/ Grill (LD)/Parking Lamp
Left (HD)
29 Parking Lamp Right (HD)
30 ELM 3 –Electronic
Lighting Module 3
31 ELM 1 –Electronic
Lighting Module 1
32 –
33 Not R/C
34 Radars (LD) 37 MISC IP Headliner Ignition
38 Seat Fan Ignition
39 Trailer Ignition Module
40 Misc Ignition 41 Trailer Parking Lamp Fuses
Usage
42 Tail Lamp Left (HD)
44 DEFC/ICCM Ignition (LD/ HD)/FTZM Ignition (HD)
45 Secondary Axle Motor
46 Engine Control Module Ignition
47 –
48 –
49 Transmission Auxiliary Oil Pump (LD)
50 A/C Clutch 51 Transfer Case Control Module
52 Front Wiper
53 Center High-Mounted Stop Lamp
54 Tail Lamp Right (HD) 55 Trailer Back-up Lamp
56 SADS (LD)/Fuel Tank Zone Module 2 (HD)
57 TTPM/SBZA
58 Starter Motor (LD) Fuses
Usage
60 Powertrain Sensor 2 (DSL)
61 Active Hydraulic Steering (HD)
62 DEFC Batt 1/CVS
63 Trailer Brake
65 –
66 Cooling Fan Motor Left (LD)
67 –
68 DEFC Batt 2
69 Starter Pinion (LD Gas)/ Starter Motor (HD)
71 Cooling Fan Lower (LD)
72 Cooling Fan Right (LD)
73 Trailer Stop/Turn Lamp Left
74 Trailer Interface Module 2
75 Integrated Chassis Control Module
76 Electric RNG BDS
Page 341 of 433

Chevrolet Silverado 2500 HD/3500 HD Owner Manual (GMNA-Localizing-U.
S./Canada/Mexico-16908339) - 2024 - CRC - 12/5/22
Vehicle Care 339
FusesUsage
F22 Heated Steering Wheel
F23 –
F24 –
F25 SPOT LAMP LT/RT (LD)
F26 USB Ports/Special Equipment Option Retained
Accessory Power
F27 Accessory Power Outlet/ Retained Accessory Power
F28 Accessory Power Outlet/ Battery
F30 SDM/ICS/IPC/HUD/HMDTY (HD)/HDLM (LD)
F31 BCM 2 –Body Control
Module 2
F32 RFA WCM AUX JACK/CSM AUX JACK/TBCS
F33 BCM 4 –Body Control
Module 4
F34 –
F40 –
F41 – Fuses
Usage
F42 Electric Park Brake Switch
F43 –
F44 Shifter Interface Board (LD) F45 Radio Lo
F46 –
F47 –
F48 Transmission Control Module
F49 Body Control Module 1 F50 –
F51 Battery 1 (HD)
F52 Battery 2 (HD)
F53 –
F54 Sunroof F55 Driver Power Seat
F56 DC DC TRANS 1 (LD) F57 DC DC TRANS 2 (LD)
F58 – Circuit
Breakers Usage
1 Accessory Power Outlet 1
2 –
3 –
4 –
Relays Usage
K1 –
K2 Retained Accessory Power/ Accessory 1
K4 –
K5 –
Wheels and Tires
Tires
Every new GM vehicle has high-quality
tires made by a leading tire
manufacturer. See the warranty manual
for information regarding the tire
warranty and where to get service. For
additional information refer to the tire
manufacturer.