2024 CHEVROLET SILVERADO brakes
[x] Cancel search: brakesPage 290 of 433
Chevrolet Silverado 2500 HD/3500 HD Owner Manual (GMNA-Localizing-U.
S./Canada/Mexico-16908339) - 2024 - CRC - 12/12/22
288 Driving and Operating
.There is an electrical fault in the wiring to
the trailer brakes. This message will
continue as long as there is an electrical
fault in the trailer wiring. This message
will also turn off if it is acknowledged.
To determine whether the electrical fault is
on the vehicle side or trailer side of the
trailer wiring harness connection: 1. Disconnect the trailer wiring harness from the vehicle.
2. Turn the vehicle off.
3. Wait 10 seconds, then turn the vehicle back to RUN.
4. If the CHECK TRAILER WIRING message reappears, the electrical fault is on the
vehicle side.
5. If the CHECK TRAILER WIRING message only reappears when connecting the
trailer wiring harness to the vehicle, the
electrical fault is on the trailer side.
SERVICE TRAILER BRAKES or REDUCED
TRAILER BRAKING: This message will display
if the electric trailer brake performance is
either reduced or non-functional.
HOLD LAST KNOWN GAIN: This message will
display if it is no longer possible to adjust
the trailer brake gain. Trailer brakes may or
may not still be functional, and it is not possible to adjust brake gain based on road
conditions. The trailer brakes may remain
functional until the next time the vehicle is
turned off.
TRAILER BRAKES DISABLED SERVICE
REQUIRED: This message will display when
there is a problem with the ITBC system.
If this message continues over multiple
restarts, have the vehicle serviced.
If either the CHECK TRAILER WIRING, TRAILER
BRAKES DISABLED SERVICE REQUIRED,
SERVICE TRAILER BRAKES, or REDUCED
TRAILER BRAKING message displays while
driving, the ITBC system may not be fully
functional or may not function at all. When
traffic conditions allow, carefully pull the
vehicle over to the side of the road and turn
the vehicle off. Check the wiring connection
to the trailer and turn the vehicle back on.
If either of these messages continue, either
the vehicle or trailer needs service.
{Warning
Driving while the trailer braking system is
malfunctioning may increase loading on
the vehicle's braking system or lead to
(Continued)
Warning (Continued)
trailer instability. Use caution. Drive
slowly and allow for increased stopping
distances.
A GM dealer may be able to diagnose and
repair problems with the trailer. However,
any diagnosis and repair of the trailer is not
covered under the vehicle warranty. Contact
your trailer dealer for assistance with trailer
repairs and trailer warranty information.
Trailer Sway Control (TSC)
Vehicles with StabiliTrak/Electronic Stability
Control (ESC) have a Trailer Sway Control
(TSC) feature. Trailer sway is unintended
side-to-side motion of a trailer while towing.
If the vehicle is towing a trailer and the TSC
detects that sway is increasing, the vehicle
brakes are selectively applied at each wheel,
to help reduce excessive trailer sway.
If equipped with the Integrated Trailer Brake
Control (ITBC) system, and the trailer has an
electric brake system, StabiliTrak/ESC may
also apply the trailer brakes.
Page 291 of 433
Chevrolet Silverado 2500 HD/3500 HD Owner Manual (GMNA-Localizing-U.
S./Canada/Mexico-16908339) - 2024 - CRC - 12/12/22
Driving and Operating 289
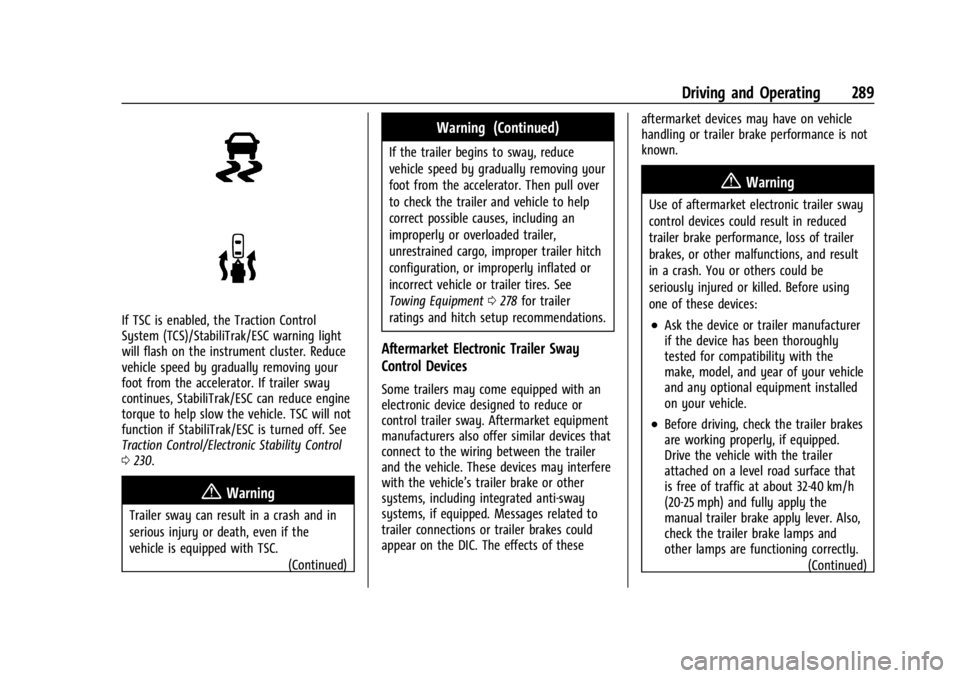
If TSC is enabled, the Traction Control
System (TCS)/StabiliTrak/ESC warning light
will flash on the instrument cluster. Reduce
vehicle speed by gradually removing your
foot from the accelerator. If trailer sway
continues, StabiliTrak/ESC can reduce engine
torque to help slow the vehicle. TSC will not
function if StabiliTrak/ESC is turned off. See
Traction Control/Electronic Stability Control
0230.
{Warning
Trailer sway can result in a crash and in
serious injury or death, even if the
vehicle is equipped with TSC.
(Continued)
Warning (Continued)
If the trailer begins to sway, reduce
vehicle speed by gradually removing your
foot from the accelerator. Then pull over
to check the trailer and vehicle to help
correct possible causes, including an
improperly or overloaded trailer,
unrestrained cargo, improper trailer hitch
configuration, or improperly inflated or
incorrect vehicle or trailer tires. See
Towing Equipment0278 for trailer
ratings and hitch setup recommendations.
Aftermarket Electronic Trailer Sway
Control Devices
Some trailers may come equipped with an
electronic device designed to reduce or
control trailer sway. Aftermarket equipment
manufacturers also offer similar devices that
connect to the wiring between the trailer
and the vehicle. These devices may interfere
with the vehicle’s trailer brake or other
systems, including integrated anti-sway
systems, if equipped. Messages related to
trailer connections or trailer brakes could
appear on the DIC. The effects of these aftermarket devices may have on vehicle
handling or trailer brake performance is not
known.
{Warning
Use of aftermarket electronic trailer sway
control devices could result in reduced
trailer brake performance, loss of trailer
brakes, or other malfunctions, and result
in a crash. You or others could be
seriously injured or killed. Before using
one of these devices:
.Ask the device or trailer manufacturer
if the device has been thoroughly
tested for compatibility with the
make, model, and year of your vehicle
and any optional equipment installed
on your vehicle.
.Before driving, check the trailer brakes
are working properly, if equipped.
Drive the vehicle with the trailer
attached on a level road surface that
is free of traffic at about 32-40 km/h
(20-25 mph) and fully apply the
manual trailer brake apply lever. Also,
check the trailer brake lamps and
other lamps are functioning correctly.
(Continued)
Page 292 of 433
Chevrolet Silverado 2500 HD/3500 HD Owner Manual (GMNA-Localizing-U.
S./Canada/Mexico-16908339) - 2024 - CRC - 12/12/22
290 Driving and Operating
Warning (Continued)
.If the trailer brakes are not operating
properly at any time, or if a DIC
message indicates problems with the
trailer connections or trailer brakes,
carefully pull the vehicle over to the
side of the road when traffic
conditions allow.
Trailer Tires
Special Trailer (ST) tires differ from vehicle
tires. Trailer tires are designed with stiff
sidewalls to help prevent sway and to
support heavy loads. These features can
make it difficult to determine if the trailer
tire pressures are low only based on a visual
inspection.
Always check all trailer tire pressures before
each trip when the tires are cool. Low trailer
tire pressure is a leading cause of trailer tire
blow-outs.
If the vehicle is equipped with a trailer tire
pressure monitoring system, see the trailer
tire pressure monitoring system description
and the trailering app.Trailer tires deteriorate over time. The trailer
tire sidewall will show the week and year
the tire was manufactured. Many trailer tire
manufacturers recommend replacing tires
more than six years old.
Overloading is another leading cause of
trailer tire blow-outs. Never load your trailer
with more weight than the tires are
designed to support. The load rating is
located on the trailer tire sidewall.
Always know the maximum speed rating for
the trailer tires before driving. This may be
significantly lower than the vehicle tire
speed rating. The speed rating may be on
the trailer tire sidewall. If the speed rating is
not shown, the default trailer tire speed
rating is 105 km/h (65 mph).
Trailering App
Trailer Lights App
If equipped, the Trailer Lights App is on the
infotainment home screen.
Touch Start to cycle the trailer lamps on and
off to determine if they are working. The
test follows this sequence:
1. The running lights turn on first and remain on throughout the sequence. 2. The brake lights turn on for about
two seconds.
3. The left turn signal light flashes three times.
4. The right turn signal light flashes three times.
5. The reverse lights turn on for about two seconds.
6. Steps 2–5 repeat for approximately one minute and 45 seconds, or until the
test deactivates.
Touch Stop to stop the test. The test
automatically ends after one minute and
45 seconds.
The sequence also deactivates when any of
the following occur:
.The vehicle is turned off.
.The transmission is shifted out of P (Park).
.The brake pedal is pressed.
.The turn signal is activated.
.The hazard warning lights are activated.
Trailering App
If equipped, the Trailering App is on the
infotainment home screen.
Page 304 of 433
Chevrolet Silverado 2500 HD/3500 HD Owner Manual (GMNA-Localizing-U.
S./Canada/Mexico-16908339) - 2024 - CRC - 12/12/22
302 Driving and Operating
on the front. However, the front GAWR, rear
GAWR, and Gross Vehicle Weight
Rating (GVWR) must never be exceeded.
{Warning
On some vehicles that have certain front
mounted equipment, such as a snow
plow, it may be possible to load the front
axle to the front Gross Axle Weight
Rating (GAWR) but not have enough
weight on the rear axle to have proper
braking performance. If the brakes cannot
work properly, the vehice could crash.
Always follow the snow plow
manufacturer or installer's
recommendation for rear ballast to
ensure a proper front and rear weight
distribution ratio. Maintaining a proper
front and rear weight distribution ratio is
necessary to provide proper braking
performance.
See your dealer for additional advice and
information about using a snow plow on the
vehicle. Also, see Vehicle Load Limits 0204.
Pickup Conversion to Chassis Cab
We are aware that some vehicle owners
might consider having the pickup box
removed and a commercial or recreational
body installed. Owners should be aware
that, as manufactured, there are differences
between a chassis cab and a pickup with the
box removed which could affect vehicle
safety. The components necessary to adapt
a pickup to permit its safe use with a
specialized body should be installed by the
body builder.
Page 305 of 433
Chevrolet Silverado 2500 HD/3500 HD Owner Manual (GMNA-Localizing-U.
S./Canada/Mexico-16908339) - 2024 - CRC - 12/5/22
Vehicle Care 303
Vehicle Care
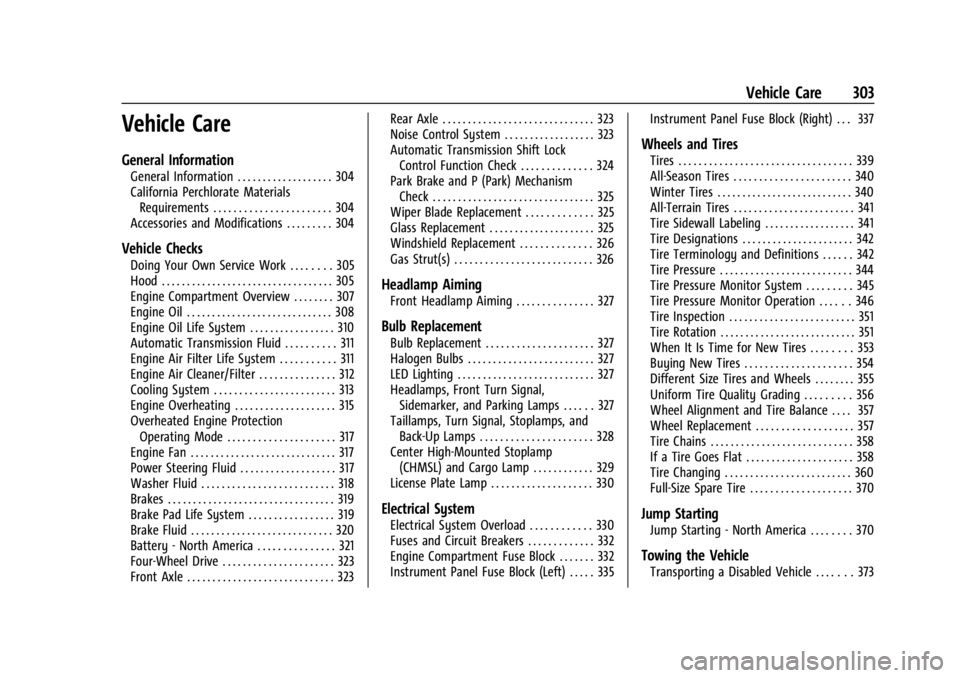
General Information
General Information . . . . . . . . . . . . . . . . . . . 304
California Perchlorate MaterialsRequirements . . . . . . . . . . . . . . . . . . . . . . . 304
Accessories and Modifications . . . . . . . . . 304
Vehicle Checks
Doing Your Own Service Work . . . . . . . . 305
Hood . . . . . . . . . . . . . . . . . . . . . . . . . . . . . . . . . . 305
Engine Compartment Overview . . . . . . . . 307
Engine Oil . . . . . . . . . . . . . . . . . . . . . . . . . . . . . 308
Engine Oil Life System . . . . . . . . . . . . . . . . . 310
Automatic Transmission Fluid . . . . . . . . . . 311
Engine Air Filter Life System . . . . . . . . . . . 311
Engine Air Cleaner/Filter . . . . . . . . . . . . . . . 312
Cooling System . . . . . . . . . . . . . . . . . . . . . . . . 313
Engine Overheating . . . . . . . . . . . . . . . . . . . . 315
Overheated Engine Protection Operating Mode . . . . . . . . . . . . . . . . . . . . . 317
Engine Fan . . . . . . . . . . . . . . . . . . . . . . . . . . . . . 317
Power Steering Fluid . . . . . . . . . . . . . . . . . . . 317
Washer Fluid . . . . . . . . . . . . . . . . . . . . . . . . . . 318
Brakes . . . . . . . . . . . . . . . . . . . . . . . . . . . . . . . . . 319
Brake Pad Life System . . . . . . . . . . . . . . . . . 319
Brake Fluid . . . . . . . . . . . . . . . . . . . . . . . . . . . . 320
Battery - North America . . . . . . . . . . . . . . . 321
Four-Wheel Drive . . . . . . . . . . . . . . . . . . . . . . 323
Front Axle . . . . . . . . . . . . . . . . . . . . . . . . . . . . . 323 Rear Axle . . . . . . . . . . . . . . . . . . . . . . . . . . . . . . 323
Noise Control System . . . . . . . . . . . . . . . . . . 323
Automatic Transmission Shift Lock
Control Function Check . . . . . . . . . . . . . . 324
Park Brake and P (Park) Mechanism
Check . . . . . . . . . . . . . . . . . . . . . . . . . . . . . . . . 325
Wiper Blade Replacement . . . . . . . . . . . . . 325
Glass Replacement . . . . . . . . . . . . . . . . . . . . . 325
Windshield Replacement . . . . . . . . . . . . . . 326
Gas Strut(s) . . . . . . . . . . . . . . . . . . . . . . . . . . . 326
Headlamp Aiming
Front Headlamp Aiming . . . . . . . . . . . . . . . 327
Bulb Replacement
Bulb Replacement . . . . . . . . . . . . . . . . . . . . . 327
Halogen Bulbs . . . . . . . . . . . . . . . . . . . . . . . . . 327
LED Lighting . . . . . . . . . . . . . . . . . . . . . . . . . . . 327
Headlamps, Front Turn Signal, Sidemarker, and Parking Lamps . . . . . . 327
Taillamps, Turn Signal, Stoplamps, and Back-Up Lamps . . . . . . . . . . . . . . . . . . . . . . 328
Center High-Mounted Stoplamp (CHMSL) and Cargo Lamp . . . . . . . . . . . . 329
License Plate Lamp . . . . . . . . . . . . . . . . . . . . 330
Electrical System
Electrical System Overload . . . . . . . . . . . . 330
Fuses and Circuit Breakers . . . . . . . . . . . . . 332
Engine Compartment Fuse Block . . . . . . . 332
Instrument Panel Fuse Block (Left) . . . . . 335 Instrument Panel Fuse Block (Right) . . . 337
Wheels and Tires
Tires . . . . . . . . . . . . . . . . . . . . . . . . . . . . . . . . . . 339
All-Season Tires . . . . . . . . . . . . . . . . . . . . . . . 340
Winter Tires . . . . . . . . . . . . . . . . . . . . . . . . . . . 340
All-Terrain Tires . . . . . . . . . . . . . . . . . . . . . . . . 341
Tire Sidewall Labeling . . . . . . . . . . . . . . . . . . 341
Tire Designations . . . . . . . . . . . . . . . . . . . . . . 342
Tire Terminology and Definitions . . . . . . 342
Tire Pressure . . . . . . . . . . . . . . . . . . . . . . . . . . 344
Tire Pressure Monitor System . . . . . . . . . 345
Tire Pressure Monitor Operation . . . . . . 346
Tire Inspection . . . . . . . . . . . . . . . . . . . . . . . . . 351
Tire Rotation . . . . . . . . . . . . . . . . . . . . . . . . . . . 351
When It Is Time for New Tires . . . . . . . . 353
Buying New Tires . . . . . . . . . . . . . . . . . . . . . 354
Different Size Tires and Wheels . . . . . . . . 355
Uniform Tire Quality Grading . . . . . . . . . 356
Wheel Alignment and Tire Balance . . . . 357
Wheel Replacement . . . . . . . . . . . . . . . . . . . 357
Tire Chains . . . . . . . . . . . . . . . . . . . . . . . . . . . . 358
If a Tire Goes Flat . . . . . . . . . . . . . . . . . . . . . 358
Tire Changing . . . . . . . . . . . . . . . . . . . . . . . . . 360
Full-Size Spare Tire . . . . . . . . . . . . . . . . . . . . 370
Jump Starting
Jump Starting - North America . . . . . . . . 370
Towing the Vehicle
Transporting a Disabled Vehicle . . . . . . . 373
Page 306 of 433
Chevrolet Silverado 2500 HD/3500 HD Owner Manual (GMNA-Localizing-U.
S./Canada/Mexico-16908339) - 2024 - CRC - 12/5/22
304 Vehicle Care
Recreational Vehicle Towing . . . . . . . . . . . 374
Appearance Care
Exterior Care . . . . . . . . . . . . . . . . . . . . . . . . . . . 377
Interior Care . . . . . . . . . . . . . . . . . . . . . . . . . . . 382
Floor Mats . . . . . . . . . . . . . . . . . . . . . . . . . . . . 385
General Information
For service and parts needs, visit your
dealer. You will receive genuine GM parts
and GM-trained and supported service
people.
Genuine GM parts have one of these marks:
California Perchlorate Materials
Requirements
Certain types of automotive applications,
such as airbag initiators, seat belt
pretensioners, and lithium batteries
contained in electronic keys, may contain
perchlorate materials. Perchlorate Material–special handling may apply. See
www.dtsc.ca.gov/hazardouswaste/
perchlorate.
Accessories and Modifications
Adding non-dealer accessories or making
modifications to the vehicle can affect
vehicle performance and safety, including
such things as airbags, braking, stability,
ride and handling, emissions systems,
aerodynamics, durability, Advanced Driver
Assistance Systems, and electronic systems
like antilock brakes, traction control, and
stability control. These accessories or
modifications could even cause malfunction
or damage not covered by the vehicle
warranty.
Caution
When adding accessories or other
equipment after the purchase of your
vehicle, ensure you are not exceeding the
vehicle axle weight ratings or overall
weight ratings. Overloading the vehicle
may cause damage. Repairs would not be
covered by the vehicle warranty. Do not
(Continued)
Page 321 of 433
Chevrolet Silverado 2500 HD/3500 HD Owner Manual (GMNA-Localizing-U.
S./Canada/Mexico-16908339) - 2024 - CRC - 12/5/22
Vehicle Care 319
Caution (Continued)
.Do not use engine coolant (antifreeze)
in the windshield washer. It can
damage the windshield washer system
and paint.
.Do not mix water with ready-to-use
washer fluid. Water can cause the
solution to freeze and damage the
washer fluid tank and other parts of
the washer system.
.When using concentrated washer fluid,
follow the manufacturer instructions
for adding water.
.Fill the washer fluid tank only
three-quarters full when it is very cold.
This allows for fluid expansion if
freezing occurs, which could damage
the tank if it is completely full.
Brakes
Disc brake linings have built-in wear
indicators that make a high-pitched warning
sound when the brake linings are worn and
new linings are needed. The sound can come
and go or can be heard all the time when
the vehicle is moving, except when applying
the brake pedal firmly.
{Warning
The brake wear warning sound means
that soon the brakes will not work well.
That could lead to a crash. When the
brake wear warning sound is heard, have
the vehicle serviced.
Caution
Continuing to drive with worn-out brake
linings could result in costly brake
repairs.
Some driving conditions or climates can
cause a brake squeal when the brakes are
first applied, clearing up following several
applications. This does not mean something
is wrong with the brakes.
Properly torqued wheel nuts are necessary
to help prevent brake pulsation. When tires
are rotated, inspect brake linings for wear
and evenly tighten wheel nuts in the proper
sequence to torque specifications. See
Capacities and Specifications 0396.
Brake pads should be replaced as complete
axle sets.
Brake Pedal Travel
See your dealer if the brake pedal does not
return to normal height, or if there is a
rapid increase in pedal travel. This could be
a sign that brake service may be required.
Replacing Brake System Parts
Always replace brake system parts with
new, approved replacement parts. If this is
not done, the brakes may not work
properly. The braking performance can
change in many ways if the wrong brake
parts are installed or if parts are improperly
installed.
Brake Pad Life System
When to Change Brake Pads
This vehicle has a system that estimates the
remaining life of the front and rear brake
pads. Brake pad life is displayed in the
Driver Information Center (DIC), along with
a percentage for each axle. The system must
be reset every time the brake pads are
changed.
When the system has determined that the
brake pads need to be replaced, a message
will display, which may include mileage
remaining.
Page 322 of 433

Chevrolet Silverado 2500 HD/3500 HD Owner Manual (GMNA-Localizing-U.
S./Canada/Mexico-16908339) - 2024 - CRC - 12/5/22
320 Vehicle Care
Brake pads should always be replaced as
complete axle sets.
How to Reset the Brake Pad Life System
The system will automatically detect when
significantly worn brake pads are replaced.
When the ignition is turned on after new
pads and wear sensors are installed, a
message will display. Follow the prompts to
reset the system.
The brake pad life system can also be
manually reset:1. Display Brake Pad Life on the DIC. See Driver Information Center (DIC) (Base
Level) 0126 orDriver Information Center
(DIC) (Uplevel) 0128.
2. Select the Brake Pad Life menu.
3. Select front or rear pads as appropriate.
4. Select YES on the confirmation message. Repeat for pads on the other axle if they
were also replaced.
How to Disable the Brake Pad Life
System
The brake pad life system can be turned off.
This may be necessary if aftermarket brake
pads without wear sensors are installed.
When the system is turned off, the front and rear brake pad life percentages will not
display. However, the built-in wear
indicators that make a high-pitched warning
sound when the brake pads are worn can
still determine when the pads should be
replaced. See
Brakes0319.
To turn off the brake pad life system: 1. Display Brake Pad Life on the DIC. See Driver Information Center (DIC) (Base
Level) 0126 orDriver Information Center
(DIC) (Uplevel) 0128.
2. Select the Brake Pad Life menu.
3. Select DISABLE.
To turn the brake pad life system back on,
follow the above steps but select ENABLE in
Step 2.
Brake Fluid
The brake master cylinder reservoir is filled
with GM approved DOT 4 brake fluid as
indicated on the reservoir cap. See Engine
Compartment Overview 0307 for the
location of the reservoir.
Checking Brake Fluid
With the vehicle in P (Park) on a level
surface, the brake fluid level should be
between the minimum and maximum marks
on the brake fluid reservoir.
There are only two reasons why the brake
fluid level in the reservoir may go down:
.Normal brake lining wear. When new
linings are installed, the fluid level goes
back up.
.A fluid leak in the brake hydraulic system.
Have the brake hydraulic system fixed.
With a leak, the brakes will not
work well.
Always clean the brake fluid reservoir cap
and the area around the cap before
removing it.
Do not top off the brake fluid. Adding fluid
does not correct a leak. If fluid is added
when the linings are worn, there will be too
much fluid when new brake linings are