2024 CHEVROLET CORVETTE lock
[x] Cancel search: lockPage 29 of 362

Chevrolet Corvette Owner Manual (GMNA-Localizing-U.S./Canada/Mexico-
17272984) - 2024 - CRC - 2/20/23
28 Keys, Doors, and Windows
.Tilt
{Warning
The Rear Camera Mirror (RCM) has a
limited view. Portions of the road,
vehicles, and other objects may not be
seen. Do not drive or park the vehicle
using only this camera. Objects may
appear closer than they are. Check the
outside mirrors or glance over your
shoulder when making lane changes or
merging. Failure to use proper care may
result in injury, death, or vehicle damage.
Troubleshooting
See your dealer for service if a blue screen
and
3are displayed in the mirror, and
the display shuts off. Also, push the tab as
indicated to return to the automatic
dimming mode.
The Rear Camera Mirror may not work
properly or display a clear image if:
.There is glare from the sun or headlamps.
This may obstruct objects from view.
If needed, push the tab to turn off the
display.
.Dirt, snow, or other debris blocks the
camera lens. Clean the lens with a soft
damp cloth.
Coupe Shown, Convertible Similar
Page 30 of 362
Chevrolet Corvette Owner Manual (GMNA-Localizing-U.S./Canada/Mexico-
17272984) - 2024 - CRC - 2/20/23
Keys, Doors, and Windows 29
.The camera’s mounting on the vehicle has
been damaged, and/or the position or the
mounting angle of the camera has
changed.
The Rear Camera Mirror will not work on
the convertible with the top down. Use the
tab to switch to standard mirror display.
Windows
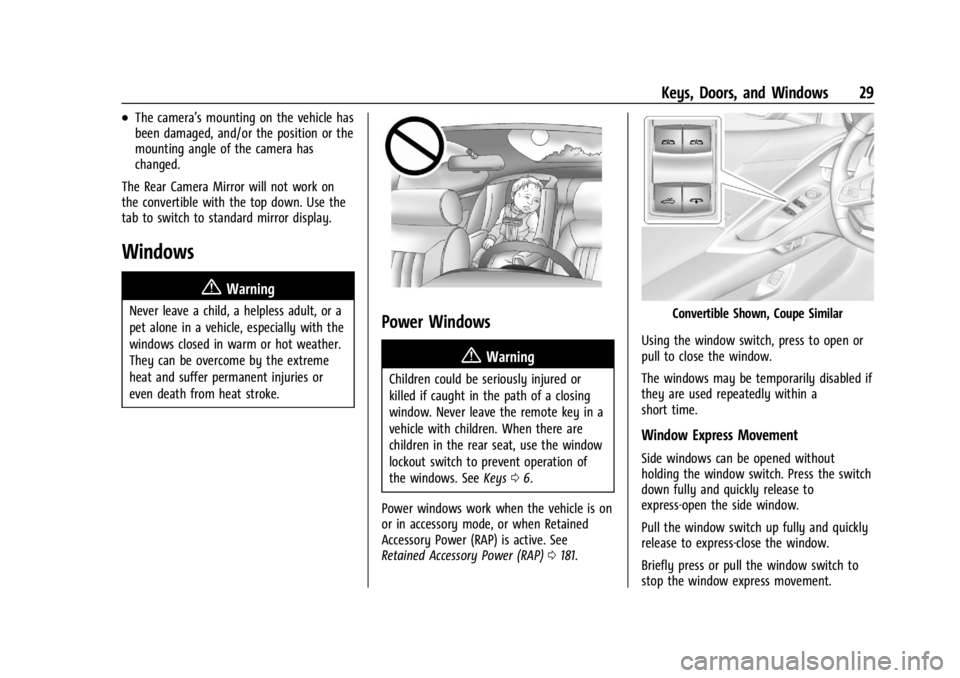
{
Warning
Never leave a child, a helpless adult, or a
pet alone in a vehicle, especially with the
windows closed in warm or hot weather.
They can be overcome by the extreme
heat and suffer permanent injuries or
even death from heat stroke.Power Windows
{Warning
Children could be seriously injured or
killed if caught in the path of a closing
window. Never leave the remote key in a
vehicle with children. When there are
children in the rear seat, use the window
lockout switch to prevent operation of
the windows. See Keys06.
Power windows work when the vehicle is on
or in accessory mode, or when Retained
Accessory Power (RAP) is active. See
Retained Accessory Power (RAP) 0181.
Convertible Shown, Coupe Similar
Using the window switch, press to open or
pull to close the window.
The windows may be temporarily disabled if
they are used repeatedly within a
short time.
Window Express Movement
Side windows can be opened without
holding the window switch. Press the switch
down fully and quickly release to
express-open the side window.
Pull the window switch up fully and quickly
release to express-close the window.
Briefly press or pull the window switch to
stop the window express movement.
Page 31 of 362
Chevrolet Corvette Owner Manual (GMNA-Localizing-U.S./Canada/Mexico-
17272984) - 2024 - CRC - 2/20/23
30 Keys, Doors, and Windows
Window Automatic Reversal System
The express-close feature will reverse
window movement if it comes in contact
with an object. Extreme cold or ice could
cause the window to auto-reverse. The
window will operate normally after the
object or condition is removed.
Programming the Power Windows
Programming may be necessary if the
vehicle battery has been disconnected or
discharged. If the window will not
express-close, program each express-close
window:1. Close all doors.
2. Turn the ignition on or to accessory mode.
3. If equipped, ensure the convertible top is fully closed.
4. Partially open the window to be programmed. Then close it and continue
to pull the switch briefly after the
window has fully closed.
5. Open the window and continue to press the switch briefly after the window has
fully opened.
Window Operation with Convertible Top
Windows lower when the convertible top is
lowered or raised. See Convertible Top034.
Remote Window Operation
This feature allows the side windows to be
opened remotely. If enabled in vehicle
personalization, press
Ktwice and hold on
the remote key. To view available settings
from the infotainment screen, touch Settings
> Vehicle > Remote Lock, Unlock, Start.
Window Indexing
When fully closed, indexing automatically
lowers the window a small amount when
the door is opened. When the door is
closed, the window will raise to its previous
position. If either window does not index
properly, it could be due to loss of power.
Before seeing your dealer for service,
program the power windows.
Rear Windows
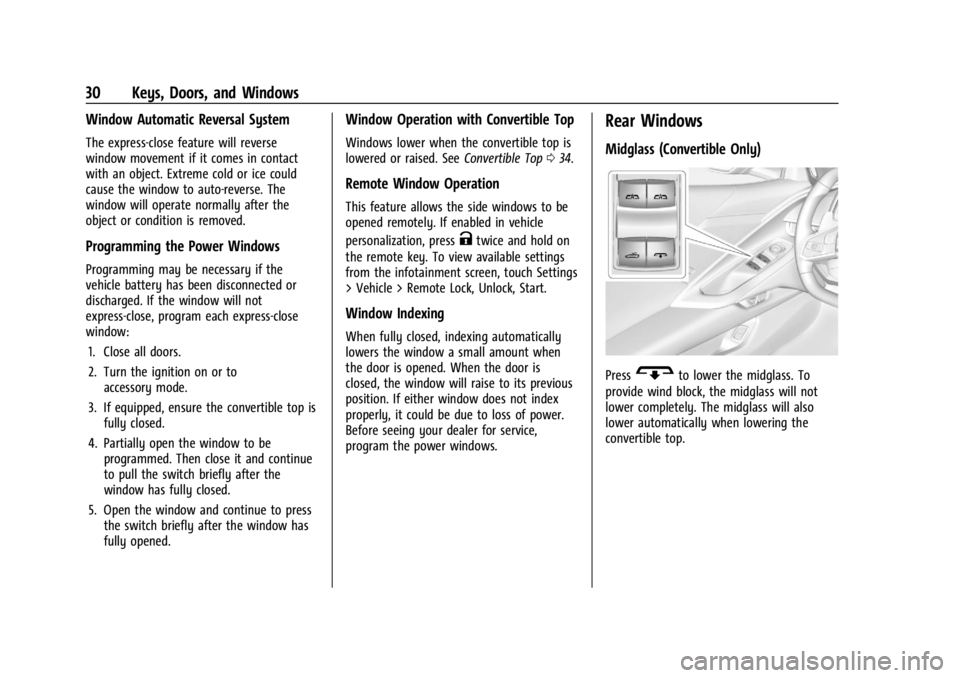
Midglass (Convertible Only)
PressGto lower the midglass. To
provide wind block, the midglass will not
lower completely. The midglass will also
lower automatically when lowering the
convertible top.
Page 32 of 362
Chevrolet Corvette Owner Manual (GMNA-Localizing-U.S./Canada/Mexico-
17272984) - 2024 - CRC - 2/20/23
Keys, Doors, and Windows 31
Sun Visors
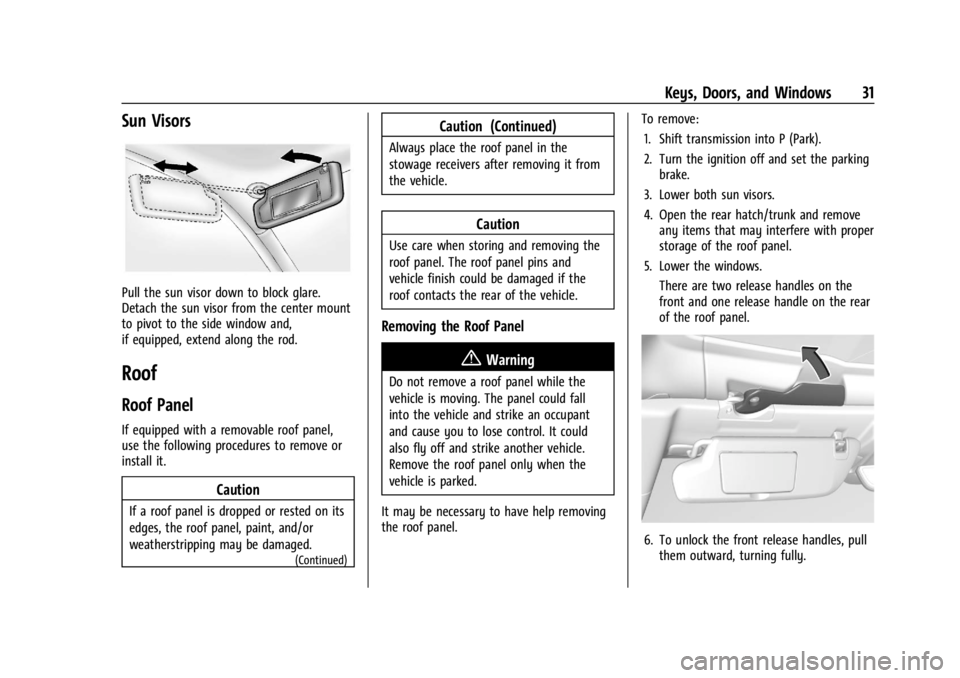
Pull the sun visor down to block glare.
Detach the sun visor from the center mount
to pivot to the side window and,
if equipped, extend along the rod.
Roof
Roof Panel
If equipped with a removable roof panel,
use the following procedures to remove or
install it.
Caution
If a roof panel is dropped or rested on its
edges, the roof panel, paint, and/or
weatherstripping may be damaged.
(Continued)
Caution (Continued)
Always place the roof panel in the
stowage receivers after removing it from
the vehicle.
Caution
Use care when storing and removing the
roof panel. The roof panel pins and
vehicle finish could be damaged if the
roof contacts the rear of the vehicle.
Removing the Roof Panel
{Warning
Do not remove a roof panel while the
vehicle is moving. The panel could fall
into the vehicle and strike an occupant
and cause you to lose control. It could
also fly off and strike another vehicle.
Remove the roof panel only when the
vehicle is parked.
It may be necessary to have help removing
the roof panel. To remove:
1. Shift transmission into P (Park).
2. Turn the ignition off and set the parking brake.
3. Lower both sun visors.
4. Open the rear hatch/trunk and remove any items that may interfere with proper
storage of the roof panel.
5. Lower the windows. There are two release handles on the
front and one release handle on the rear
of the roof panel.
6. To unlock the front release handles, pullthem outward, turning fully.
Page 33 of 362
Chevrolet Corvette Owner Manual (GMNA-Localizing-U.S./Canada/Mexico-
17272984) - 2024 - CRC - 2/20/23
32 Keys, Doors, and Windows
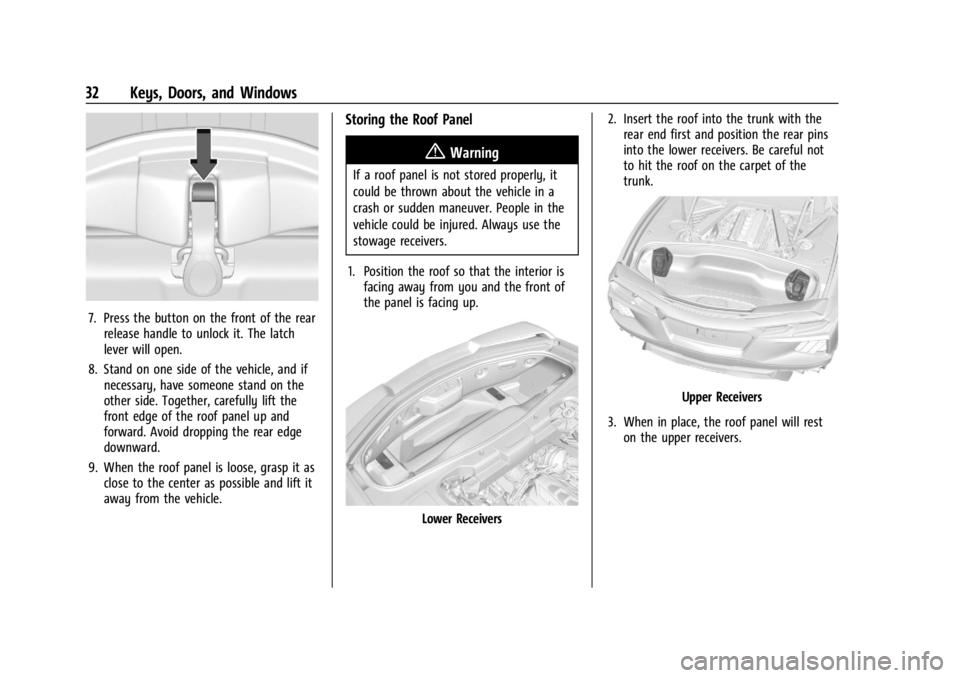
7. Press the button on the front of the rearrelease handle to unlock it. The latch
lever will open.
8. Stand on one side of the vehicle, and if necessary, have someone stand on the
other side. Together, carefully lift the
front edge of the roof panel up and
forward. Avoid dropping the rear edge
downward.
9. When the roof panel is loose, grasp it as close to the center as possible and lift it
away from the vehicle.
Storing the Roof Panel
{Warning
If a roof panel is not stored properly, it
could be thrown about the vehicle in a
crash or sudden maneuver. People in the
vehicle could be injured. Always use the
stowage receivers.
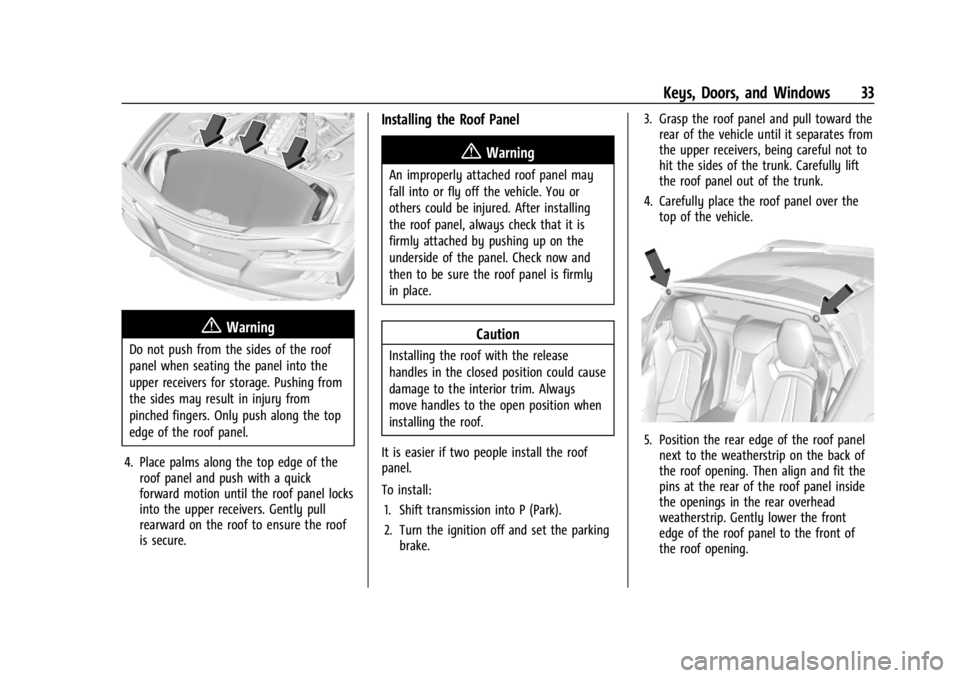
1. Position the roof so that the interior is facing away from you and the front of
the panel is facing up.
Lower Receivers 2. Insert the roof into the trunk with the
rear end first and position the rear pins
into the lower receivers. Be careful not
to hit the roof on the carpet of the
trunk.
Upper Receivers
3. When in place, the roof panel will rest on the upper receivers.
Page 34 of 362
Chevrolet Corvette Owner Manual (GMNA-Localizing-U.S./Canada/Mexico-
17272984) - 2024 - CRC - 2/20/23
Keys, Doors, and Windows 33
{Warning
Do not push from the sides of the roof
panel when seating the panel into the
upper receivers for storage. Pushing from
the sides may result in injury from
pinched fingers. Only push along the top
edge of the roof panel.
4. Place palms along the top edge of the roof panel and push with a quick
forward motion until the roof panel locks
into the upper receivers. Gently pull
rearward on the roof to ensure the roof
is secure.
Installing the Roof Panel
{Warning
An improperly attached roof panel may
fall into or fly off the vehicle. You or
others could be injured. After installing
the roof panel, always check that it is
firmly attached by pushing up on the
underside of the panel. Check now and
then to be sure the roof panel is firmly
in place.
Caution
Installing the roof with the release
handles in the closed position could cause
damage to the interior trim. Always
move handles to the open position when
installing the roof.
It is easier if two people install the roof
panel.
To install: 1. Shift transmission into P (Park).
2. Turn the ignition off and set the parking brake. 3. Grasp the roof panel and pull toward the
rear of the vehicle until it separates from
the upper receivers, being careful not to
hit the sides of the trunk. Carefully lift
the roof panel out of the trunk.
4. Carefully place the roof panel over the top of the vehicle.
5. Position the rear edge of the roof panelnext to the weatherstrip on the back of
the roof opening. Then align and fit the
pins at the rear of the roof panel inside
the openings in the rear overhead
weatherstrip. Gently lower the front
edge of the roof panel to the front of
the roof opening.
Page 41 of 362
Chevrolet Corvette Owner Manual (GMNA-Localizing-U.S./Canada/Mexico-
17272984) - 2024 - CRC - 2/20/23
40 Seats and Restraints
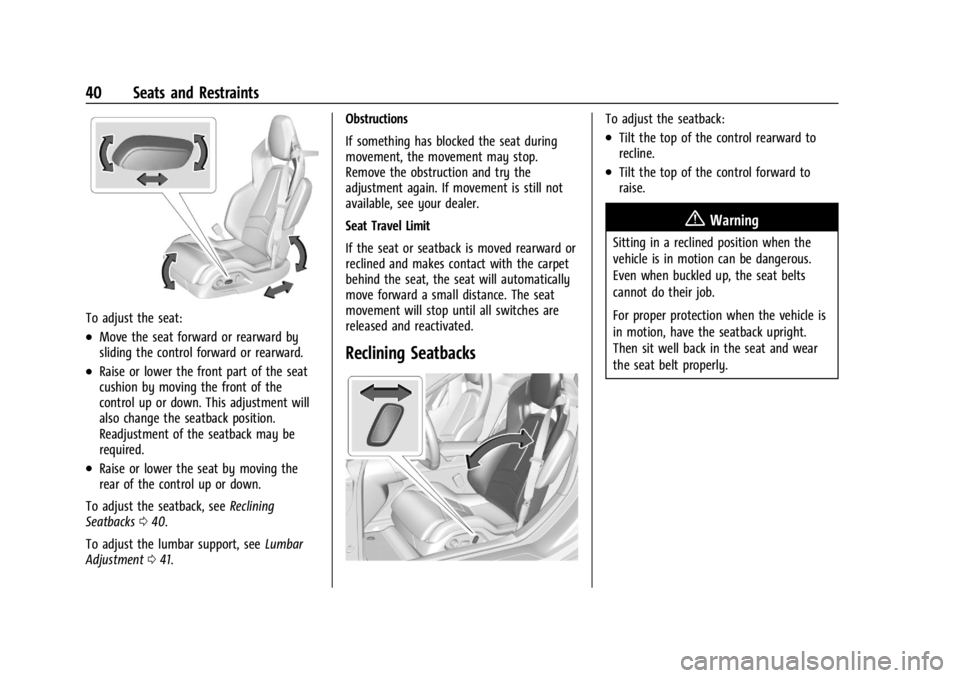
To adjust the seat:
.Move the seat forward or rearward by
sliding the control forward or rearward.
.Raise or lower the front part of the seat
cushion by moving the front of the
control up or down. This adjustment will
also change the seatback position.
Readjustment of the seatback may be
required.
.Raise or lower the seat by moving the
rear of the control up or down.
To adjust the seatback, see Reclining
Seatbacks 040.
To adjust the lumbar support, see Lumbar
Adjustment 041. Obstructions
If something has blocked the seat during
movement, the movement may stop.
Remove the obstruction and try the
adjustment again. If movement is still not
available, see your dealer.
Seat Travel Limit
If the seat or seatback is moved rearward or
reclined and makes contact with the carpet
behind the seat, the seat will automatically
move forward a small distance. The seat
movement will stop until all switches are
released and reactivated.
Reclining Seatbacks
To adjust the seatback:
.Tilt the top of the control rearward to
recline.
.Tilt the top of the control forward to
raise.
{Warning
Sitting in a reclined position when the
vehicle is in motion can be dangerous.
Even when buckled up, the seat belts
cannot do their job.
For proper protection when the vehicle is
in motion, have the seatback upright.
Then sit well back in the seat and wear
the seat belt properly.
Page 45 of 362
Chevrolet Corvette Owner Manual (GMNA-Localizing-U.S./Canada/Mexico-
17272984) - 2024 - CRC - 2/20/23
44 Seats and Restraints
Obstructions
If something has blocked the seat while
recalling a memory position, the recall may
stop. Remove the obstruction and try the
recall again. If the memory position still
does not recall, see your dealer.
Heated and Ventilated Front
Seats
{Warning
If temperature change or pain to the skin
cannot be felt, the seat heater may cause
burns. To reduce the risk of burns, use
care when using the seat heater,
especially for long periods of time. Do
not place anything on the seat that
insulates against heat, such as a blanket,
cushion, cover, or similar item. This may
cause the seat heater to overheat. An
overheated seat heater may cause a burn
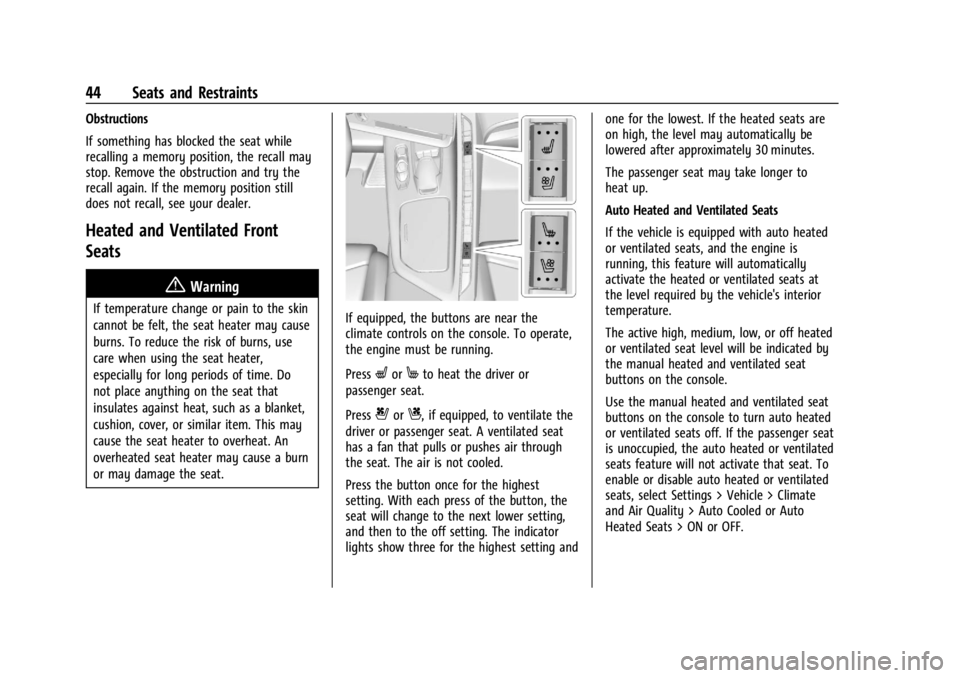
or may damage the seat.If equipped, the buttons are near the
climate controls on the console. To operate,
the engine must be running.
Press
LorMto heat the driver or
passenger seat.
Press
{orC, if equipped, to ventilate the
driver or passenger seat. A ventilated seat
has a fan that pulls or pushes air through
the seat. The air is not cooled.
Press the button once for the highest
setting. With each press of the button, the
seat will change to the next lower setting,
and then to the off setting. The indicator
lights show three for the highest setting and one for the lowest. If the heated seats are
on high, the level may automatically be
lowered after approximately 30 minutes.
The passenger seat may take longer to
heat up.
Auto Heated and Ventilated Seats
If the vehicle is equipped with auto heated
or ventilated seats, and the engine is
running, this feature will automatically
activate the heated or ventilated seats at
the level required by the vehicle's interior
temperature.
The active high, medium, low, or off heated
or ventilated seat level will be indicated by
the manual heated and ventilated seat
buttons on the console.
Use the manual heated and ventilated seat
buttons on the console to turn auto heated
or ventilated seats off. If the passenger seat
is unoccupied, the auto heated or ventilated
seats feature will not activate that seat. To
enable or disable auto heated or ventilated
seats, select Settings > Vehicle > Climate
and Air Quality > Auto Cooled or Auto
Heated Seats > ON or OFF.