2024 CHEVROLET CORVETTE brake fluid
[x] Cancel search: brake fluidPage 93 of 362
Chevrolet Corvette Owner Manual (GMNA-Localizing-U.S./Canada/Mexico-
17272984) - 2024 - CRC - 2/20/23
92 Instruments and Controls
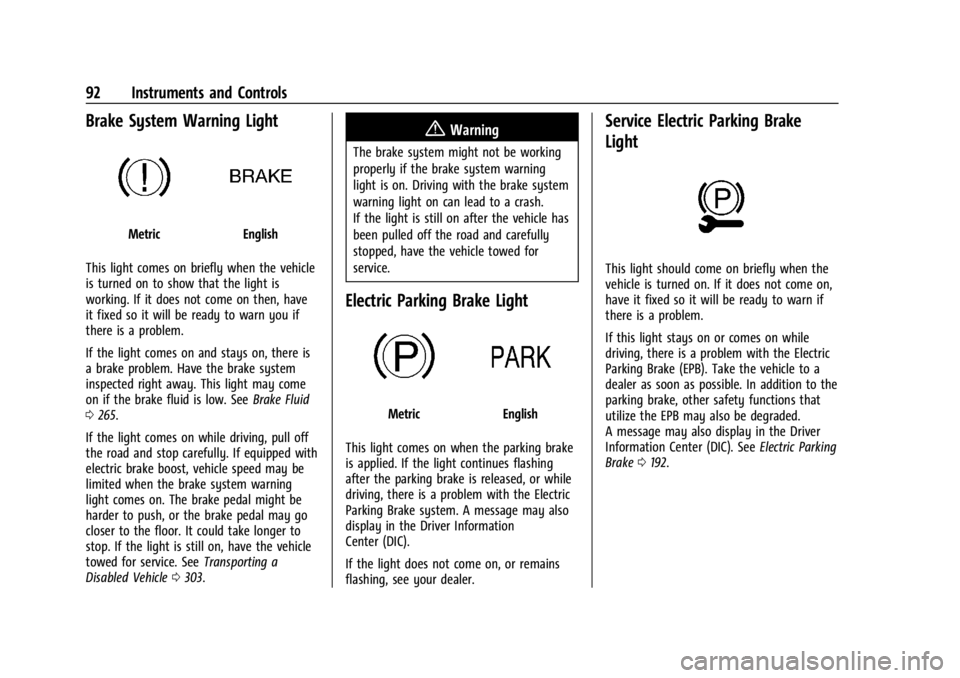
Brake System Warning Light
MetricEnglish
This light comes on briefly when the vehicle
is turned on to show that the light is
working. If it does not come on then, have
it fixed so it will be ready to warn you if
there is a problem.
If the light comes on and stays on, there is
a brake problem. Have the brake system
inspected right away. This light may come
on if the brake fluid is low. See Brake Fluid
0 265.
If the light comes on while driving, pull off
the road and stop carefully. If equipped with
electric brake boost, vehicle speed may be
limited when the brake system warning
light comes on. The brake pedal might be
harder to push, or the brake pedal may go
closer to the floor. It could take longer to
stop. If the light is still on, have the vehicle
towed for service. See Transporting a
Disabled Vehicle 0303.
{Warning
The brake system might not be working
properly if the brake system warning
light is on. Driving with the brake system
warning light on can lead to a crash.
If the light is still on after the vehicle has
been pulled off the road and carefully
stopped, have the vehicle towed for
service.
Electric Parking Brake Light
MetricEnglish
This light comes on when the parking brake
is applied. If the light continues flashing
after the parking brake is released, or while
driving, there is a problem with the Electric
Parking Brake system. A message may also
display in the Driver Information
Center (DIC).
If the light does not come on, or remains
flashing, see your dealer.
Service Electric Parking Brake
Light
This light should come on briefly when the
vehicle is turned on. If it does not come on,
have it fixed so it will be ready to warn if
there is a problem.
If this light stays on or comes on while
driving, there is a problem with the Electric
Parking Brake (EPB). Take the vehicle to a
dealer as soon as possible. In addition to the
parking brake, other safety functions that
utilize the EPB may also be degraded.
A message may also display in the Driver
Information Center (DIC). See Electric Parking
Brake 0192.
Page 106 of 362
Chevrolet Corvette Owner Manual (GMNA-Localizing-U.S./Canada/Mexico-
17272984) - 2024 - CRC - 2/20/23
Instruments and Controls 105
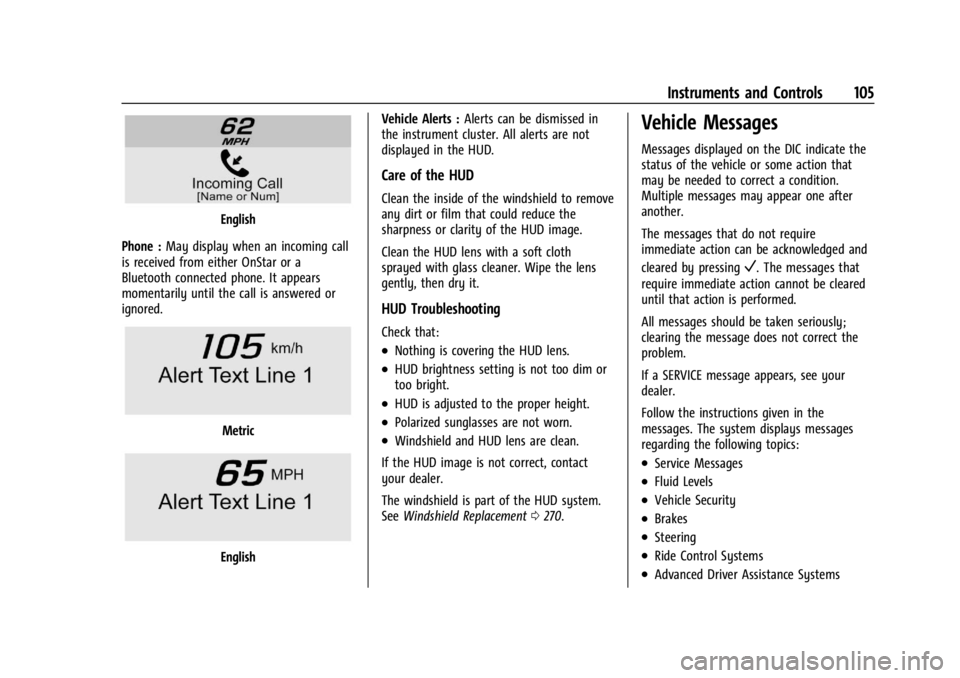
English
Phone : May display when an incoming call
is received from either OnStar or a
Bluetooth connected phone. It appears
momentarily until the call is answered or
ignored.
Metric
English Vehicle Alerts :
Alerts can be dismissed in
the instrument cluster. All alerts are not
displayed in the HUD.
Care of the HUD
Clean the inside of the windshield to remove
any dirt or film that could reduce the
sharpness or clarity of the HUD image.
Clean the HUD lens with a soft cloth
sprayed with glass cleaner. Wipe the lens
gently, then dry it.
HUD Troubleshooting
Check that:
.Nothing is covering the HUD lens.
.HUD brightness setting is not too dim or
too bright.
.HUD is adjusted to the proper height.
.Polarized sunglasses are not worn.
.Windshield and HUD lens are clean.
If the HUD image is not correct, contact
your dealer.
The windshield is part of the HUD system.
See Windshield Replacement 0270.
Vehicle Messages
Messages displayed on the DIC indicate the
status of the vehicle or some action that
may be needed to correct a condition.
Multiple messages may appear one after
another.
The messages that do not require
immediate action can be acknowledged and
cleared by pressing
V. The messages that
require immediate action cannot be cleared
until that action is performed.
All messages should be taken seriously;
clearing the message does not correct the
problem.
If a SERVICE message appears, see your
dealer.
Follow the instructions given in the
messages. The system displays messages
regarding the following topics:
.Service Messages
.Fluid Levels
.Vehicle Security
.Brakes
.Steering
.Ride Control Systems
.Advanced Driver Assistance Systems
Page 159 of 362
Chevrolet Corvette Owner Manual (GMNA-Localizing-U.S./Canada/Mexico-
17272984) - 2024 - CRC - 2/20/23
158 Driving and Operating
Average driver reaction time is about
three-quarters of a second. In that time, a
vehicle moving at 100 km/h (60 mph) travels
20 m (66 ft), which could be a lot of
distance in an emergency.
Helpful braking tips to keep in mind include:
.Keep enough distance between you and
the vehicle in front of you.
.Avoid needless heavy braking.
.Keep pace with traffic.
If the engine ever stops or a brake fault
occurs, the brakes may lose power assist.
More effort will be required to stop the
vehicle. It may take longer to stop.
Steering
Caution
To avoid damage to the steering system,
do not drive over curbs, parking barriers,
or similar objects at speeds greater than
3 km/h (1 mph). Use care when driving
over other objects such as lane dividers
and speed bumps. Damage caused by
misuse of the vehicle is not covered by
the vehicle warranty.
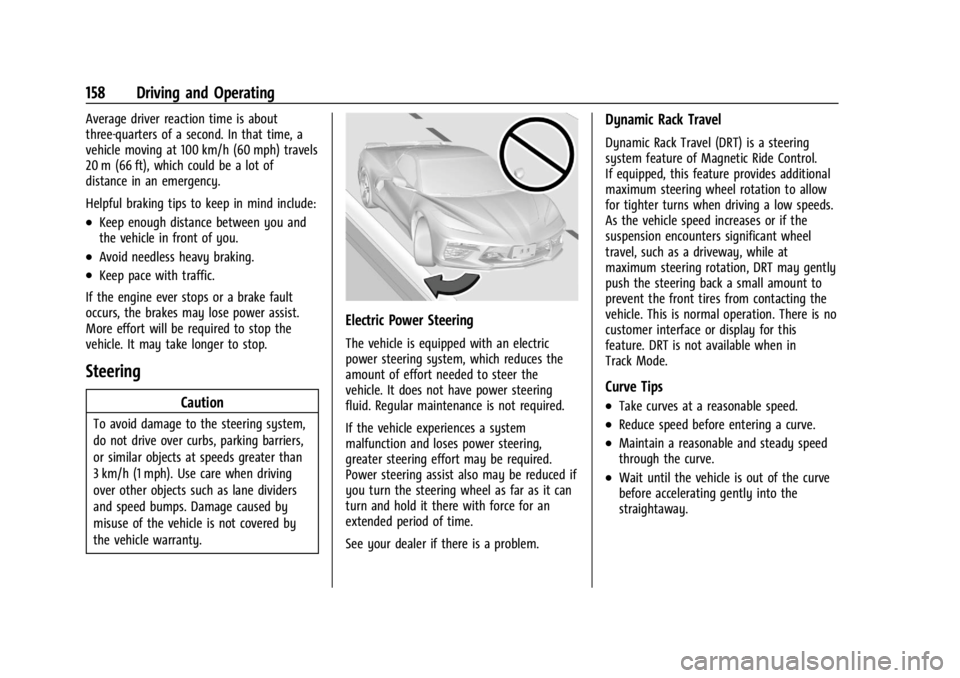
Electric Power Steering
The vehicle is equipped with an electric
power steering system, which reduces the
amount of effort needed to steer the
vehicle. It does not have power steering
fluid. Regular maintenance is not required.
If the vehicle experiences a system
malfunction and loses power steering,
greater steering effort may be required.
Power steering assist also may be reduced if
you turn the steering wheel as far as it can
turn and hold it there with force for an
extended period of time.
See your dealer if there is a problem.
Dynamic Rack Travel
Dynamic Rack Travel (DRT) is a steering
system feature of Magnetic Ride Control.
If equipped, this feature provides additional
maximum steering wheel rotation to allow
for tighter turns when driving a low speeds.
As the vehicle speed increases or if the
suspension encounters significant wheel
travel, such as a driveway, while at
maximum steering rotation, DRT may gently
push the steering back a small amount to
prevent the front tires from contacting the
vehicle. This is normal operation. There is no
customer interface or display for this
feature. DRT is not available when in
Track Mode.
Curve Tips
.Take curves at a reasonable speed.
.Reduce speed before entering a curve.
.Maintain a reasonable and steady speed
through the curve.
.Wait until the vehicle is out of the curve
before accelerating gently into the
straightaway.
Page 163 of 362
Chevrolet Corvette Owner Manual (GMNA-Localizing-U.S./Canada/Mexico-
17272984) - 2024 - CRC - 2/20/23
162 Driving and Operating
Brakes
Battery Disconnect
Disconnect the battery before servicing the
hydraulic brake system. It is critical to
disconnect the battery before bleeding the
system, replacing the pads, or any other
work. The battery must be disconnected to
prevent the brake master cylinder from
pressurizing the hydraulic system during its
automated self diagnostic tests that can
occur when a door is opened or the remote
key is present.
{Warning
To avoid personal injury and/or vehicle
damage, always disconnect the battery
before performing service work on the
hydraulic brake system. Bleeding the
brake system with the battery connected
can lead to the system diagnosing a leak
or air in the braking system. A Diagnostic
Trouble Code (DTC) may set and vehicle
speed may be limited.Brake Fluid
Replace existing brake fluid with a qualified
high performance DOT 4 brake fluid from a
sealed container. Brake fluid with a dry
boiling point >310 °C (590 °F) is qualified.
If high performance brake fluid is used,
replace it with GM approved brake fluid
before driving on public roads. If high
performance brake fluid is in the vehicle and
the age of the brake fluid is over a month
old or unknown, replace the brake fluid
before track events and competitive driving.
Do not use silicone or DOT-5 brake fluids.
Check the fluid level before each competitive
driving event.
Brake System Flushing and Bleeding
The J55, J56, and J57 brake systems require
specific processes for bleeding and fluid
flushing. These can be found in the service
manual.
Properly bleeding the brake system is
required for proper operation of the
hydraulic brake system. Brake Leak Detection
The hydraulic braking system has advanced
diagnostic capability to help detect hydraulic
leaks, trapped air, and other performance
issues. These diagnostics are active when
the hydraulic system is powered. To avoid
inadvertently setting a leak DTC, disconnect
the battery before servicing the brake
system.
If the vehicle sets a DTC related to a brake
system leak, the Brake System Warning
Light will come on and vehicle speed may
be limited to 100 kph (62 mph). Any time a
leak DTC is set, the vehicle should be
inspected carefully for evidence of a leak
and should be repaired immediately. See
your dealer.
Brake Fade Warning Assist
The Brake Fade Warning Assist system
monitors brake system performance. If the
system detects brake fade, or if the brake
fluid is near the boiling point, the driver will
be alerted.
The Brake Fade Warning Assist system is
designed for use with the factory-installed
brake pads or GM approved replacement
pads. If the brake pads on the vehicle need
Page 164 of 362
Chevrolet Corvette Owner Manual (GMNA-Localizing-U.S./Canada/Mexico-
17272984) - 2024 - CRC - 2/20/23
Driving and Operating 163
to be replaced, use GM approved brake
pads. If this is not done, the brake fade
warning system may not function properly.
Stage 1 :The Driver Information Center (DIC)
displays a “Reduce Braking to Avoid
Overheating” message, a chime sounds and
brake pedal effort and travel is increased.
When the message displays, the driver
should back up braking points and reduce
brake usage in order to reduce brake
temperature. This will allow for continued
lapping with no speed limitations.
Stage 2 : The Driver Information Center
(DIC) displays a “Brakes Overheated Service
Now” message, a chime sounds, and brake
pedal effort and travel is further increased.
This code indicates that the brake fluid
temperature is excessive and is about to
boil. The system limits vehicle speed to
100KPH/62MPH. The driver should
immediately start a cool down lap if on the
track. If this message displays, the vehicle
needs to be serviced. The brake system
needs to cool down, and the brake fluid
must be immediately flushed with DOT4 for
street use, or to a qualified DOT4 race fluid
for track use. Boiled brake fluid is
compromised and must be replaced. Brake Burnishing
Caution
Performing the brake burnish procedure
on a base brake system can result in
brake damage.
Caution
The new vehicle break-in period should be
completed before performing the brake
burnish procedure, otherwise damage
may occur to the powertrain/engine. See
New Vehicle Break-In
0177.
Caution
Brake pedal fade will occur during any
track burnish procedure and can cause
brake pedal travel and force to increase.
This could extend stopping distance until
the brakes are fully burnished.
New brake pads must be burnished before
racing or other competitive driving.
When this procedure is performed as
instructed, it will not damage the brakes.
The brake pads will smoke and produce an odor. The braking force and pedal travel
may increase. After the procedure, the brake
pads may appear white at the rotor contact.
Perform this procedure only on dry
pavement, in a safe manner, and in
compliance with all local and state
ordinances/laws regarding motor vehicle
operation.
Brake Burnishing Procedure for J55 (Stingray
with Z51) and J56 (Z06 Standard) Brakes
This brake burnish procedure should only be
performed on vehicles with the Z06 with
J56, or Z51 with J55 factory equipped brake
systems.
1. Using the friction bubble in the Cluster Performance menu, apply the brakes 25
times starting at 100 km/h (60 mph) to
50 km/h (30 mph) while decelerating at
0.4 g. See Instrument Cluster 081. This is
a medium brake application. Drive for at
least 1 km (0.6 mi) between applying the
brakes. This first step may be skipped if
there are more than 320 km (200 mi) on
the brake pads.
2. Apply the brakes 25 times starting at 100 km/h (60 mph) to 25 km/h (15 mph)
while decelerating at 0.8 g. This is a hard
brake application without activating the
Page 172 of 362
Chevrolet Corvette Owner Manual (GMNA-Localizing-U.S./Canada/Mexico-
17272984) - 2024 - CRC - 2/20/23
Driving and Operating 171
wheel is exposed to the heat. Rolling the
car back and forth in a small space is
better than sitting still with hot brakes.
Driving on Wet Roads
Rain and wet roads can reduce vehicle
traction and affect your ability to stop and
accelerate. Always drive slower in these
types of driving conditions and avoid driving
through large puddles and deep-standing or
flowing water.
{Warning
Wet brakes can cause crashes. They
might not work as well in a quick stop
and could cause pulling to one side. You
could lose control of the vehicle.
After driving through a large puddle of
water or a car/vehicle wash, lightly apply
the brake pedal until the brakes work
normally.
Flowing or rushing water creates strong
forces. Driving through flowing water
could cause the vehicle to be carried
away. If this happens, you and other
vehicle occupants could drown. Do not(Continued)
Warning (Continued)
ignore police warnings and be very
cautious about trying to drive through
flowing water.
Caution
Driving through deep puddles or standing
water can cause water to come in
through the engine air intake and
damage the engine. If deep puddles or
standing water cannot be avoided,
proceed with caution and do not exceed
8 km/h (5 mph). Do not drive through
water that may come close to or cover
the vehicle’s underbody.
Hydroplaning
Hydroplaning is dangerous. Water can build
up under the vehicle's tires so they actually
ride on the water. This can happen if the
road is wet enough and you are going fast
enough. When the vehicle is hydroplaning, it
has little or no contact with the road.
There is no hard and fast rule about
hydroplaning. The best advice is to slow
down when the road is wet.
Other Rainy Weather Tips
Besides slowing down, other wet weather
driving tips include:
.Allow extra following distance.
.Pass with caution.
.Keep windshield wiping equipment in
good shape.
.Keep the windshield washer fluid reservoir
filled.
.Have good tires with proper tread depth.
SeeTires 0279.
.Turn off cruise control.
Hill and Mountain Roads
Driving on steep hills or through mountains
is different than driving on flat or rolling
terrain. Tips include:
.When driving downhill in D (Drive), the
vehicle may automatically downshift to
assist with speed control.
.A lower gear may also be selected to
provide further speed control.
Page 187 of 362
Chevrolet Corvette Owner Manual (GMNA-Localizing-U.S./Canada/Mexico-
17272984) - 2024 - CRC - 2/20/23
186 Driving and Operating
2. Apply the brake pedal.
3. Shift to N (Neutral).
4. Turn off the engine and release thebrake pedal.
5. The indicator should continue to show N. If it does not, start the engine and
repeat Steps 2–4.
6. The vehicle will now remain in N (Neutral).
Driver Leaves Vehicle : To place the vehicle
in N (Neutral) with the engine off and the
vehicle unoccupied:
1. Ensure the vehicle is on level ground, the engine is running and the vehicle is in
P (Park).
2. Apply the brake pedal.
3. Open the door.
4. Shift to N (Neutral).
5. Turn off the engine and release the brake pedal.
6. The indicator should continue to show N. If it does not, start the engine and
repeat Steps 2–5.
7. Exit the vehicle and close the door.
8. The vehicle may automatically shift to P (Park) upon re-entry.Caution
A transmission hot message may display
if the transmission fluid is too hot.
Driving under this condition can damage
the vehicle. Stop and idle the engine to
cool the transmission fluid. This message
clears when the transmission fluid has
cooled sufficiently.
D : This position is for normal driving.
If more power is needed for passing, press
the accelerator pedal.
If the vehicle is shifted into D (Drive) while
the speed is too high, the transmission will
get ready to engage D (Drive). Reduce the
vehicle speed, then the transmission will
engage D (Drive).
To shift into D (Drive):
1. Bring the vehicle to a complete stop.
2. Pull the D (Drive) switch on the center console.
To shift out of D (Drive): 1. Bring the vehicle to a complete stop.
2. Shift to the desired gear. Downshifting the transmission in slippery
road conditions could result in skidding. See
“Skidding”
underLoss of Control 0159.
The transmission can be shifted like a
manual transmission using the paddle shift
controls while in D (Drive). See Manual
Mode 0187.
Caution
Spinning the tires or holding the vehicle
in one place on a hill using only the
accelerator pedal may damage the
transmission. The repair will not be
covered by the vehicle warranty. If the
vehicle is stuck, do not spin the tires.
When stopping on a hill, use the brakes
to hold the vehicle in place.
Page 207 of 362
Chevrolet Corvette Owner Manual (GMNA-Localizing-U.S./Canada/Mexico-
17272984) - 2024 - CRC - 2/20/23
206 Driving and Operating
The Front Lift System can also be used in
accessory mode. Put the vehicle in accessory
mode and press and hold the button on the
center console for 10 consecutive seconds to
automatically raise the vehicle.
The Driver Information Center (DIC) may
display the message“Lift System
Unavailable” if:
.any doors are ajar
.the hood is open
.the vehicle is moving over 38 km/h
(24 mph)
.too many lift requests within a short
period
The Front Lift System should not be used to
service the vehicle. Do not place anything or
body parts under the vehicle while lifted.
See Recommended Fluids and Lubricants
0 320.
Performance Driving
If equipped, Competitive Driving mode,
Performance Traction Management (PTM),
and Launch Control are systems designed to
allow increased performance while
accelerating and/or cornering. This is
accomplished by regulating and optimizing
the engine, brakes, and suspension performance. These modes are for use at a
closed course race track and are not
intended for use on public roads. They will
not compensate for driver inexperience or
lack of familiarity with a race track.
Drivers who prefer to allow the system to
have more control of the engine, brakes,
and suspension are advised to turn on the
normal traction control and StabiliTrak/
Electronic Stability Control (ESC) systems on.
If equipped with E-Ray, there is a
Performance app on the infotainment screen
that shows the vehicle electric and engine
power/torque. See
“E-Ray Performance App”
later in this section for more information.
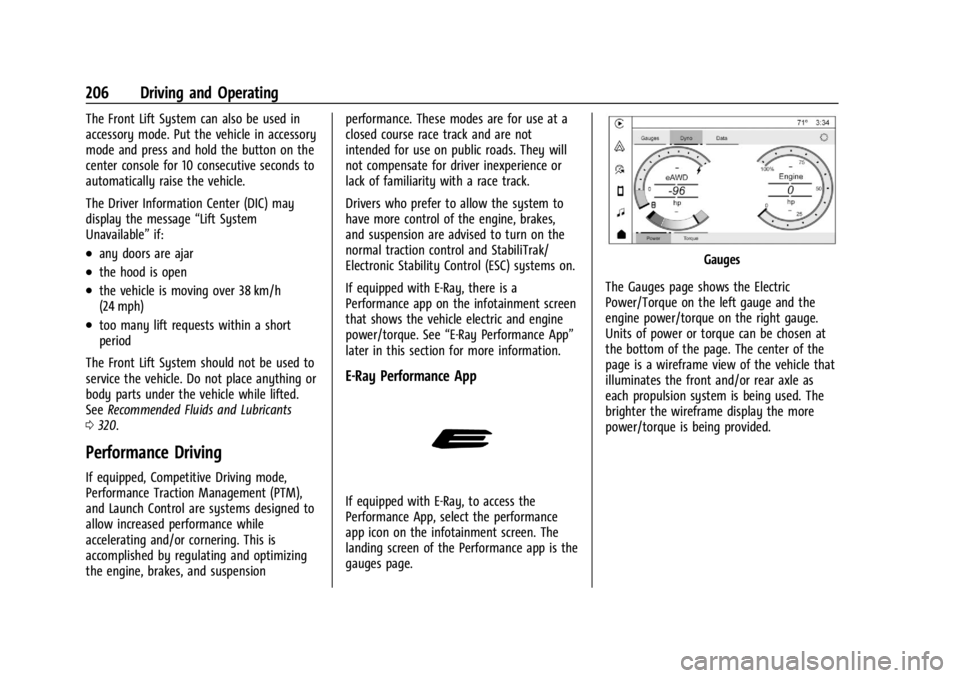
E-Ray Performance App
If equipped with E-Ray, to access the
Performance App, select the performance
app icon on the infotainment screen. The
landing screen of the Performance app is the
gauges page.
Gauges
The Gauges page shows the Electric
Power/Torque on the left gauge and the
engine power/torque on the right gauge.
Units of power or torque can be chosen at
the bottom of the page. The center of the
page is a wireframe view of the vehicle that
illuminates the front and/or rear axle as
each propulsion system is being used. The
brighter the wireframe display the more
power/torque is being provided.