2024 CHEVROLET CORVETTE automatic transmission
[x] Cancel search: automatic transmissionPage 6 of 362

Chevrolet Corvette Owner Manual (GMNA-Localizing-U.S./Canada/Mexico-
17272984) - 2024 - CRC - 2/20/23
Introduction 5
1.Air Vents 0153.
2. Turn Signal Lever. See Turn and
Lane-Change Signals 0112.
Exterior Lamp Controls 0109.
3. Manual Shift Paddles. See Manual Mode
0 187.
4. Instrument Cluster 081.
5. Windshield Wiper/Washer 075.
6. Volume Control Knob and Infotainment Home Button. See Overview0117.
7. Infotainment Display. See Using the
System 0120.
8. Alarm System Indicator Light. See Vehicle
Alarm System 022.
Light Sensor. See Automatic Headlamp
System 0111.
9. Dual Automatic Climate Control System
0150.
Driver and Passenger Heated and
Ventilated Seat Controls (If Equipped).
See Heated and Ventilated Front Seats
0 44. 10.
Traction Control/Electronic Stability
Control 0194.
Curb View Camera (If Equipped). See
Assistance Systems for Parking or Backing
0 215.
Front Lift System Control (If Equipped).
See Front Lift System 0205.
11. Driver Mode Control 0196.
12. Shift Switches. See Dual Clutch
Transmission 0184.
13. Hybrid Battery Charging (Charge+). See Driver Mode Control 0196.
Auto Stop Disable Switch. See Stop/Start
System 0180.
14. Keyless Ignition. See Ignition Positions
0 178.
15. Driver Information Center (DIC) Controls. SeeDriver Information Center (DIC) 099.
16. Heated Steering Wheel 075 (If
Equipped).
17. Bluetooth Controls. See Steering Wheel
Controls 0119.
Voice Recognition Controls. See Steering
Wheel Controls 0119. 18. Volume Control Buttons. See
Steering
Wheel Controls 0119.
19. Horn 075.
20. Favorites Select Buttons. Steering Wheel
Controls 0119.
21. Z-Mode Control. See Driver Mode Control
0 196.
Forward Collision Alert (FCA) System
0 218.
22. Cruise Control 0212.
23. Electric Parking Brake 0192.
24. Data Link Connector (DLC) (Out of View). SeeMalfunction Indicator Lamp (Check
Engine Light) 090.
25. Instrument Panel Illumination Control
0113.
26. Head-Up Display Controls (If Equipped). SeeHead-Up Display (HUD) 0102.
Page 17 of 362
Chevrolet Corvette Owner Manual (GMNA-Localizing-U.S./Canada/Mexico-
17272984) - 2024 - CRC - 2/20/23
16 Keys, Doors, and Windows
From Outside the Vehicle
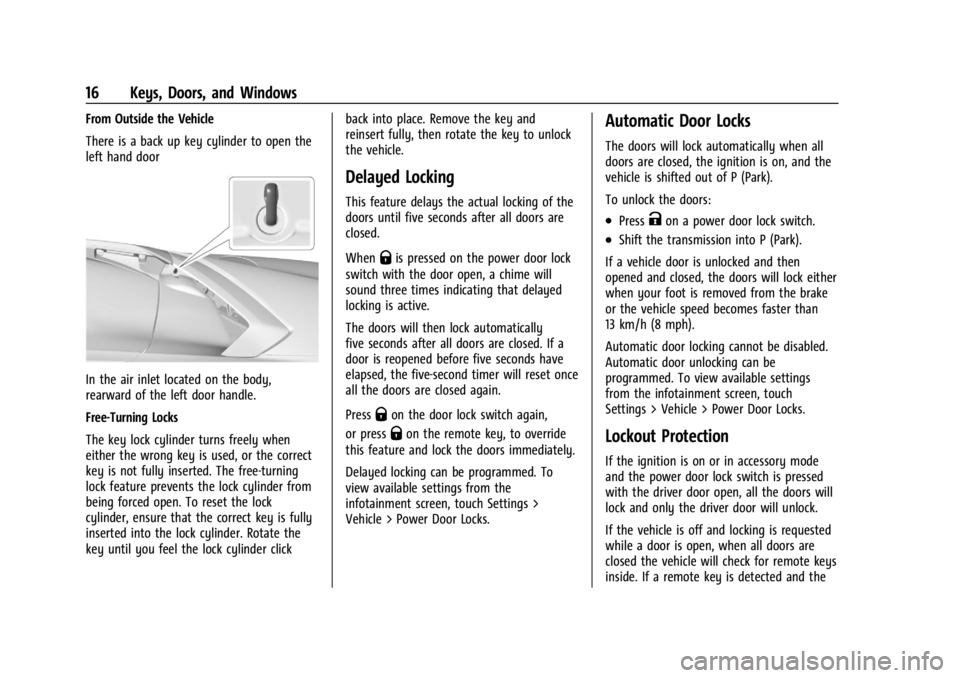
There is a back up key cylinder to open the
left hand door
In the air inlet located on the body,
rearward of the left door handle.
Free-Turning Locks
The key lock cylinder turns freely when
either the wrong key is used, or the correct
key is not fully inserted. The free-turning
lock feature prevents the lock cylinder from
being forced open. To reset the lock
cylinder, ensure that the correct key is fully
inserted into the lock cylinder. Rotate the
key until you feel the lock cylinder clickback into place. Remove the key and
reinsert fully, then rotate the key to unlock
the vehicle.
Delayed Locking
This feature delays the actual locking of the
doors until five seconds after all doors are
closed.
When
Qis pressed on the power door lock
switch with the door open, a chime will
sound three times indicating that delayed
locking is active.
The doors will then lock automatically
five seconds after all doors are closed. If a
door is reopened before five seconds have
elapsed, the five-second timer will reset once
all the doors are closed again.
Press
Qon the door lock switch again,
or press
Qon the remote key, to override
this feature and lock the doors immediately.
Delayed locking can be programmed. To
view available settings from the
infotainment screen, touch Settings >
Vehicle > Power Door Locks.
Automatic Door Locks
The doors will lock automatically when all
doors are closed, the ignition is on, and the
vehicle is shifted out of P (Park).
To unlock the doors:
.PressKon a power door lock switch.
.Shift the transmission into P (Park).
If a vehicle door is unlocked and then
opened and closed, the doors will lock either
when your foot is removed from the brake
or the vehicle speed becomes faster than
13 km/h (8 mph).
Automatic door locking cannot be disabled.
Automatic door unlocking can be
programmed. To view available settings
from the infotainment screen, touch
Settings > Vehicle > Power Door Locks.
Lockout Protection
If the ignition is on or in accessory mode
and the power door lock switch is pressed
with the driver door open, all the doors will
lock and only the driver door will unlock.
If the vehicle is off and locking is requested
while a door is open, when all doors are
closed the vehicle will check for remote keys
inside. If a remote key is detected and the
Page 18 of 362
Chevrolet Corvette Owner Manual (GMNA-Localizing-U.S./Canada/Mexico-
17272984) - 2024 - CRC - 2/20/23
Keys, Doors, and Windows 17
number of remote keys inside has not
reduced, the driver door will unlock and the
horn will chirp three times.
Lockout Protection can be manually
overridden with the driver door open by
pressing and holding
Qon the power door
lock switch.
Doors
Hood
Hood Release
{Warning
Do not drive the vehicle if the hood is
not latched completely. The hood could
open fully, block your vision, and cause a
crash. You or others could be injured.
Always close the hood completely before
driving. When the hood is not closed, the
vehicle will not exceed 42 km/h
(26 mph). Close the hood to drive faster
than 42 km/h (26 mph).
{Warning
When closing the hood, keep hands out
of the opening between the body and
the trunk. The vehicle features a self
closing power latch. You or others could
be injured.
The hood compartment can be accessed in
several ways.
Ensure the hood is clear of any objects
before opening.
This vehicle prevents from shifting out of
P (Park) when the hood is not closed. Close
the hood to shift out of P (Park). Confirm
the hood is closed by checking that the
hood is flush with the surrounding
components.
If the hood is closed but the ajar message is
still present, then the transmission lockout
can be overridden by holding the brake for
20 seconds and then shifting into D (Drive).
In this case, the vehicle will not exceed
42 km/h (26 mph). See your dealer for
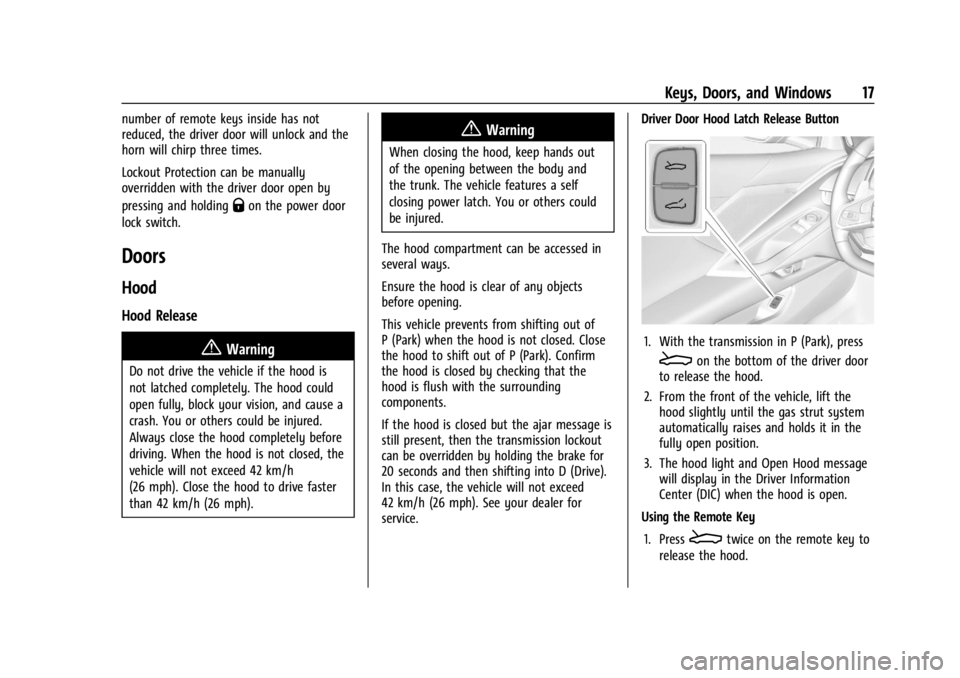
service. Driver Door Hood Latch Release Button
1. With the transmission in P (Park), press
Eon the bottom of the driver door
to release the hood.
2. From the front of the vehicle, lift the hood slightly until the gas strut system
automatically raises and holds it in the
fully open position.
3. The hood light and Open Hood message will display in the Driver Information
Center (DIC) when the hood is open.
Using the Remote Key
1. Press
Etwice on the remote key to
release the hood.
Page 75 of 362

Chevrolet Corvette Owner Manual (GMNA-Localizing-U.S./Canada/Mexico-
17272984) - 2024 - CRC - 2/20/23
74 Instruments and Controls
Instruments and Controls
Controls
Steering Wheel Adjustment . . . . . . . . . . . . . 75
Heated Steering Wheel . . . . . . . . . . . . . . . . . 75
Horn . . . . . . . . . . . . . . . . . . . . . . . . . . . . . . . . . . . . 75
Windshield Wiper/Washer . . . . . . . . . . . . . . 75
Compass . . . . . . . . . . . . . . . . . . . . . . . . . . . . . . . 76
Clock . . . . . . . . . . . . . . . . . . . . . . . . . . . . . . . . . . . 76
Power Outlets . . . . . . . . . . . . . . . . . . . . . . . . . . 77
Wireless Charging . . . . . . . . . . . . . . . . . . . . . . 78
Warning Lights, Gauges, and Indicators
Warning Lights, Gauges, andIndicators . . . . . . . . . . . . . . . . . . . . . . . . . . . . 80
Instrument Cluster . . . . . . . . . . . . . . . . . . . . . . 81
Speedometer . . . . . . . . . . . . . . . . . . . . . . . . . . . 85
Odometer . . . . . . . . . . . . . . . . . . . . . . . . . . . . . . 85
Trip Odometer . . . . . . . . . . . . . . . . . . . . . . . . . . 85
Tachometer . . . . . . . . . . . . . . . . . . . . . . . . . . . . 85
Battery Gauge (High Voltage) . . . . . . . . . . 86
Stealth Drive Mode Capability Gauge . . . . . . . . . . . . . . . . . . . . . . . . . . . . . . . . 86
Fuel Gauge . . . . . . . . . . . . . . . . . . . . . . . . . . . . . 86
Hybrid Battery Charging Light (Charge+) . . . . . . . . . . . . . . . . . . . . . . . . . . . . . 87
Power Indicator Gauge . . . . . . . . . . . . . . . . . 87
Engine Coolant Temperature Gauge . . . . 87
Transmission Temperature Gauge . . . . . . 88
Seat Belt Reminders . . . . . . . . . . . . . . . . . . . . 88 Airbag Readiness Light . . . . . . . . . . . . . . . . . 88
Passenger Airbag Status Indicator . . . . . . 89
Charging System Light (12-Volt
Battery) . . . . . . . . . . . . . . . . . . . . . . . . . . . . . . 90
Malfunction Indicator Lamp (Check
Engine Light) . . . . . . . . . . . . . . . . . . . . . . . . . 90
Front Lift System Light . . . . . . . . . . . . . . . . . 91
Brake System Warning Light . . . . . . . . . . . 92
Electric Parking Brake Light . . . . . . . . . . . . . 92
Service Electric Parking Brake Light . . . . . 92
Antilock Brake System (ABS) Warning Light . . . . . . . . . . . . . . . . . . . . . . . . . . . . . . . . . . 93
Performance Transmission Active . . . . . . . 93
All-Wheel-Drive Light . . . . . . . . . . . . . . . . . . . 93
Lane Keep Assist (LKA) Light . . . . . . . . . . . 94
Automatic Emergency Braking (AEB) Disabled Light . . . . . . . . . . . . . . . . . . . . . . . . 94
Vehicle Ahead Indicator . . . . . . . . . . . . . . . . 94
Pedestrian Ahead Indicator . . . . . . . . . . . . . 94
Traction Off Light . . . . . . . . . . . . . . . . . . . . . . 95
Traction Control System (TCS)/Electronic Stability Control Light . . . . . . . . . . . . . . . . 95
Electronic Stability Control (ESC) Off Light . . . . . . . . . . . . . . . . . . . . . . . . . . . . . . . . . . 95
Engine Coolant Temperature Warning Light . . . . . . . . . . . . . . . . . . . . . . . . . . . . . . . . . 96
Driver Mode Control Light . . . . . . . . . . . . . . 96
Tire Pressure Light . . . . . . . . . . . . . . . . . . . . . . 97
Engine Oil Pressure Light . . . . . . . . . . . . . . . 97
Low Fuel Warning Light . . . . . . . . . . . . . . . . 97 Auto Stop Indicator . . . . . . . . . . . . . . . . . . . . 98
Traffic Sign Indicator . . . . . . . . . . . . . . . . . . . 98
Security Light . . . . . . . . . . . . . . . . . . . . . . . . . . 98
High-Beam On Light . . . . . . . . . . . . . . . . . . . . 98
Lamps On Reminder . . . . . . . . . . . . . . . . . . . . 99
Cruise Control Light . . . . . . . . . . . . . . . . . . . . 99
Door Ajar Light . . . . . . . . . . . . . . . . . . . . . . . . . 99
Information Displays
Driver Information Center (DIC) . . . . . . . . 99
Head-Up Display (HUD) . . . . . . . . . . . . . . . . 102
Vehicle Messages
Vehicle Messages . . . . . . . . . . . . . . . . . . . . . . 105
Engine Power Messages . . . . . . . . . . . . . . . 106
Vehicle Speed Messages . . . . . . . . . . . . . . . 106
Universal Remote System
Universal Remote System . . . . . . . . . . . . . 106
Universal Remote System
Programming . . . . . . . . . . . . . . . . . . . . . . . . 106
Universal Remote System Operation . . . . . . . . . . . . . . . . . . . . . . . . . . . 108
Page 102 of 362
Chevrolet Corvette Owner Manual (GMNA-Localizing-U.S./Canada/Mexico-
17272984) - 2024 - CRC - 2/20/23
Instruments and Controls 101
thumbwheel to save it. On the next
acceleration, the performance timer will
record the time. Pressing the thumbwheel
while the timer is running will cancel the
timer if done before reaching the End Speed.
Lap Timer (without PDR) :Press
Twhen
Lap Timer is displayed to start, stop, or reset
the lap timer. Press the thumbwheel while
the Lap Timer page is active to start the
timer. If the lap timer is active, pressing the
thumbwheel will stop the current lap timer
and start a new lap. Pressing the
thumbwheel within 10 seconds after
completing the last lap (Stop Lap Timer
option is displayed), the Lap Timer will stop.
Lap Timer (with PDR) : The lap times
recorded with the PDR system will
automatically be displayed in this window.
This only happens if a track has been
selected in the PDR system and a video
recording is started. See Performance Data
Recorder (PDR) 0130.
Maintenance
Press the thumbwheel to enter the
Maintenance menu. Scroll through the
available items. Oil Life :
Displays an estimate of the oil's
remaining useful life. If REMAINING OIL LIFE
99% is displayed, that means 99% of the
current oil life remains.
When the remaining oil life is low, the
CHANGE ENGINE OIL SOON message will
appear on the display. The oil should be
changed as soon as possible. See Engine Oil
(5.5L LT6 Engine) 0246 or
Engine Oil (6.2L LT2 Engine) 0249. In
addition to the engine oil life system
monitoring the oil life, additional
maintenance is recommended in the
Maintenance Schedule. See Maintenance
Schedule 0316.
The Oil Life display must be reset after each
oil change. It will not reset itself. Do not
reset the Oil Life display accidentally at any
time other than when the oil has just been
changed. It cannot be reset accurately until
the next oil change. To reset, see Engine Oil
Life System 0252.
Transmission Fluid Life : Displays an
estimate of the fluid's remaining useful life.
If REMAINING FLUID LIFE 99% is displayed,
that means 99% of the current fluid life
remains. When the remaining fluid life is low, the
CHANGE TRANSMISSION FLUID SOON
message will appear on the display. The
fluid should be changed as soon as possible.
See
Dual Clutch Transmission Fluid Life
System 0253. In addition to the
Transmission Fluid Life system monitoring
the fluid life, additional maintenance is
recommended in the Maintenance Schedule.
See Maintenance Schedule 0316.
The Fluid Life display must be reset after
each fluid change. It will not reset itself. Do
not reset the Fluid Life display accidentally
at any time other than when the fluid has
just been changed. It cannot be reset
accurately until the next fluid change. To
reset, see Dual Clutch Transmission Fluid Life
System 0253.
Transmission Filter Life : Displays an
estimate of the filter’s remaining useful life.
If REMAINING FILTER LIFE 99% is displayed,
that means 99% of the current filter life
remains.
When the remaining filter life is low, the
REPLACE TRANSMISSION FILTER SOON
message will appear on the display. The
external canister filter should be replaced as
soon as possible. See Dual Clutch
Transmission Fluid Life System 0253. In
Page 145 of 362
Chevrolet Corvette Owner Manual (GMNA-Localizing-U.S./Canada/Mexico-
17272984) - 2024 - CRC - 2/20/23
144 Infotainment System
Google
This menu allows adjustment of the Google
settings.
Teen Driver
If equipped, this allows multiple keys to be
registered for beginner drivers to encourage
safe driving habits. When the vehicle is
started with a Teen Driver key, it will
automatically activate certain safety
systems, allow setting of some features, and
limit the use of others. The Report Card will
record vehicle data about driving behavior
that can be viewed later. When the vehicle
is started with a registered key, the Driver
Information Center (DIC) displays a message
that Teen Driver is active.
To access:1. Touch Settings on the Home Page, then touch Vehicle, and then Teen Driver.
2. Create a Personal Identification Number (PIN) by choosing a four-digit PIN.
Re-enter the PIN to confirm. To change
the PIN, touch Change PIN.
The PIN is required to:
.Set up/Add or remove keys.
.Change Teen Driver settings.
.Change or clear the Teen Driver PIN.
.Access or delete Report Card data.
Set up/Add keys to activate Teen Driver and
assign restrictions to the key:
Any vehicle key can be registered, up to a
maximum of eight keys. Label the key to
tell it apart from the other keys.
For a pushbutton start system: 1. Start the vehicle.
2. For automatic transmissions, the vehicle must be in P (Park). For manual
transmissions, the vehicle must be
stopped with the parking brake set.
3. From the Settings menu, touch Vehicle and then Teen Driver.
4. Enter the PIN.
5. Place the remote key you wish to register in the transmitter pocket. The
key does not need to be the one that
started the vehicle. See Remote Key
Operation 07for transmitter pocket
location.
6. From the Teen Driver menu, touch Setup Keys or Add/Remove Teen Driver Keys.
.If the remote key has not previously
been registered, the option to add
the key displays. Touch Add and a confirmation message displays. Teen
Driver restrictions will be applied
whenever this remote key is used to
operate the vehicle.
.If the remote key has already been
registered, the option to remove the
key displays. If Remove is touched,
the remote key is no longer
registered. A confirmation message
displays, and Teen Driver restrictions
will not be applied if this remote key
is used to operate the vehicle.
In vehicles with a pushbutton start system,
if a Teen Driver and a non-Teen Driver key
are both present at start up, the vehicle will
recognize the non-Teen Driver key to start
the vehicle. The Teen Driver settings will not
be active.
For a keyed ignition system: 1. Start the vehicle.
2. For automatic transmissions, the vehicle must be in P (Park). For manual
transmissions, the vehicle must be
stopped with the parking brake set.
3. From the Settings menu, touch Vehicle and then Teen Driver.
4. Enter the PIN.
Page 156 of 362
Chevrolet Corvette Owner Manual (GMNA-Localizing-U.S./Canada/Mexico-
17272984) - 2024 - CRC - 2/20/23
Driving and Operating 155
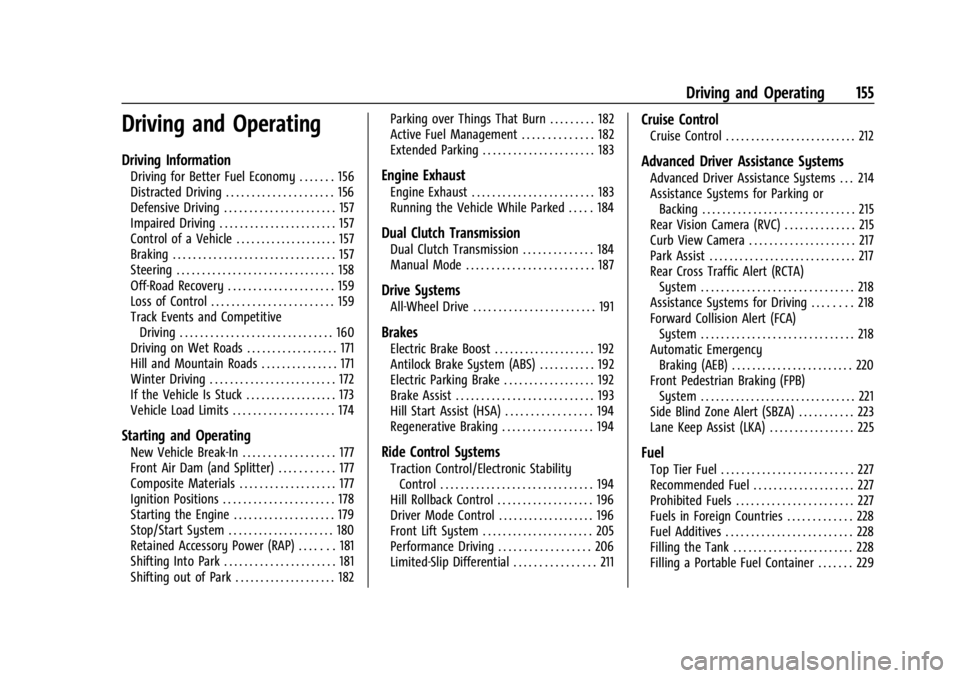
Driving and Operating
Driving Information
Driving for Better Fuel Economy . . . . . . . 156
Distracted Driving . . . . . . . . . . . . . . . . . . . . . 156
Defensive Driving . . . . . . . . . . . . . . . . . . . . . . 157
Impaired Driving . . . . . . . . . . . . . . . . . . . . . . . 157
Control of a Vehicle . . . . . . . . . . . . . . . . . . . . 157
Braking . . . . . . . . . . . . . . . . . . . . . . . . . . . . . . . . 157
Steering . . . . . . . . . . . . . . . . . . . . . . . . . . . . . . . 158
Off-Road Recovery . . . . . . . . . . . . . . . . . . . . . 159
Loss of Control . . . . . . . . . . . . . . . . . . . . . . . . 159
Track Events and CompetitiveDriving . . . . . . . . . . . . . . . . . . . . . . . . . . . . . . 160
Driving on Wet Roads . . . . . . . . . . . . . . . . . . 171
Hill and Mountain Roads . . . . . . . . . . . . . . . 171
Winter Driving . . . . . . . . . . . . . . . . . . . . . . . . . 172
If the Vehicle Is Stuck . . . . . . . . . . . . . . . . . . 173
Vehicle Load Limits . . . . . . . . . . . . . . . . . . . . 174
Starting and Operating
New Vehicle Break-In . . . . . . . . . . . . . . . . . . 177
Front Air Dam (and Splitter) . . . . . . . . . . . 177
Composite Materials . . . . . . . . . . . . . . . . . . . 177
Ignition Positions . . . . . . . . . . . . . . . . . . . . . . 178
Starting the Engine . . . . . . . . . . . . . . . . . . . . 179
Stop/Start System . . . . . . . . . . . . . . . . . . . . . 180
Retained Accessory Power (RAP) . . . . . . . 181
Shifting Into Park . . . . . . . . . . . . . . . . . . . . . . 181
Shifting out of Park . . . . . . . . . . . . . . . . . . . . 182 Parking over Things That Burn . . . . . . . . . 182
Active Fuel Management . . . . . . . . . . . . . . 182
Extended Parking . . . . . . . . . . . . . . . . . . . . . . 183
Engine Exhaust
Engine Exhaust . . . . . . . . . . . . . . . . . . . . . . . . 183
Running the Vehicle While Parked . . . . . 184
Dual Clutch Transmission
Dual Clutch Transmission . . . . . . . . . . . . . . 184
Manual Mode . . . . . . . . . . . . . . . . . . . . . . . . . 187
Drive Systems
All-Wheel Drive . . . . . . . . . . . . . . . . . . . . . . . . 191
Brakes
Electric Brake Boost . . . . . . . . . . . . . . . . . . . . 192
Antilock Brake System (ABS) . . . . . . . . . . . 192
Electric Parking Brake . . . . . . . . . . . . . . . . . . 192
Brake Assist . . . . . . . . . . . . . . . . . . . . . . . . . . . 193
Hill Start Assist (HSA) . . . . . . . . . . . . . . . . . 194
Regenerative Braking . . . . . . . . . . . . . . . . . . 194
Ride Control Systems
Traction Control/Electronic Stability
Control . . . . . . . . . . . . . . . . . . . . . . . . . . . . . . 194
Hill Rollback Control . . . . . . . . . . . . . . . . . . . 196
Driver Mode Control . . . . . . . . . . . . . . . . . . . 196
Front Lift System . . . . . . . . . . . . . . . . . . . . . . 205
Performance Driving . . . . . . . . . . . . . . . . . . 206
Limited-Slip Differential . . . . . . . . . . . . . . . . 211
Cruise Control
Cruise Control . . . . . . . . . . . . . . . . . . . . . . . . . . 212
Advanced Driver Assistance Systems
Advanced Driver Assistance Systems . . . 214
Assistance Systems for Parking or Backing . . . . . . . . . . . . . . . . . . . . . . . . . . . . . . 215
Rear Vision Camera (RVC) . . . . . . . . . . . . . . 215
Curb View Camera . . . . . . . . . . . . . . . . . . . . . 217
Park Assist . . . . . . . . . . . . . . . . . . . . . . . . . . . . . 217
Rear Cross Traffic Alert (RCTA) System . . . . . . . . . . . . . . . . . . . . . . . . . . . . . . 218
Assistance Systems for Driving . . . . . . . . 218
Forward Collision Alert (FCA) System . . . . . . . . . . . . . . . . . . . . . . . . . . . . . . 218
Automatic Emergency Braking (AEB) . . . . . . . . . . . . . . . . . . . . . . . . 220
Front Pedestrian Braking (FPB)
System . . . . . . . . . . . . . . . . . . . . . . . . . . . . . . . 221
Side Blind Zone Alert (SBZA) . . . . . . . . . . . 223
Lane Keep Assist (LKA) . . . . . . . . . . . . . . . . . 225
Fuel
Top Tier Fuel . . . . . . . . . . . . . . . . . . . . . . . . . . 227
Recommended Fuel . . . . . . . . . . . . . . . . . . . . 227
Prohibited Fuels . . . . . . . . . . . . . . . . . . . . . . . 227
Fuels in Foreign Countries . . . . . . . . . . . . . 228
Fuel Additives . . . . . . . . . . . . . . . . . . . . . . . . . 228
Filling the Tank . . . . . . . . . . . . . . . . . . . . . . . . 228
Filling a Portable Fuel Container . . . . . . . 229
Page 173 of 362
Chevrolet Corvette Owner Manual (GMNA-Localizing-U.S./Canada/Mexico-
17272984) - 2024 - CRC - 2/20/23
172 Driving and Operating
{Warning
Using the brakes to slow the vehicle on a
long downhill slope can cause brake
overheating, can reduce brake
performance, and could result in a loss of
braking. Shift the transmission to a lower
gear to let the engine assist the brakes
on a steep downhill slope.
{Warning
Coasting downhill in N (Neutral) or with
the ignition off is dangerous. This can
cause overheating of the brakes and loss
of steering assist. Always have the engine
running and the vehicle in gear.
.Drive at speeds that keep the vehicle in
its own lane. Do not swing wide or cross
the center line.
.Be alert on top of hills; something could
be in your lane (e.g., stalled car, crash).
.Pay attention to special road signs
(e.g., falling rocks area, winding roads,
long grades, passing or no-passing zones)
and take appropriate action.
Winter Driving
Driving on Snow or IceCaution
To avoid damage to the wheels and
brake components, always clear snow and
ice from inside the wheels and
underneath the vehicle before driving.
Snow or ice between the tires and the road
creates less traction or grip, so drive
carefully. Wet ice can occur at about 0 °C
(32 °F) when freezing rain begins to fall.
Avoid driving on wet ice or in freezing rain
until roads can be treated.
For Slippery Road Driving:
.Accelerate gently. Accelerating too quickly
causes the wheels to spin and makes the
surface under the tires slick.
.Turn on Traction Control. On E-Ray, the
electric all-wheel drive system (eAWD)
automatically engages when wheel slip is
detected. See Traction Control/Electronic
Stability Control 0194 and
All-Wheel Drive 0191.
.The Antilock Brake System (ABS) improves
vehicle stability during hard stops, but
the brakes should be applied sooner than
when on dry pavement. See Antilock
Brake System (ABS) 0192.
.Turn off cruise control.
.Turn on Weather Mode. See Driver Mode
Control 0196.
.Allow greater following distance and
watch for slippery spots. Icy patches can
occur on otherwise clear roads in shaded
areas. The surface of a curve or an
overpass can remain icy when the
surrounding roads are clear. Avoid sudden
steering maneuvers and braking while
on ice.
Cold Weather Mode
In very low temperatures, a cold weather
message may display on the Driver
Information Center (DIC). The engine speed,
transmission shift patterns, and cabin fan
speed may operate differently to enable the
vehicle to warm up quicker. You can
manually override the cabin fan speed in
cold weather mode.