2023 TOYOTA VENZA HYBRID change wheel
[x] Cancel search: change wheelPage 38 of 560
381-1. For safe use
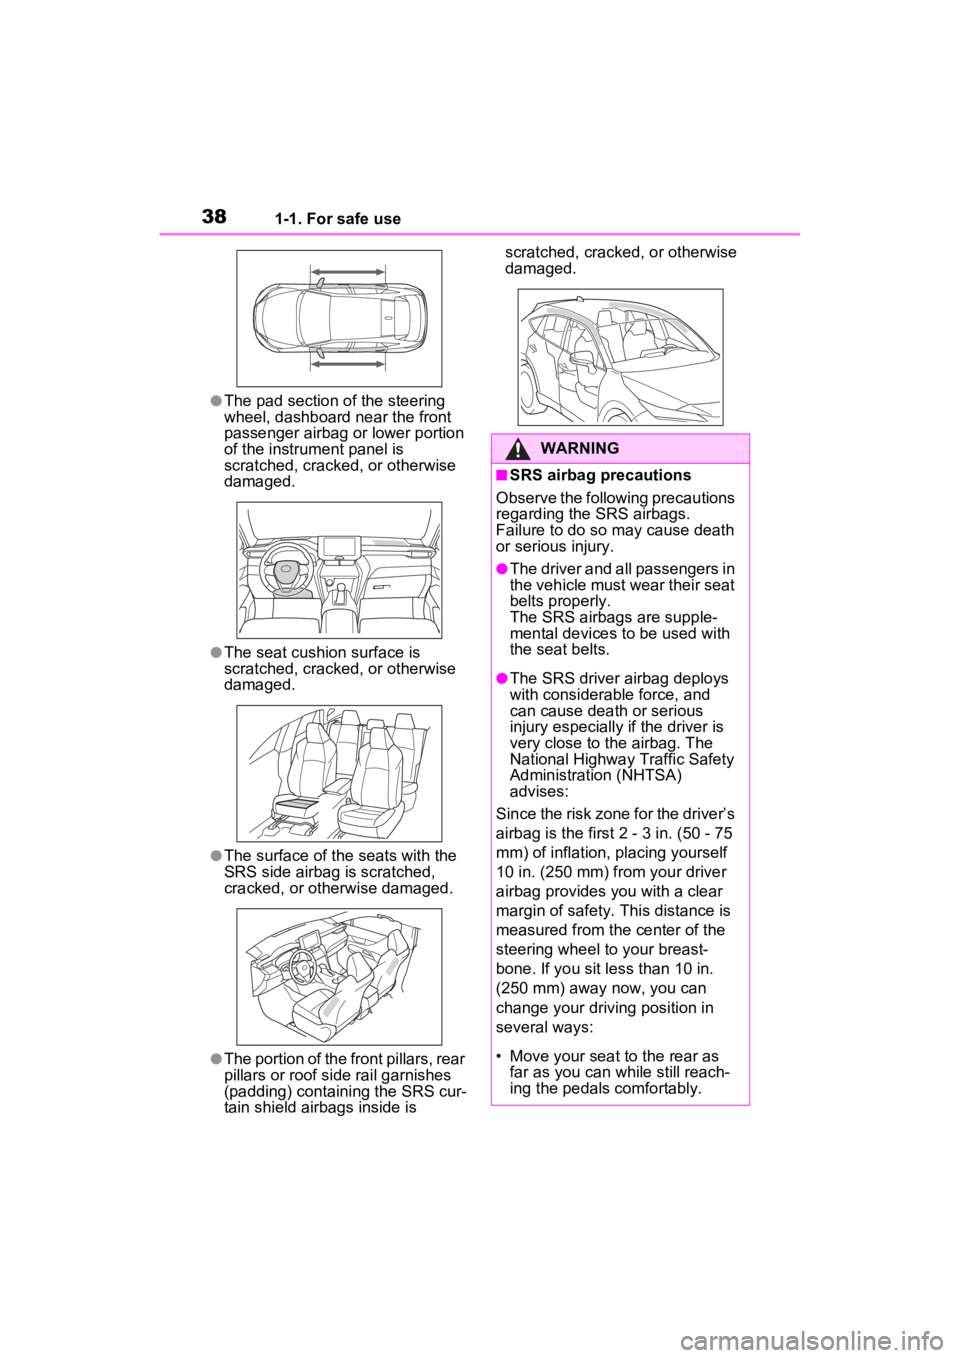
●The pad section of the steering
wheel, dashboard near the front
passenger airbag or lower portion
of the instrument panel is
scratched, cracked, or otherwise
damaged.
●The seat cushion surface is
scratched, cracked, or otherwise
damaged.
●The surface of the seats with the
SRS side airbag is scratched,
cracked, or otherwise damaged.
●The portion of the front pillars, rear
pillars or roof side rail garnishes
(padding) containing the SRS cur-
tain shield airbags inside is scratched, cracked, or otherwise
damaged.
WARNING
■SRS airbag precautions
Observe the following precautions
regarding the SRS airbags.
Failure to do so may cause death
or serious injury.
●The driver and all passengers in
the vehicle must wear their seat
belts properly.
The SRS airbags are supple-
mental devices to be used with
the seat belts.
●The SRS driver airbag deploys
with considerable force, and
can cause death or serious
injury especially if the driver is
very close to the airbag. The
National Highway Traffic Safety
Administration (NHTSA)
advises:
Since the risk zone for the driver’s
airbag is the first 2 - 3 in. (50 - 75
mm) of inflation, placing yourself
10 in. (250 mm) from your driver
airbag provides you with a clear
margin of safety. This distance is
measured from the center of the
steering wheel to your breast-
bone. If you sit less than 10 in.
(250 mm) away now, you can
change your driving position in
several ways:
• Move your seat to the rear as far as you can while still reach-
ing the pedals comfortably.
Page 71 of 560
711-4. Hybrid system
1
For safety and security
*: When the hybrid battery (traction battery) requires charging or the
engine is warming up, etc., the
gasoline engine will not automati-
cally stop. ( P.71)
■During normal driving
The gasoline engine is predomi-
nantly used. The electric motor
(traction motor) charges the
hybrid battery (traction battery)
as necessary.
■When accelerating sharply
When the accelerator pedal is
depressed heavily, the power of
the hybrid battery (traction bat-
tery) is added to that of the gas-
oline engine via the electric
motor (traction motor).
■When braking (regenera-
tive braking)
The wheels operate the electric
motor (traction motor) as a
power generator, and the hybrid
battery (traction battery) is
charged.
■Regenerative braking
In the following si tuations, kinetic
energy is converted to electric
energy and deceleration force can
be obtained in conjunction with the
recharging of the hybrid battery
(traction battery).
●The accelerator pedal is released
while driving with the shift lever in
D or S.
●The brake pedal is depressed
while driving with the shift lever in
D or S.
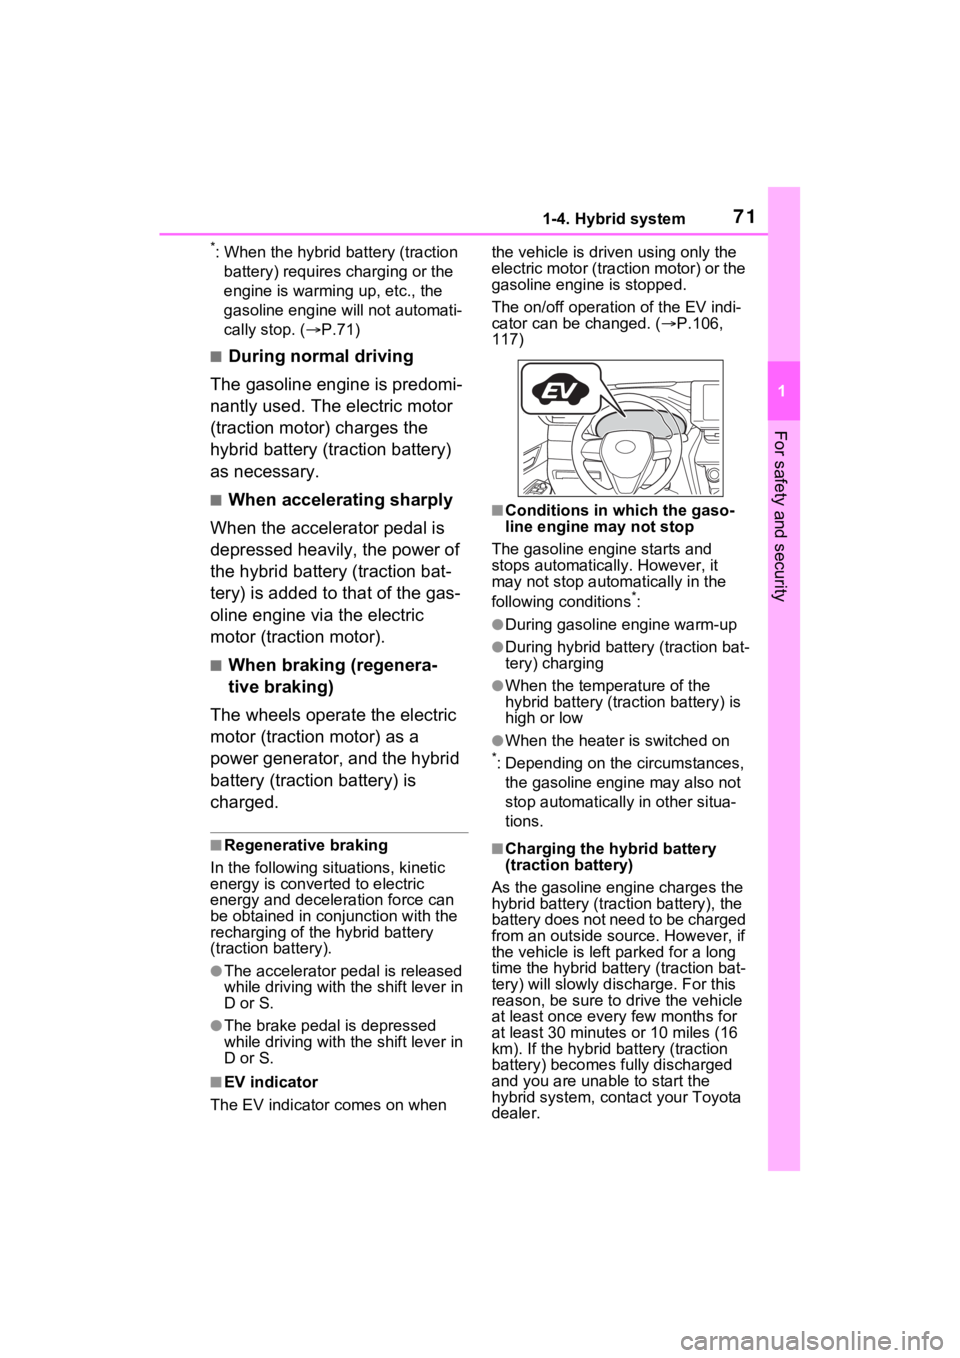
■EV indicator
The EV indicator comes on when the vehicle is driven using only the
electric motor (traction motor) or the
gasoline engine is stopped.
The on/off operation of the EV indi-
cator can be changed. (
P.106,
117)
■Conditions in which the gaso-
line engine may not stop
The gasoline engine starts and
stops automatically. However, it
may not stop automatically in the
following conditions
*:
●During gasoline engine warm-up
●During hybrid battery (traction bat-
tery) charging
●When the temperature of the
hybrid battery (traction battery) is
high or low
●When the heater is switched on
*: Depending on the circumstances, the gasoline engine may also not
stop automatically in other situa-
tions.
■Charging the hybrid battery
(traction battery)
As the gasoline engine charges the
hybrid battery (trac tion battery), the
battery does not need to be charged
from an outside source. However, if
the vehicle is left parked for a long
time the hybrid battery (traction bat-
tery) will slowly dis charge. For this
reason, be sure to drive the vehicle
at least once every few months for
at least 30 minutes or 10 miles (16
km). If the hybrid battery (traction
battery) becomes fully discharged
and you are unabl e to start the
hybrid system, contact your Toyota
dealer.
Page 106 of 560
1062-1. Instrument cluster
wheel in 6 steps from 0 to 5.
G-force display*
Displays the size and direction of
the G-force applied to the vehicle
via changes to the position of the
ball on the display.
Maximum G-force course*
This item is linke d with the G-force
display and the course of the past
movement of the ball is displayed.
Press and hold to reset the
record.
Wheel spin display
When a tire is spin ning, its icon on
the display change s its color and
blinks.
*: This item is displayed only when driving mode is set to sport mode.
The illustration used is intended as
an example, and may differ from
the image that is actually displayed
on the multi-info rmation display.
■Safety system status
Select to display the operational
status of the following systems:
PCS (Pre-Collision System)
( P.239)
Intuitive parking assist (if
equipped) ( P.287)
BSM (Blind Spot Monitor)
( P.277)
RCTA (Rear Cross Traffic
Alert) ( P.277)
Vehicle settings and the content
displayed on the screen can be changed by using the meter
control switches.
■Setting procedure
1 Operate or of the
meter control switches and
select .
2 Operate or of the
meter control switches and
select the desired item.
• If the function is turned on and off or the volume, etc. is
changed on the setting
screen, the setting is changed
each time is pressed.
• For functions that allow oper- ation contents, display con-
tents, etc., of function to be
selected, the setting screen is
displayed by pressing and
holding . When the setting
screen is displayed, select the
setting or desired value (time,
etc.) with .
3 After changing the settings,
press of the meter control
switches.
■ LTA (Lane Tracing
Assist) ( P.250)
Select to set up the following
items.
“Lane Center”
Select to enable /disable the lane
centering function.
“Alert”
Select to set the alert type.
Settings display
B
C
D
Page 108 of 560

1082-1. Instrument cluster
Road Sign Assist on/off
Select to enable/disable the RSA
(Road Sign Assist).
“Notification method”
Select to change e ach notification
method used to notify the driver
when the system recognizes
excess speed and Do Not Enter
sign.
“Notification Level”
Select to change e ach notification
level used to notify the driver when
the system recognizes a speed limit
sign.
■ DRCC
Select to change the curve
speed reduction function setting.
■ Vehicle Settings
PBD (Power Back Door)
( P.143)
Select to set up the following items.
• System settings
Select to enable/disable the power
back door system.
• “Hands Free” (if equipped)
Select to enable/disable the Hands
Free Power Back Door operation.
• “Opening Adjustment”
Select the open position when
power back door is fully open.
•“Volume”
Select to set the volume of the
buzzer which sounds when the
power back door system operates.
“TPWS setting” (Tire Pres-
sure Warning System) (
P.402)
• “Setting Pressure”
Select to initialize the tire pressure
warning system.
• “Identify Wheel”
Select to change the tire pressure
warning system sen sor ID code set.
To enable this function, a second
set of tire pressure warning system
sensor ID codes must be registered
by a Toyota dealer. For information
regarding changing the registered
ID code set, contact your Toyota
dealer.
• “Setting Unit”
Select to change the units of mea-
sure displayed.
Rear Seat Reminder
( P.139)
Select to enable/disable the rear
seat reminder function.
“Scheduled Maintenance”
( P.380)
Select to reset the scheduled main-
tenance information (message indi-
cating maintenance is required and
distance until the next mainte-
nance) after all ma intenance is per-
formed.
Oil Maintenance
Select to reset the Oil maintenance.
( P.392)
■ Settings
“Language”
Select to change the language on
the multi-information display.
“Units”
Select to change the units of mea-
Page 117 of 560
1172-1. Instrument cluster
2
Vehicle status information and indicators
• Elapsed time: Displays elapsed time since hybrid sys-
tem start
*
*: These items are reset each time the hybrid system stops.
■Trip information
2 items that are selected using
the “TRIP A Items” or “TRIP B
Items” setting (average speed
and distance) can be displayed
vertically.
Use the displayed information
as a reference only.
• Average Speed: Displays the average vehicle speed since
the display was reset
*
• Distance: Displays the dis-tance driven since the display
was reset
*
• Elapsed time: Displays
elapsed time since the display
was reset
*
*: To reset, display the desired item
and press and hold .
P.128
P.402
■Tire pressure
●It may take a few minutes to dis-
play the tire inflation pressure
after the power switch is turned to
ON. It may also take a few min-
utes to display the tire inflation pressure after infl
ation pressure
has been adjusted.
●“---” may be displayed if the tire
position information cannot be
determined due to unfavorable
radio wave conditions.
●Tire inflation pressure changes
with temperature. The displayed
values may also be different from
the values measured using a tire
pressure gauge.
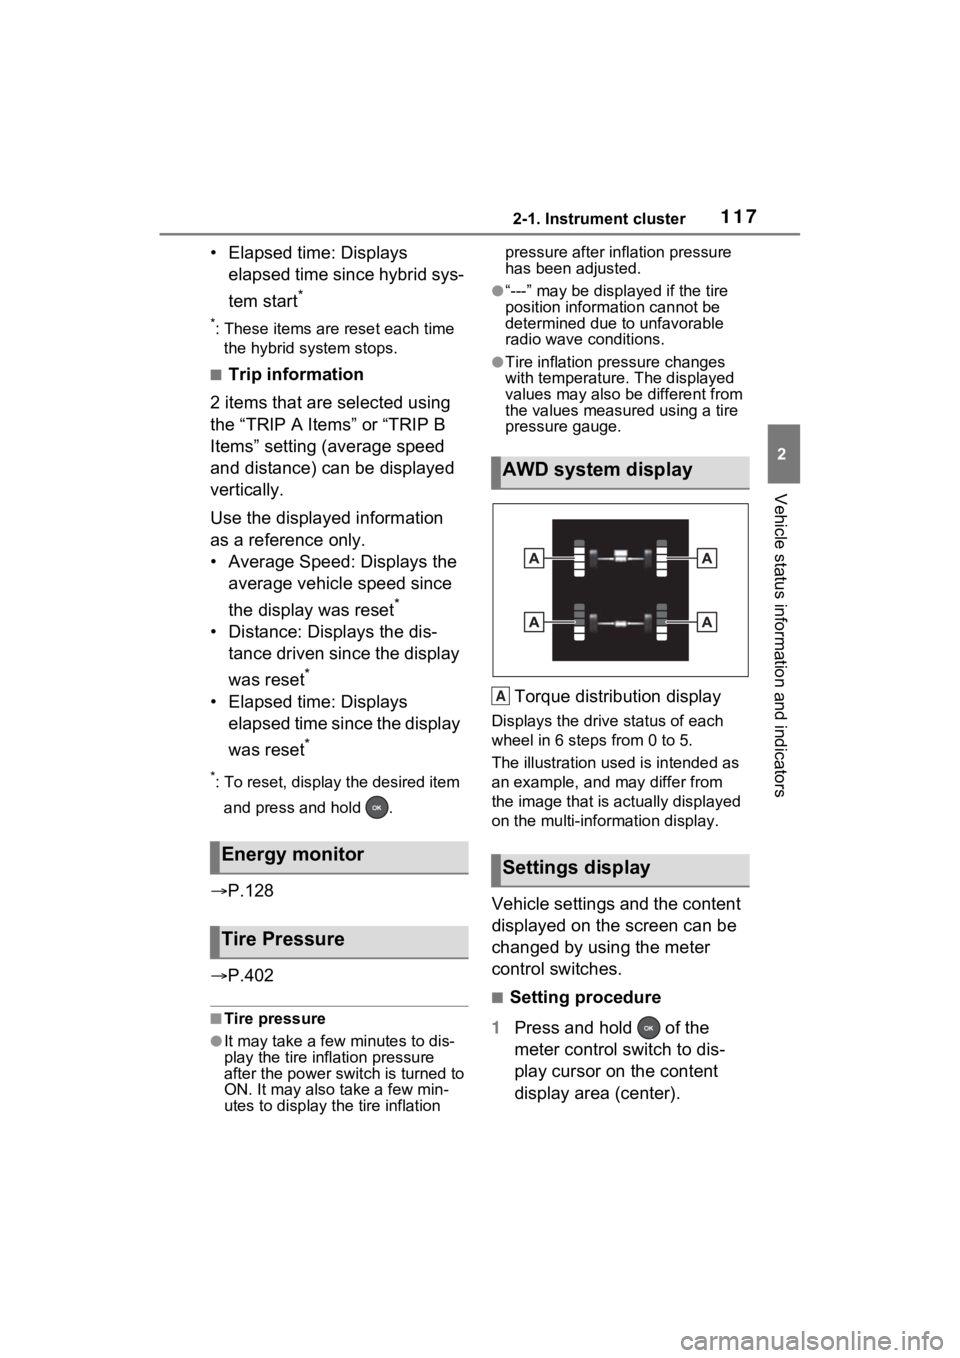
Torque distribution display
Displays the drive status of each
wheel in 6 steps from 0 to 5.
The illustration used is intended as
an example, and may differ from
the image that is actually displayed
on the multi-information display.
Vehicle settings and the content
displayed on the screen can be
changed by using the meter
control switches.
■Setting procedure
1 Press and hold of the
meter control switch to dis-
play cursor on the content
display area (center).
Energy monitor
Tire Pressure
AWD system display
Settings display
A
Page 120 of 560

1202-1. Instrument cluster
Select to initialize the tire pres-
sure warning system.
• “Identifying Each Wheel & Posi- tion”
Select to change the tire pressure
warning system sensor ID code
set. To enable this function, a
second set of tire pressure warn-
ing system sensor ID codes must
be registered by a Toyota dealer.
For information regarding chang-
ing the registered ID code set,
contact your Toyota dealer.
• “Pressure unit setting” Select to change the units of
measure displayed.
“Scheduled Maintenance”
( P.380)
Select to reset the scheduled
maintenance information
(message indicating mainte-
nance is required and dis-
tance until the next
maintenance) after all mainte-
nance is performed.
Oil Maintenance
Select to reset the Oil mainte-
nance. ( P.392)
Rear Seat Reminder
( P.139)
Select to enable/disable the
rear seat reminder function.
■ Settings
“Language”
Select to change the lan-
guage on the multi-informa-
tion display.
“Units”
Select to change the unit of measure for fuel consump-
tion.
Meter Type
Select to change the meter
type setting.
Meter Style
Select to change the meter
style.
Dial Type
Select to change dial type.
( P.94)
EV indicator
Select to enable/disable the
EV indicator.
Fuel Economy
Select to change the display
on Fuel Economy. ( P.114)
Hybrid System
Select to enable/disable refer-
ence operation range.
Drive Info
Select to change displayed
items on drive information dis-
play. ( P.116)
Pop-Up Display
Select to enable/disable the
pop-up displays, which may
appear in some situations.
Default Settings
Select to reset the meter dis-
play settings.
■Suspension of the settings dis-
play
●Some settings cannot be changed
while driving. When changing set-
tings, park the vehicle in a safe
place.
Page 170 of 560
1703-4. Adjusting the steering wheel and mirrors
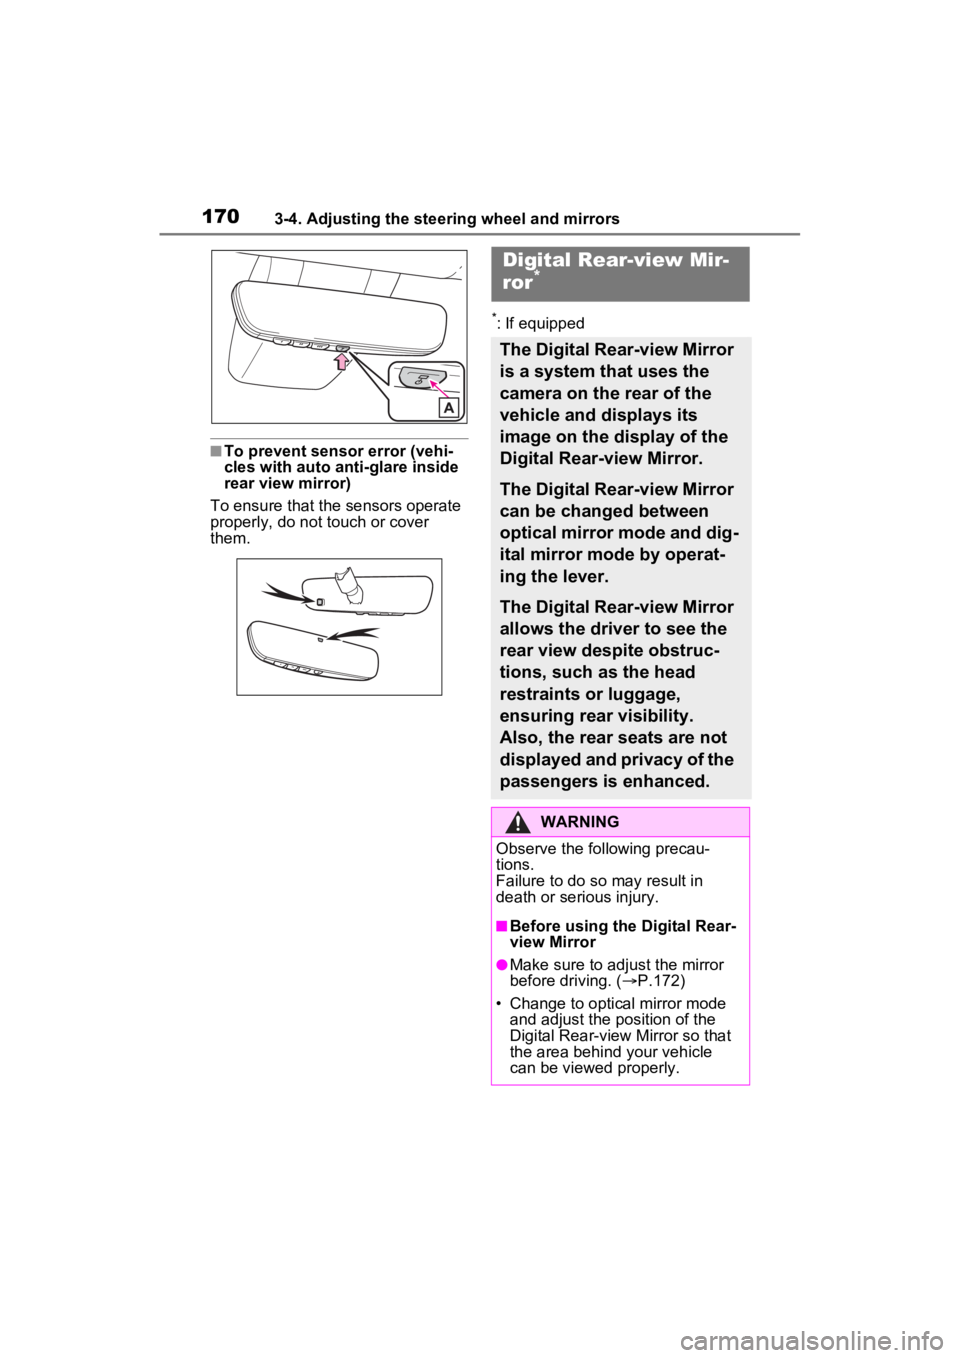
■To prevent sensor error (vehi-
cles with auto anti-glare inside
rear view mirror)
To ensure that the sensors operate
properly, do not touch or cover
them.
*: If equipped
Digital Rear-view Mir-
ror*
The Digital Rear-view Mirror
is a system that uses the
camera on the rear of the
vehicle and displays its
image on the display of the
Digital Rear-view Mirror.
The Digital Rear-view Mirror
can be changed between
optical mirror mode and dig-
ital mirror mode by operat-
ing the lever.
The Digital Rear-view Mirror
allows the driver to see the
rear view despite obstruc-
tions, such as the head
restraints or luggage,
ensuring rear visibility.
Also, the rear seats are not
displayed and privacy of the
passengers is enhanced.
WARNING
Observe the following precau-
tions.
Failure to do so may result in
death or serious injury.
■Before using the Digital Rear-
view Mirror
●Make sure to adjust the mirror
before driving. ( P.172)
• Change to optical mirror mode and adjust the position of the
Digital Rear-view Mirror so that
the area behind your vehicle
can be viewed properly.
Page 171 of 560
1713-4. Adjusting the steering wheel and mirrors
3
Before driving
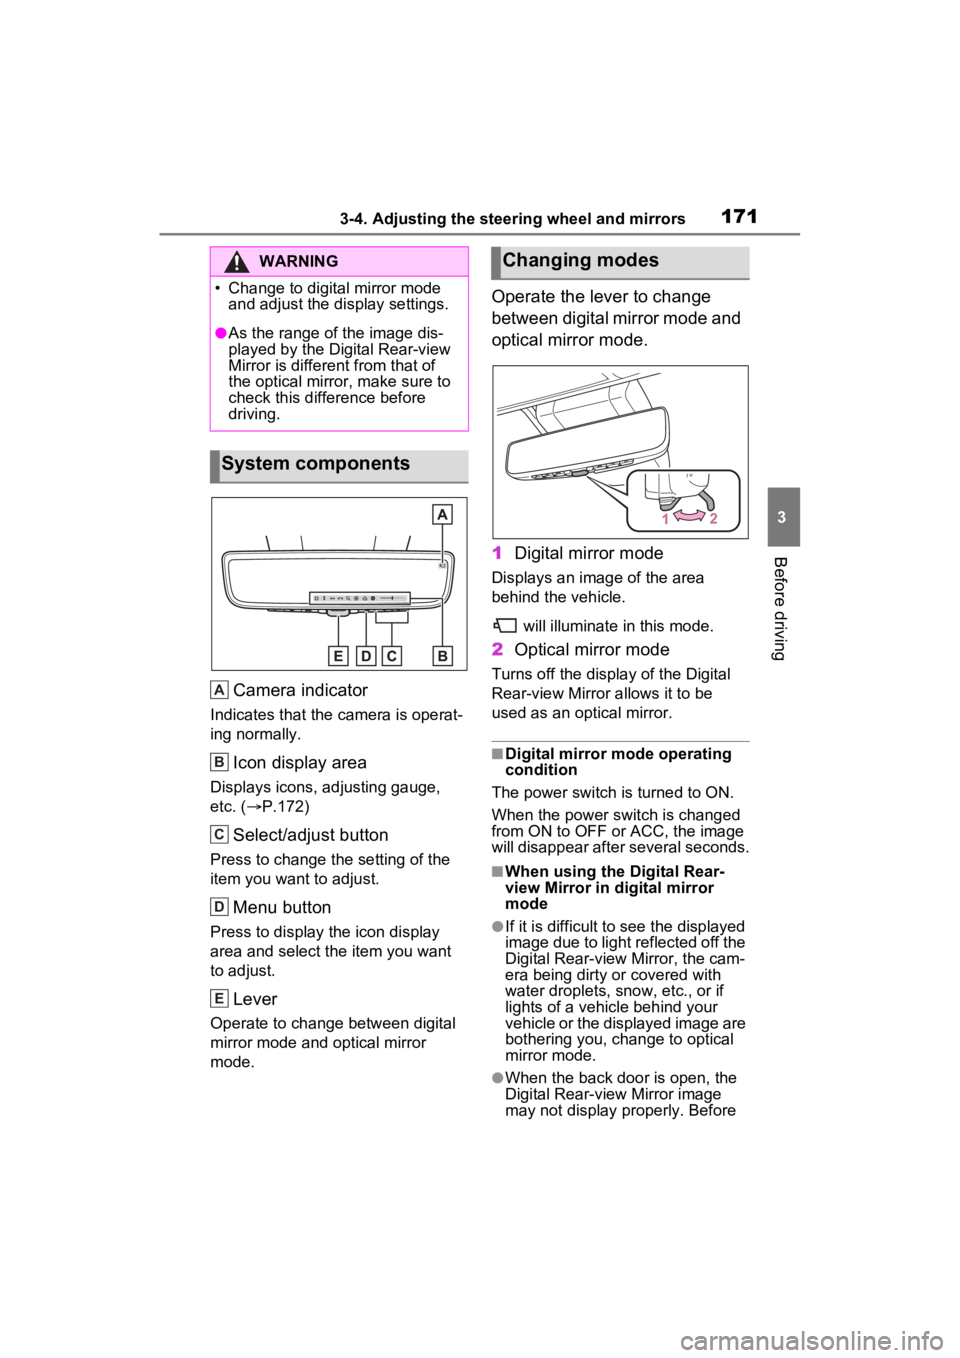
Camera indicator
Indicates that the camera is operat-
ing normally.
Icon display area
Displays icons, adjusting gauge,
etc. ( P.172)
Select/adjust button
Press to change the setting of the
item you want to adjust.
Menu button
Press to display the icon display
area and select the item you want
to adjust.
Lever
Operate to change between digital
mirror mode and optical mirror
mode.
Operate the lever to change
between digital mirror mode and
optical mirror mode.
1 Digital mirror mode
Displays an ima ge of the area
behind the vehicle.
will illuminate in this mode.
2Optical mirror mode
Turns off the display of the Digital
Rear-view Mirror allows it to be
used as an optical mirror.
■Digital mirror mode operating
condition
The power switch is turned to ON.
When the power switch is changed
from ON to OFF or ACC, the image
will disappear after several seconds.
■When using the Digital Rear-
view Mirror in d igital mirror
mode
●If it is difficult to see the displayed
image due to light reflected off the
Digital Rear-view Mirror, the cam-
era being dirty or covered with
water droplets, snow, etc., or if
lights of a vehicle behind your
vehicle or the displayed image are
bothering you, change to optical
mirror mode.
●When the back door is open, the
Digital Rear-view Mirror image
may not display properly. Before
WARNING