2023 TOYOTA VENZA HYBRID reset
[x] Cancel search: resetPage 120 of 560

1202-1. Instrument cluster
Select to initialize the tire pres-
sure warning system.
• “Identifying Each Wheel & Posi- tion”
Select to change the tire pressure
warning system sensor ID code
set. To enable this function, a
second set of tire pressure warn-
ing system sensor ID codes must
be registered by a Toyota dealer.
For information regarding chang-
ing the registered ID code set,
contact your Toyota dealer.
• “Pressure unit setting” Select to change the units of
measure displayed.
“Scheduled Maintenance”
( P.380)
Select to reset the scheduled
maintenance information
(message indicating mainte-
nance is required and dis-
tance until the next
maintenance) after all mainte-
nance is performed.
Oil Maintenance
Select to reset the Oil mainte-
nance. ( P.392)
Rear Seat Reminder
( P.139)
Select to enable/disable the
rear seat reminder function.
■ Settings
“Language”
Select to change the lan-
guage on the multi-informa-
tion display.
“Units”
Select to change the unit of measure for fuel consump-
tion.
Meter Type
Select to change the meter
type setting.
Meter Style
Select to change the meter
style.
Dial Type
Select to change dial type.
( P.94)
EV indicator
Select to enable/disable the
EV indicator.
Fuel Economy
Select to change the display
on Fuel Economy. ( P.114)
Hybrid System
Select to enable/disable refer-
ence operation range.
Drive Info
Select to change displayed
items on drive information dis-
play. ( P.116)
Pop-Up Display
Select to enable/disable the
pop-up displays, which may
appear in some situations.
Default Settings
Select to reset the meter dis-
play settings.
■Suspension of the settings dis-
play
●Some settings cannot be changed
while driving. When changing set-
tings, park the vehicle in a safe
place.
Page 125 of 560
1252-1. Instrument cluster
2
Vehicle status information and indicators
• Compass (heading-up display) (if equipped)
• Audio system operation status
*: Make sure to enable this display when using the driving support
systems
Display angle
Select to adjust the angle of the
head-up display.
■Enabling/disabling of the head-
up display
If the head-up display is disabled, it
will remain disabled when the power
switch is turned off then back to ON.
■Display brightness
The brightness of the head-up dis-
play can be adjusted on the
screen of the mult i-information dis-
play. Also, it is automatically
adjusted according to the ambient
brightness.
■Head-up display automatic
position adjustment
If the display position is recorded
into memory, the head-up display
will be automatically adjusted to the
desired position. ( P.163)
■When the 12-volt battery is dis-
connected
The customize settings of the head-
up display will be reset.
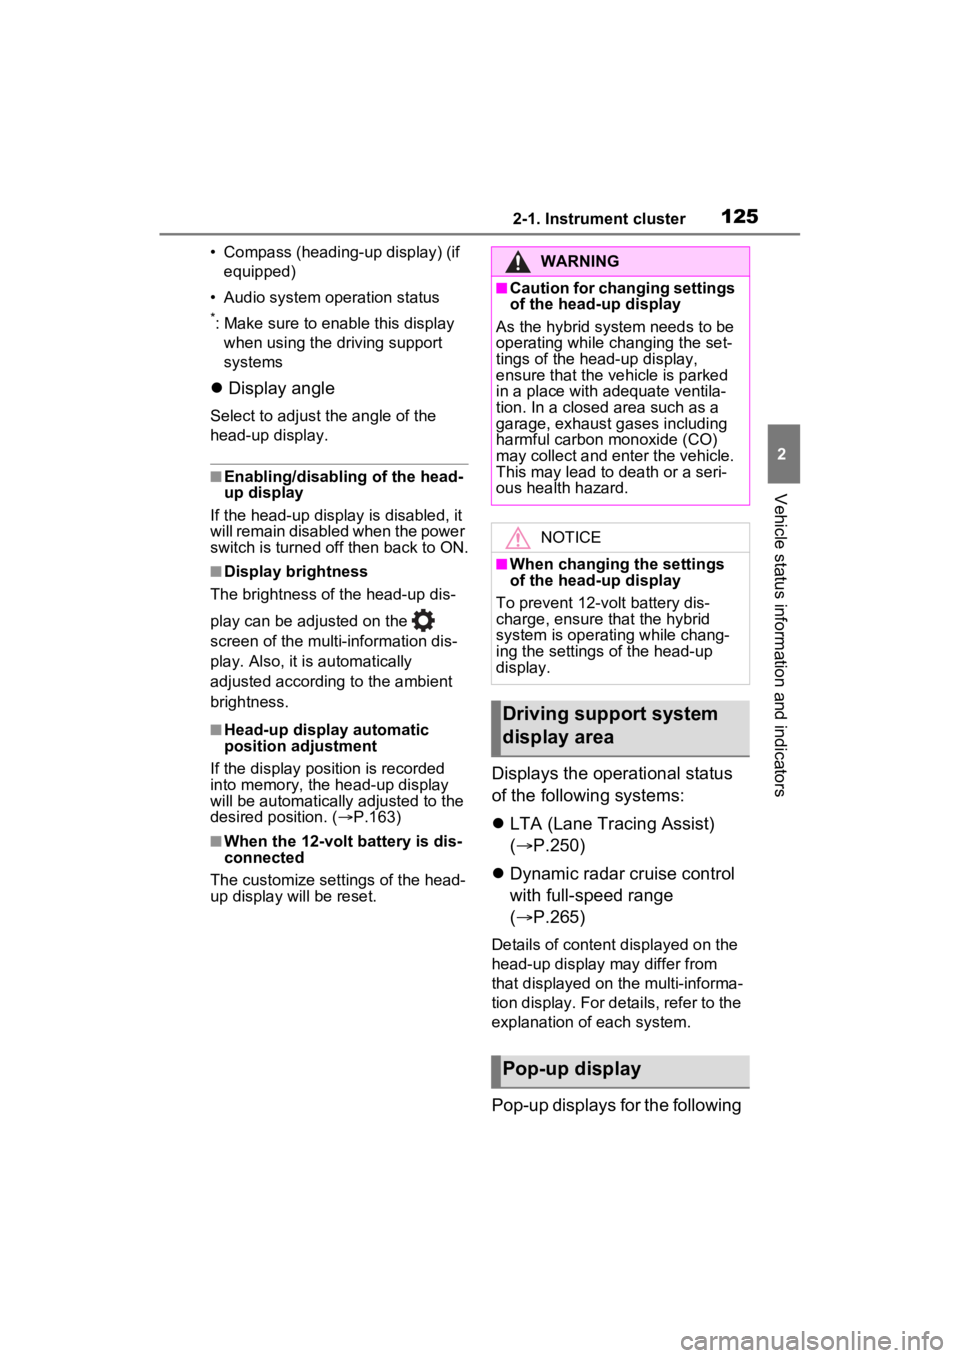
Displays the operational status
of the following systems:
LTA (Lane Tracing Assist)
( P.250)
Dynamic radar cruise control
with full-speed range
( P.265)
Details of content d isplayed on the
head-up display may differ from
that displayed on the multi-informa-
tion display. For details, refer to the
explanation of each system.
Pop-up displays for the following
WARNING
■Caution for changing settings
of the head-up display
As the hybrid system needs to be
operating while changing the set-
tings of the head-up display,
ensure that the vehicle is parked
in a place with adequate ventila-
tion. In a closed area such as a
garage, exhaust gases including
harmful carbon monoxide (CO)
may collect and enter the vehicle.
This may lead to death or a seri-
ous health hazard.
NOTICE
■When changing the settings
of the head-up display
To prevent 12-vo lt battery dis-
charge, ensure that the hybrid
system is operating while chang-
ing the settings of the head-up
display.
Driving support system
display area
Pop-up display
Page 130 of 560
1302-1. Instrument cluster
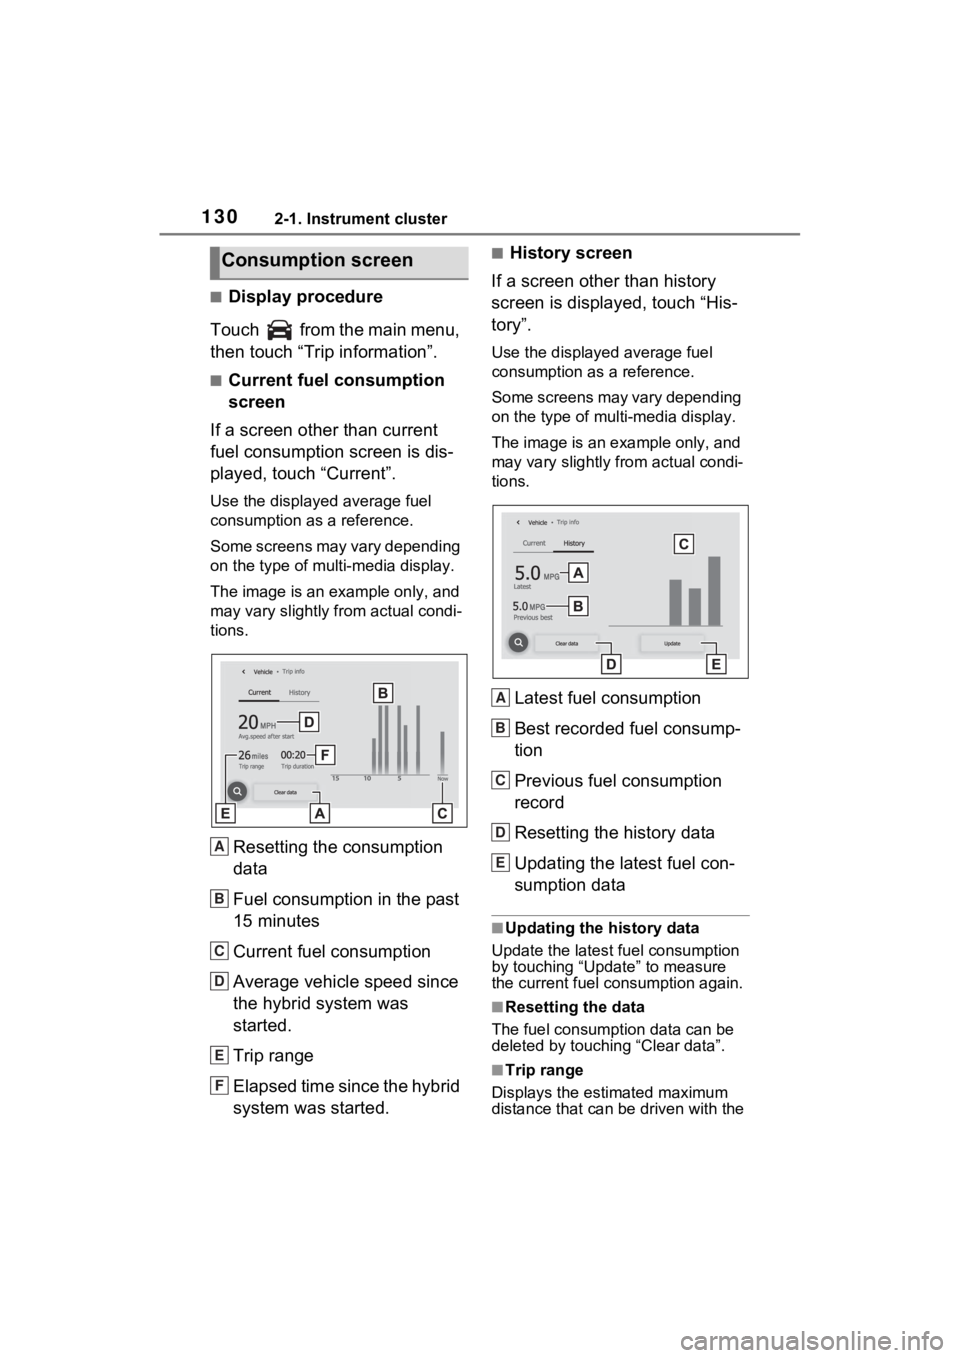
■Display procedure
Touch from the main menu,
then touch “Trip information”.
■Current fuel consumption
screen
If a screen other than current
fuel consumption screen is dis-
played, touch “Current”.
Use the displayed average fuel
consumption as a reference.
Some screens may vary depending
on the type of multi-media display.
The image is an example only, and
may vary slightly f rom actual condi-
tions.
Resetting the consumption
data
Fuel consumption in the past
15 minutes
Current fuel consumption
Average vehicle speed since
the hybrid system was
started.
Trip range
Elapsed time since the hybrid
system was started.
■History screen
If a screen other than history
screen is displayed, touch “His-
tory”.
Use the displayed average fuel
consumption as a reference.
Some screens may vary depending
on the type of multi-media display.
The image is an example only, and
may vary slightly from actual condi-
tions.
Latest fuel consumption
Best recorded fuel consump-
tion
Previous fuel consumption
record
Resetting the history data
Updating the latest fuel con-
sumption data
■Updating the history data
Update the latest fuel consumption
by touching “Upd ate” to measure
the current fuel consumption again.
■Resetting the data
The fuel consumption data can be
deleted by touching “Clear data”.
■Trip range
Displays the estimated maximum
distance that can be driven with the
Consumption screen
A
B
C
D
E
F
A
B
C
D
E
Page 141 of 560
1413-2. Opening, closing and locking the doors
3
Before driving
●The door lock switches can be
reset by unlocking all the doors
with the entry function or wireless
remote control.
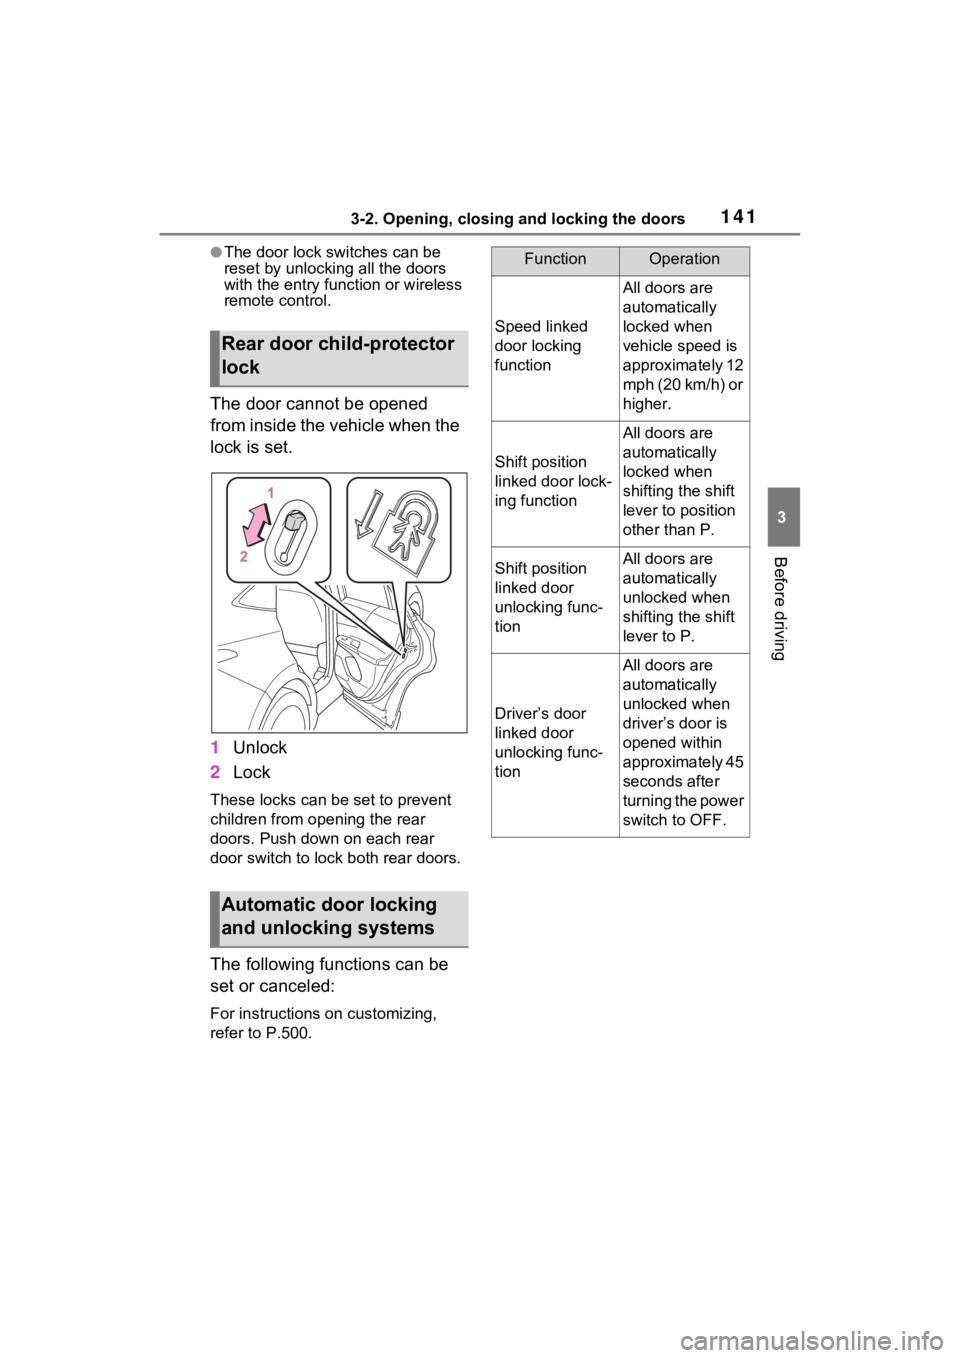
The door cannot be opened
from inside the vehicle when the
lock is set.
1Unlock
2 Lock
These locks can be set to prevent
children from opening the rear
doors. Push down on each rear
door switch to lock both rear doors.
The following functions can be
set or canceled:
For instructions on customizing,
refer to P.500.
Rear door child-protector
lock
Automatic door locking
and unlocking systems
FunctionOperation
Speed linked
door locking
function
All doors are
automatically
locked when
vehicle speed is
approximately 12
mph (20 km/h) or
higher.
Shift position
linked door lock-
ing function
All doors are
automatically
locked when
shifting the shift
lever to position
other than P.
Shift position
linked door
unlocking func-
tionAll doors are
automatically
unlocked when
shifting the shift
lever to P.
Driver’s door
linked door
unlocking func-
tion
All doors are
automatically
unlocked when
driver’s door is
opened within
approximately 45
seconds after
turning the power
switch to OFF.
Page 153 of 560
1533-2. Opening, closing and locking the doors
3
Before driving
The settings of the power back
door system can be changed by
displaying the “Vehicle Set-
tings” - “PBD” screen from the screen of the multi-informa-
tion display. ( P.106, 117)
The changed power back door set-
tings are not reset by turning the
power switch to OFF. In order to
restore the original settings, they
need to be changed back on the
screen of the multi-information
display.
The open position of the power
back door can be adjusted.
1 Stop the back door in the
desirable position. ( P.143)
2 Press and hold the
switch on the lower part of
the back door for approxi-
mately 2 seconds.
When the settings are completed,
the buzzer sounds 4 times.
When opening the back door the
next time, the back door will stop at
NOTICE
●Do not park the vehicle near
objects that may move and con-
tact the lower center part of the
rear bumper, such as grass or
trees.
If the vehicle has been parked
for a while near objects that
may move and contact the
lower center par t of the rear
bumper, such as grass or trees,
the Hands Free Power Back
Door may not operate. In this
situation, move the vehicle from
the current posi tion and then
check if the Hands Free Power
Back Door. If it does not oper-
ate, have the vehicle inspected
by your Toyota dealer.
●Do not subject the kick sensor
or its surrounding area to a
strong impact.
If the kick sensor or its sur-
rounding area has been sub-
jected to a strong impact, the
Hands Free Power Back Door
may not operate properly. If the
kick sensor does not operate in
the following situ ations, have
the vehicle insp ected by your
Toyota dealer.
• The kick sensor or its surround- ing area has been subjected to
a strong impact.
• The lower center part of the rear bumper is scratched or dam-
aged.
●Do not disassemble the rear
bumper.
●Do not attach stickers to the
rear bumper.
●Do not paint the rear bumper.
●If a bicycle carrier or similar
heavy object is attached to the
power back door, disable the
kick sensor. ( P.106, 117)
Changing settings of the
power back door system
Adjusting the open posi-
tion of the back door
Page 163 of 560
1633-3. Adjusting the seats
3
Before driving
The power switch has been
turned to OFF.
The driver’s seat belt has
been unfastened.
When any of the following has
been performed, the driver’s
seat and steering wheel auto-
matically return to their original
positions.
The power switch has been
turned to ACC or ON.
The driver’s seat belt has
been fastened.
■Operation of the power easy
access system
When exiting the vehicle, the power
easy access system may not oper-
ate if the seat is already close to the
rearmost position, etc.
■Customization
The seat movement amount set-
tings of the powe r easy access sys-
tem can be customized.
(Customizable features: P.508)
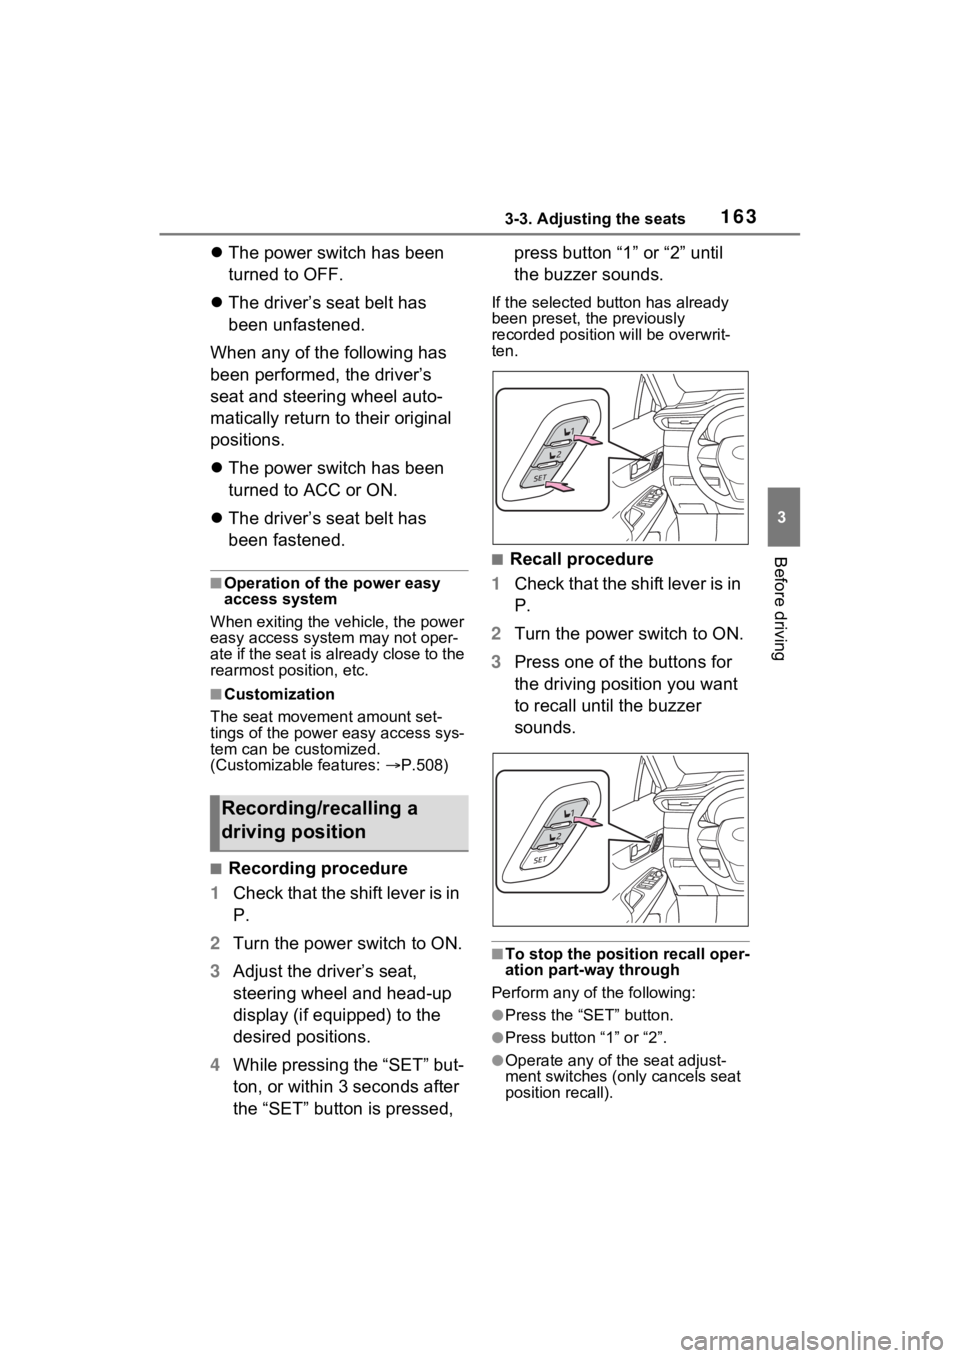
■Recording procedure
1 Check that the shift lever is in
P.
2 Turn the power switch to ON.
3 Adjust the driver’s seat,
steering wheel and head-up
display (if equipped) to the
desired positions.
4 While pressing the “SET” but-
ton, or within 3 seconds after
the “SET” button is pressed, press button “1” or “2” until
the buzzer sounds.
If the selected button has already
been preset, the previously
recorded positio
n will be overwrit-
ten.
■Recall procedure
1 Check that the shift lever is in
P.
2 Turn the power switch to ON.
3 Press one of the buttons for
the driving position you want
to recall until the buzzer
sounds.
■To stop the position recall oper-
ation part-way through
Perform any of the following:
●Press the “SET” button.
●Press button “1” or “2”.
●Operate any of t he seat adjust-
ment switches (only cancels seat
position recall).
Recording/recalling a
driving position
Page 203 of 560
2034-2. Driving procedures
4
Driving
1Stop the vehicle completely.
2 If the parking brake is in man-
ual mode, set the parking
brake. ( P.213)
Check the parking brake indicator
is illuminated.
3 Shift the shift lever to P.
( P.209)
Do not press the shift lever button
after shifting the shift lever to P.
4Press the power switch
shortly and firmly.
The hybrid system will stop, and the
meter display will be extinguished.
Release the shift lever when press-
ing the power switch.
5Release the brake pedal and
check that “ACCESSORY” or
“IGNITION ON” is not shown
on the multi-information dis-
play.
■Automatic hybrid system shut
off feature
●The vehicle is equipped with a
feature that automatically shuts off
the hybrid system when the shift
lever is in P with the hybrid system
operating for an extended period.
●The hybrid system will automati-
cally shut off after approximately 1
hour if it has been left operating
while the shift lever is in P.
●The message asking if you wish to
enable/disable t he automatic
hybrid syste m shut off feature will
sometimes be displayed on the
multi-information display.
Leaving the vehicle as is or select-
ing “Perform Auto Off” keeps the
automatic hybrid system shut off
feature enabled, and selecting
“Keep Vehicle On” disables the
automatic hybrid system shut off
feature.
●The timer for the automatic hybrid
system shut off feature will reset if
the brake pedal is depressed or if
the shift lever is in a position other
than P.
●After the vehicle is parked, if the
door is locked with the door lock
switch ( P.140) from the inside
or the mechanical key ( P.467)
from the outside , the automatic
hybrid syste m shut off feature will
be disabled. The timer for the
automatic hybrid system shut off
feature will be re-enabled if the
driver’s door is opened.
NOTICE
■When starting the hybrid sys-
tem
If the hybrid system becomes diffi-
cult to start, have your vehicle
checked by your Toyota dealer
immediately.
■Symptoms indicating a mal-
function with the power
switch
If the power switch seems to be
operating somewhat differently
than usual, such as the switch
sticking slightly, there may be a
malfunction. Contact your Toyota
dealer immediately.
Stopping the hybrid sys-
tem
Page 380 of 560
3806-2. Maintenance
■Resetting the message indicat-
ing maintenance is required
After the required maintenance is
performed according to the mainte-
nance schedule, please reset the
reminder light or message.
To reset the reminder light or mes-
sage, follow the procedure
described below:
Vehicles with 7-inch multi-informa-
tion display
1 Press or of the meter
control switches on the steering
wheel and select .
2 Press or of the meter
control switches and select
“ Vehicle Settings”.
Then press and hold .
3 Press or of the meter
control switches and select
“Scheduled Maintenance”, and
then press .
4 Select “Yes” and press .
A message will be displayed when
the reset proced ure has been com-
pleted.
Vehicles with 12.3-inch multi-infor-
mation display
1 Press and hold to display the
cursor on the content display
area (center) of the multi-infor-
mation display.
2 Press or of the meter
control switches to select and
then press .
3 Press or of the meter
control switches and select .
Then press . 4
Press or of the meter
control switch es and select
“Scheduled Maintenance”. Then
press .
5 Select “Yes” and press .
A message will be d isplayed when
the reset procedure has been com-
pleted.
You can perform some mainte-
nance procedures by yourself.
Please be aware that do-it-your-
self maintenance may affect
warranty coverage.
The use of Toyota Repair Manuals
is recommended.
For details about warranty cover-
age, refer to the separate “Owner’s
Warranty Informat ion Booklet” or
“Owner’s Manual Supplement”.
Do-it-yourself mainte-
nance