2023 TOYOTA VENZA HYBRID inflation pressure
[x] Cancel search: inflation pressurePage 409 of 560
4096-3. Do-it-yourself maintenance
6
Maintenance and care
Every tire pressure warning
valve and transmitter has a
unique ID code. When replacing
a tire pressure warning valve
and transmitter, it is necessary
to register the ID code.
When registering the ID codes,
perform the following procedure.
■Registering procedure
(vehicles with 7-inch multi-
information display)
1 Park the vehicle in a safe
place, wait for approximately
20 minutes, and then start
the hybrid system.
2 Press or of the meter
control switches on the steer-
ing wheel and select .
3 Press or of the meter
control switches and select
“ Vehicle Settings”, and
then press and hold .
4 Press or of the meter
control switches and select “TPWS setting”, and then
press .
5 Press or of the meter
control switches and select
“Identify Wheel”. Then press
and hold until the tire
pressure warning light starts
slowly blinking 3 times.
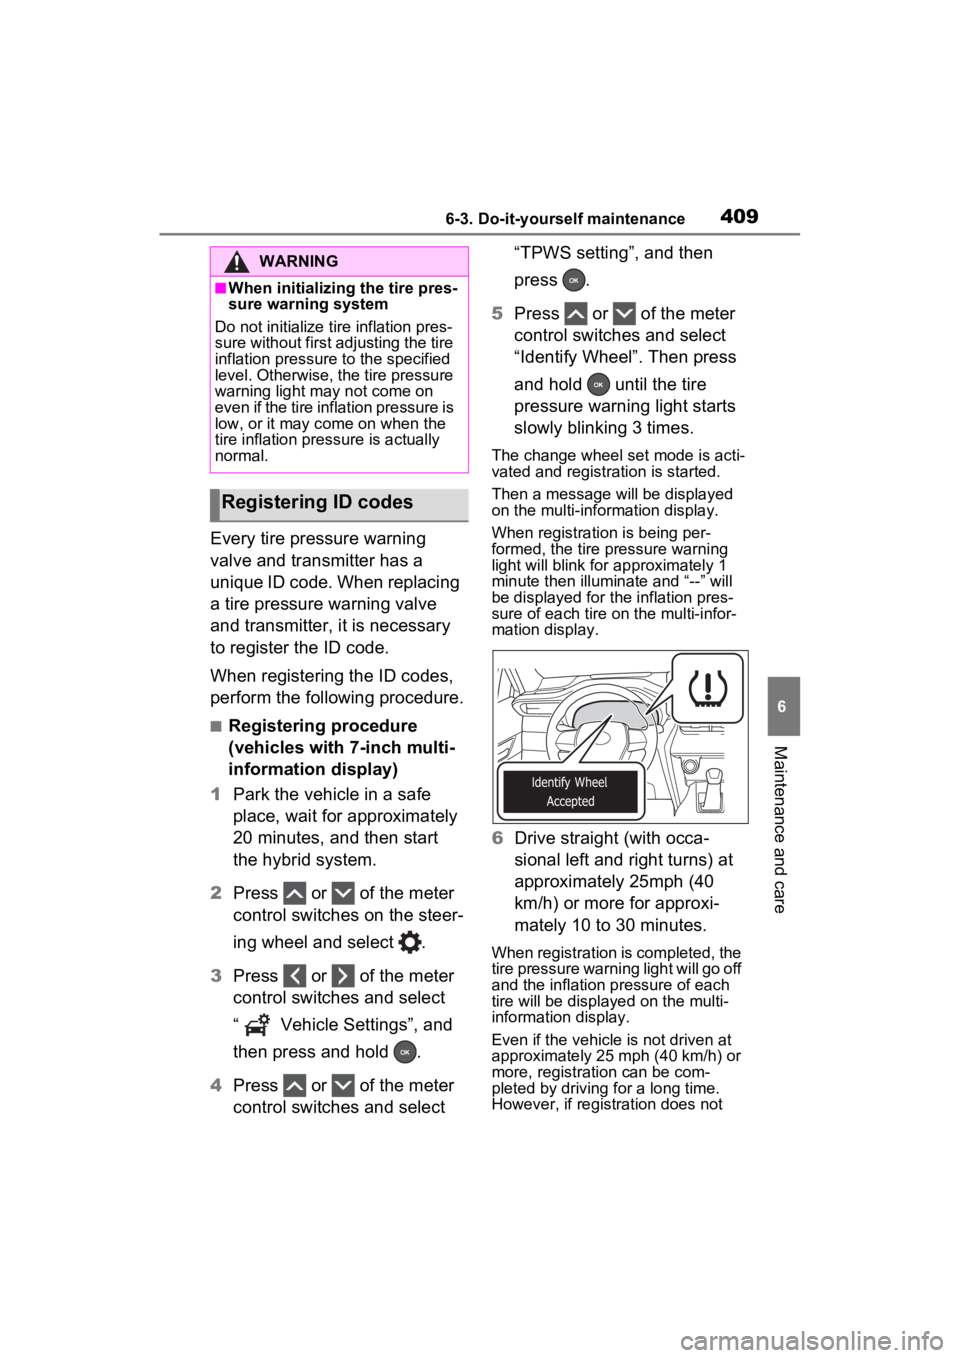
The change wheel set mode is acti-
vated and registra tion is started.
Then a message will be displayed
on the multi-information display.
When registration is being per-
formed, the tire pressure warning
light will blink for approximately 1
minute then illuminate and “--” will
be displayed for the inflation pres-
sure of each tire on the multi-infor-
mation display.
6 Drive straight (with occa-
sional left and right turns) at
approximately 25mph (40
km/h) or more for approxi-
mately 10 to 30 minutes.
When registration is completed, the
tire pressure warning light will go off
and the inflation pressure of each
tire will be displayed on the multi-
information display.
Even if the vehicle is not driven at
approximately 25 mph (40 km/h) or
more, registration can be com-
pleted by driving for a long time.
However, if registration does not
WARNING
■When initializing the tire pres-
sure warning system
Do not initialize tire inflation pres-
sure without first adjusting the tire
inflation pressure to the specified
level. Otherwise, the tire pressure
warning light may not come on
even if the tire inflation pressure is
low, or it may c ome on when the
tire inflation pressure is actually
normal.
Registering ID codes
Page 410 of 560
4106-3. Do-it-yourself maintenance
complete after driving for 1 hour or
more, perform the procedure again
from the beginning.
7Initialize the tire pressure
warning system. ( P.405)
■Registering procedure
(vehicles with 12.3-inch
multi-information display)
1 Park the vehicle in a safe
place, wait for approximately
20 minutes, and then start
the hybrid system.
2 Press and hold to display
the cursor on the content dis-
play area (center) of the
multi-information display.
3 Press or of the meter
control switches to select
and then press .
4 Press or of the meter
control switches and select
, and then press .
5 Press or of the meter
control switches and select
“TPWS”, and then press .
6 Press or of the meter
control switches and select
“Identifying Each Wheel &
Position”. Then press and
hold until the tire pressure
warning light starts slowly
blinking 3 times.
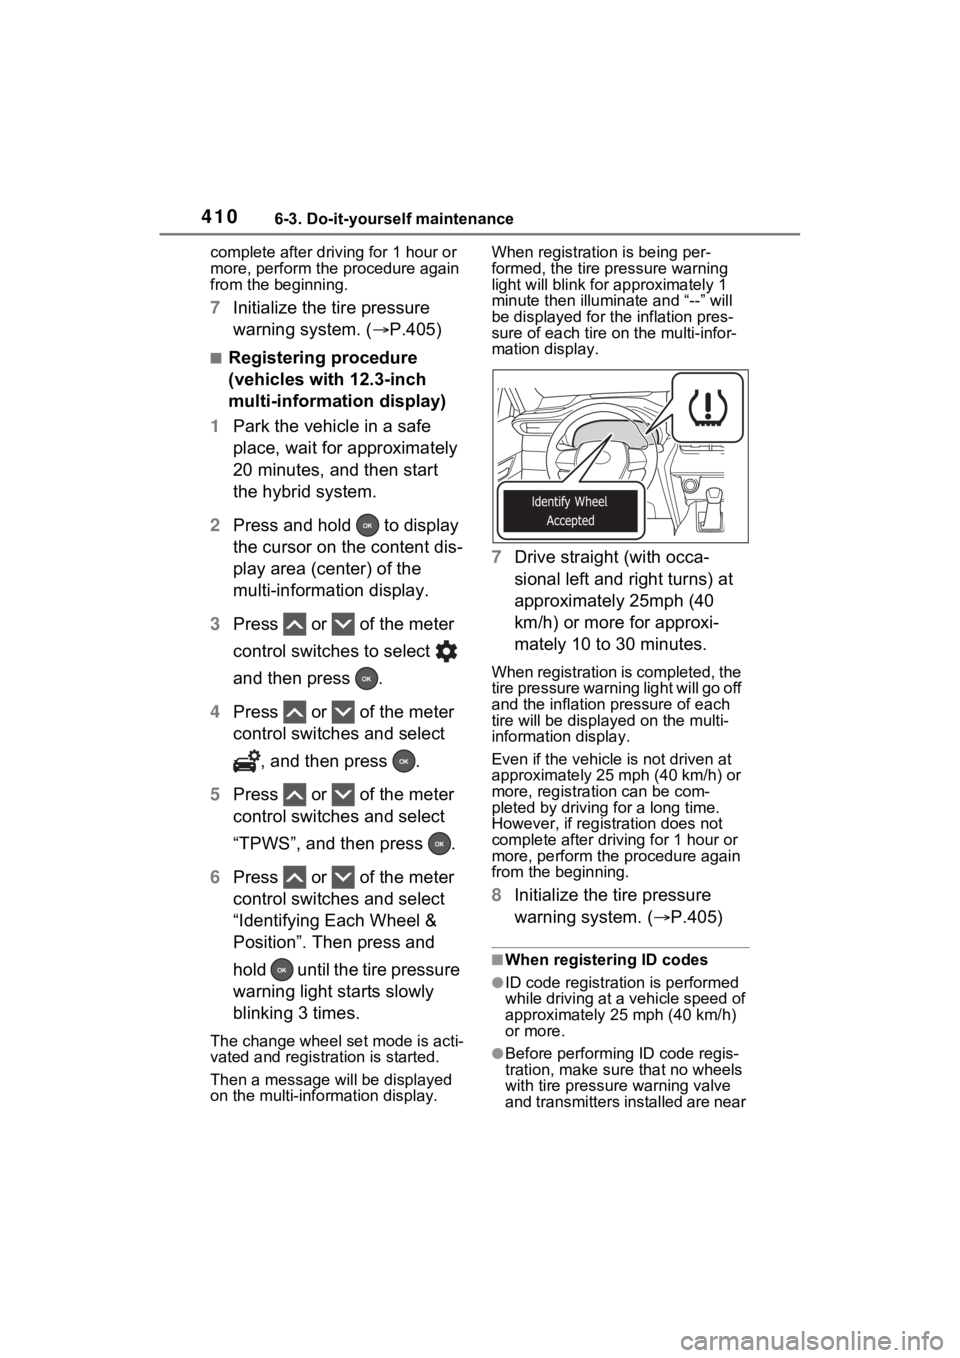
The change wheel set mode is acti-
vated and registration is started.
Then a message w ill be displayed
on the multi-info rmation display. When registration is being per-
formed, the tire pressure warning
light will blink for
approximately 1
minute then illumi nate and “--” will
be displayed for the inflation pres-
sure of each tire o n the multi-infor-
mation display.
7 Drive straight (with occa-
sional left and right turns) at
approximately 25mph (40
km/h) or more for approxi-
mately 10 to 30 minutes.
When registration is completed, the
tire pressure warning light will go off
and the inflation pressure of each
tire will be displaye d on the multi-
information display.
Even if the vehicle is not driven at
approximately 25 mph (40 km/h) or
more, registration can be com-
pleted by driving for a long time.
However, if registr ation does not
complete after driving for 1 hour or
more, perform the p rocedure again
from the beginning.
8 Initialize the tire pressure
warning system. ( P.405)
■When registering ID codes
●ID code registrati on is performed
while driving at a vehicle speed of
approximately 25 mph (40 km/h)
or more.
●Before performing ID code regis-
tration, make sure that no wheels
with tire pressure warning valve
and transmitters installed are near
Page 412 of 560
4126-3. Do-it-yourself maintenance
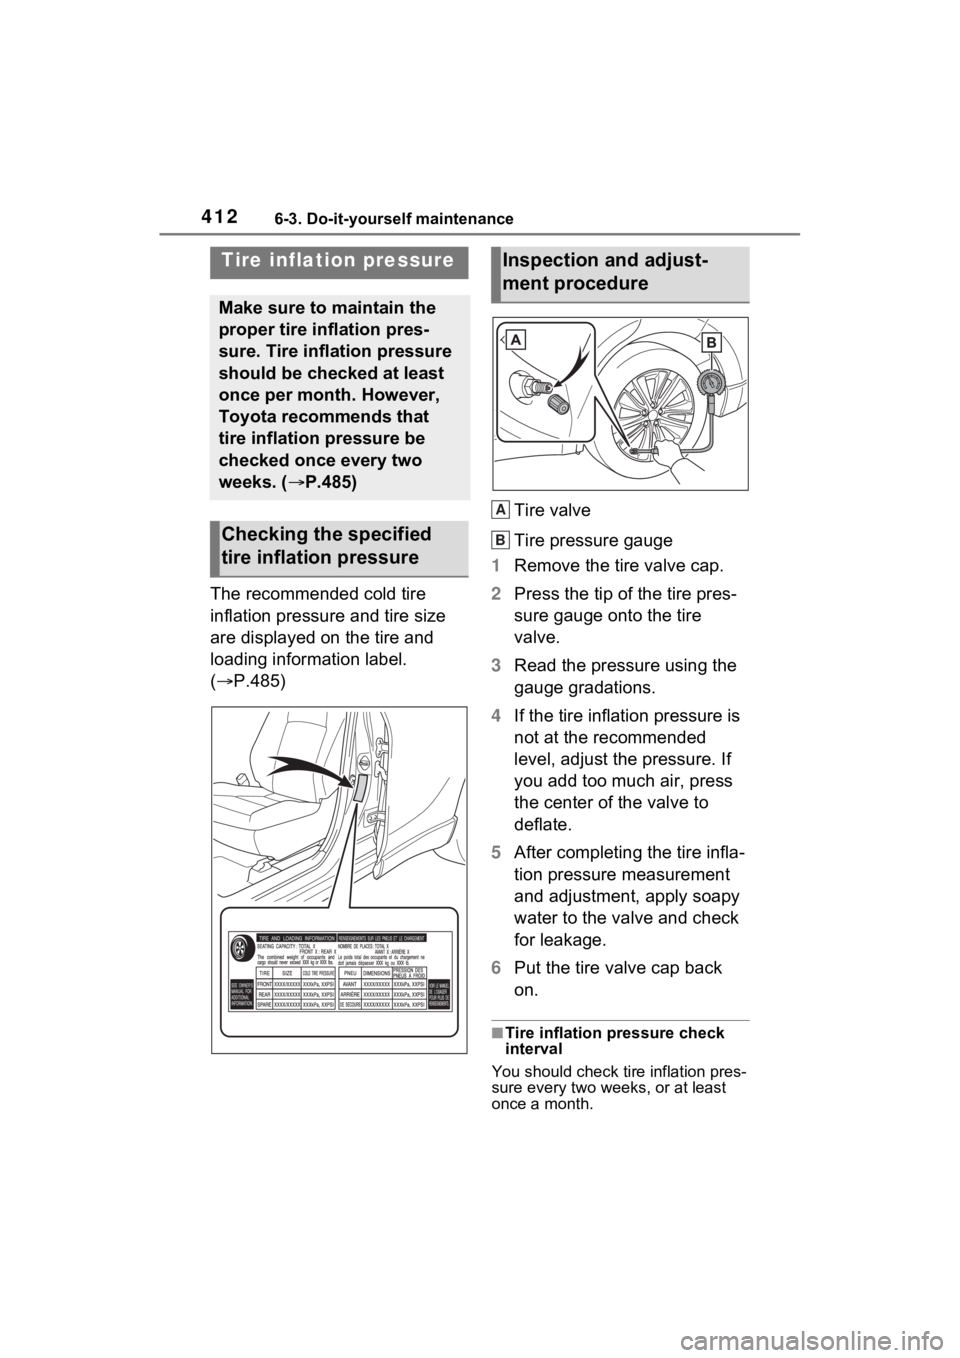
The recommended cold tire
inflation pressure and tire size
are displayed on the tire and
loading information label.
(P.485) Tire valve
Tire pressure gauge
1 Remove the tire valve cap.
2 Press the tip of the tire pres-
sure gauge onto the tire
valve.
3 Read the pressure using the
gauge gradations.
4 If the tire inflation pressure is
not at the recommended
level, adjust the pressure. If
you add too much air, press
the center of the valve to
deflate.
5 After completing the tire infla-
tion pressure measurement
and adjustment, apply soapy
water to the valve and check
for leakage.
6 Put the tire valve cap back
on.
■Tire inflation pressure check
interval
You should check tire inflation pres-
sure every two week s, or at least
once a month.
Tire inflation pressure
Make sure to maintain the
proper tire inflation pres-
sure. Tire inflation pressure
should be checked at least
once per month. However,
Toyota recommends that
tire inflation pressure be
checked once every two
weeks. ( P.485)
Checking the specified
tire inflation pressure
Inspection and adjust-
ment procedure
A
B
Page 413 of 560
4136-3. Do-it-yourself maintenance
6
Maintenance and care
Do not forget to check the spare.
■Effects of incorrect tire inflation
pressure
Driving with incorrect tire inflation
pressure may result in the following:
●Reduced fuel economy
●Reduced driving comfort and poor
handling
●Reduced tire life due to wear
●Reduced safety
●Damage to the drive train
If a tire needs frequent inflating,
have it checked b y your Toyota
dealer.
■Instructions for checking tire
inflation pressure
When checking tire inflation pres-
sure, observe the following:
●Check only when the tires are
cold.
If your vehicle has been parked
for at least 3 hours or has not
been driven for more than 1 mile
or 1.5 km, you will get an accurate
cold tire inflation pressure reading.
●Always use a tire pressure gauge.
It is difficult to judge if a tire is
properly inflated based only on its
appearance.
●It is normal for the tire inflation
pressure to be higher after driving
as heat is generated in the tire. Do
not reduce tire inflation pressure
after driving.
●Never exceed the vehicle capacity
weight. Passengers and luggage
weight should be placed so that
the vehicle is balanced.
WARNING
■Proper inflation is critical to
save tire performance
Keep your tires properly inflated.
If the tires are not properly
inflated, the following conditions
may occur which could lead to an
accident resulting in death or seri-
ous injury:
●Excessive wear
●Uneven wear
●Poor handling
●Possibility of blowouts resulting
from overheated tires
●Air leaking from between tire
and wheel
●Wheel deformation and/or tire
damage
●Greater possibi lity of tire dam-
age while driving (due to road
hazards, expansion joints,
sharp edges in the road, etc.)
NOTICE
■When inspecting and adjust-
ing tire inflation pressure
Be sure to put the tire valve caps
back on.
If a valve cap is no t installed, dirt
or moisture may get into the valve
and cause an air leak, resulting in
decreased tire inflation pressure.
Page 414 of 560
4146-3. Do-it-yourself maintenance
When replacing wheels, care
should be taken to ensure that
they are equivalent to those
removed in load capacity, diam-
eter, rim width and inset
*.
Replacement wheels are avail-
able at your Toyota dealer.
*: Conventionally referred to as off- set.
Toyota does not recommend
using the following:
Wheels of different sizes or
types
Used wheels
Bent wheels that have been
straightened
■When replacing wheels
The wheels of your vehicle are
equipped with tire pressure warning
valves and transmitters that allow
the tire pressure warning system to
provide advance warning in the
event of a loss in tire inflation pres-
sure. Whenever wheels are
replaced, tire pressure warning
valves and transmitters must be
installed. ( P.402, 415)
Wheels
If a wheel is bent, cracked or
heavily corroded, it should
be replaced. Otherwise, the
tire may separate from the
wheel or cause a loss of
handling control.
Wheel selection
WARNING
■When replacing wheels
●Do not use wheels that are a dif-
ferent size from those recom-
mended in the Owner’s Manual,
as this may result in a loss of
handling control.
●Never use an inner tube in a
leaking wheel which is designed
for a tubeless tire. Doing so may
result in an accident, causing
death or serious injury.
■When installing the wheel
nuts
Never use oil or grease on the
wheel bolts or wheel nuts. Oil and
grease may cause the wheel nuts
to be excessively tightened, lead-
ing to bolt or disc wheel damage.
In addition, the oil or grease can
cause the wheel nuts to loosen
and the wheel may fall off, caus-
ing an accident and resulting in
death or serious injury. Remove
any oil or grease from the wheel
bolts or wheel nuts.
■Use of defective wheels pro-
hibited
Do not use cracke d or deformed
wheels.
Doing so could cause the tire to
leak air during driving, possibly
causing an accident.
Page 429 of 560
4296-3. Do-it-yourself maintenance
6
Maintenance and care
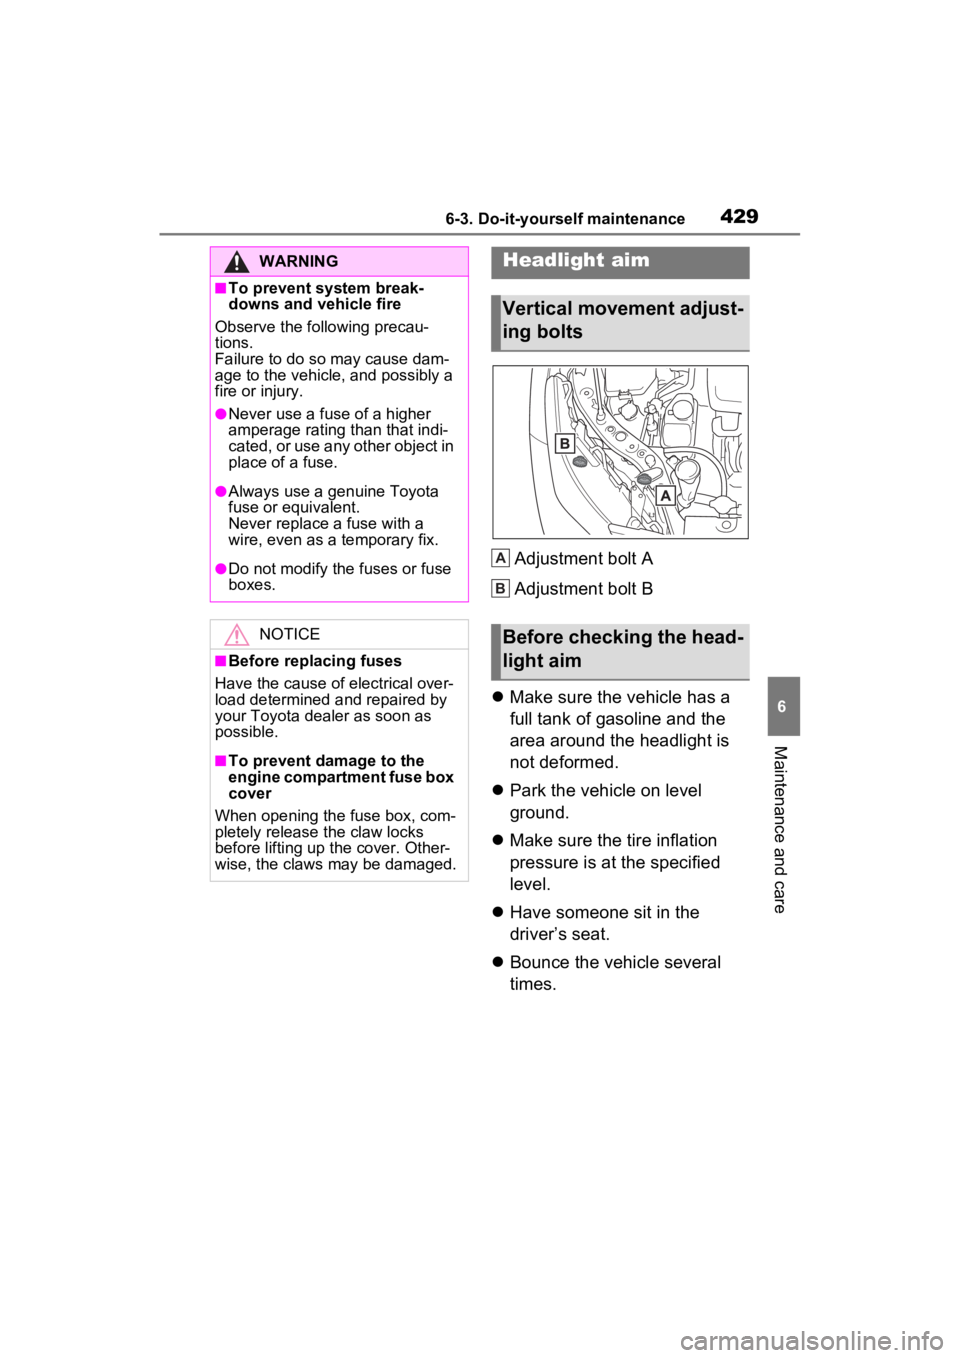
Adjustment bolt A
Adjustment bolt B
Make sure the vehicle has a
full tank of gasoline and the
area around the headlight is
not deformed.
Park the vehicle on level
ground.
Make sure the tire inflation
pressure is at the specified
level.
Have someone sit in the
driver’s seat.
Bounce the vehicle several
times.
WARNING
■To prevent system break-
downs and vehicle fire
Observe the following precau-
tions.
Failure to do so may cause dam-
age to the vehicle, and possibly a
fire or injury.
●Never use a fuse of a higher
amperage rating than that indi-
cated, or use any other object in
place of a fuse.
●Always use a genuine Toyota
fuse or equivalent.
Never replace a fuse with a
wire, even as a temporary fix.
●Do not modify the fuses or fuse
boxes.
NOTICE
■Before replacing fuses
Have the cause of electrical over-
load determined and repaired by
your Toyota dealer as soon as
possible.
■To prevent damage to the
engine compartment fuse box
cover
When opening the fuse box, com-
pletely release the claw locks
before lifting up the cover. Other-
wise, the claws may be damaged.
Headlight aim
Vertical movement adjust-
ing bolts
Before checking the head-
light aim
A
B
Page 446 of 560
4467-2. Steps to take in an emergency
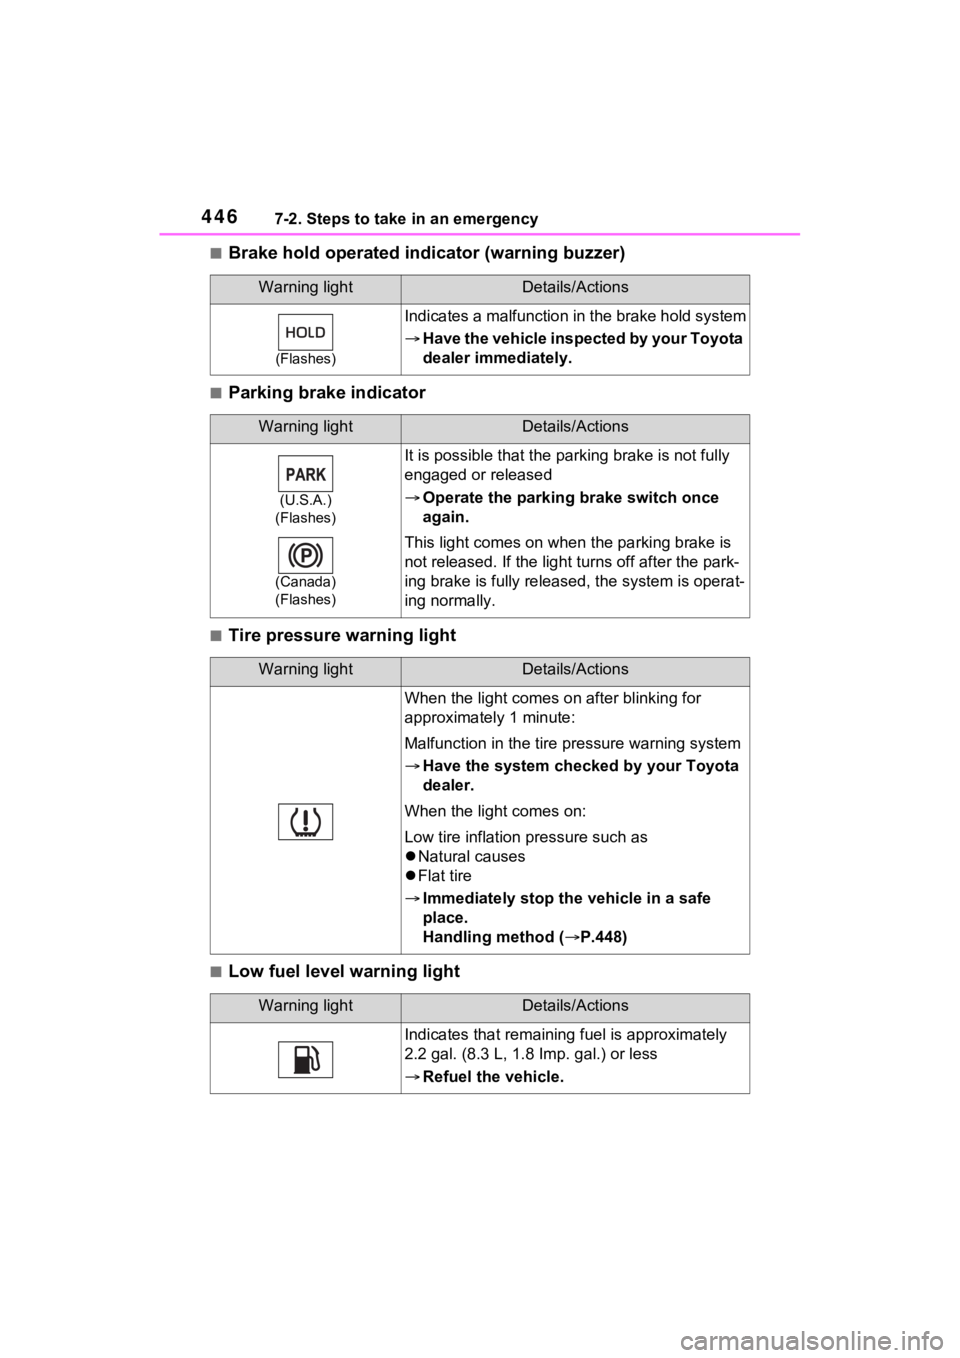
■Brake hold operated indicator (warning buzzer)
■Parking brake indicator
■Tire pressure warning light
■Low fuel level warning light
Warning lightDetails/Actions
(Flashes)
Indicates a malfunction in the brake hold system
Have the vehicle inspected by your Toyota
dealer immediately.
Warning lightDetails/Actions
(U.S.A.)
(Flashes)
(Canada)
(Flashes)
It is possible that the par king brake is not fully
engaged or released
Operate the parking brake switch once
again.
This light comes on when the parking brake is
not released. If the light t urns off after the park-
ing brake is fully released, the system is operat-
ing normally.
Warning lightDetails/Actions
When the light comes on after blinking for
approximately 1 minute:
Malfunction in the tire pressure warning system
Have the system checked by your Toyota
dealer.
When the light comes on:
Low tire inflation pressure such as
Natural causes
Flat tire
Immediately stop the vehicle in a safe
place.
Handling method ( P.448)
Warning lightDetails/Actions
Indicates that remaining fuel is approximately
2.2 gal. (8.3 L, 1.8 Imp. gal.) or less
Refuel the vehicle.
Page 448 of 560

4487-2. Steps to take in an emergency
an audio sound.
■Front passenger detection sen-
sor, seat belt reminder and
warning buzzer
●If luggage is placed on the front
passenger seat, the front passen-
ger detection sensor may cause
the warning light to flash and the
warning buzzer to sound even if a
passenger is not sitting in the
seat.
●If a cushion is placed on the seat,
the sensor may n ot detect a pas-
senger, and the warning light may
not operate properly.
■SRS warning light
This warning light system monitors
the airbag sensor assembly, front
impact sensors, side impact sensors
(front door), side impact sensors
(front), driver’s seat position sen-
sor, front passeng er occupant clas-
sification sensors, “AIR BAG ON”
indicator light, “AIR BAG OFF” indi-
cator light, front passenger’s seat
belt buckle switch, d river’s seat belt
pretensioner, front passenger’s seat
belt pretensioner and force limiter,
outboard rear seat belt pretension-
ers, airbags, interconnecting wiring
and power sources. ( P.34)
■If the malfunction indicator
lamp comes on while driving
First check the following:
●Is the fuel t ank empty?
If it is, fill the fuel tank immediately.
●Is the fuel tank cap loose?
If it is, tighten it securely.
The light will go o ff after several
driving trips.
If the light does not go off even after
several trips, contact your Toyota
dealer as soon as possible.
■Electric power steering system
warning light (warning buzzer)
When the 12-volt battery charge
becomes insufficien t or the voltage temporarily drops, the electric power
steering system warning light may
come on and the warning buzzer
may sound.
At this time, the functions of the air
conditioning, etc. may be partially
limited in order to reduce the power
consumption of the
12-volt battery.
■When the tire pressure warning
light comes on
Inspect the tires to check if a tire is
punctured.
If a tire is punctured: P.456
If none of the tires are punctured:
Turn the power switch to OFF then
turn it to ON.
Check if the tire pressure warning
light comes on or blinks.
If the tire pressur e warning light
blinks for approximately 1 minute
then stays on
There may be a malfunction in the
tire pressure warning system. Have
the vehicle inspected by your
Toyota dealer immediately.
If the tire pressur e warning light
comes on
1 After the temperature of the tires
has lowered sufficiently, check
the inflation pressure of each tire
and adjust them to the specified
level.
2 If the warning light does not turn
off even after several minutes
have elapsed, check that the
inflation pressure of each tire is
at the specified level and perform
initialization. ( P.406)
■The tire pressure warning light
may come on due to natural
causes
The tire pressure warning light may
come on due to natural causes such
as natural air leaks and tire inflation
pressure changes caused by tem-
perature. In this ca se, adjusting the
tire inflation pressure will turn off the
warning ligh t (after a few minutes).