2023 TOYOTA SUPRA display
[x] Cancel search: displayPage 85 of 372

853-1. CONTROLS
3
CONTROLS
the following circumstances:
• The battery of the vehicle key is discharged. For replacing
the battery, refer to page 84.
• Interference of the radio con- nection from transmission
towers or other equipment
with high transmitting power.
• Shielding of the remote con- trol due to metal objects.
Do not transport the remote control
together with metal objects.
• Interference of the radio con-nection from mobile phones
or other electronic devices in
direct proximity to the remote
control.
Do not transport the remote control
together with elec tronic devices.
• Interference of radio transmis-
sion by a charging process of
mobile devices, for instance
charging of a mobile phone.
• The remote control is in direct proximity of the wireless
charging tray.
Place the remote control down at a
different location.
In the case of interference, the
vehicle can be unlocked and
locked from the outside with the
integrated key, refer to page 86. It is not possible to switch on the
drive-ready state if the remote
control has not been detected.
Proceed as follows in this case:
1
Hold the remote control with
its back against the marked
area on the steering column.
Pay attention to the display in
the instrument cluster.
2 If the remote control is
detected: Switch on
drive-ready state within 10
seconds.
If the remote control is not
detected, slightly change the
position of the remote control
and repeat the procedure.
What precautions can be taken
to be able to open a vehicle with
an accidentally locked in remote
control?
• The options provided by the Switching the drive-ready
state on via emergency
detection of the remote con-
trol
Frequently asked ques-
tions
Page 102 of 372

1023-1. CONTROLS
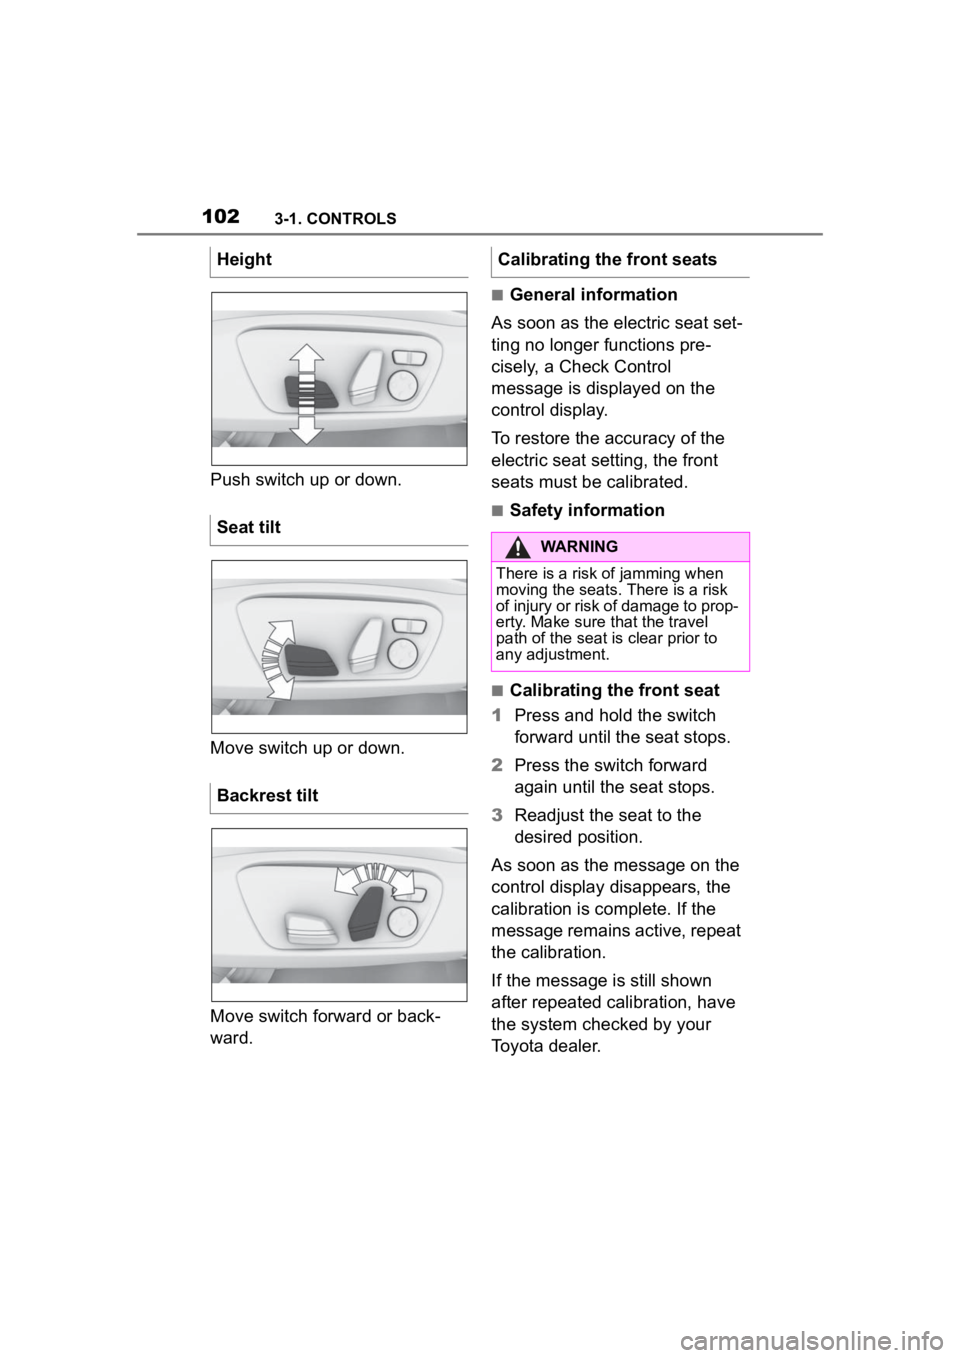
Push switch up or down.
Move switch up or down.
Move switch forward or back-
ward.
■General information
As soon as the electric seat set-
ting no longer functions pre-
cisely, a Check Control
message is displayed on the
control display.
To restore the accuracy of the
electric seat setting, the front
seats must be calibrated.
■Safety information
■Calibrating the front seat
1 Press and hold the switch
forward until the seat stops.
2 Press the switch forward
again until the seat stops.
3 Readjust the seat to the
desired position.
As soon as the message on the
control display disappears, the
calibration is complete. If the
message remains active, repeat
the calibration.
If the message is still shown
after repeated calibration, have
the system checked by your
Toyota dealer.
Height
Seat tilt
Backrest tilt
Calibrating the front seats
WARNING
There is a risk of jamming when
moving the seats.
There is a risk
of injury or risk of damage to prop-
erty. Make sure t hat the travel
path of the seat is clear prior to
any adjustment.
Page 107 of 372

1073-1. CONTROLS
3
CONTROLS
1Guide the safety belt slowly
over shoulder and hip to put it
on.
2 Insert the tongue plate into
the safety belt buckle. The
safety belt buckle must
engage audibly. 1
Hold the safety belt firmly.
2 Press the red button in the
safety belt buckle.
3 Guide the safety belt back
into its roll-up mechanism.
The safety belt warning is
issued when the driver's safety
belt is not buckled.
The safety belt warning is also
active when the front passenger
seat belt is not buckled or
objects are on the front passen-
ger seat.
The safety belt warning is also
activated when a passenger
unbuckles a safety belt during
the trip.
WARNING
Correct use of the seat belts when
pregnant:
Pregnant women must wear a
seat belt. Consult your physician
for advice on correct way to wear
a seat belt. Position the lap belt as
low as possible over the hips and
the shoulder belt completely over
the shoulder, passing the center
of the chest, so tha t the seat belt
does not apply any pressure to
the abdomen.
Buckling the safety belt
Unbuckling the safety belt
Safety belt warning for
driver's seat and front pas-
senger seat
General information
Display in the instrument
cluster
The indicator light lights up
and a signal sounds.
Make sure that the safety
belts are positioned cor-
rectly. The safety belt
warning can also be acti-
vated if objects are placed
on the front passenger
seat.
Page 120 of 372

1203-1. CONTROLS
Manual transmission
The engine is switched off auto-
matically during a stop under the
following conditions:
Neutral is engaged and the
clutch pedal is snot pressed.
The driver's safety belt is
buckled or the driver's door is
closed.
Automatic transmission
The engine is switched off auto-
matically during a stop under the
following conditions:
The selector lever is in selec-
tor lever position D.
The brake pedal remains
pressed while the vehicle is
stationary.
The driver's safety belt is
buckled or the driver's door is
closed.
If the engine was not switched
off automatically when the vehi-
cle stopped, the engine can be
switched off manually:
Press the brake pedal force-
fully again from the current
pedal position.
Engage selector lever posi-
tion P. If all functional preconditions are
fulfilled, the engine switches off.
The air flow from the air condi-
tioner is reduced when the
engine is switched off.
■General information
The engine is not switched off
automatically in the following sit-
uations:
In case of a steep downhill
grade.
Brake not engaged strongly
enough.
The external temperature is
high and automatic air condi-
tioning is running.
The car's interior has not yet
been heated or cooled to the
Engine stop
Functional requirements
Manual engine stop
Air conditioner when the
engine is switched off
Displays in the instrument
cluster
The display in the
instrument cluster indi-
cates that the Auto
Start/Stop function is
ready for automatically
starting the engine.
The display indicates
that the conditions for
an automatic engine
stop have not been
met.
Functional limitations
Page 123 of 372

1233-1. CONTROLS
3
CONTROLS
switch.
■General information
During an automatic engine
stop, the vehicle can be
switched off permanently, for
instance when leaving it.
■Manual transmission
1 Press the Start/Stop button.
Drive-ready state is switched
off.
Standby state is switched on.
2 Shift into first gear or reverse.
3 Set the parking brake.
■Automatic transmission
1 Press the Start/Stop button.
Drive-ready state is switched
off.
Standby state is switched on.
Selector lever position P is
engaged automatically.
2 Set the parking brake.
In certain situations, the Auto
Start/Stop function is deacti-
vated automatically for safety
reasons, for instance if no driver
is detected. The Auto Start/Stop function no
longer switches off the engine
automatically. A vehicle mes-
sage is displayed. It is possible
to continue driving. Have the
system checked by your Toyota
dealer.
The parking brake is used to
prevent the vehicle from rolling
when it is parked.
Switching off the vehicle
during an automatic engine
stop
Automatic deactivation
General information
Malfunction
Parking brake
Concept
Safety information
WARNING
An unsecured vehicle can begin
to move and possibly roll away.
There is a risk of an accident.
Before exiting, secure the vehicle
against rolling.
In order to ensure that the vehicle
is secured against rolling away,
follow the following:
●Set the parking brake.
●On uphill grades or on a down-
hill slope, turn the front wheels
in the direction of the curb.
●On uphill grades or on a down-
hill slope, also secure the vehi-
cle, for instanc e with a wheel
chock.
Page 124 of 372

1243-1. CONTROLS
■General information
To use as emergency brake
while driving:
Pull the switch and hold it. The
vehicle brakes hard while the
switch is being pulled.
A vehicle message is displayed.
If the vehicle is slowed down to
a speed of approx. 2 mph/3
km/h the parking brake is set.
1 Switch on drive-ready state.
2 Manual transmission:
press the switch while the
brake pedal is pressed.
Automatic transmission:
WARNING
Unattended children or animals in
the vehicle can cause the vehicle
to move and endanger them-
selves and traffic, for instance due
to the following actions:
●Pressing the Start/Stop button.
●Releasing the parking brake.
●Opening and closing the doors
or windows.
●Engaging selector lever position
N.
●Using vehicle equipment.
There is a risk of accidents or inju-
ries. Do not leave children or ani-
mals unattended in the vehicle.
Take the remote control with you
when exiting and lock the vehicle.
Overview
Parking brake
Setting
With a stationary vehicle
Pull the switch.
The LED lights up.
The indicator light in the
instrument cluster illumi-
nates red. The parking
brake is set.
While driving
The indicator light in the
instrument cluster illumi-
nates red, a signal
sounds, and the brake
lights illuminate.
Releasing
Releasing manually
Page 133 of 372

1333-1. CONTROLS
3
CONTROLS
In some situations, the vehicle is
to roll without its own power for
a short distance, for instance in
a vehicle wash, or be pushed.
1Switch on drive-ready state
while pressing on the brake
pedal.
2 If necessary, release the
parking brake.
3 Depress the brake pedal.
4 Touch the selector lever lock
and engage selector lever
position N.
5 Switch off drive-ready state.
In this way, standby state remains
switched on, and a vehicle mes-
sage is displayed.
The vehicle can roll.
Irrespective of standby state, the
selector lever position P is auto-
matically engaged after approx.
35 minutes.
If there is a malfunction, you may not be able to change the
selector lever position.
Electronically unlock the trans-
mission lock, if needed, refer to
page 135.
Kickdown is used to achieve
maximum driving performance.
Step on the accelerator pedal
beyond the resistance point at
the full throttle position.
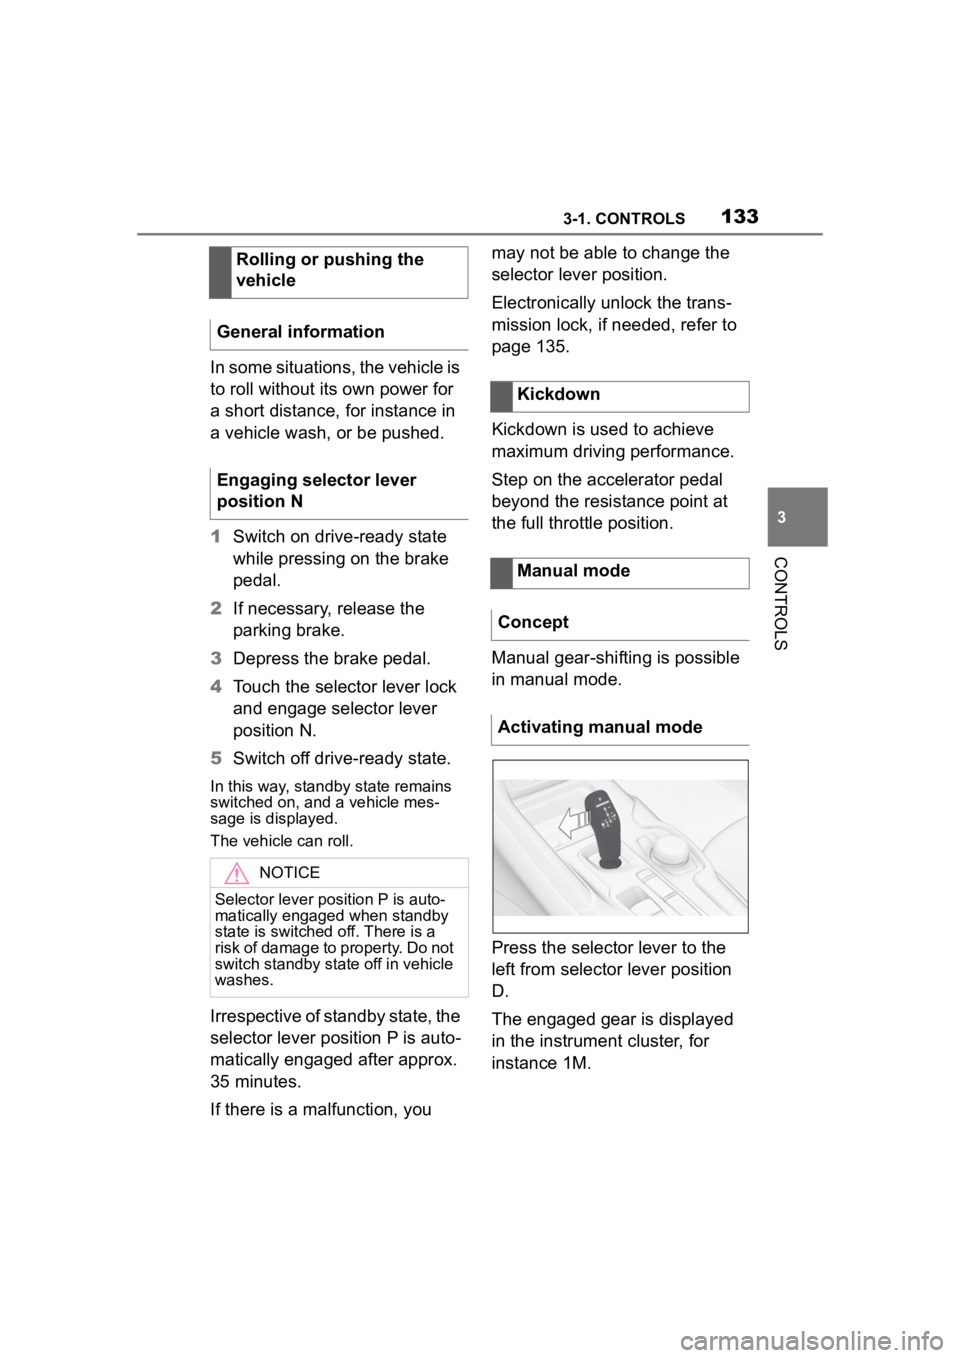
Manual gear-shifting is possible
in manual mode.
Press the selector lever to the
left from selector lever position
D.
The engaged gear is displayed
in the instrument cluster, for
instance 1M.
Rolling or pushing the
vehicle
General information
Engaging selector lever
position N
NOTICE
Selector lever position P is auto-
matically engaged when standby
state is switched off. There is a
risk of damage to property. Do not
switch standby state off in vehicle
washes.
Kickdown
Manual mode
Concept
Activating manual mode
Page 134 of 372

1343-1. CONTROLS
To shift down: press the
selector lever forward.
To shift up: pull the selector
lever rearwards.
Push the selector lever to the
right.
D is displayed in the instrument
cluster.
The shift paddles on the steer-
ing wheel allow you to shift
gears quickly while keeping both
hands on the steering wheel.
■Shifting
The vehicle only shifts at suit-
able engine and road speeds.
■Short-term manual mode
In selector lever position D,
actuating a shift paddle switches
into manual mode temporarily.
After conservative driving in
manual mode without accelera-
tion or shifting via the shift pad-
dles for a certain amount of
time, the transmission switches
back to automatic mode. It is possible to switch into auto-
matic mode as follows:
Pull and hold right shift pad-
dle.
In addition to the briefly pulled
right shift paddle, briefly pull
the left shift paddle.
■Continuous manual mode
In selector lever position M,
actuating a shift paddle switches
into manual mode permanently.
Shifting up: pull the right shift
paddle.
Shifting down: pull left shift
paddle.
Downshifting to the lowest
possible gear: keep the left
shift paddle pulled.
The selected gear is briefly dis-
played in the instrument cluster,
followed by the current gear.
Shifting
Ending the manual mode
Shift paddles
Concept
General information
Shifting