Page 22 of 372
222-1. QUICK REFERENCE
Close the trunk lid manually.
1Wipers
2 Instrument cluster
3 Turn signal indicator, high
beams
4 Light switch element
The indicator/warning lights can light up in a variety of combina-
tions and colors.
Several of the lights are
checked for proper functioning
and light up temporarily when
the engine is started or standby
state is switched on.
1
Exterior mirrors
2 Power windows
3 Central locking system
4 Unlocking the trunk lid
1 Selector lever
2 Controller
3 Auto Start/Stop cancel button
4 Sport mode button
5 Park Assistant button
Trunk lid
Opening
Press and hold the but-
ton on the remote con-
trol for approximately 1
second. Depending on
the setting, the doors
may also unlock, refer
to page 81.
Closing
Displays and control ele-
ments
In the vicinity of the steer-
ing wheel
Indicator/warning lights
1
2
3
4
�'�U�L�Y�H�U�
�V���G�R�R�U
�6�Z�L�W�F�K���F�R�Q�V�R�O�H
321
4
Page 30 of 372
302-1. QUICK REFERENCE
Push the lever forward or pull it
backward.
• High beams on, arrow 1. The
high beams light up when the
low beams are switched on.
• High beams off/headlight flasher, arrow 2 .
1 Right turn
2 Lane change to the right
(movethe lever partway and
release it)
The right hand signals will flash 3
times.
3Lane change to the left
(movethe lever partway and
release it)
The left hand signals will flash 3
times.
4Left turn
The wipers can be operated in
the standby state.
High beams, headlight
flasher, turn signal
High beams, headlight
flasher
Turn signal
2 1
3 4
�/�L�J�K�W�V���D�Q�G���O�L�J�K�W�L�Q�J
�/�L�J�K�W���I�X�Q�F�W�L�R�Q�V
SymbolFunction
Lights off.
Daytime running lights.
Parking lights.
Automatic headlight control.
Low beams.
Instrument lighting.
Right roadside parking light.
Left roadside parking light.
Washer/wiper system
Page 31 of 372
312-1. QUICK REFERENCE
2
QUICK REFERENCE
■Switching on
Press the lever up until the
desired position is reached.
• Resting position of the wipers: position 0.
• Rain sensor: position 1.
• Normal wiper speed: position 2.
• Fast wiper speed: position 3.
■Brief wipe and switching off
Press the lever down.
• Switching off: press the lever down until it reaches its stan-
dard position (position 0).
• Brief wipe: press the lever down from the standard posi-
tion (position 0).
■Activating/deactivating
To activate: press the lever up
once from its standard position,
arrow 1.
To deactivate: press the lever
back into the standard position.
■Adjusting the sensitivity
Turn the thumbwheel on the
wiper lever.
Switching the wipers on/off
and brief wipe
Rain sensor
Cleaning the windshield
Page 126 of 372

1263-1. CONTROLS
2"Vehicle settings"
3 "Exterior lighting"
4 "One-touch turn signal"
5 Select the desired setting.
Press the lever to the resistance
point and hold it there for as
long as you want the turn signal
to flash.
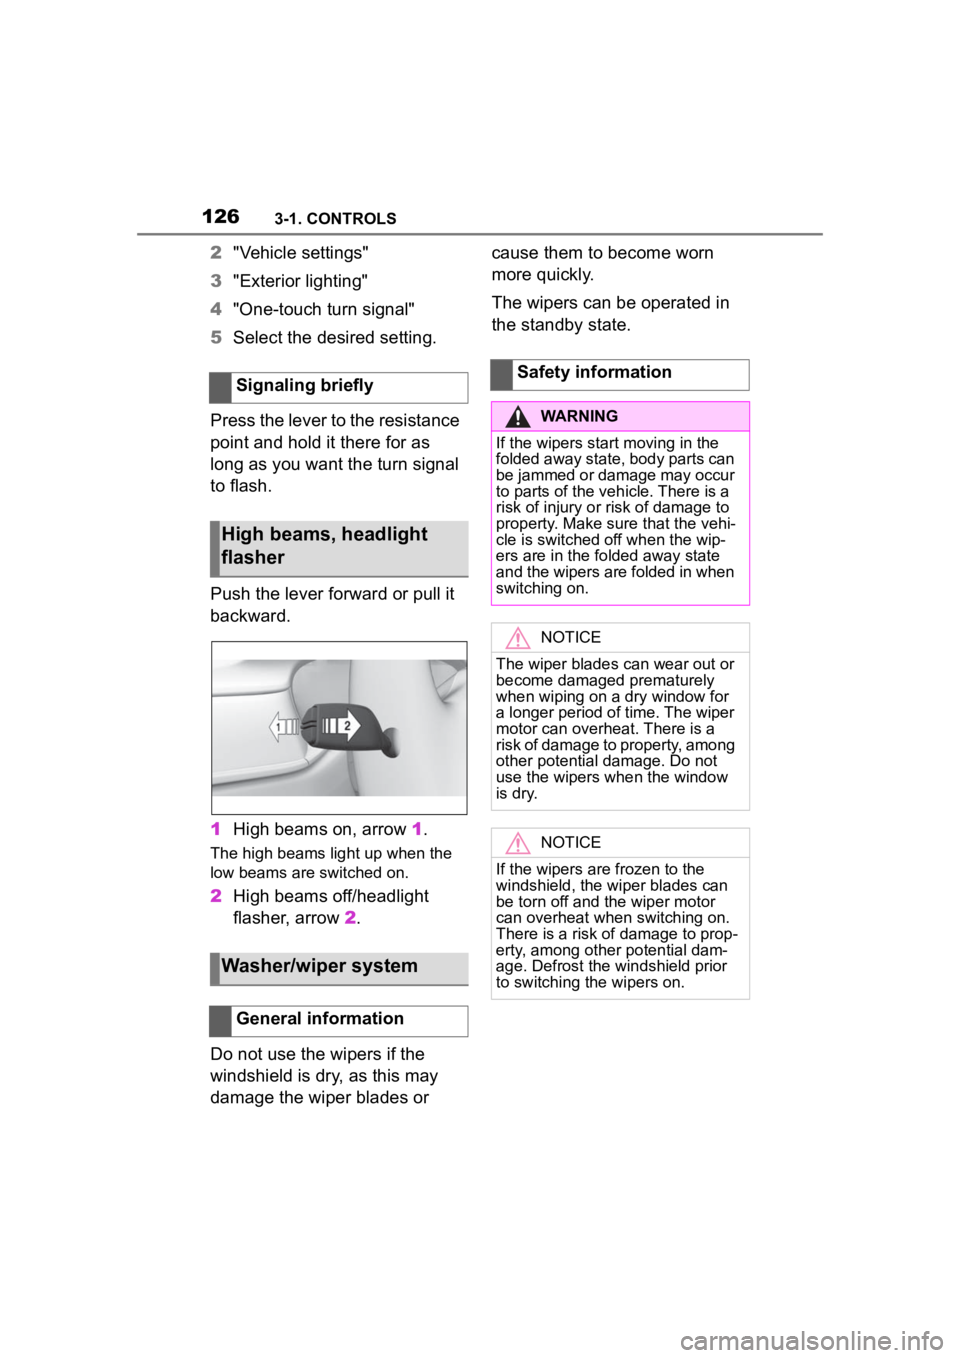
Push the lever forward or pull it
backward.
1 High beams on, arrow 1.
The high beams light up when the
low beams are switched on.
2High beams off/headlight
flasher, arrow 2.
Do not use the wipers if the
windshield is dry, as this may
damage the wiper blades or cause them to become worn
more quickly.
The wipers can be operated in
the standby state.
Signaling briefly
High beams, headlight
flasher
Washer/wiper system
General information
Safety information
WARNING
If the wipers start moving in the
folded away state, body parts can
be jammed or damage may occur
to parts of the veh icle. There is a
risk of injury or risk of damage to
property. Make sure that the vehi-
cle is switched off when the wip-
ers are in the folded away state
and the wipers are folded in when
switching on.
NOTICE
The wiper blades can wear out or
become damaged prematurely
when wiping on a dry window for
a longer period of time. The wiper
motor can overheat. There is a
risk of damage to property, among
other potential damage. Do not
use the wipers when the window
is dry.
NOTICE
If the wipers are frozen to the
windshield, the wiper blades can
be torn off and th e wiper motor
can overheat whe n switching on.
There is a risk of damage to prop-
erty, among other potential dam-
age. Defrost the windshield prior
to switching the wipers on.
Page 127 of 372

1273-1. CONTROLS
3
CONTROLS
Press the lever up until the
desired position is reached.
Resting position of the wipers,
position 0 .
Rain sensor, position 1.
Normal wiper speed, position
2.
Fast wiper speed, position 3.
When travel is interrupted with
the wiper system switched on:
when travel continues, the wip-
ers resume at their previous
speed.
Press the lever down.
Turn off: press the lever down until it reaches the 0 position.
Flick wipe: press the lever
down from the 0 position.
The lever automatically returns to
its 0 position when released.
The rain sensor automatically
controls the time between wipes
depending on the intensity of the
rainfall.
The sensor is located on the
windshield, directly in front of
the interior mirror.
Turn on window wiper sys-
tem
Turn off the window wiper
system and flick wipe
Rain sensor
Concept
General information
Safety information
NOTICE
If the rain sensor is activated, the
wipers can accidentally start mov-
ing in vehicle washes. There is a
risk of damage to property. Deac-
tivate the rain sensor in vehicle
washes.
Page 128 of 372

1283-1. CONTROLS
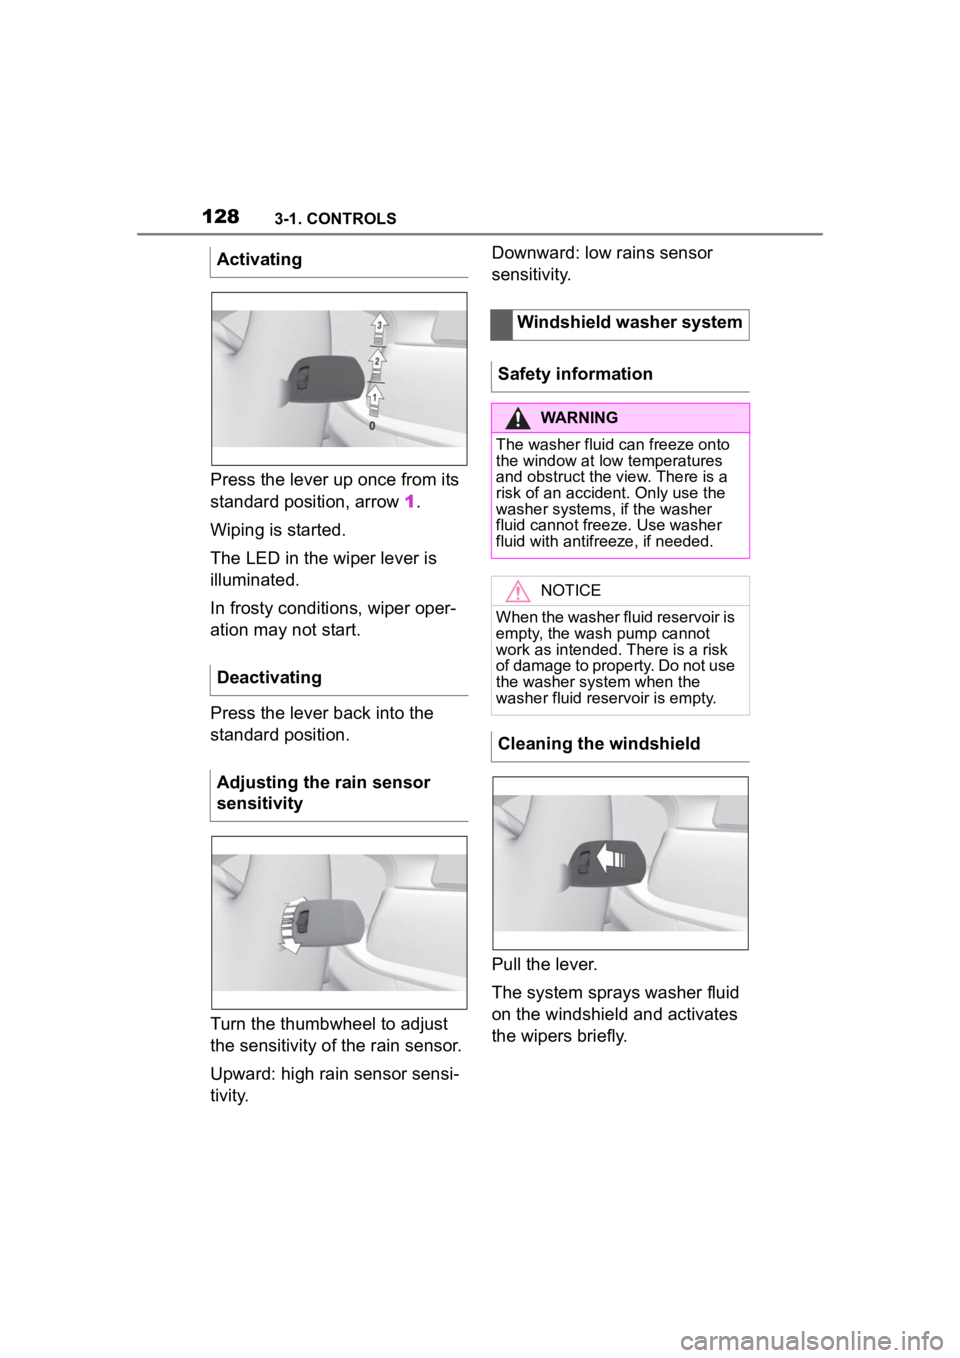
Press the lever up once from its
standard position, arrow 1.
Wiping is started.
The LED in the wiper lever is
illuminated.
In frosty conditions, wiper oper-
ation may not start.
Press the lever back into the
standard position.
Turn the thumbwheel to adjust
the sensitivity of the rain sensor.
Upward: high rain sensor sensi-
tivity. Downward: low rains sensor
sensitivity.
Pull the lever.
The system sprays washer fluid
on the windshield and activates
the wipers briefly.
Activating
Deactivating
Adjusting the rain sensor
sensitivity
Windshield washer system
Safety information
WARNING
The washer fluid can freeze onto
the window at low temperatures
and obstruct the view. There is a
risk of an accident. Only use the
washer systems, if the washer
fluid cannot fr eeze. Use washer
fluid with antifreeze, if needed.
NOTICE
When the washer fluid reservoir is
empty, the wash pump cannot
work as intended. There is a risk
of damage to property. Do not use
the washer system when the
washer fluid reservoir is empty.
Cleaning the windshield
Page 129 of 372

1293-1. CONTROLS
3
CONTROLS
The windshield washer nozzles
are automatically heated while
standby state is switched on.
In the fold-out position, the wip-
ers can be folded out from the
windshield, which is important,
for instance, when changing the
wiper blades or for folding away
under frosty conditions.1
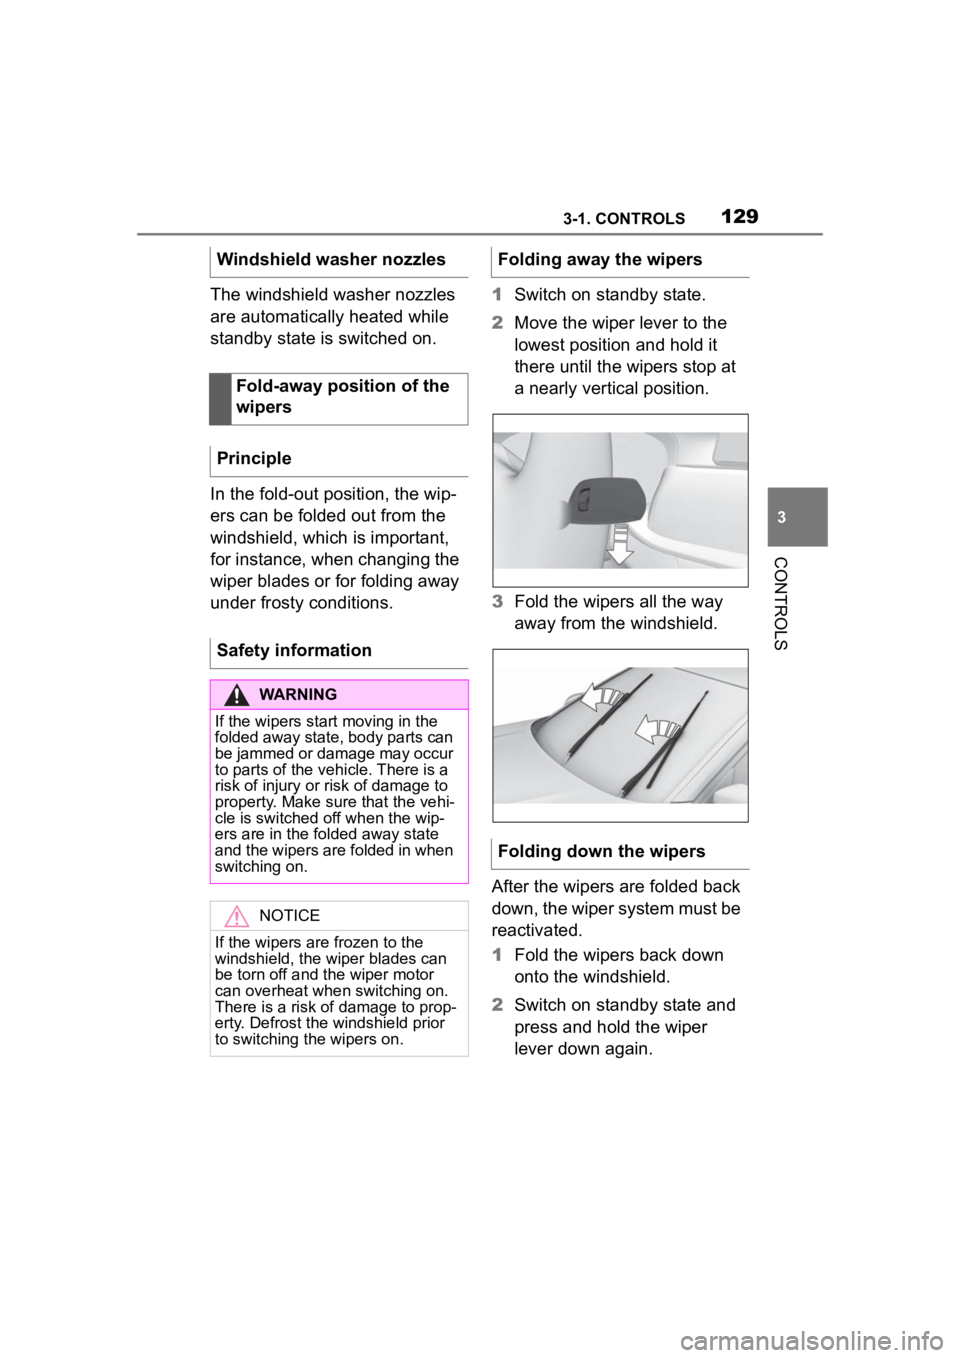
Switch on standby state.
2 Move the wiper lever to the
lowest position and hold it
there until the wipers stop at
a nearly vertical position.
3 Fold the wipers all the way
away from the windshield.
After the wipers are folded back
down, the wiper system must be
reactivated.
1 Fold the wipers back down
onto the windshield.
2 Switch on standby state and
press and hold the wiper
lever down again.
Windshield washer nozzles
Fold-away position of the
wipers
Principle
Safety information
WARNING
If the wipers start moving in the
folded away state, body parts can
be jammed or damage may occur
to parts of the vehicle. There is a
risk of injury or risk of damage to
property. Make sure that the vehi-
cle is switched off when the wip-
ers are in the folded away state
and the wipers are folded in when
switching on.
NOTICE
If the wipers are frozen to the
windshield, the wiper blades can
be torn off and the wiper motor
can overheat when switching on.
There is a risk of damage to prop-
erty. Defrost the windshield prior
to switching the wipers on.
Folding away the wipers
Folding down the wipers
Page 130 of 372

1303-1. CONTROLS
3Wipers return to their resting
position and are ready again
for operation.
1–6: forward gears.
R: reverse gear.
Depending on the motorization,
the RPM during a shifting opera-
tion is adjusted automatically as
required for harmonious gear
changing.
Select only when the vehicle is
stationary.
In some situations, the vehicle is
to roll without its own power, for
instance in a car wash, or be
pushed.
1 Turn on standby state.
2 Press on the clutch pedal
and shift out of a forward
gear or reverse.
3 Release the parking brake.
Manual transmission
Safety information
WARNING
An unsecured vehicle can begin
to move and possibly roll away.
There is a risk of an accident.
Before exiting, secure the vehicle
against rolling.
In order to ensure that the vehicle
is secured against rolling away,
follow the following:
●Set the parking brake.
●On uphill grades or on a down-
hill slope, turn the front wheels
in the direction of the curb.
●On uphill grades or on a down-
hill slope, also secure the vehi-
cle, for instance with a wheel
chock.
NOTICE
When shifting to a lower gear,
excessive RPM can damage the
engine. There is a risk of damage
to property, among other poten-
tial damage. When shifting into
5th or 6th gear, press the gearshift
lever to the right.
Shift pattern
General information
Reverse gear
Rolling or pushing the vehi-
cle