2023 TOYOTA RAV4 HYBRID mirror
[x] Cancel search: mirrorPage 183 of 586
1813-4. Adjusting the steering wheel and mirrors
3
Before driving
■When using the outside rear
view mirrors in a cold weather
When it is cold and the outside rear
view mirrors are frozen, it may not
be possible to fold /extend them or
adjust the mirror surface. Remove
the ice, snow, etc . covering the out-
side rear view mirrors.
■Defogging the mirrors (if
equipped)
The outside rear v iew mirrors can
be cleared using the mirror defog-
gers. Turn on the rear window
defogger to turn on the outside rear
view mirror defoggers.
( P.344)
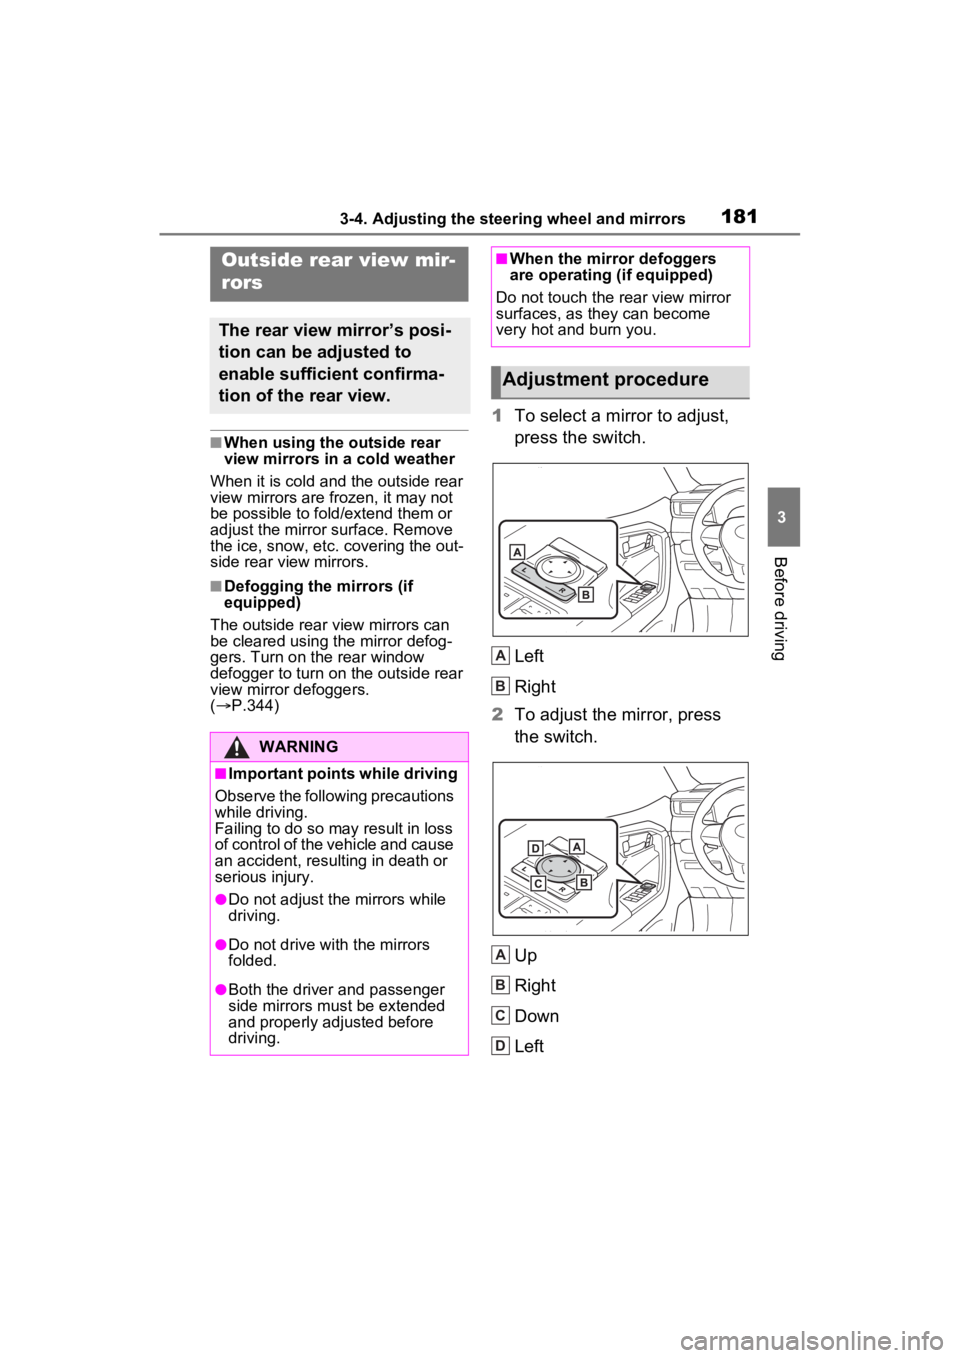
1 To select a mirror to adjust,
press the switch.
Left
Right
2 To adjust the mirror, press
the switch.
Up
Right
Down
Left
Outside rear view mir-
rors
The rear view mirror’s posi-
tion can be adjusted to
enable sufficient confirma-
tion of the rear view.
WARNING
■Important points while driving
Observe the following precautions
while driving.
Failing to do so may result in loss
of control of the vehicle and cause
an accident, resul ting in death or
serious injury.
●Do not adjust the mirrors while
driving.
●Do not drive with the mirrors
folded.
●Both the driver and passenger
side mirrors must be extended
and properly adjusted before
driving.
■When the mirror defoggers
are operating (if equipped)
Do not touch the rear view mirror
surfaces, as they can become
very hot and burn you.
Adjustment procedure
A
B
A
B
C
D
Page 184 of 586
1823-4. Adjusting the steering wheel and mirrors
■Mirror angle can be adjusted
when
The power switch i s in ACC or ON.
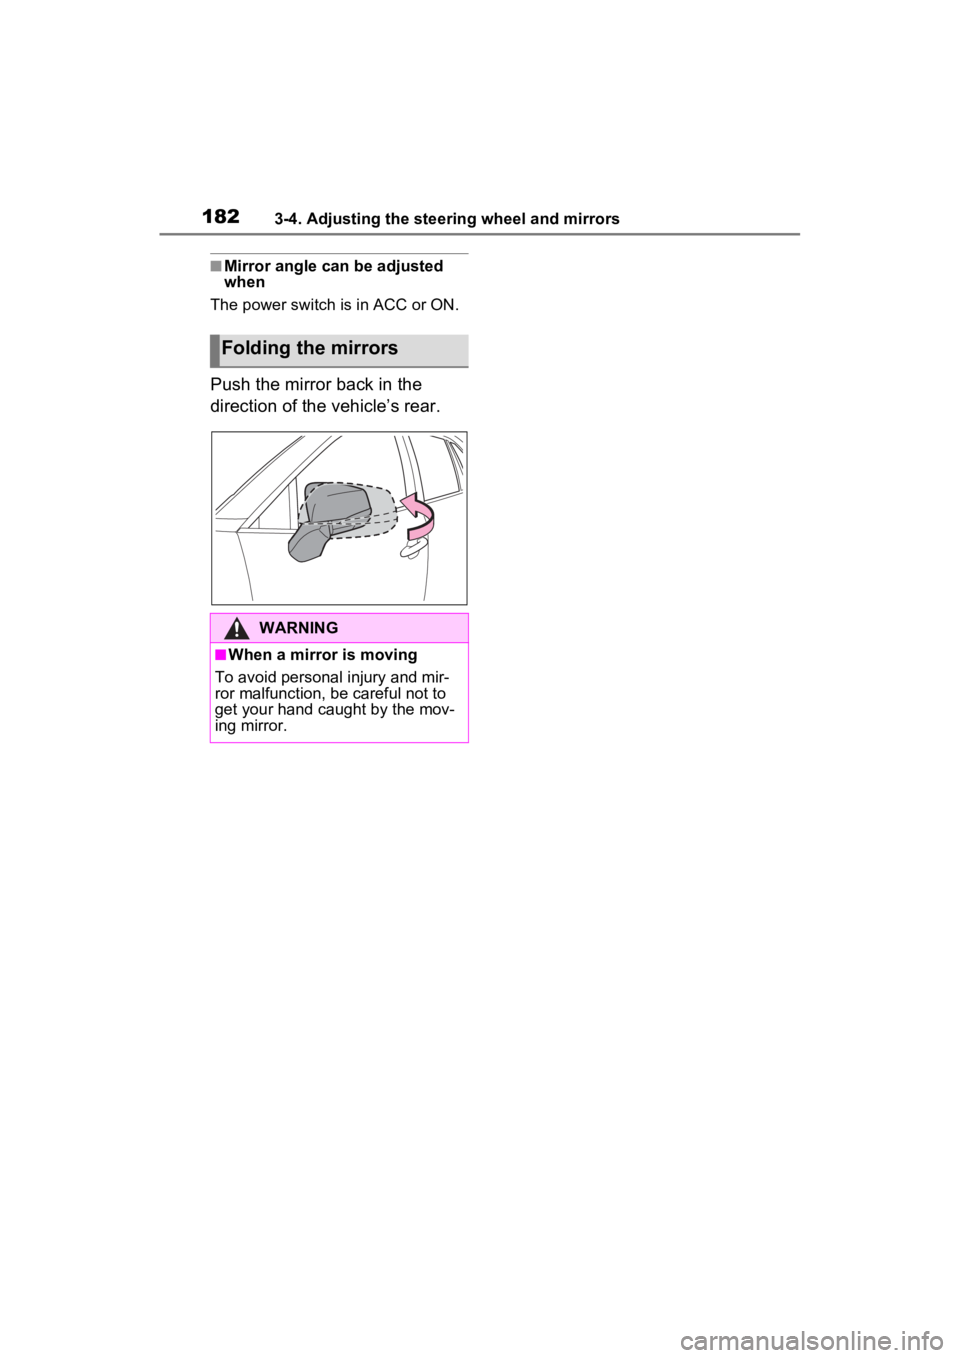
Push the mirror back in the
direction of the vehicle’s rear.
Folding the mirrors
WARNING
■When a mirror is moving
To avoid personal injury and mir-
ror malfunction, be careful not to
get your hand caught by the mov-
ing mirror.
Page 208 of 586
2064-1. Before driving
■Before towing
Check that the fo llowing conditions
are met:
●Ensure that your vehicle’s tires
are properly inflated. ( P.502)
●Trailer tires are inflated according
to the trailer manufacturer’s rec-
ommendation.
●All trailer lights work as required
by law.
●All lights work each time you con-
nect them.
●The trailer ball is set at the proper
height for the coupler on the
trailer.
●The trailer is level when it is
hitched.
Do not drive if th e trailer is not
level, and check for improper
tongue weight, overloading, worn
suspension, or other possible
causes.
●The trailer cargo is securely
loaded.
●The rear view mirr ors conform to
all applicable fede ral, state/provin-
cial or local regulations. If they do
not, install rear view mirrors
appropriate for towing purposes.
■When towing a trailer
Disable the following systems, as
the systems may no t operate prop-
erly.
●LTA (Lane Tracing Assist)
( P.268)
Trailer towing
Your vehicle is designed
primarily as a passenger-
and-load-carrying vehicle.
Towing a trailer can have an
adverse impact on handling,
performance, braking, dura-
bility, and fuel consump-
tion. For your safety and the
safety of others, you must
not overload your vehicle or
trailer. You must also
ensure that you are using
appropriate towing equip-
ment, that the towing equip-
ment has been installed
correctly and used properly,
and that you employ the
requisite driving habits.
Vehicle-trailer stability and
braking performance are
affected by trailer stability,
brake performance and set-
ting, trailer brakes, the hitch
and hitch systems (if
equipped).
To tow a trailer safely, use
extreme care and drive the
vehicle in accordance with
your trailer’s characteris-
tics and operating condi-
tions.
Toyota warranties do not
apply to damage or mal-
function caused by towing a
trailer for commercial pur-
poses.
Contact your Toyota dealer for
further information about addi-
tional requirements such as a
towing kit, etc.
Page 244 of 586

2424-3. Operating the lights and wipers
fog, mist, ice, dirt, etc.
• The windshield is cracked or dam- aged
• The front camera is deformed or
dirty
• When the temperature of the front
camera is extremely high
• Surrounding brightness levels are equal to those of h eadlights, tail
lights or fog lights
• When headlights or tail lights of vehicles ahead are turned off,
dirty, changing color, or not aimed
properly
• When the vehicle is hit by water,
snow, dust, etc. fr om a preceding
vehicle
• When driving thr ough an area of
intermittently changing brightness
and darkness
• When frequently and repeatedly
driving ascending/descending
roads, or roads with rough, bumpy
or uneven surfaces (such as
stone-paved roads, gravel roads,
etc.)
• When frequently and repeatedly
taking curves or driving on a wind-
ing road
• There is a highly reflective object
ahead of the vehicle, such as a
sign or mirror
• The back of a vehicle ahead is
highly reflective, such as a con-
tainer on a truck
• The vehicle’s headlights are dam-
aged or dirty, or are not aimed
properly
• The vehicle is listing or tilting due
to a flat tire, a trailer being towed,
etc.
• The high beams and low beams
are repeatedly being switched
between in an abnormal manner
• The driver believes that the high
beams may be causing problems
or distress to other drivers or
pedestrians nearby
■If “Headlight System Malfunc-
tion Visit Your D ealer” is dis-
played on the multi-information
display
The system may be malfunctioning. Have the vehicle inspected by your
Toyota dealer.
■Temporarily lowering sensor
sensitivity
The sensitivity of the sensor can be
temporarily lowered.
1 Turn the power switch to OFF
while the following conditions are
met.
●The headlight switch is in or
position.
●The headlight switch lever is in
high beam position.
●Automatic High Beam switch is
on.
2 Turn the power switch to ON.
3 Within 60 seconds after step 2,
repeat pulling the headlight
switch lever to the original posi-
tion then pushing it to the high
beam position qui ckly 10 times,
then leave the lever in the origi-
nal position.
4 If the sensitivity is changed, the
Automatic High Beam indicator
is turn on and off 3 times.
Automatic High Beam (headlights)
may turn on even when the vehicle
is stopped.
■Switching to the high
beams
Push the lever away from you.
The Automatic High Beam indicator
will turn off and the headlight high
beam indicator will turn on.
Pull the lever to its original position
to activate Automatic High Beam
system again.
Turning the high beams
on/off manually
Page 256 of 586
2544-5. Using the driving support systems
WARNING
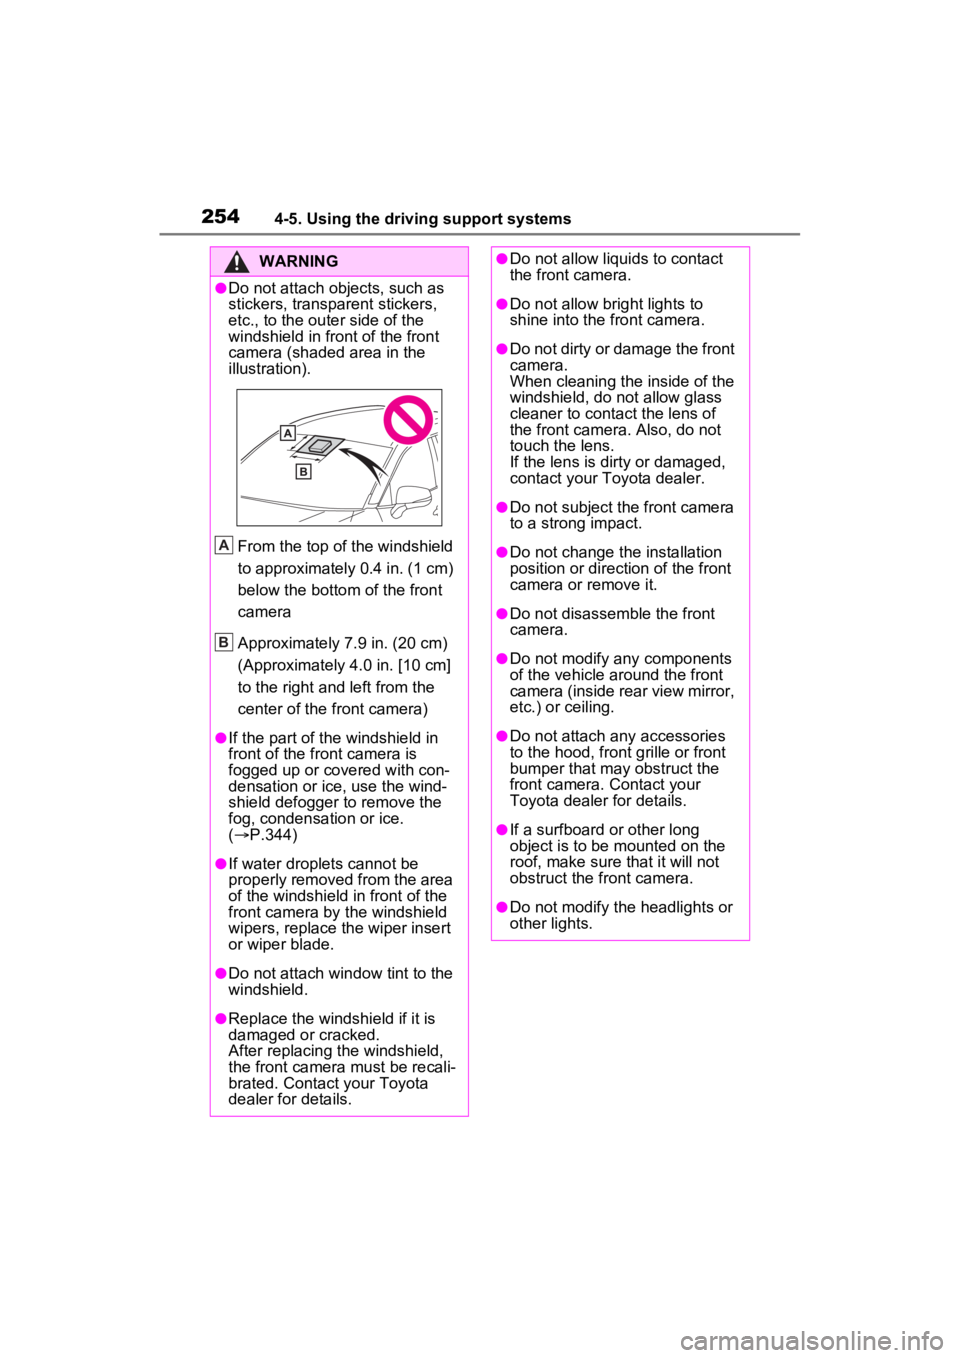
●Do not attach objects, such as
stickers, transparent stickers,
etc., to the outer side of the
windshield in fr ont of the front
camera (shaded area in the
illustration).
From the top of the windshield
to approximately 0.4 in. (1 cm)
below the bottom of the front
camera
Approximately 7.9 in. (20 cm)
(Approximately 4.0 in. [10 cm]
to the right and left from the
center of the front camera)
●If the part of the windshield in
front of the front camera is
fogged up or covered with con-
densation or ice, use the wind-
shield defogger to remove the
fog, condensation or ice.
( P.344)
●If water droplets cannot be
properly removed from the area
of the windshield in front of the
front camera by the windshield
wipers, replace the wiper insert
or wiper blade.
●Do not attach win dow tint to the
windshield.
●Replace the windshield if it is
damaged or cracked.
After replacing the windshield,
the front camera must be recali-
brated. Contact your Toyota
dealer for details.
A
B
●Do not allow liquids to contact
the front camera.
●Do not allow bright lights to
shine into the front camera.
●Do not dirty or damage the front
camera.
When cleaning the inside of the
windshield, do not allow glass
cleaner to contact the lens of
the front camera . Also, do not
touch the lens.
If the lens is dirty or damaged,
contact your Toyota dealer.
●Do not subject the front camera
to a strong impact.
●Do not change the installation
position or direction of the front
camera or remove it.
●Do not disassemble the front
camera.
●Do not modify any components
of the vehicle around the front
camera (inside rear view mirror,
etc.) or ceiling.
●Do not attach any accessories
to the hood, front grille or front
bumper that may obstruct the
front camera. Contact your
Toyota dealer for details.
●If a surfboard or other long
object is to be mounted on the
roof, make sure that it will not
obstruct the front camera.
●Do not modify the headlights or
other lights.
Page 295 of 586
2934-5. Using the driving support systems
4
Driving
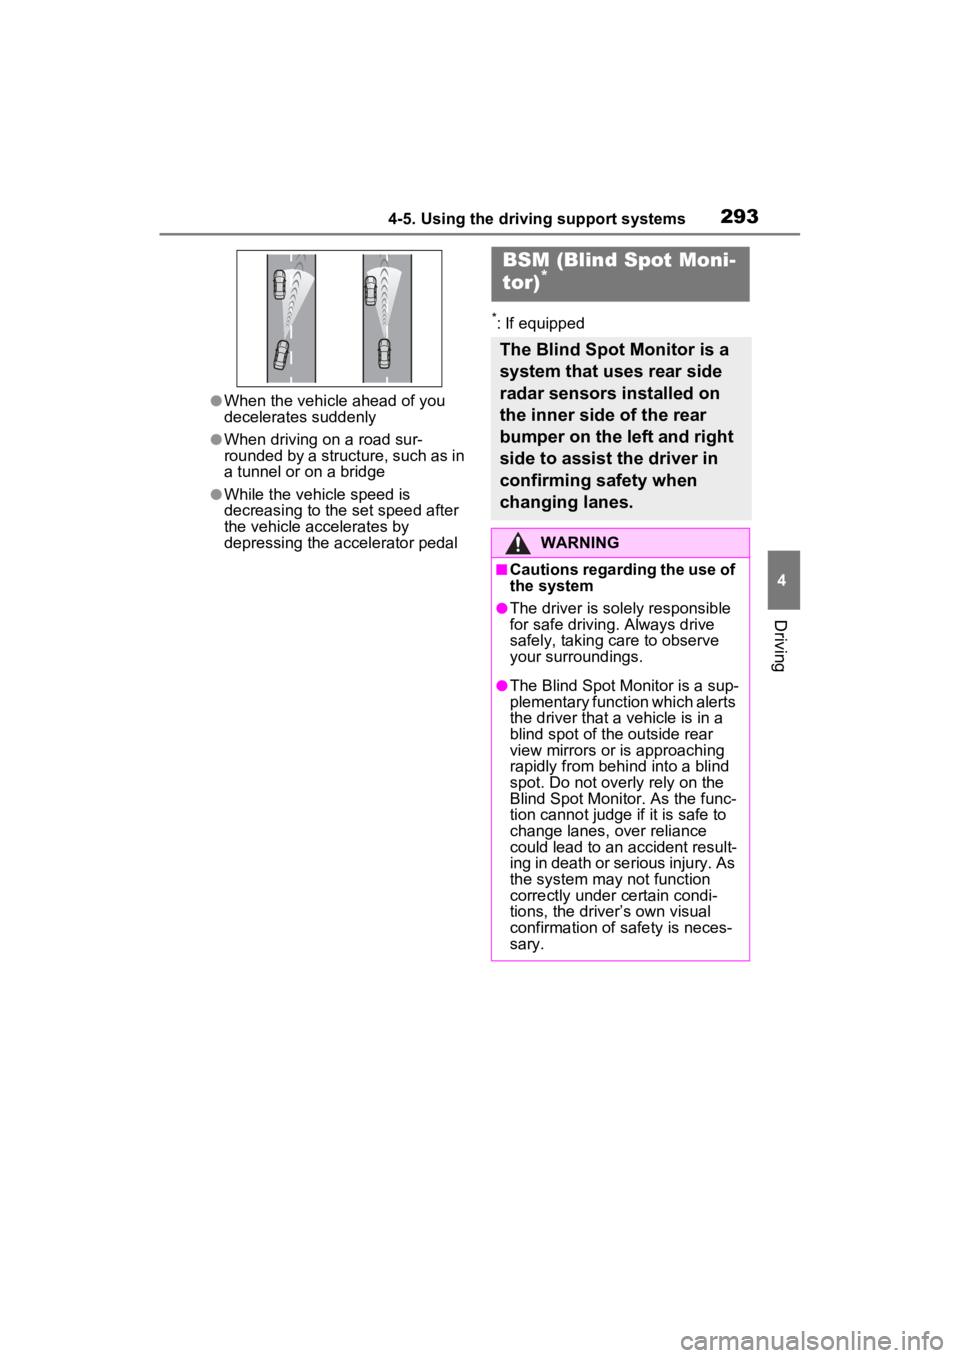
●When the vehicle ahead of you
decelerates suddenly
●When driving on a road sur-
rounded by a structure, such as in
a tunnel or on a bridge
●While the vehicle speed is
decreasing to the set speed after
the vehicle accelerates by
depressing the accelerator pedal
*: If equipped
BSM (Blind Spot Moni-
tor)*
The Blind Spot Monitor is a
system that uses rear side
radar sensors installed on
the inner side of the rear
bumper on the left and right
side to assist the driver in
confirming safety when
changing lanes.
WARNING
■Cautions regarding the use of
the system
●The driver is solely responsible
for safe driving. Always drive
safely, taking care to observe
your surroundings.
●The Blind Spot Monitor is a sup-
plementary function which alerts
the driver that a vehicle is in a
blind spot of the outside rear
view mirrors or is approaching
rapidly from behind into a blind
spot. Do not overly rely on the
Blind Spot Monitor. As the func-
tion cannot judge if it is safe to
change lanes, over reliance
could lead to an accident result-
ing in death or se rious injury. As
the system may not function
correctly under certain condi-
tions, the driver’s own visual
confirmation of safety is neces-
sary.
Page 296 of 586
2944-5. Using the driving support systems
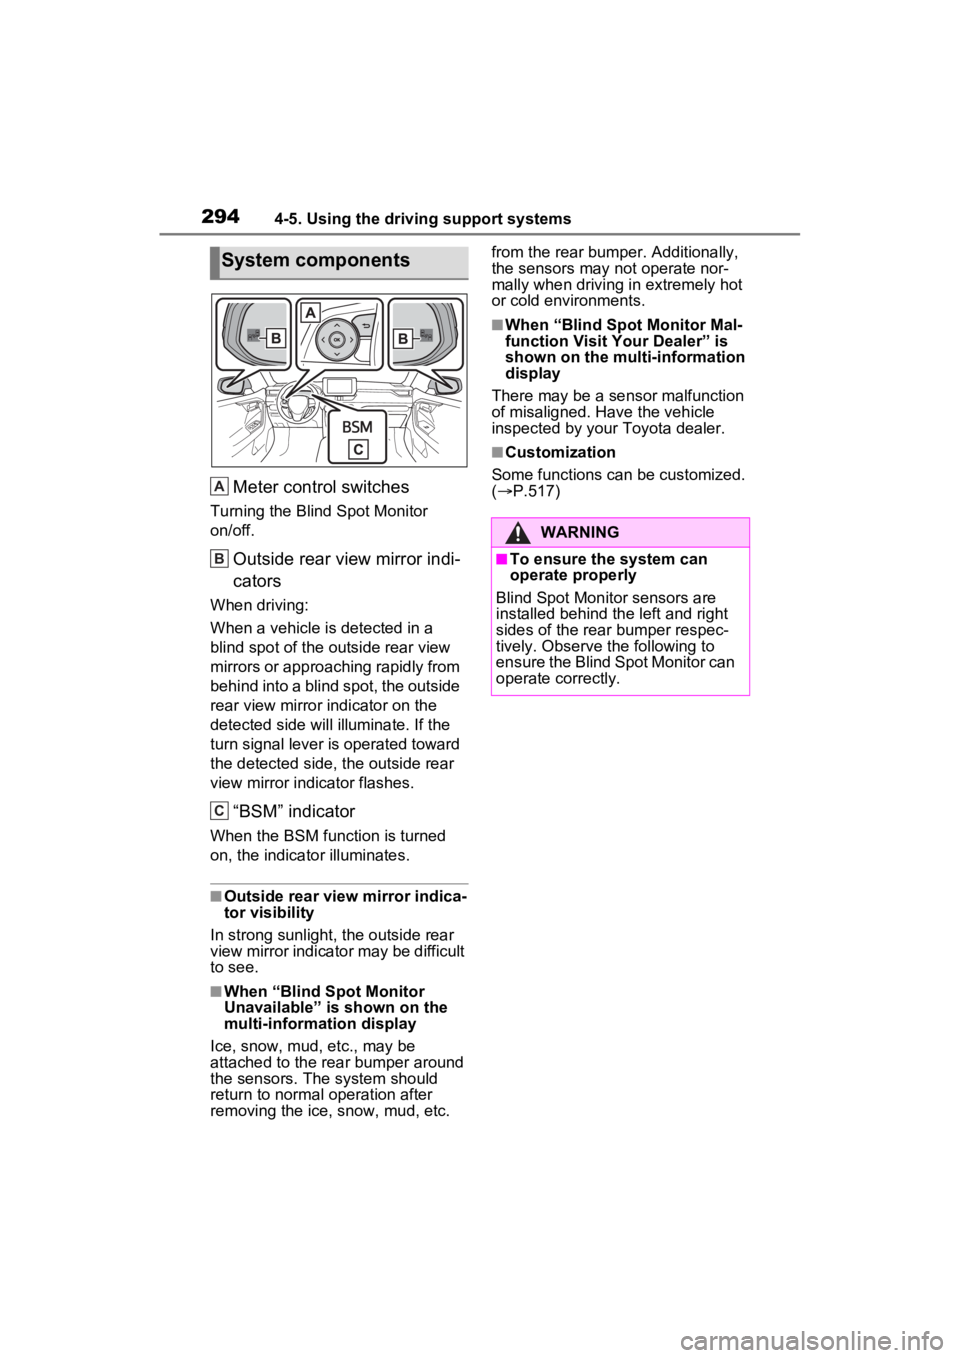
Meter control switches
Turning the Blind Spot Monitor
on/off.
Outside rear view mirror indi-
cators
When driving:
When a vehicle is detected in a
blind spot of the outside rear view
mirrors or approaching rapidly from
behind into a blind spot, the outside
rear view mirror indicator on the
detected side will illuminate. If the
turn signal lever is operated toward
the detected side, the outside rear
view mirror indicator flashes.
“BSM” indicator
When the BSM function is turned
on, the indicator illuminates.
■Outside rear view mirror indica-
tor visibility
In strong sunlight, the outside rear
view mirror indicato r may be difficult
to see.
■When “Blind Spot Monitor
Unavailable” is shown on the
multi-information display
Ice, snow, mud, etc., may be
attached to the rear bumper around
the sensors. The system should
return to normal operation after
removing the ice, snow, mud, etc. from the rear bumper. Additionally,
the sensors may not operate nor-
mally when driving in extremely hot
or cold environments.
■When “Blind Spot Monitor Mal-
function Visit Your Dealer” is
shown on the multi-information
display
There may be a sensor malfunction
of misaligned. Have the vehicle
inspected by your Toyota dealer.
■Customization
Some functions can be customized.
( P.517)
System components
A
B
C
�:�$�5�1�,�1�*
■To ensure the system can
operate properly
Blind Spot Monitor sensors are
installed behind the left and right
sides of the rear bumper respec-
tively. Observe the following to
ensure the Blind Spot Monitor can
operate correctly.
Page 298 of 586
2964-5. Using the driving support systems
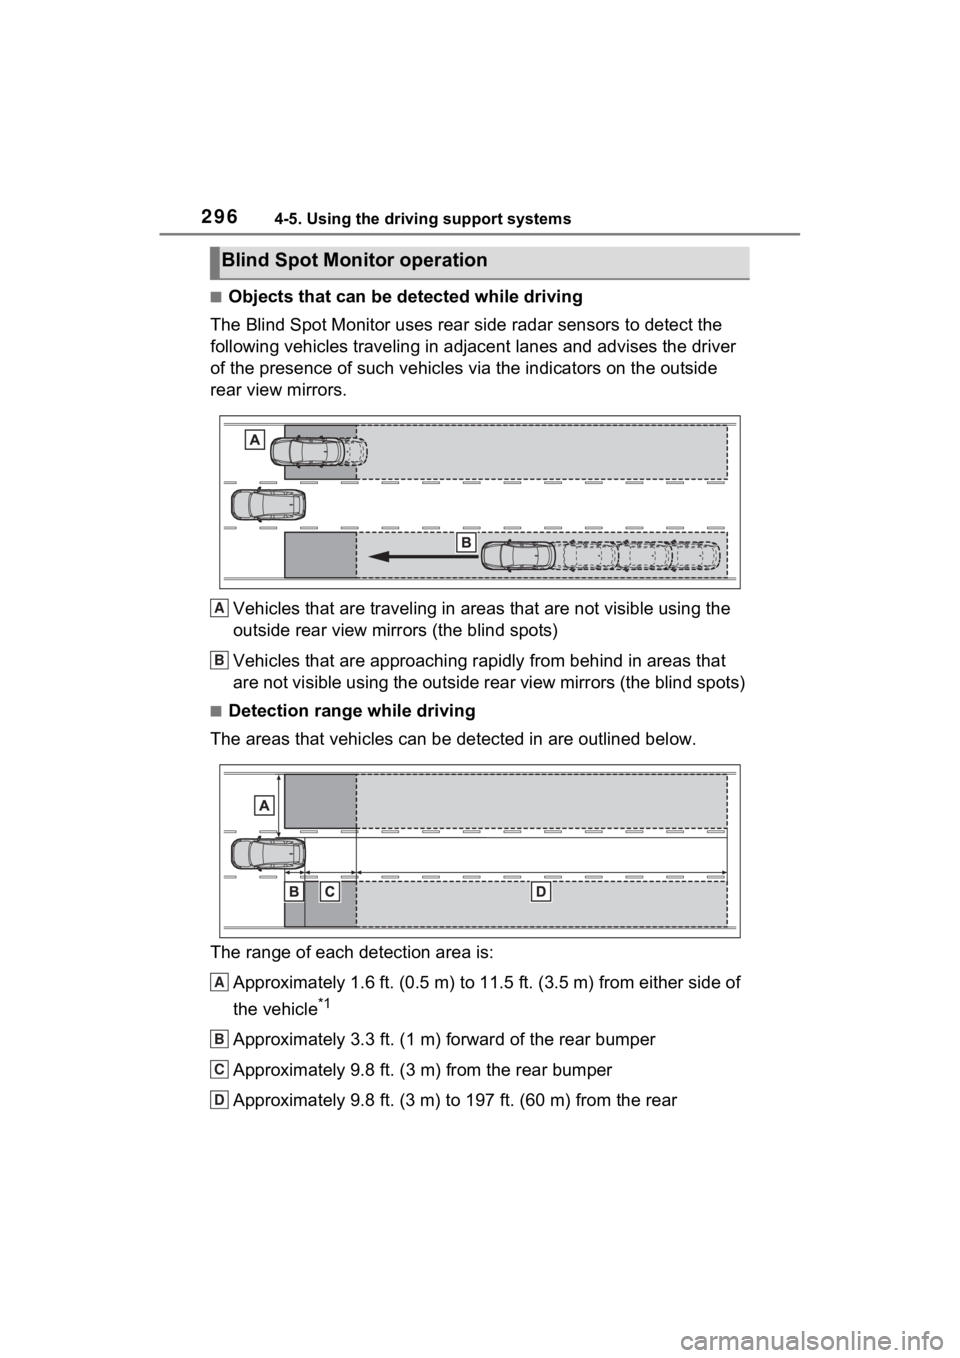
■Objects that can be detected while driving
The Blind Spot Monitor uses rear side radar sensors to detect the
following vehicles traveling in adjacent lanes and advises the driver
of the presence of such vehicles via the indicators on the outside
rear view mirrors.
Vehicles that are traveling in areas that are not visible using the
outside rear view mirrors (the blind spots)
Vehicles that are approaching r apidly from behind in areas that
are not visible using the outside rear view mirrors (the blind spots)
■Detection range while driving
The areas that vehicles can be detected in are outlined below.
The range of each detection area is:
Approximately 1.6 ft. (0.5 m) to 11.5 ft. (3.5 m) from either s ide of
the vehicle
*1
Approximately 3.3 ft. (1 m) forward of the rear bumper
Approximately 9.8 ft. (3 m) from the rear bumper
Approximately 9.8 ft. (3 m) to 197 ft. (60 m) from the rear
Blind Spot Monitor operation
A
B
A
B
C
D