2023 TOYOTA HIGHLANDER heating
[x] Cancel search: heatingPage 13 of 552

13Pictorial index
Precautions for winter season.............................................. P.314
To prevent freezing (windshiel d wiper de-icer) ..................... P.324
Precautions for car wash
*.................................................... P.371
Fuel filler door ............................................... ..................... P.221
Refueling method ............................................... .................. P.221
Fuel type/fuel tan k capacity ................................... .............. P.475
Tires.......................................................... ........................... P.393
Tire size/inflation pressure ................................... ........ P.393, 479
Winter tires/tire chains ....................................... .................. P.314
Checking/rotation/tire pressur e warning system ..................P.393
Coping with flat tires......................................... .................... P.446
Hood ........................................................... ......................... P.384
Opening ............................................................................... P.384
Engine oil ..................................................... ........................ P.476
Coping with overheating ...................................................... P.469
Warning messages ............................................... ............... P.442
Front turn signal lights/parking lights
*..................... P.204,210
Parking lights
*............................................................... ..... P.210
Headlights/daytime running lights
*.................................. P.210
Headlights..................................................... ...................... P.210
Daytime running lights .. .................................................... P.210
Front side marker lights ....................................... ............. P.210
Parking lights
*/daytime running lights*........................... P.210
Front fog lights
*............................................................... ... P.216
Stop/tail lights ............................................... ..................... P.210
Tail lights.................................................... ......................... P.210
Back-up lights
Shifting the shift lever to R ................................................... P.201
Light bulbs of the exterior lights for driving
(Replacing method: P.415, Watts: P.481)
Page 80 of 552

802-1. Instrument cluster
■The meters and display illumi-
nate when
The engine switch is in ON.
■Outside temperature display
●In the following si tuations, the cor-
rect outside tempe rature may not
be displayed, or the display may
take longer than normal to
change:
• When stopped, or driving at low
speeds (less than 12 mph [20
km/h])
• When the outside temperature
has changed suddenly (at the
entrance/exit of a garage, tunnel,
etc.)
●When “--” or “E” is displayed, the
system may be malfunctioning.
Take your vehicle to your Toyota
dealer.
■Liquid crystal display
Small spots or light spots may
appear on the display. This phenom-
enon is characteristi c of liquid crys-
tal displays, and there is no problem
continuing to use the display.
■Customization
The meters can be customized on of the multi-information display.
( P.94)
■Display items
Odometer
Displays the total distance the vehi-
cle has been driven.
Trip meter A/trip meter B
Displays the distance the vehicle
has been driven since the meter
was last reset. Trip meters A and B
can be used to record and display
different distances independently.
Distance until next engine oil
change
Displays the distance the vehicle
can be driven until an oil change is
WARNING
■The information display at
low temperatures
Allow the interior of the vehicle to
warm up before u sing the liquid
crystal informat ion display. At
extremely low temperatures, the
information display monitor may
respond slowly, and display
changes may be delayed.
For example, there is a lag
between the driver’s shifting and
the new gear number appearing
on the display. This lag could
cause the driver to downshift
again, causing rapid and exces-
sive engine braking and possibly
an accident resulting in death or
injury.
NOTICE
■To prevent damage to the
engine and its components
●Do not let the indicator needle
of the tachometer enter the red
zone, which indicates the maxi-
mum engine speed.
●The engine may be overheating
if the engine coolant tempera-
ture gauge is in the red zone
(H). In this case, immediately
stop the vehicle in a safe place,
and check the engine after it
has cooled completely.
( P.469)
Odometer and trip meter
display
Page 85 of 552

852-1. Instrument cluster
2
Vehicle status information and indicators
Take your vehicle to your Toyota
dealer.
■Liquid crystal display
Small spots or light spots may
appear on the display. This phenom-
enon is characteristi c of liquid crys-
tal displays, and there is no problem
continuing to use the display.
■Free/Open Source Software
Information
This product contains Free/Open
Source Software (FOSS). The
license information and/or the
source code of such FOSS can be
found at the following URL.
https://www.denso.com/global/en/
opensource/meter/toyota/
■Customization
The gauges and meters can be cus-
tomized in of the multi-informa-
tion display. ( P.494)
■Changing the display
Each time the “ODO TRIP”
switch is pressed, the displayed
item will be changed. When the
trip meter is displayed, pressing
and holding the switch will reset
the trip meter.
■Display items
Odometer
Displays the total distance the vehi-
cle has been driven.
Trip meter A/Trip meter B
Displays the distance the vehicle
WARNING
■The information display at
low temperatures
Allow the interior of the vehicle to
warm up before u sing the liquid
crystal informat ion display. At
extremely low temperatures, the
information display monitor may
respond slowly, and display
changes may be delayed.
For example, there is a lag
between the driver’s shifting and
the new gear number appearing
on the display. This lag could
cause the driver to downshift
again, causing rapid and exces-
sive engine braking and possibly
an accident resulting in death or
injury.
NOTICE
■To prevent damage to the
engine and its components
●Do not let the indicator needle
of the tachometer enter the red
zone, which indicates the maxi-
mum engine speed.
●The engine may be overheating
if the engine coolant tempera-
ture gauge is in the red zone
(H). In this case, immediately
stop the vehicle in a safe place,
and check the engine after it
has cooled completely.
( P.469)
Odometer and trip meter
display
Page 179 of 552

1794-1. Before driving
4
Driving
WARNING
●Always apply the parking brake,
shift the shift lever to P, stop the
engine and lock the vehicle.Do
not leave the vehicle unat-
tended while the engine is run-
ning.If the vehicle is parked with
the shift lever in P but the park-
ing brake is not set, the vehicle
may start to move, possibly
leading to an accident.
●Do not touch the exhaust pipes
while the engine is running or
immediately after turning the
engine off.Doing so may cause
burns.
■When taking a nap in the vehi-
cle
Always turn the engine off. Other-
wise, if you accidentally move the
shift lever or dep ress the acceler-
ator pedal, this could cause an
accident or fire due to engine
overheating. Additionally, if the
vehicle is parked in a poorly venti-
lated area, exhaust gases may
collect and enter the vehicle, lead-
ing to death or a serious health
hazard.
■When braking
●When the brakes a re wet, drive
more cautiously.Braking dis-
tance increases when the
brakes are wet, and this may
cause one side of the vehicle to
brake differently than the other
side. Also, the parking brake
may not securely hold the vehi-
cle.
●If the brake booster device does
not operate, do not follow other
vehicles closely and avoid hills
or sharp turns t hat require brak-
ing.In this case, braking is still
possible, but the brake pedal
should be depressed more
firmly than usual. Also, the brak-
ing distance will increase. Have
your brakes fixed immediately.
●Do not pump the brake pedal if
the engine stalls.Each push on
the brake pedal uses up the
reserve for the power-assisted
brakes.
●The brake system consists of 2
individual hydraulic systems; if
one of the systems fails, the
other will still operate. In this
case, the brake pedal should be
depressed more firmly than
usual and the braking distance
will increase. Have your brakes
fixed immediately.
■If the vehicle becomes stuck
(AWD models)
Do not spin the wheels exces-
sively when any of the tires is up
in the air, or the vehicle is stuck in
sand, mud, etc. This may damage
the driveline components or pro-
pel the vehicle forward or back-
ward, causing an accident.
NOTICE
■When driving the vehicle
●Do not depress the accelerator
and brake pedals at the same
time during driving, as this may
restrain the engine output.
●Do not use the accelerator
pedal or depress the accelera-
tor and brake pedals at the
same time to hold the vehicle on
a hill.
Page 195 of 552

1954-1. Before driving
4
Driving
or steep grade. If the engine
coolant temperature gauge
indicates overheating, imme-
diately turn off the air condi-
tioning (if in use), pull your
vehicle off the road and stop
in a safe spot. (P.469)
Always place wheel blocks
under both the vehicle’s and
the trailer’s wheels when
parking. Put the transmission
in P and apply the parking
brake. Avoid parking on a
slope, but if unavoidable, do
so only after performing the
following:
1 Apply the brakes and keep
them applied.
2 Have someone place wheel
blocks under both the vehi-
cle’s and trailer’s wheels.
3 When the wheel blocks are in
place, release the brakes
slowly until the blocks absorb
the load.
4 Shift into P and apply the
parking brake.
5 Turn off the engine.
When restarting after parking
on a slope:
1 With the transmission in P,
start the engine. Be sure to
keep the brake pedal
depressed.
2 Shift into a forward gear. If
reversing, shift into R. 3
If the parking brake is in man-
ual mode, release the park-
ing brake. ( P.205)
4 Release the brake pedal, and
slowly pull or back away from
the wheel blocks. Stop and
apply the brakes.
5 Have someone retrieve the
blocks.
Page 206 of 552

2064-2. Driving procedures
When the shift lever is moved
into P, the parking brake will
be set, and the parking brake
indicator light and parking
brake light turn on.
Operate the shift lever with the
brake pedal depressed.
■Turns automatic mode off
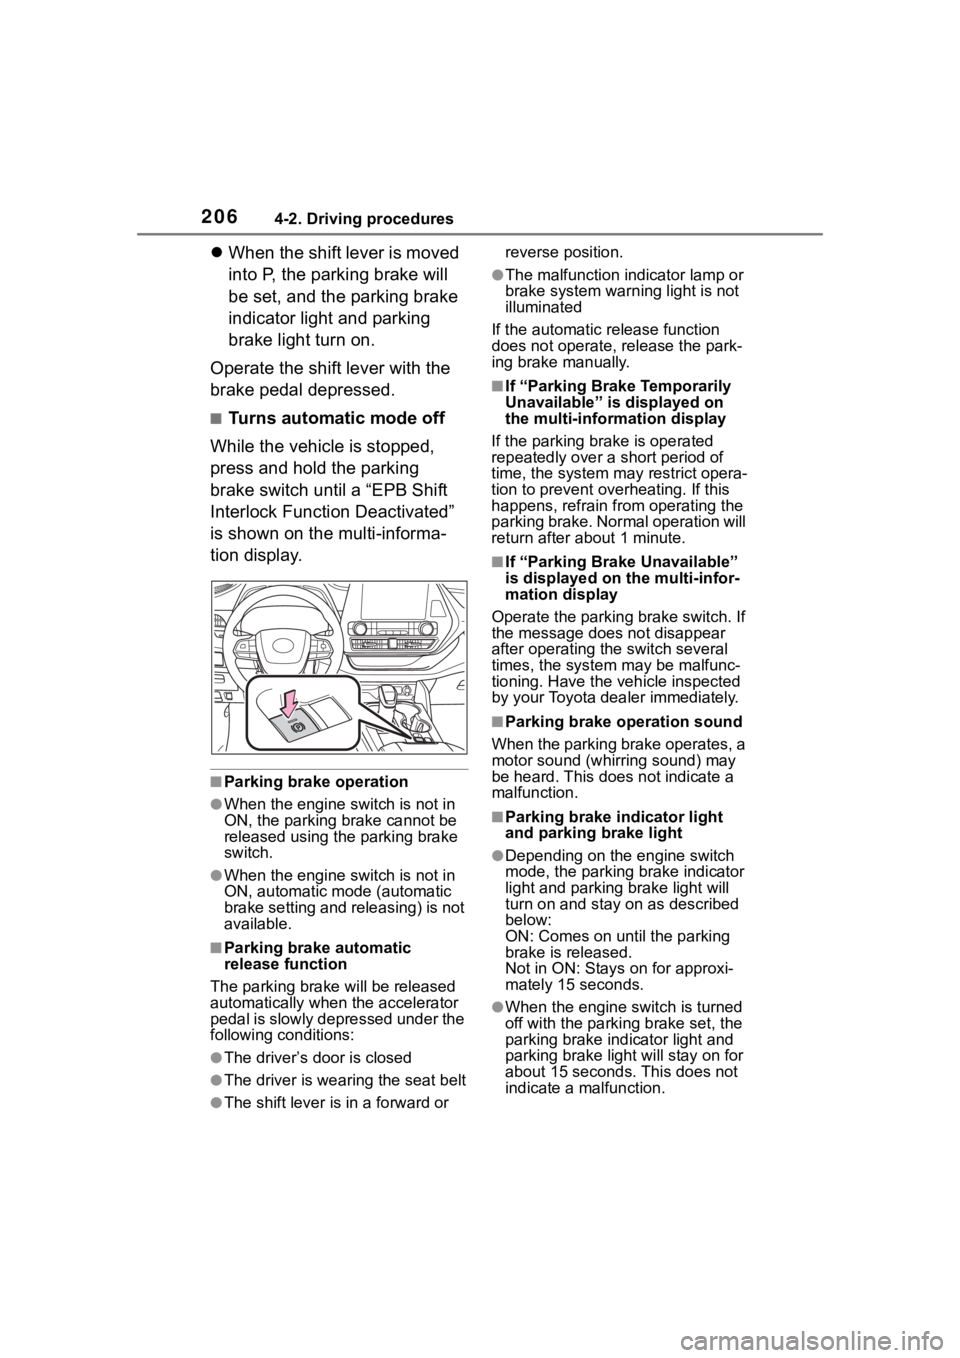
While the vehicle is stopped,
press and hold the parking
brake switch until a “EPB Shift
Interlock Function Deactivated”
is shown on the multi-informa-
tion display.
■Parking brake operation
●When the engine switch is not in
ON, the parking brake cannot be
released using the parking brake
switch.
●When the engine switch is not in
ON, automatic mode (automatic
brake setting and releasing) is not
available.
■Parking brake automatic
release function
The parking brake will be released
automatically when the accelerator
pedal is slowly depressed under the
following conditions:
●The driver’s door is closed
●The driver is wearing the seat belt
●The shift lever is in a forward or reverse position.
●The malfunction in
dicator lamp or
brake system warning light is not
illuminated
If the automatic release function
does not operate, release the park-
ing brake manually.
■If “Parking Brake Temporarily
Unavailable” is displayed on
the multi-info rmation display
If the parking brake is operated
repeatedly over a short period of
time, the system may restrict opera-
tion to prevent ove rheating. If this
happens, refrain from operating the
parking brake. Normal operation will
return after about 1 minute.
■If “Parking Brake Unavailable”
is displayed on the multi-infor-
mation display
Operate the parking brake switch. If
the message does not disappear
after operating the switch several
times, the system may be malfunc-
tioning. Have the vehicle inspected
by your Toyota dealer immediately.
■Parking brake operation sound
When the parking brake operates, a
motor sound (whirr ing sound) may
be heard. This does not indicate a
malfunction.
■Parking brake indicator light
and parking brake light
●Depending on the engine switch
mode, the parking brake indicator
light and parking brake light will
turn on and stay on as described
below:
ON: Comes on until the parking
brake is released.
Not in ON: Stays on for approxi-
mately 15 seconds.
●When the engine switch is turned
off with the parking brake set, the
parking brake indicator light and
parking brake light will stay on for
about 15 seconds. This does not
indicate a malfunction.
Page 207 of 552

2074-2. Driving procedures
4
Driving
■When the parking brake switch
malfunctions
Automatic mode (automatic brake
setting and releas ing) will be turned
on automatically.
■Parking the vehicle
P. 1 7 4
■Parking brake engaged warning
buzzer
A buzzer will sound if the vehicle is
driven with the parking brake
engaged. “Parking Brake ON” is dis-
played on the multi-information dis-
play.
■Warning messages and buzzers
Warning messages and buzzers are
used to indicate a system malfunc-
tion or to inform the driver of the
need for caution. If a warning mes-
sage is shown on the multi-informa-
tion display, read the message and
follow the instructions.
■If the brake system warning
light comes on
P. 4 3 1
■Usage in winter time
P. 3 1 4
WARNING
■When parking the vehicle
Do not leave a child in the vehicle
alone. The parking brake may be
released unintentionally and there
is the danger of the vehicle mov-
ing that may lead to an accident
resulting in death or serious injury.
■Parking brake switch
Do not set any o bjects near the
parking brake switch. Objects
may interfere with the switch and
may lead the parking brake to
unexpectedly operate.
NOTICE
■When parking the vehicle
Before you leave the vehicle, shift
the shift lever to P, set the parking
brake and make s ure that the
vehicle does not move.
■When the system malfunc-
tions
Stop the vehicle in a safe place
and check the warning messages.
■When the parking brake can-
not be released due to a mal-
function
Driving the vehicle with the park-
ing brake set will lead to brake
components overheating, which
may affect braking performance
and increase brake wear.
Have the vehicle inspected by
your Toyota dealer immediately if
this occurs.
Page 301 of 552

3014-5. Using the driving support systems
4
Driving
driving on roads with many curves.
When Sport mode is selected,
Sport mode indicator comes on.
3Eco drive mode
Helps the driver a ccelerate in an
eco-friendly manner and improve
fuel economy through moderate
throttle characteri stics and by con-
trolling the operation of the air con-
ditioning system (heating/cooling).
When Eco drive mode is selected,
Eco drive mode indicator comes
on.
■When changing to a driving
mode other than normal mode
Switches to AWD control suitable for
the selected mode. (for Dynamic
Torque Vectoring AWD vehicles
only)
■Air conditioning system opera-
tion in Eco drive mode
In Eco drive mode, heating/cooling
operations and the fan speed is con-
trolled to improve fuel efficiency.
Perform the following procedures to
increase the air conditioning perfor-
mance.
●Vehicle with 12.3-inch audio sys-
tem screen: Turn eco air condi-
tioning mode off ( P.328)
●Adjust the fan speed ( P.323)
●Cancel Eco drive mode
■Canceling a driving mode
●Sport mode is automatically can-
celed and the driving mode
returns to normal mode when the
engine switch is turned off.
●Normal mode and Eco drive mode
are not canceled until another
driving mode is sel ected. (Even if
the engine switch is turned off,
normal mode and Eco drive mode
will not be automatically can-
celed.)
Multi-terrain Select
(AWD models)
Multi-terrain Select is a sys-
tem that improves drivabil-
ity in off-road situations.
When driving over muddy,
sandy or rough road sur-
faces, the system selects a
suitable driving mode to
switch AWD, brake and
drive force control to per-
form control suitable for the
road condition.
WARNING
■Before using Multi-terrain
Select
Make sure to observe the follow-
ing precautions. Failure to
observe these precautions may
result in an unexp ected accident.
●Check that the Mud & Sand and
Rock & Dirt indicators are illumi-
nated before driving. Multi-ter-
rain Select will not operate
when the indicators are off.
●Do not rely solely upon the
Multi-terrain Select. This func-
tion is not inten ded to expand
the limits of the vehicle. If the
system is continuously used for
a long period of time, the load
on related parts increases and
the system may be unable to
operate normally, which may
lead to an accident. Thoroughly
check the road conditions and
driving route before driving, and
drive with caution.