2023 TOYOTA HIGHLANDER change time
[x] Cancel search: change timePage 280 of 552

2804-5. Using the driving support systems
■Adjusting the buzzer vol-
ume
The buzzer volume can be
adjusted on the multi-informa-
tion display.
Use the meter control switches
to change settings. ( P.102)
1 Select of the multi-infor-
mation display and then
press .
2 Press or to select
and then press and hold .
3 Select the volume and then
press .
Each time the switch is pressed,
the volume level will change
between 1, 2, and 3.
■Muting a buzzer temporarily
A mute button will be displayed
on the multi-information display
when an object is detected. To
mute the buzzer, press .
Mute will be canceled automati-
cally in the following situations:
When the shift lever is
changed.
When the vehicle speed
exceeds a certain speed.
When there is malfunction in
a sensor or the system is tem-
porarily unavailable.
When the operating function
is disabled manually.
When the engine switch is
turned off.
■Detection range of the sen-
sors
Approximately 3.3 ft. (100
cm)
Approximately 4.9 ft. (150
cm)
Approximately 2.0 ft. (60 cm)
The diagram shows the detection
range of the sensors. Note that the
sensors cannot detect objects that
are extremely clos e to the vehicle.
The range of the sensors may
change depending on the shape of
the object, etc.
Setting the buzzer volume
Sensor detection display,
object distance
Page 284 of 552

2844-5. Using the driving support systems
Meter control switches
Turning the RCTA function on/off.
When the RCTA function is dis-
abled, the RCTA OFF indicator illu-
minates.
Outside rear view mirror indi-
cators
If a vehicle is detected as
approaching from the left or right
behind the vehicle, both outside
rear view mirror indicators will blink
and a buzzer will sound.
Center Display
If a vehicle approaching from the
right or left at the rear of the vehicle
is detected, the RCTA icon
( P.285) for the det ected side will
be displayed on the Center Display.
This illustration shows an example
of a vehicle approaching from both
sides of the vehicle.
The RCTA can be enabled/dis-
abled on of the multi-infor-
mation display. ( P.494)
When the RCTA function is dis-
abled, the RCTA OFF indicator (
P.76) illuminates. (Each time the
engine switch is turned off then
changed to ON, t he RCTA function
will be enabled a utomatically.)
■Outside rear vie w mirror indica-
tor visibility
In strong sunlight, the outside rear
view mirror indicator may be difficult
to see.
■Hearing the RCTA buzzer
The RCTA buzzer may be difficult to
hear over loud noises, such as if the
audio system volume is high.
■When “Rear Cross Traffic Alert
Unavailable” is shown on the
multi-information display
Ice, snow, mud, etc., may be
attached to the rear bumper around
the sensors. ( P.271) Removing
the ice, snow, mud, etc., from the
attached to the rear bumper around
the sensors to normal.
Additionally, the function may not
function normally when used in
extremely hot or cold environments.
■When “Rear Cross Traffic Alert
Malfunction Visit Your Dealer”
is shown on the multi-informa-
tion display
There may be a sensor malfunction
or misaligned. Have the vehicle
inspected at a Toyota dealer.
■Rear side radar sensors
P.271
■Operation of the RCTA function
The RCTA function uses rear side radar sensors to detect vehicles
approaching from the right or left at the rear of the vehicle a nd alerts
the driver of the presence of such vehicles by flashing the out side
rear view mirror indicators and sounding a buzzer.
Turning the RCTA func-
tion on/off
RCTA function
Page 291 of 552

2914-5. Using the driving support systems
4
Driving
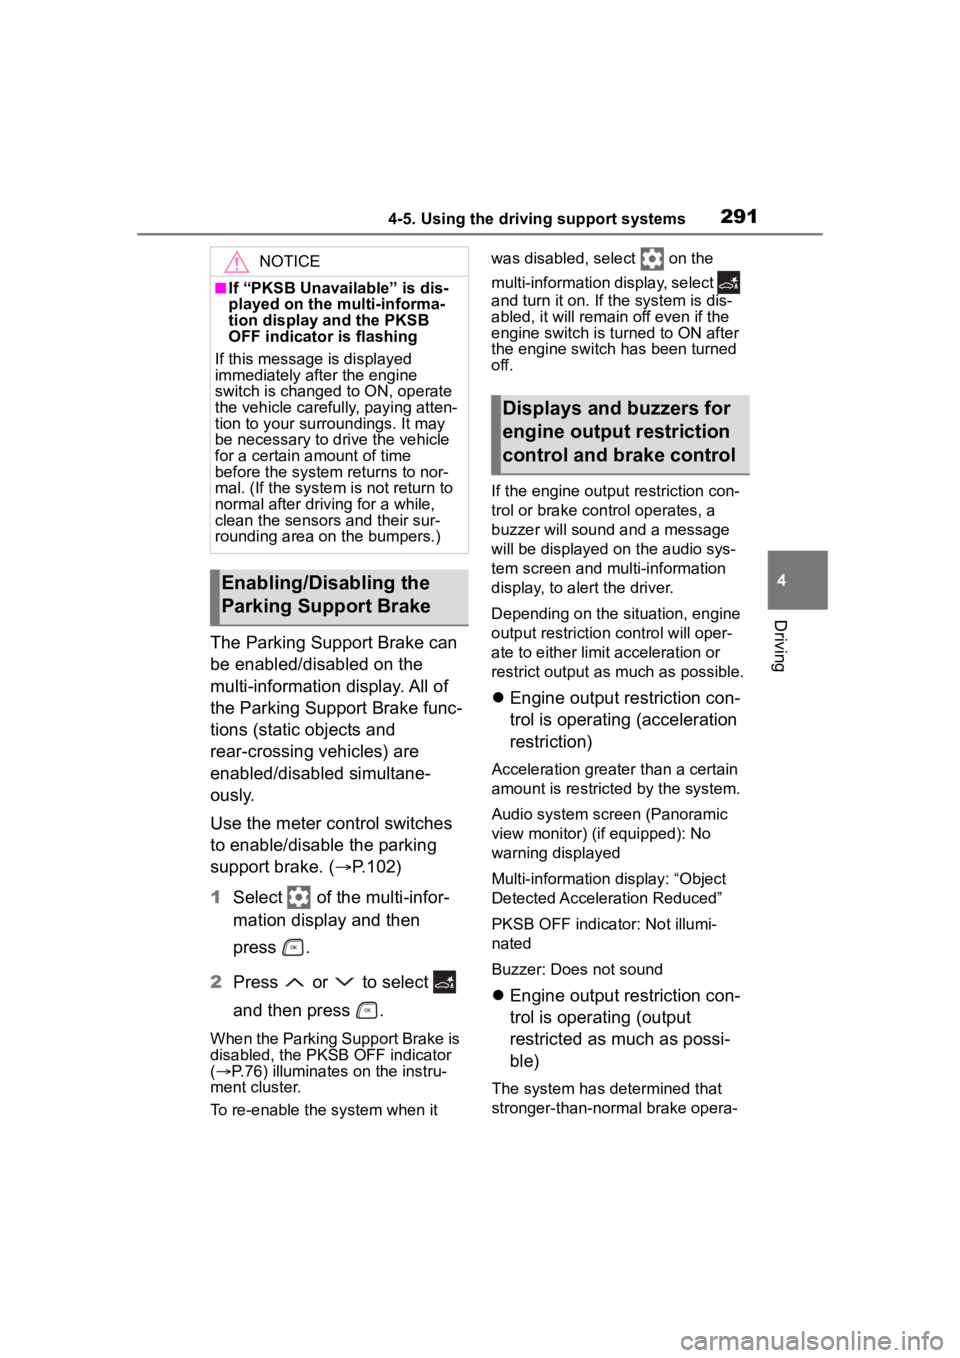
The Parking Support Brake can
be enabled/disabled on the
multi-information display. All of
the Parking Support Brake func-
tions (static objects and
rear-crossing vehicles) are
enabled/disabled simultane-
ously.
Use the meter control switches
to enable/disable the parking
support brake. (P.102)
1 Select of the multi-infor-
mation display and then
press .
2 Press or to select
and then press .
When the Parking Support Brake is
disabled, the PKSB OFF indicator
( P.76) illuminates on the instru-
ment cluster.
To re-enable the system when it was disabled, select on the
multi-information
display, select
and turn it on. If the system is dis-
abled, it will remain off even if the
engine switch is turned to ON after
the engine switch has been turned
off.
If the engine output restriction con-
trol or brake control operates, a
buzzer will sound and a message
will be displayed on the audio sys-
tem screen and multi-information
display, to alert the driver.
Depending on the situation, engine
output restriction control will oper-
ate to either limit acceleration or
restrict output as much as possible.
Engine output restriction con-
trol is operating (acceleration
restriction)
Acceleration greater than a certain
amount is restric ted by the system.
Audio system screen (Panoramic
view monitor) (if equipped): No
warning displayed
Multi-information display: “Object
Detected Acceleration Reduced”
PKSB OFF indicator: Not illumi-
nated
Buzzer: Does not sound
Engine output restriction con-
trol is operating (output
restricted as much as possi-
ble)
The system has determined that
stronger-than-normal brake opera-
NOTICE
■If “PKSB Unavailable” is dis-
played on the multi-informa-
tion display and the PKSB
OFF indicator is flashing
If this message is displayed
immediately after the engine
switch is changed to ON, operate
the vehicle carefully, paying atten-
tion to your surroundings. It may
be necessary to drive the vehicle
for a certain amount of time
before the system returns to nor-
mal. (If the system is not return to
normal after driving for a while,
clean the sensors and their sur-
rounding area on the bumpers.)
Enabling/Disabling the
Parking Support Brake
Displays and buzzers for
engine output restriction
control and brake control
Page 323 of 552

3235-1. Using the air conditioning system and defogger
5
Interior features
■Adjusting the temperature
setting
Turn driver’s side temperature
control switch clockwise to
increases the temperature and
turn the switch counterclockwise
to decreases the temperature.
If “A/C” switch is not pressed, the
system will blow a mbient tempera-
ture air or heated air.
The temperature for the driver,
front passenger and rear seats
can be adjusted separately
when:
“SYNC” control knob is
moved upward or downward.
(The “PASS” and “REAR” dis-
plays disappear)
The passenger’s side tem-
perature control switch is
turned. (The “PASS” display
disappears)
The rear seat temperature
control knob is moved upward
or downward. (The “REAR”
display disappears)
To switch the air c onditioning sys-
tem between individual and simul-
taneous modes, move “SYNC”
control knob upward or downward.
■Setting the fan speed
To set the fan speed, move the
fan speed control knob upward
or downward.
Upward: Increases the fan speed
Downward: Decreases the fan
speed
Pressing the “OFF” switch turns off the fan.
■Change the airflow mode
To change the airflow mode,
move the airflow mode control
knob upward or downward.
1 Upper body
2 Upper body and feet
3 Feet
4 Feet and the windshield
defogger operates
■Switching between outside
air and recirculated air
modes
Press the outside/recirculated
air mode switch.
The mode switches between out-
side air mode and recirculated air
mode each time the switch is oper-
ated.
When recirculated air mode is
selected, the indicator illuminates
on the outside/recirculated air
mode switch.
Page 329 of 552

3295-1. Using the air conditioning system and defogger
5
Interior features
■Manually turning front seat
concentrated airflow mode
on/off
In front seat concentrated air-
flow mode, directing airflow to
the front seats only and to all
seats can be switched via switch
operation. When the mode has
been switched manually, auto-
matic airflow control stops oper-
ating.
Select on the main con-
trol screen or press the S-FLOW
mode switch on the air condi-
tioning operation panel and
switch the airflow.
Indicator illuminated: Airflow
to the front seats only
Indicator off: Airflow to all the
seats
■Operation of automatic airflow
control
●In order to maintain a comfortable
interior, airflow ma y be directed to
seats without pa ssengers immedi-
ately after the e ngine is started
and at other times depending on
the outside temperature.
●After the engine is started, if pas-
sengers move around inside or
enter/exit the vehicle, the system
cannot accurately detect the pres-
ence of passengers and automatic
airflow control will not operate.
■Operation of manual airflow
control
Even if the function is manually
switched to directi ng airflow to only
the front seats, whe n a rear seat is
occupied, it may automatically direct
airflow to all seats.
■To return to automatic airflow
control
1 With the indicator off, turn the
engine switch off.
2 After 60 minutes or more elapse,
turn the engine switch to ON.
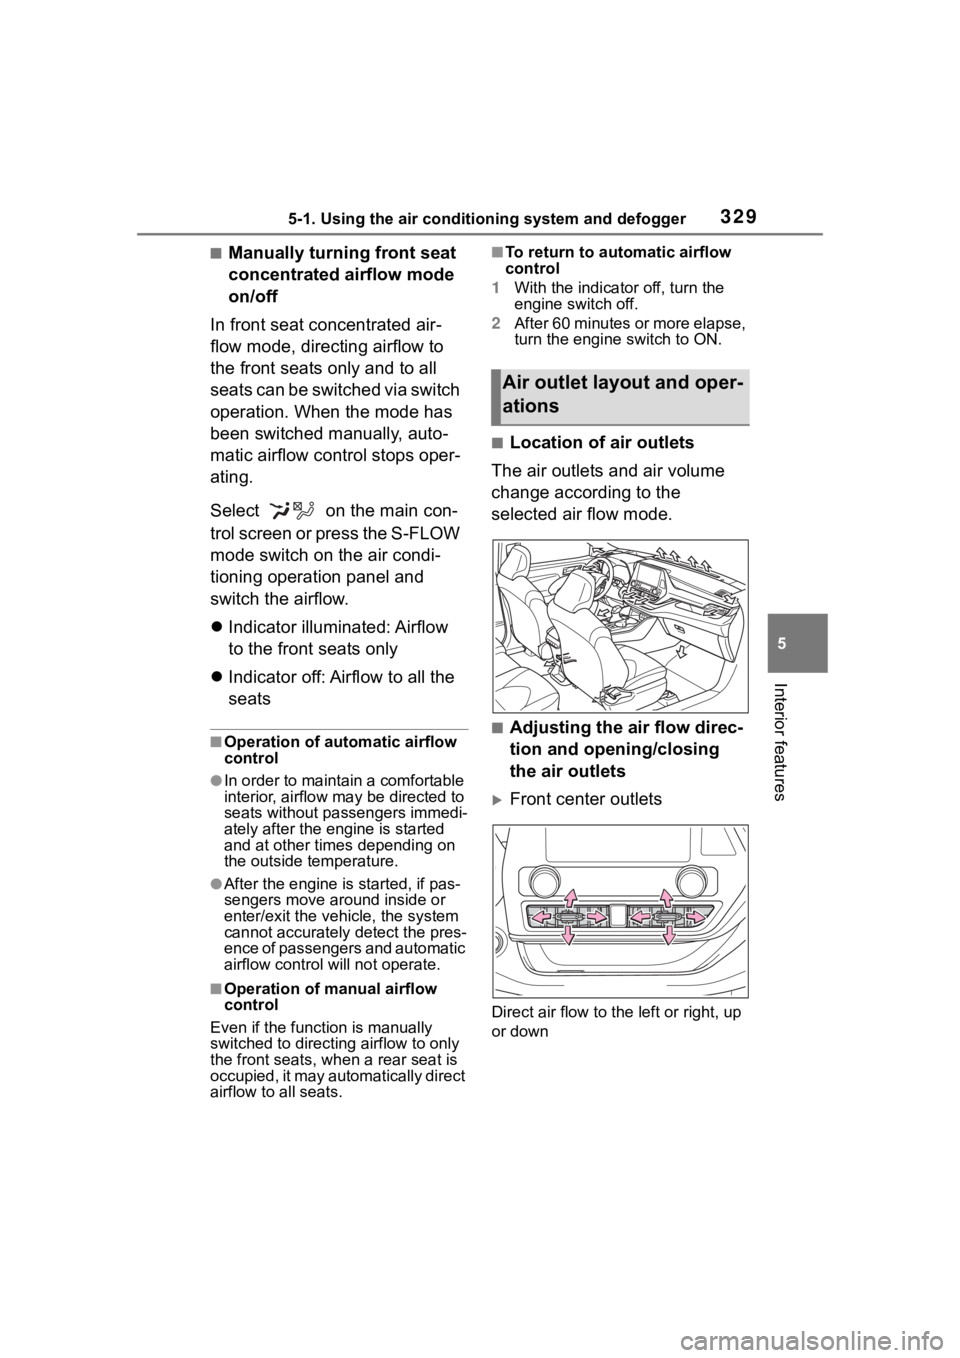
■Location of air outlets
The air outlets and air volume
change according to the
selected air flow mode.
■Adjusting the air flow direc-
tion and opening/closing
the air outlets
Front center outlets
Direct air flow to the left or right, up
or down
Air outlet lay out and oper-
ations
Page 333 of 552

3335-1. Using the air conditioning system and defogger
5
Interior features
■Rear air conditioning con-
trol screen (audio system
screen)
1 Touch on the main menu.
2 Select "Climate".
3 Select "Rear".
Adjust the rear seats tem-
perature setting
Air flow mode control switch
Adjust the rear seats fan
speed setting
“OFF” switch
Pressing the “OFF” switch turns off
the fan.
Automatic mode switch
■Rear air conditioning con-
trol panel
To change the airflow mode,
press the airflow mode control
switch.
The air outlets used are switched
each time the switch is pressed.
1 Upper body
2 Upper body and feet
3 Feet
■Front air conditioning con-
trol panel
To change the airflow mode,
move the airflow mode control
knob upward or downward.
1 Upper body
2 Upper body and feet
3 Feet
Change the airflow mode
Page 334 of 552

3345-1. Using the air conditioning system and defogger
■Rear air conditioning con-
trol screen
To change the airflow mode,
select the airflow mode control
switch.
The air outlets used are switched
each time the switch is selected.
: Air flows to the upper body
: Air flows to the upper body and
feet
: Air flows to the feet
1Press the automatic mode
switch.
2 Adjust the temperature set-
ting.
3 To stop the operation, press
the “OFF” switch.
If the fan speed setting or air
flow modes are operated, the
automatic mode indicator goes
off. However, automatic mode
for functions other than that
operated is maintained.
■Using automatic mode
Fan speed is adjusted automati-
cally according to the temperature
setting and the ambient conditions.
Therefore, the fan may stop for a
while until warm or cool air is ready
to flow immediately after the auto-
matic mode switch is pressed.
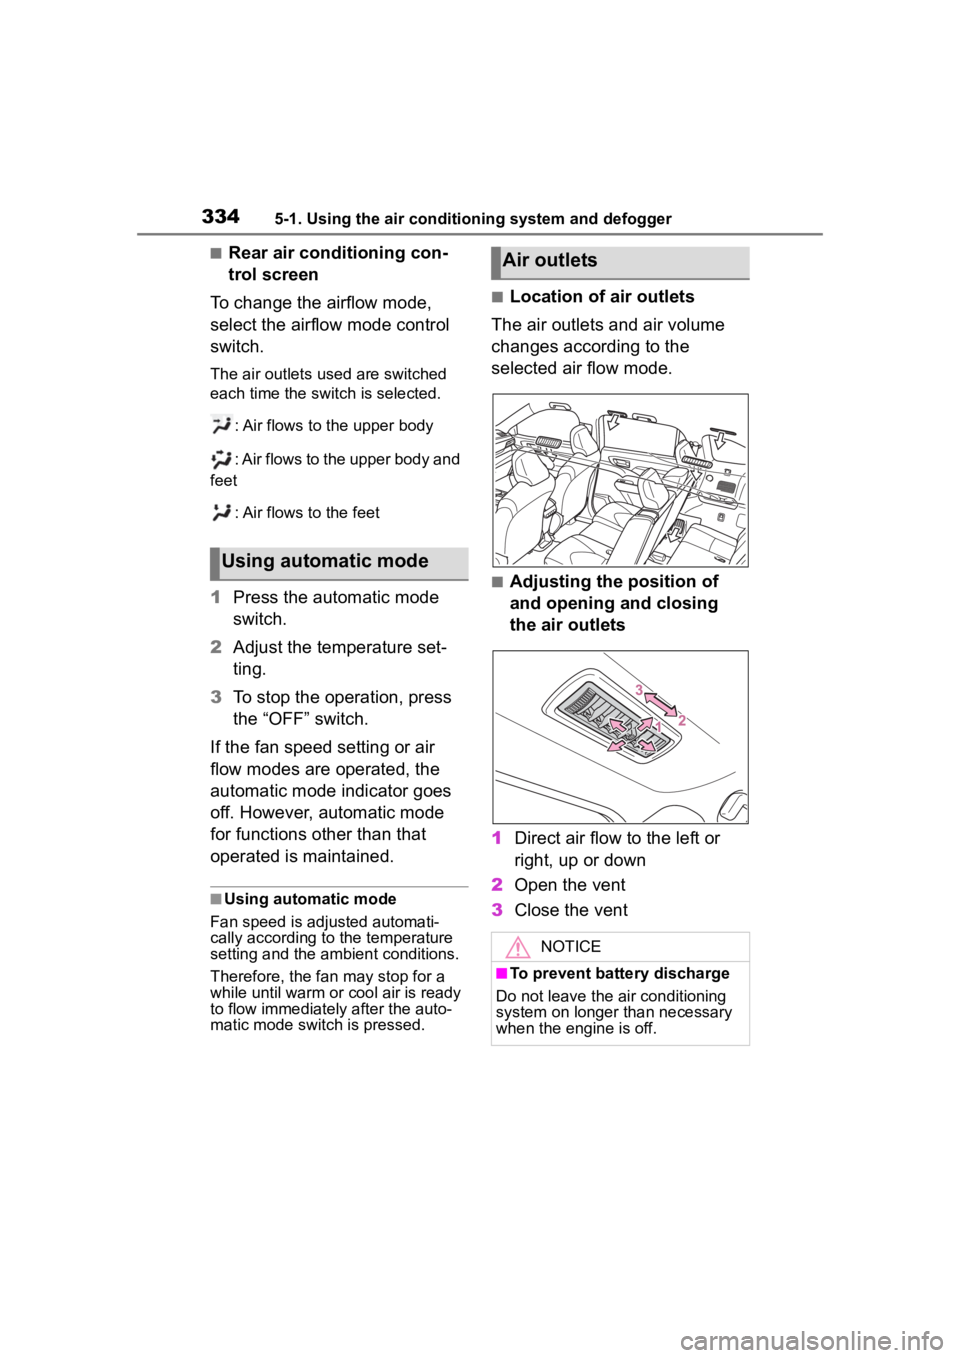
■Location of air outlets
The air outlets and air volume
changes according to the
selected air flow mode.
■Adjusting the position of
and opening and closing
the air outlets
1 Direct air flow to the left or
right, up or down
2 Open the vent
3 Close the vent
Using automatic mode
Air outlets
NOTICE
■To prevent battery discharge
Do not leave the air conditioning
system on longer than necessary
when the engine is off.
Page 335 of 552

3355-1. Using the air conditioning system and defogger
5
Interior features
*: If equipped
Turns the heated steering wheel
on/off
The indicator light comes on when
the heated steering wheel is oper-
ating.
■Operation condition
The engine switch is in ON.
■Timer function
The heated steering wheel will auto-
matically turn off after a period of
time.
■Front
Each time the switch is pressed,
the operation condition changes
as follows.
Hi (3 segments lit) Mid (2 seg-
ments lit) Lo (1 segment
lit) Off
The level indicator (amber)
lights up during operation.
Heated steering
wheel*/seat heat-
ers*/seat ventilators*
Heated steering wheel
Warms up the grip of the
steering wheel
Seat heaters
Warm up the seat upholstery
Seat ventilators
Maintain good ventilation
using a fan built into the seat
WARNING
■To prevent minor burn inju-
ries
Care should be taken if anyone in
the following categories comes in
contact with the steering wheel or
seats when the heater is on:
●Babies, small children, the
elderly, the sick and the physi-
cally challenged
●Persons with sensitive skin
●Persons who are fatigued
●Persons who have taken alco-
hol or drugs that induce sleep
(sleeping drugs, cold remedies,
etc.)
NOTICE
■To prevent damage to the
seat heaters
Do not put heavy objects that
have an uneven surface on the
seat and do not stick sharp
objects (needles, nails, etc.) into
the seat.
■To prevent battery discharge
Do not use the functions when the
engine is off.
Heated steering wheel
Seat heaters