Page 252 of 552

2524-5. Using the driving support systems
This mode employs a radar to detect the presence of vehicles up to
approximately 328 ft. (100 m) ahead, determines the current vehi-
cle-to-vehicle following distance, and operates to maintain a s uitable
following distance from the vehicle ahead. The desired vehi-
cle-to-vehicle distance can also be set by operating the vehi-
cle-to-vehicle distance switch.
When driving on downhill slopes, t he vehicle-to-vehicle distance may
become shorter.
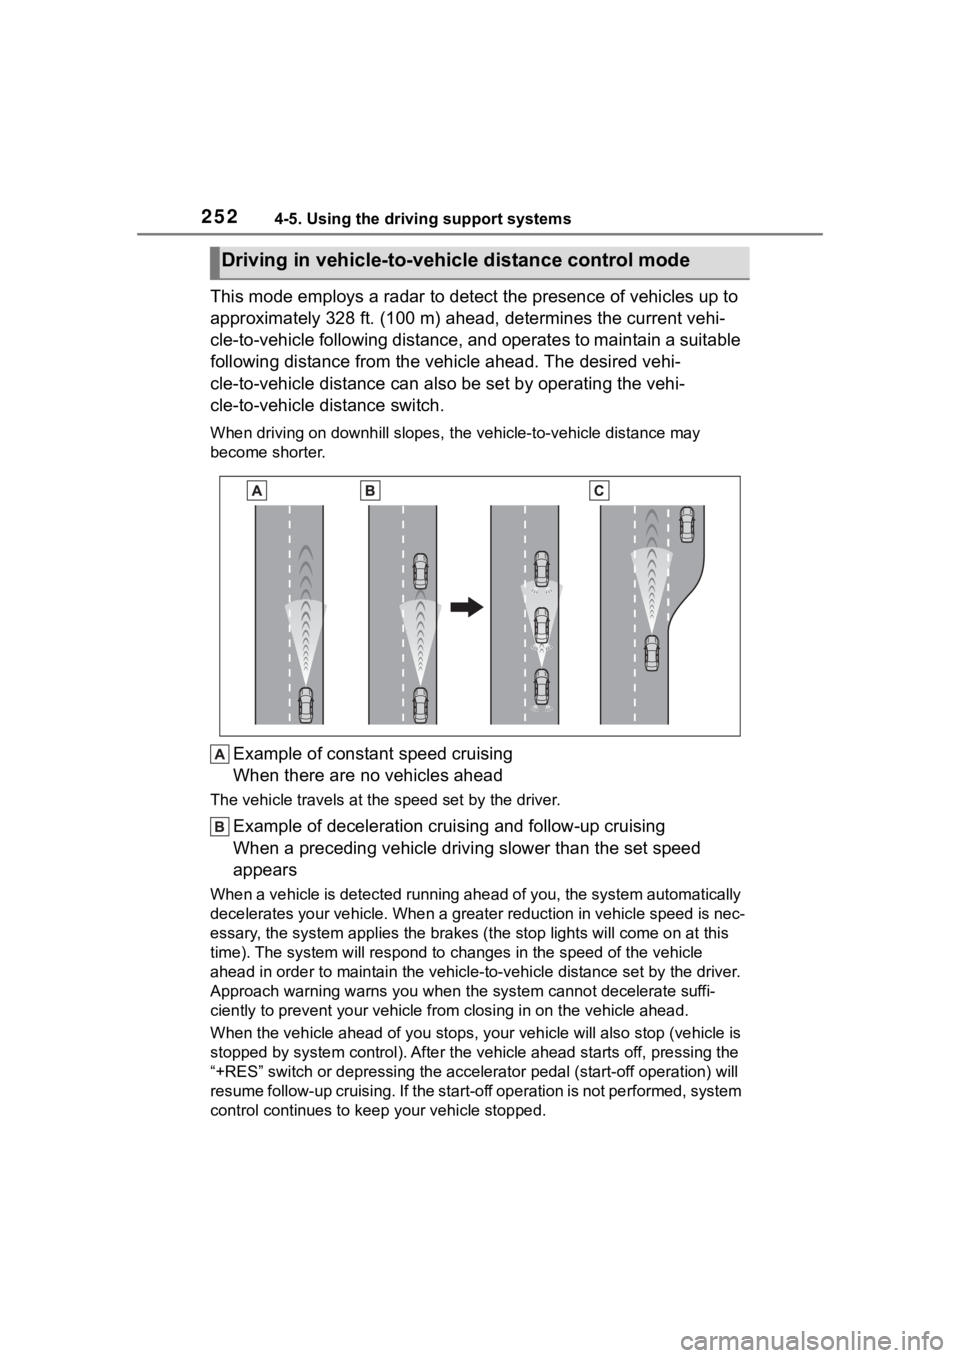
Example of constant speed cruising
When there are no vehicles ahead
The vehicle travels at the speed set by the driver.
Example of deceleration crui sing and follow-up cruising
When a preceding vehicle driving slower than the set speed
appears
When a vehicle is detected runni ng ahead of you, the system automatically
decelerates your vehicle. When a greater reduction in vehicle s peed is nec-
essary, the system applies the brakes (the stop lights will come on at this
time). The system will respond to changes in the speed of the vehicle
ahead in order to maintain the vehicle-to-vehicle distance set by the driver.
Approach warning warns you when the system cannot decelerate suffi-
ciently to prevent your vehicle from closing in on the vehicle ahead.
When the vehicle ahead of you st ops, your vehicle will also stop (vehicle is
stopped by system control). Afte r the vehicle ahead starts off, pressing the
“+RES” switch or depressing the accelerator pedal (start-off operation) will
resume follow-up cruising. If the start-off operation is not pe rformed, system
control continues to keep your vehicle stopped.
Driving in vehicle-to-vehicle distance control mode
Page 276 of 552

2764-5. Using the driving support systems
Use the meter control switches
to enable/disable the intuitive
parking assist. (P.102)
1 Select of the multi-infor-
mation display and then
press .
2 Press or to select
and then press .
When the intuitive parking assist
function is disabled, the intuitive
parking assist OFF indicator
( P.76) illuminates.
To re-enable the system, select on the multi-information dis-
play, select and turn it on. If
the system is di sabled, it will
remain off even if the engine
switch is turned to ON after the
engine switch has been turned
off.
Turning intuitive parking
assist on/off
WARNING
■Cautions regarding the use of
the system
There is a limit t o the degree of
recognition accuracy and control
performance that this system can
provide, do not overly rely on this
system. The driver is always
responsible for paying attention to
the vehicle’ surroundings and
driving safely.
■To ensure the system can
operate properly
Observe the following precau-
tions.
Failing to do so may result in the
vehicle being unable to be driven
safely and possibly cause an acci-
dent.
●Do not damage the sensors,
and always keep them clean.
●Do not attach a sticker or install
an electronic component, such
as a backlit licen se plate (espe-
cially fluorescent type), fog
lights, fender po le or wireless
antenna near a radar sensor.
●Do not subject the surrounding
area of the sensor to a strong
impact. If subjected to an
impact, have the vehicle
inspected by your Toyota
dealer. If the front or rear
bumper needs to be
removed/installed or replaced,
contact your Toyota dealer.
●Do not modify, disassemble or
paint the sensors.
●Do not attach a license plate
cover.
●Keep your tires properly
inflated.
Page 305 of 552

3054-5. Using the driving support systems
4
Driving
*: If equipped
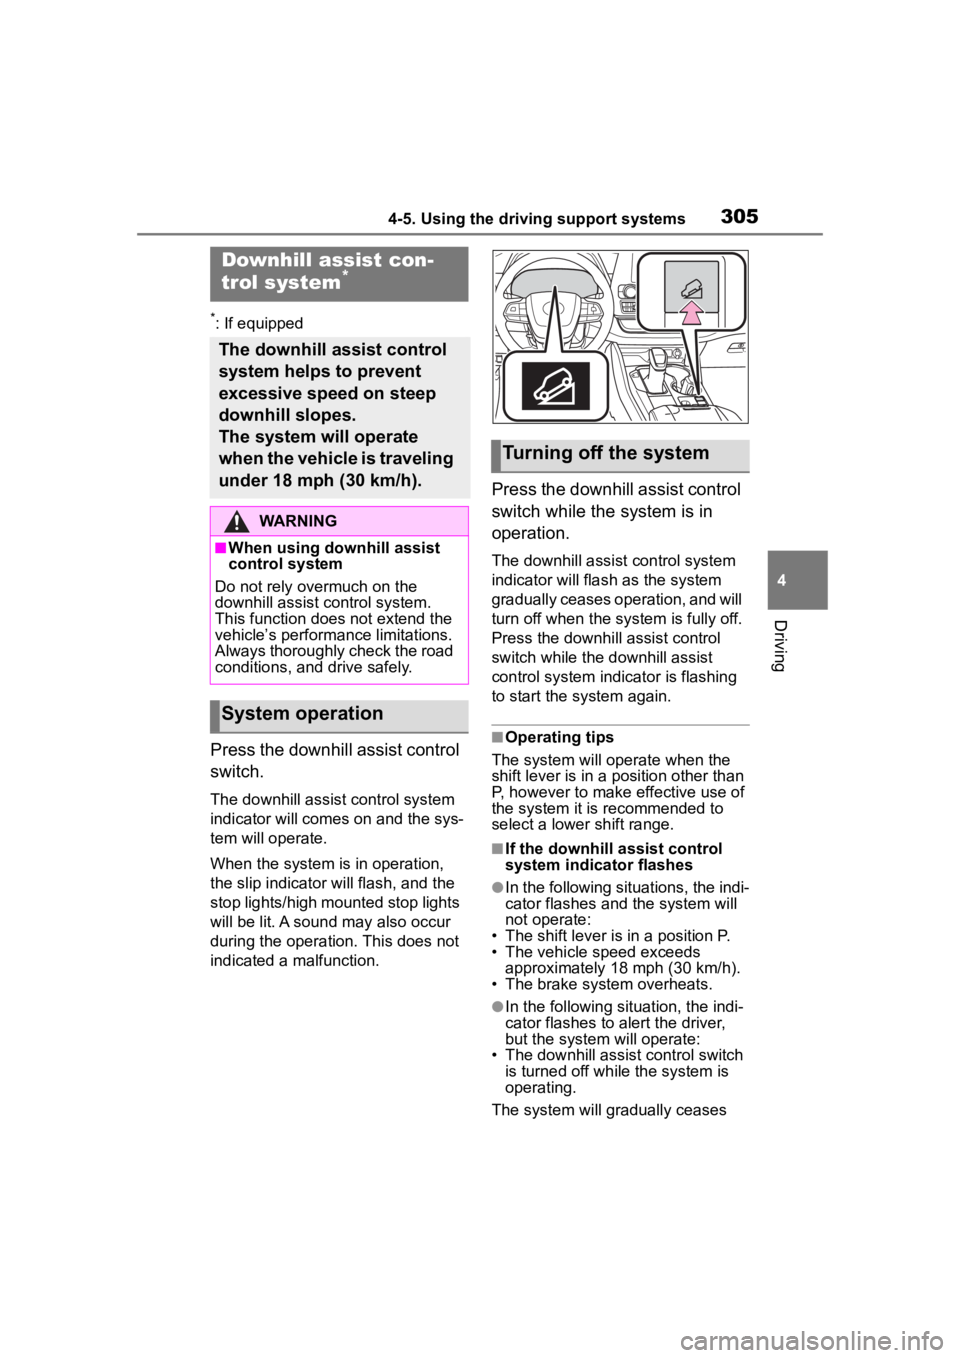
Press the downhill assist control
switch.
The downhill assist control system
indicator will comes on and the sys-
tem will operate.
When the system is in operation,
the slip indicator will flash, and the
stop lights/high mounted stop lights
will be lit. A sound may also occur
during the operation. This does not
indicated a malfunction.
Press the downhill assist control
switch while the system is in
operation.
The downhill assist control system
indicator will flash as the system
gradually ceases operation, and will
turn off when the system is fully off.
Press the downhill assist control
switch while the downhill assist
control system indicator is flashing
to start the system again.
■Operating tips
The system will o perate when the
shift lever is in a position other than
P, however to make effective use of
the system it is recommended to
select a lower shift range.
■If the downhill assist control
system indicator flashes
●In the following situ ations, the indi-
cator flashes and the system will
not operate:
• The shift lever is in a position P.
• The vehicle speed exceeds approximately 18 mph (30 km/h).
• The brake system overheats.
●In the following situation, the indi-
cator flashes to alert the driver,
but the system will operate:
• The downhill assist control switch is turned off while the system is
operating.
The system will gradually ceases
Downhill assist con-
trol system*
The downhill assist control
system helps to prevent
excessive speed on steep
downhill slopes.
The system will operate
when the vehicle is traveling
under 18 mph (30 km/h).
WARNING
■When using downhill assist
control system
Do not rely overmuch on the
downhill assist control system.
This function does not extend the
vehicle’s performance limitations.
Always thoroughly check the road
conditions, and drive safely.
System operation
Turning off the system
Page 335 of 552

3355-1. Using the air conditioning system and defogger
5
Interior features
*: If equipped
Turns the heated steering wheel
on/off
The indicator light comes on when
the heated steering wheel is oper-
ating.
■Operation condition
The engine switch is in ON.
■Timer function
The heated steering wheel will auto-
matically turn off after a period of
time.
■Front
Each time the switch is pressed,
the operation condition changes
as follows.
Hi (3 segments lit) Mid (2 seg-
ments lit) Lo (1 segment
lit) Off
The level indicator (amber)
lights up during operation.
Heated steering
wheel*/seat heat-
ers*/seat ventilators*
Heated steering wheel
Warms up the grip of the
steering wheel
Seat heaters
Warm up the seat upholstery
Seat ventilators
Maintain good ventilation
using a fan built into the seat
WARNING
■To prevent minor burn inju-
ries
Care should be taken if anyone in
the following categories comes in
contact with the steering wheel or
seats when the heater is on:
●Babies, small children, the
elderly, the sick and the physi-
cally challenged
●Persons with sensitive skin
●Persons who are fatigued
●Persons who have taken alco-
hol or drugs that induce sleep
(sleeping drugs, cold remedies,
etc.)
NOTICE
■To prevent damage to the
seat heaters
Do not put heavy objects that
have an uneven surface on the
seat and do not stick sharp
objects (needles, nails, etc.) into
the seat.
■To prevent battery discharge
Do not use the functions when the
engine is off.
Heated steering wheel
Seat heaters
Page 336 of 552
3365-1. Using the air conditioning system and defogger
■Rear
Each time the switch is pressed,
the operation condition changes
as follows.
Hi (3 segments lit) Mid (2 seg-
ments lit) Lo (1 segment
lit) Off
The level indica tor (amber)
lights up during operation.
■Operation condition
The engine switch is in ON.
Each time the switch is pressed,
the operation condition changes
as follows.
Hi (3 segments lit) Mid (2 seg-
ments lit) Lo (1 segment
lit) Off
The level indicato r (green) lights
up during operation.
■Operation condition
The engine switch is in ON.
WARNING
■To prevent overheating and
minor burn injuries
Observe the following precautions
when using the seat heaters.
●Do not cover the seat with a
blanket or cushion when using
the seat heater.
●Do not use seat heater more
than necessary.
Seat ventilators
Page 341 of 552
3415-3. Using the storage features
5
Interior features
1Unlock with the mechanical
key
2 Lock with the mechanical key
3 Open (pull lever)
■Glove box light
The glove box light turns on when
the tail lights are on.
Push the tab and slide the con-
sole box lid.
■Tray inside console box
The tray can be slid forward/back-
ward.
Front seats
Second seats (8-seat models)
Pull the armrest down.
WARNING
■When storage compartments
are not in use
When driving or when the storage
compartments are not in use,
keep the lids closed.
In the event of sudden braking or
sudden swerving, an accident
may occur due to an occupant
being struck by an open lid or the
items stored inside.
Glove box
Console box
Cup holders
Page 413 of 552

4136-3. Do-it-yourself maintenance
6
Maintenance and care
Normal fuse
Blown fuse
Type BNormal fuse
Blown fuse
Type CNormal fuse
Blown fuse
■After a fuse is replaced
●If the lights do n ot turn on even
after the fuse has been replaced,
a bulb may need replacement.
( P.415)
●If the replaced fuse blows again,
have the vehicle inspected by
your Toyota dealer.
■If there is an overload in a cir-
cuit
The fuses are designed to blow, pro-
tecting the wiring harness from
damage.
■When replacing light bulbs
Toyota recommends that you use
genuine Toyota pr oducts designed
for this vehicle. Because certain
bulbs are connected to circuits
designed to prevent overload,
non-genuine parts or parts not
designed for this vehicle may be
unusable.
WARNING
■To prevent system break-
downs and vehicle fire
Observe the following precau-
tions.
Failure to do so may cause dam-
age to the vehicle, and possibly a
fire or injury.
●Never use a fuse of a higher
amperage rating than that indi-
cated, or use any other object in
place of a fuse.
●Always use a genuine Toyota
fuse or equivalent.
Never replace a fuse with a
wire, even as a temporary fix.
●Do not modify the fuses or fuse
boxes.
NOTICE
■Before replacing fuses
Have the cause of electrical over-
load determined and repaired by
your Toyota dealer as soon as
possible.
Page 421 of 552
4216-3. Do-it-yourself maintenance
6
Maintenance and care
3Remove the light bulb.
4 Install a new light bulb.
5 Install the lens.
Hooks
1 Fit the lens into either the right or left hooks.
2 Push the lens into place.
After installation, confirm that the
lens is properly installed by gently
pulling it.
6Install the cover.
WARNING
■To prevent injury
Before performin g any light bulb
replacement procedure, be sure
to turn the engine switch off. Fail-
ure to do so may result in burns
from hot components or a part of
your body may get caught on an
operating component, possibly
causing serious injury.
■Replacing light bulbs
●Turn off the lights. Do not
attempt to replace the bulb
immediately after turning off the
lights.The bulbs become very
hot and may cause burns.