2023 TOYOTA GR YARIS seats
[x] Cancel search: seatsPage 40 of 470
38
Owner's Manual_Europe_M52P63_en
1-1. For safe use
any authorized Toyota retailer or Toyota
authorized repairer, or any reliable repairer as soon as possible.
●Any of the SRS airbags have been inflated.
●The front of the vehicle is damaged or deformed, or was involved in an acci-dent that was not severe enough to
cause the SRS front airbags to inflate.
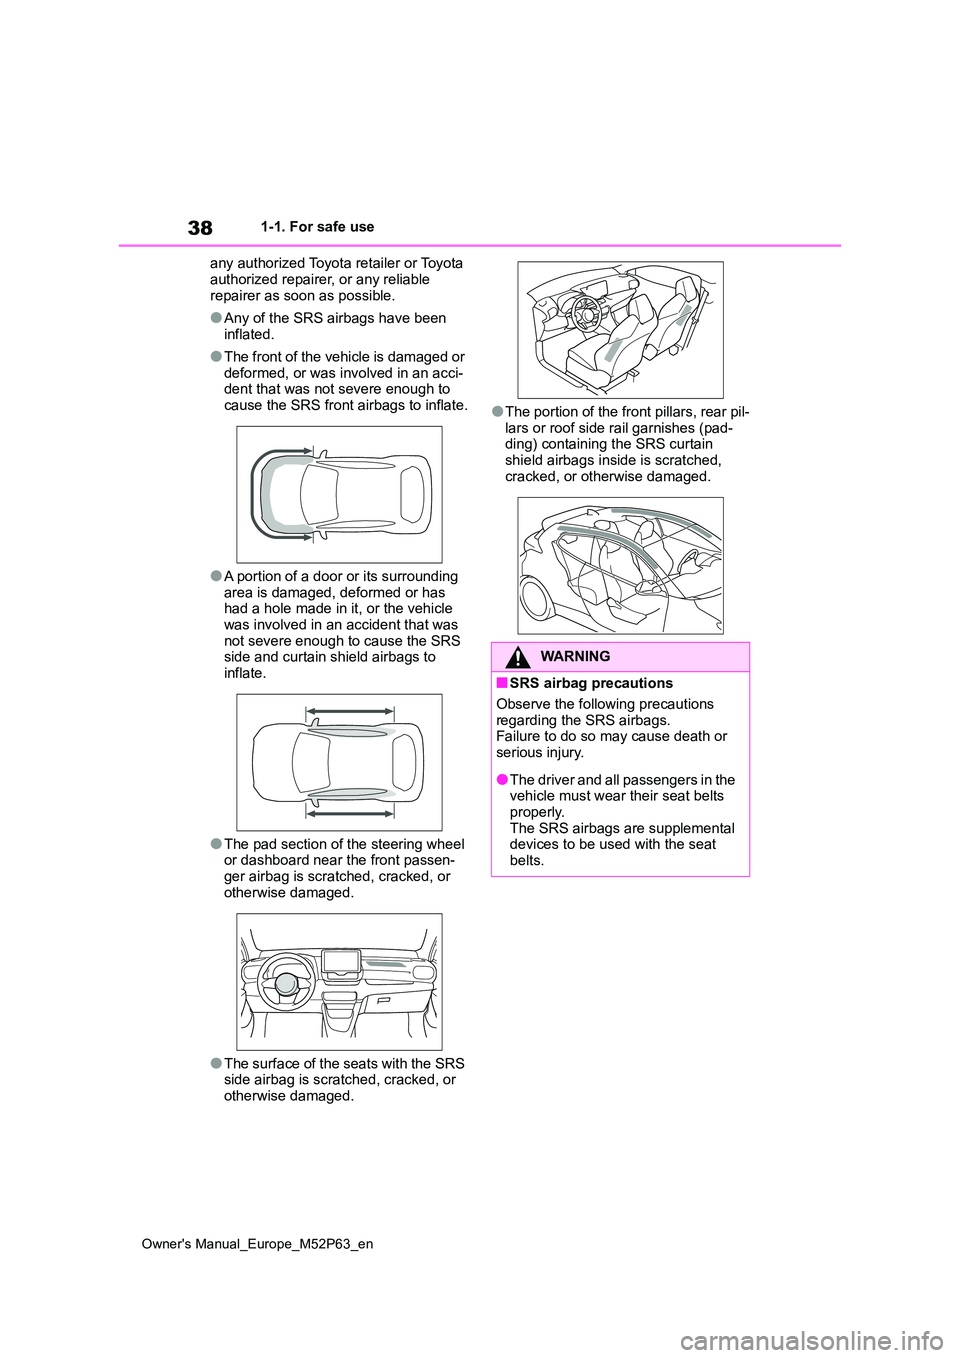
●A portion of a door or its surrounding
area is damaged, deformed or has had a hole made in it, or the vehicle was involved in an accident that was
not severe enough to cause the SRS side and curtain shield airbags to inflate.
●The pad section of the steering wheel or dashboard near the front passen-
ger airbag is scratched, cracked, or otherwise damaged.
●The surface of the seats with the SRS side airbag is scratched, cracked, or otherwise damaged.
●The portion of the front pillars, rear pil-
lars or roof side rail garnishes (pad- ding) containing the SRS curtain shield airbags inside is scratched,
cracked, or otherwise damaged.
WARNING
■SRS airbag precautions
Observe the following precautions
regarding the SRS airbags. Failure to do so may cause death or serious injury.
●The driver and all passengers in the vehicle must wear their seat belts
properly. The SRS airbags are supplemental devices to be used with the seat
belts.
Page 41 of 470
39
1
Owner's Manual_Europe_M52P63_en
1-1. For safe use
For safety and security
WARNING
●The SRS driver airbag deploys with considerable force, and can cause
death or serious injury especially if the driver is very close to the air-bag.
Since the risk zone for the driver’s air-
bag is the first 50 - 75 mm (2 - 3 in.) of
inflation, placing yourself 250 mm (10
in.) from your driver airbag provides
you with a clear margin of safety. This
distance is measured from the center
of the steering wheel to your breast-
bone. If you sit less than 250 mm (10
in.) away now, you can change your
driving position in several ways:
• Move your seat to the rear as far as
you can while still reaching the ped- als comfortably.
• Slightly recline the back of the seat. Although vehicle designs vary, many drivers can achieve the 250
mm (10 in.) distance, even with the driver seat all the way forward, sim-ply by reclining the back of the seat
somewhat. If reclining the back of your seat makes it hard to see the road, raise yourself by using a firm,
non-slippery cushion, or raise the seat if your vehicle has that feature.
• If your steering wheel is adjustable, tilt it downward. This points the air-bag toward your chest instead of
your head and neck.
The seat should be adjusted as rec-
ommended above, while still main- taining control of the foot pedals, steering wheel, and your view of the
instrument panel controls.
●The SRS front passenger airbag also deploys with considerable force, and can cause death or seri-
ous injury especially if the front pas- senger is very close to the airbag. The front passenger seat should be
as far from the airbag as possible with the seatback adjusted, so the front passenger sits upright.
●Improperly seated and/or restrained infants and children can be killed or
seriously injured by a deploying air- bag. An infant or child who is too small to use a seat belt should be
properly secured using a child restraint system. Toyota strongly recommends that all infants and
children be placed in the rear seats of the vehicle and properly restrained. The rear seats are safer
for infants and children than the front passenger seat. ( P. 4 5 )
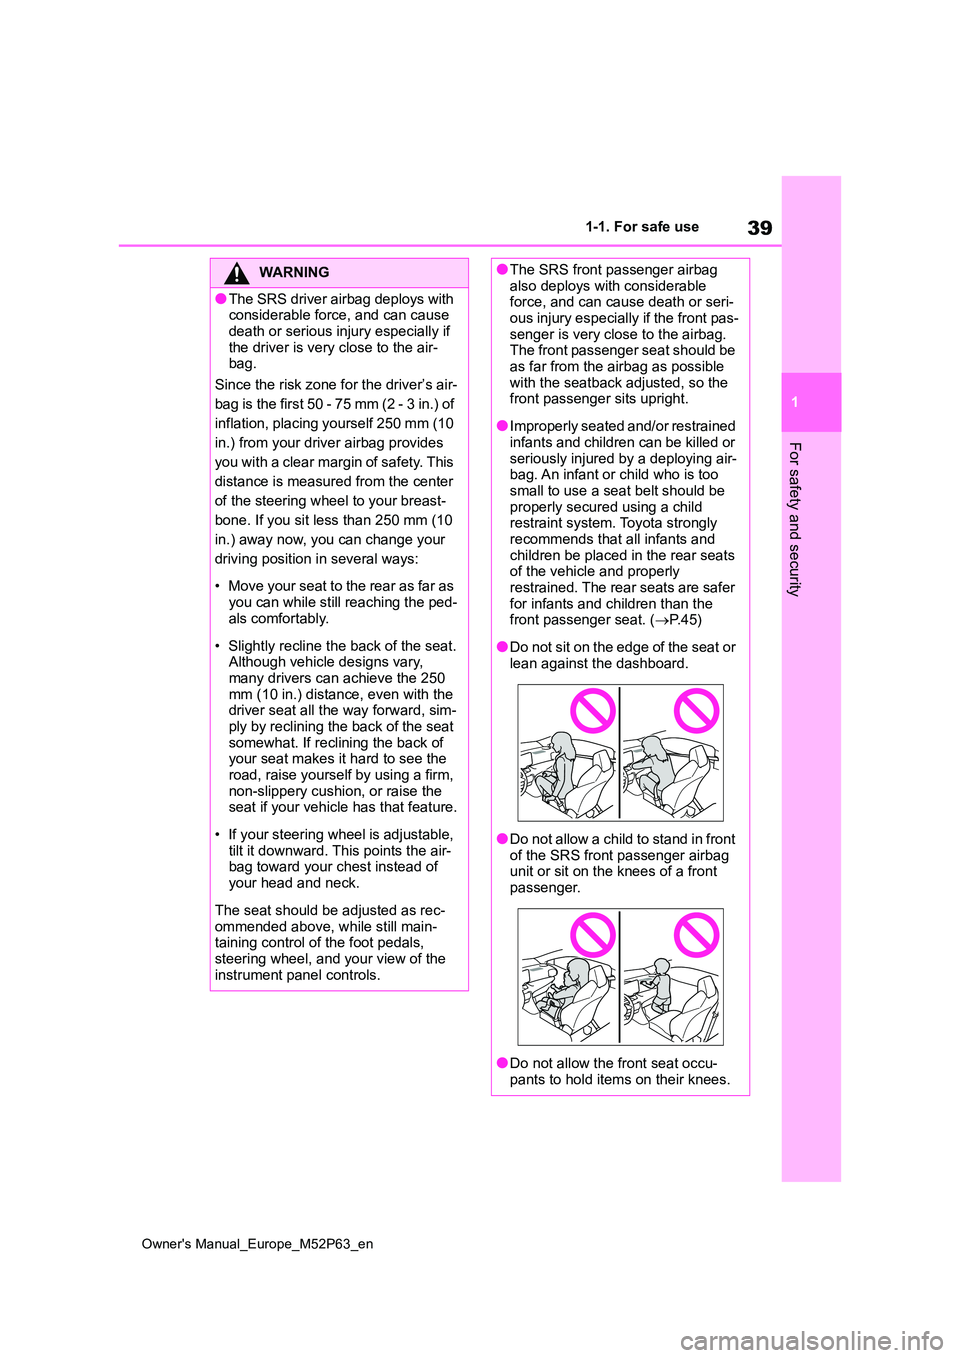
●Do not sit on the edge of the seat or lean against the dashboard.
●Do not allow a child to stand in front of the SRS front passenger airbag unit or sit on the knees of a front
passenger.
●Do not allow the front seat occu-
pants to hold items on their knees.
Page 43 of 470
41
1
Owner's Manual_Europe_M52P63_en
1-1. For safe use
For safety and security
WARNING
●If the areas where the SRS airbags are stored, such as the steering
wheel pad and front and rear pillar garnishes, are damaged or cracked, have them replaced by
any authorized Toyota dealer or repairer, or another duly qualified and equipped professional.
■Modification and disposal of SRS airbag system components
Do not dispose of your vehicle or per- form any of the following modifica-tions without consulting your Toyota
retailer or Toyota authorized repairer, or any reliable repairer. The SRS air-bags may malfunction or deploy
(inflate) accidentally, causing death or serious injury.
●Installation, removal, disassembly and repair of the SRS airbags
●Repairs, modifications, removal or replacement of the steering wheel, instrument panel, dashboard, seats
or seat upholstery, front, side and rear pillars, roof side rails, side door panels, side door trims or side door
speakers
●Modifications to the side door panel
(such as making a hole in it)
●Repairs or modifications of the front
fender, front bumper, or side of the occupant compartment
●Installation of a grille guard (bull bars, kangaroo bar, etc.), snow plows or winches
●Modifications to the vehicle’s sus-pension system
●Installation of electronic devices such as mobile two-way radios (RF-
transmitter) and CD players
Exhaust gas precautions
Harmful substance to the
human body is included in
exhaust gases if inhaled.
WARNING
Exhaust gases include harmful car-
bon monoxide (CO), which is color- less and odorless. Observe the following precautions.
Failure to do so may cause exhaust gases enter the vehicle and may lead to an accident caused by light-
headedness, or may lead to death or a serious health hazard.
■Important points while driving
●Keep the back door closed.
●If you smell exhaust gases in the vehicle even when the back door is closed, open the windows and have
the vehicle inspected at any autho- rized Toyota retailer or Toyota authorized repairer, or any reliable
repairer as soon as possible.
■When parking
●If the vehicle is in a poorly venti- lated area or a closed area, such as a garage, stop the engine.
●Do not leave the vehicle with the engine on for a long time.
If such a situation cannot be avoided, park the vehicle in an open space and ensure that
exhaust fumes do not enter the vehicle interior.
●Do not leave the engine running in an area with snow build-up, or where it is snowing. If snowbanks
build up around the vehicle while the engine is running, exhaust gases may collect and enter the
vehicle.
Page 46 of 470
44
Owner's Manual_Europe_M52P63_en
1-2. Child safety
WARNING
■When installing a child restraint system
For safety reasons, always install a child restraint system in a rear seat. In the event that the rear seat cannot be
used, the front seat can be used as long as the airbag manual on-off sys-tem is set to “OFF”.
If the airbag manual on-off system is left on, the strong impact of the airbag deployment (inflation) may cause
serious injury or even death.
■When a child restraint system is
not installed on the front passen- ger seat
Ensure that the airbag manual on-off
system is set to “ON”. If it is left off, the airbag may not deploy in the event of an accident,
which may result in serious injury or even death.
Riding with children
Observe the following precau-
tions when children are in the
vehicle.
Use a child restraint system
appropriate for the child, until
the child becomes large
enough to properly wear the
vehicle’s seat belt.
It is recommended that chil-
dren sit in the rear seats to
avoid accidental contact with
the shift lever, wiper switch,
etc.
Use the window lock switch to
avoid children opening the
door while driving or operating
the power window accidentally.
( P.124)
Do not let small children oper-
ate equipment which may
catch or pinch body parts,
such as the power window,
hood, back door, seats, etc.
WARNING
■When children are in the vehicle
Never leave children unattended in
the vehicle, and never allow children to have or use the key.
Children may be able to start the vehi-
cle or shift the vehicle into neutral. There is also a danger that children may injure themselves by playing with
the windows or other features of the vehicle. In addition, heat build-up or extremely cold temperatures inside
the vehicle can be fatal to children.
Page 53 of 470
51
1
Owner's Manual_Europe_M52P63_en
1-2. Child safety
For safety and security
*1: Move the front seat fully rearward. If
the passenger seat height can be
adjusted, move it to the upper most
position.
*2: Adjust the seatback angle to the
most upright position. When install-
ing a forward-facing child seat, if
there is a gap between the child seat
and the seatback, adjust the
seatback angle until good contact is
achieved.
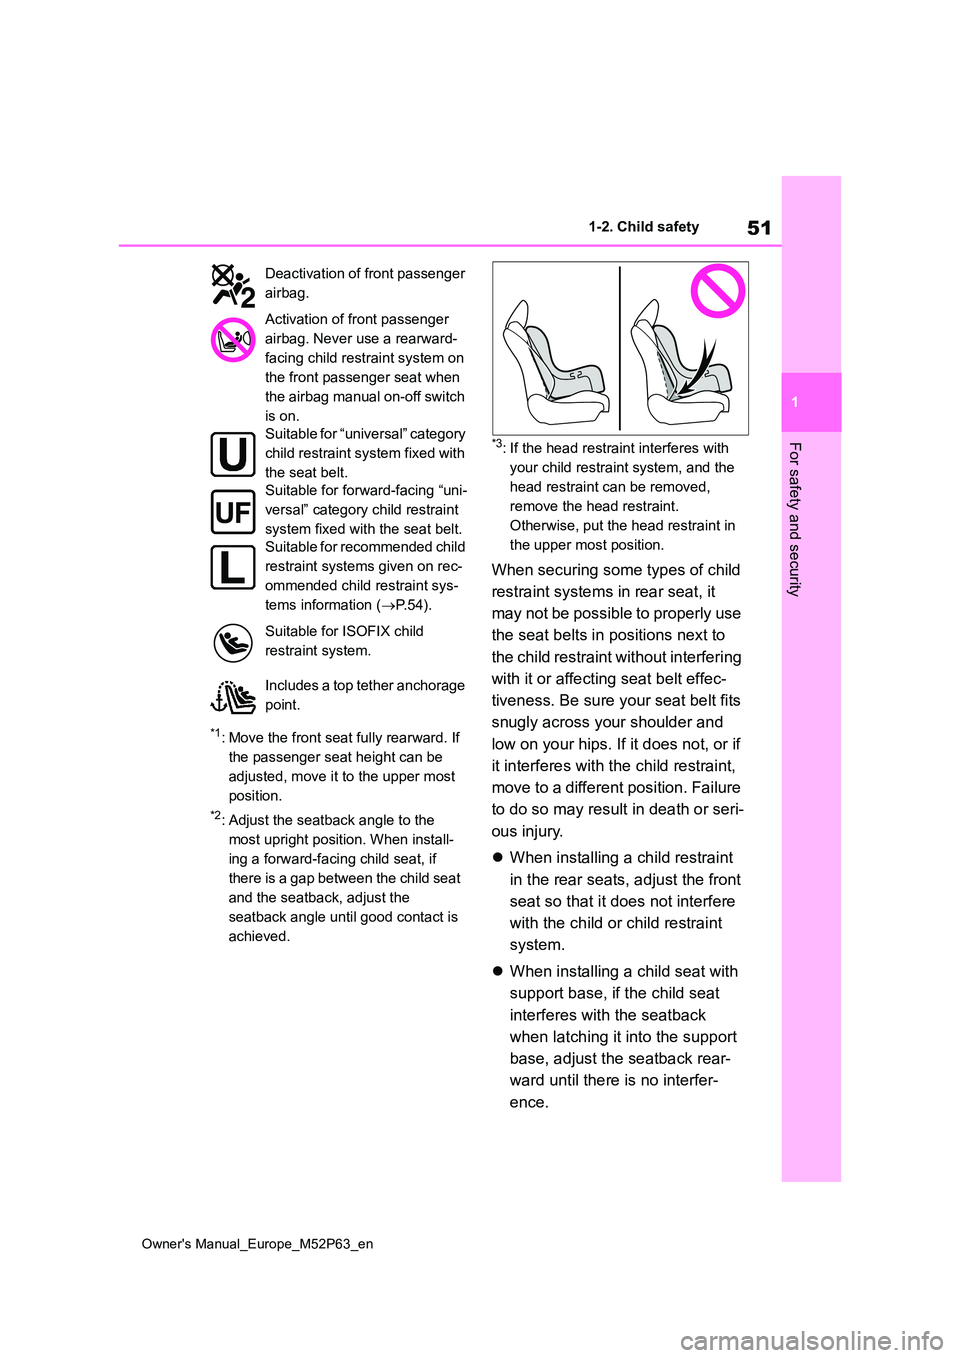
*3: If the head restraint interferes with
your child restraint system, and the
head restraint can be removed,
remove the head restraint.
Otherwise, put the head restraint in
the upper most position.
When securing some types of child
restraint systems in rear seat, it
may not be possible to properly use
the seat belts in positions next to
the child restraint without interfering
with it or affecting seat belt effec-
tiveness. Be sure your seat belt fits
snugly across your shoulder and
low on your hips. If it does not, or if
it interferes with the child restraint,
move to a different position. Failure
to do so may result in death or seri-
ous injury.
When installing a child restraint
in the rear seats, adjust the front
seat so that it does not interfere
with the child or child restraint
system.
When installing a child seat with
support base, if the child seat
interferes with the seatback
when latching it into the support
base, adjust the seatback rear-
ward until there is no interfer-
ence.
Deactivation of front passenger
airbag.
Activation of front passenger
airbag. Never use a rearward-
facing child restraint system on
the front passenger seat when
the airbag manual on-off switch
is on.
Suitable for “universal” category
child restraint system fixed with
the seat belt.
Suitable for forward-facing “uni-
versal” category child restraint
system fixed with the seat belt.
Suitable for recommended child
restraint systems given on rec-
ommended child restraint sys-
tems information ( P. 5 4 ) .
Suitable for ISOFIX child
restraint system.
Includes a top tether anchorage
point.
Page 59 of 470
57
1
Owner's Manual_Europe_M52P63_en
1-2. Child safety
For safety and security
■ISOFIX lower anchorages
(ISOFIX child restraint system)
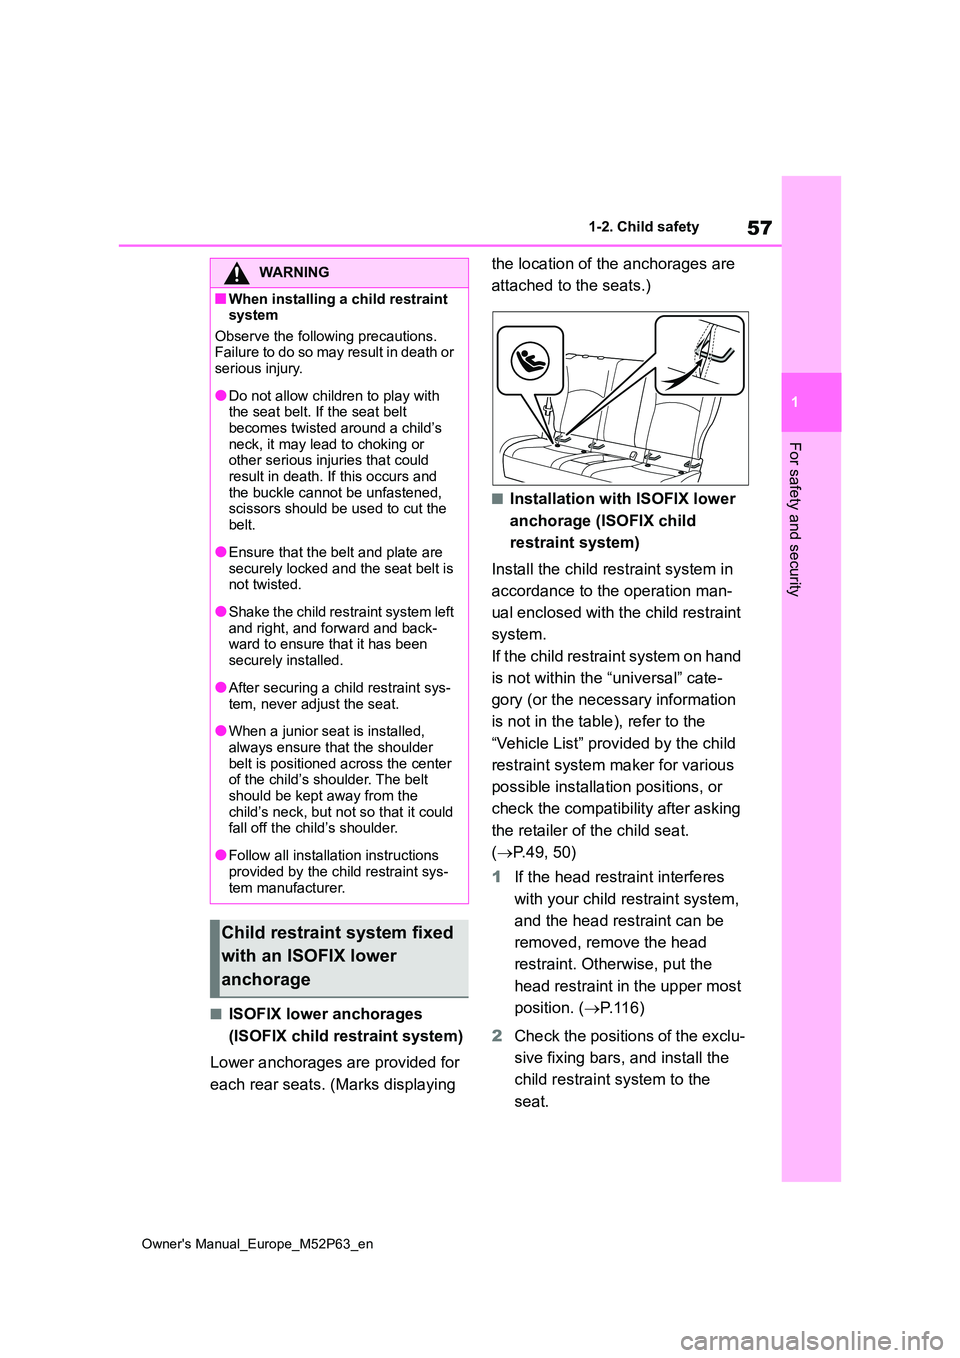
Lower anchorages are provided for
each rear seats. (Marks displaying
the location of the anchorages are
attached to the seats.)
■Installation with ISOFIX lower
anchorage (ISOFIX child
restraint system)
Install the child restraint system in
accordance to the operation man-
ual enclosed with the child restraint
system.
If the child restraint system on hand
is not within the “universal” cate-
gory (or the necessary information
is not in the table), refer to the
“Vehicle List” provided by the child
restraint system maker for various
possible installation positions, or
check the compatibility after asking
the retailer of the child seat.
( P.49, 50)
1 If the head restraint interferes
with your child restraint system,
and the head restraint can be
removed, remove the head
restraint. Otherwise, put the
head restraint in the upper most
position. ( P. 1 1 6 )
2 Check the positions of the exclu-
sive fixing bars, and install the
child restraint system to the
seat.
WARNING
■When installing a child restraint system
Observe the following precautions. Failure to do so may result in death or serious injury.
●Do not allow children to play with the seat belt. If the seat belt
becomes twisted around a child’s neck, it may lead to choking or other serious injuries that could
result in death. If this occurs and the buckle cannot be unfastened, scissors should be used to cut the
belt.
●Ensure that the belt and plate are
securely locked and the seat belt is not twisted.
●Shake the child restraint system left and right, and forward and back-ward to ensure that it has been
securely installed.
●After securing a child restraint sys-
tem, never adjust the seat.
●When a junior seat is installed,
always ensure that the shoulder belt is positioned across the center of the child’s shoulder. The belt
should be kept away from the child’s neck, but not so that it could fall off the child’s shoulder.
●Follow all installation instructions provided by the child restraint sys-
tem manufacturer.
Child restraint system fixed
with an ISOFIX lower
anchorage
Page 60 of 470
58
Owner's Manual_Europe_M52P63_en
1-2. Child safety
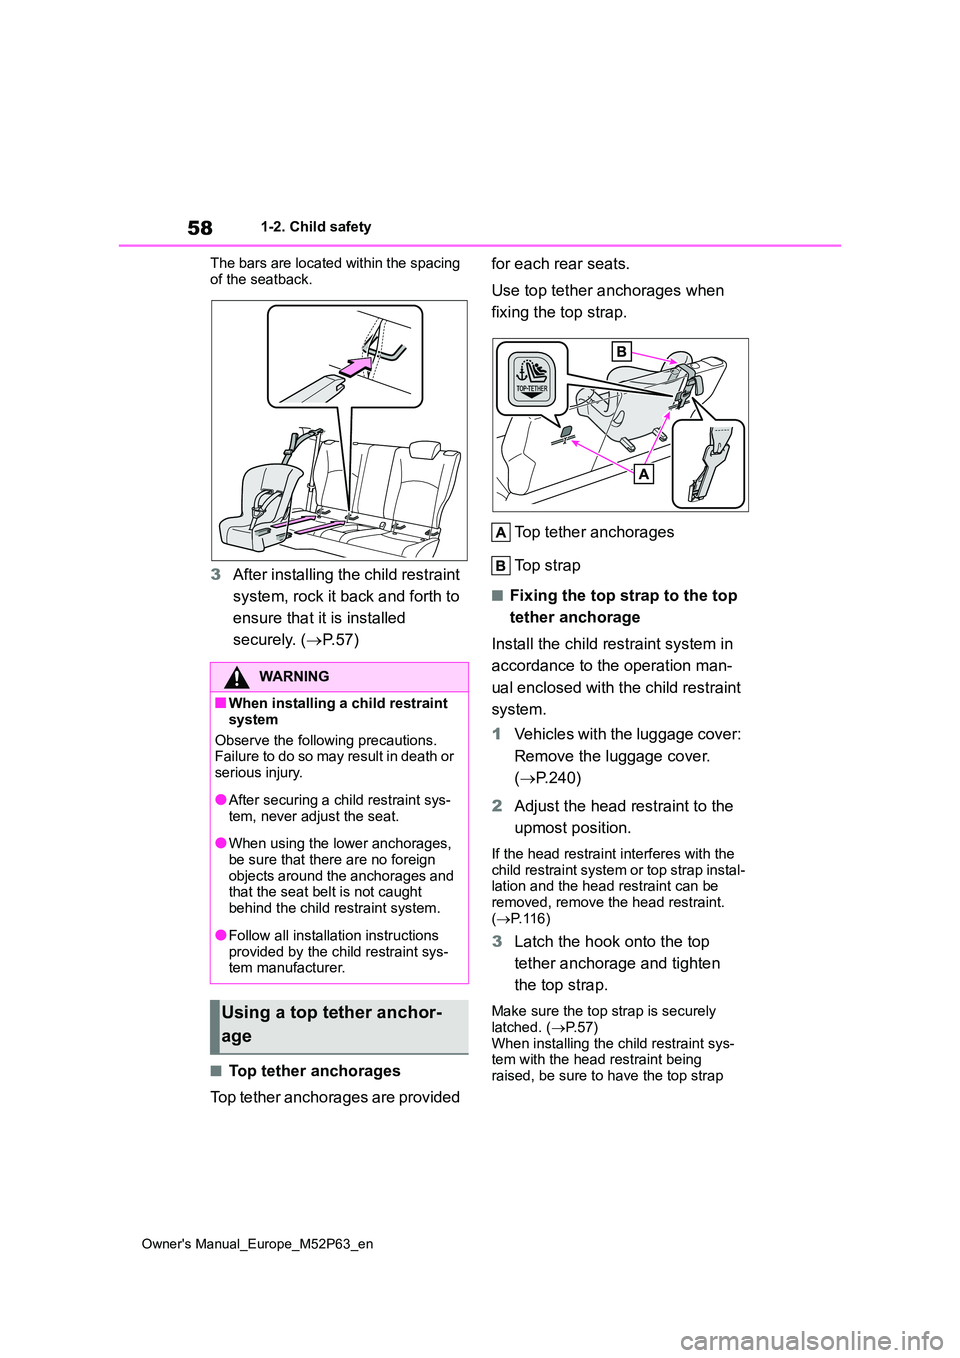
The bars are located within the spacing
of the seatback.
3 After installing the child restraint
system, rock it back and forth to
ensure that it is installed
securely. ( P. 5 7 )
■Top tether anchorages
Top tether anchorages are provided
for each rear seats.
Use top tether anchorages when
fixing the top strap.
Top tether anchorages
Top strap
■Fixing the top strap to the top
tether anchorage
Install the child restraint system in
accordance to the operation man-
ual enclosed with the child restraint
system.
1 Vehicles with the luggage cover:
Remove the luggage cover.
( P.240)
2 Adjust the head restraint to the
upmost position.
If the head restraint interferes with the child restraint system or top strap instal-lation and the head restraint can be
removed, remove the head restraint. ( P. 1 1 6 )
3Latch the hook onto the top
tether anchorage and tighten
the top strap.
Make sure the top strap is securely
latched. ( P. 5 7 ) When installing the child restraint sys-tem with the head restraint being
raised, be sure to have the top strap
WARNING
■When installing a child restraint
system
Observe the following precautions. Failure to do so may result in death or
serious injury.
●After securing a child restraint sys-
tem, never adjust the seat.
●When using the lower anchorages,
be sure that there are no foreign objects around the anchorages and that the seat belt is not caught
behind the child restraint system.
●Follow all installation instructions
provided by the child restraint sys- tem manufacturer.
Using a top tether anchor-
age
Page 99 of 470
3
97
Owner's Manual_Europe_M52P63_en
3
Before driving
Before driving
3-1. Key information
Keys.................................... 98
3-2. Opening, closing and locking
the doors
Side doors ........................ 101
Back door ......................... 104
Smart entry & start system 107
3-3. Adjusting the seats
Front seats........................ 112
Rear seats ........................ 114
Head restraints ................. 115
3-4. Adjusting the steering wheel
and mirrors
Steering wheel .................. 118
Inside rear view mirror ...... 119
Outside rear view mirrors . 120
3-5. Opening and closing the win-
dows
Power windows................. 122