2023 TOYOTA COROLLA battery
[x] Cancel search: batteryPage 333 of 468
3336-3. Do-it-yourself maintenance
6
Maintenance and care
*: If equipped
■If the key battery is depleted
The following symptoms may occur:
●The smart key system (if
equipped) and wireless remote
control will not fu nction properly.
●The operational range will be
reduced.
Flathead screwdriver
Small flathead screwdriver
Lithium battery CR2032 (vehi-
cles without a smart key sys-
tem), or CR2450 (vehicles
with a smart key system)
■Use a CR2032 (vehicles without
a smart key system), or CR2450
(vehicles with a smart key sys-
tem) lithium battery
●Batteries can be purchased at
your Toyota dealer, local electrical
appliance shops or camera stores.
●Replace only with the same or
equivalent type recommended by
the manufacturer.
●Dispose of used batteries accord-
ing to local laws.
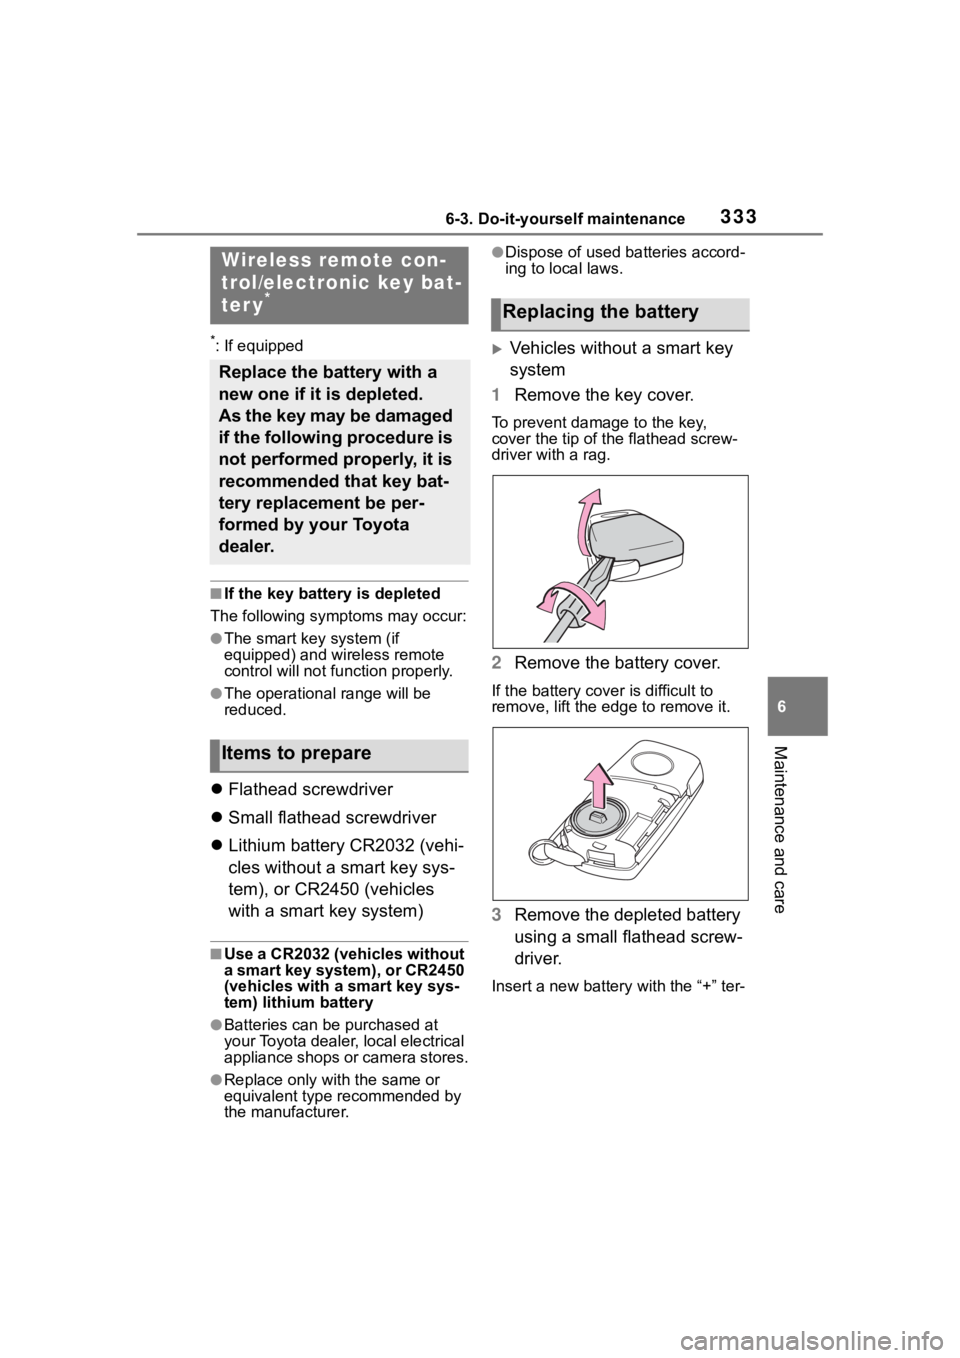
Vehicles without a smart key
system
1 Remove the key cover.
To prevent damage to the key,
cover the tip of the flathead screw-
driver with a rag.
2Remove the battery cover.
If the battery cover is difficult to
remove, lift the e dge to remove it.
3Remove the depleted battery
using a small flathead screw-
driver.
Insert a new battery with the “+” ter-
Wireless remote con-
trol/electronic key bat-
ter y
*
Replace the battery with a
new one if it is depleted.
As the key may be damaged
if the following procedure is
not performed properly, it is
recommended that key bat-
tery replacement be per-
formed by your Toyota
dealer.
Items to prepare
Replacing the battery
Page 334 of 468
3346-3. Do-it-yourself maintenance
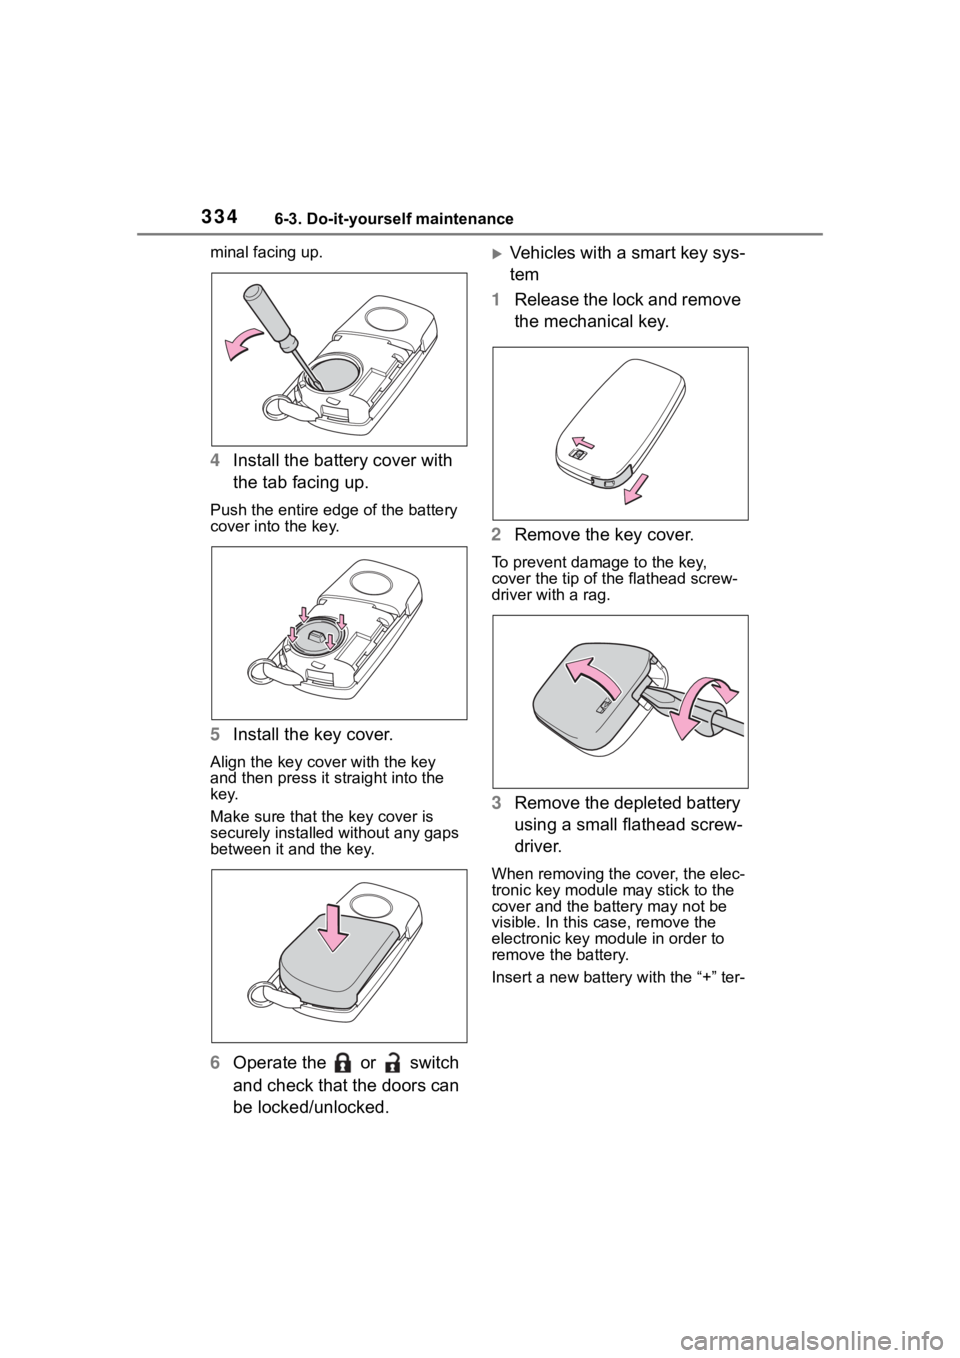
minal facing up.
4Install the battery cover with
the tab facing up.
Push the entire edge of the battery
cover into the key.
5Install the key cover.
Align the key cover with the key
and then press it straight into the
key.
Make sure that the key cover is
securely installed without any gaps
between it and the key.
6Operate the or switch
and check that the doors can
be locked/unlocked.
Vehicles with a smart key sys-
tem
1 Release the lock and remove
the mechanical key.
2 Remove the key cover.
To prevent damage to the key,
cover the tip of the flathead screw-
driver with a rag.
3Remove the depleted battery
using a small flathead screw-
driver.
When removing the cover, the elec-
tronic key module may stick to the
cover and the batt ery may not be
visible. In this case, remove the
electronic key module in order to
remove the battery.
Insert a new battery with the “+” ter-
Page 335 of 468
3356-3. Do-it-yourself maintenance
6
Maintenance and care
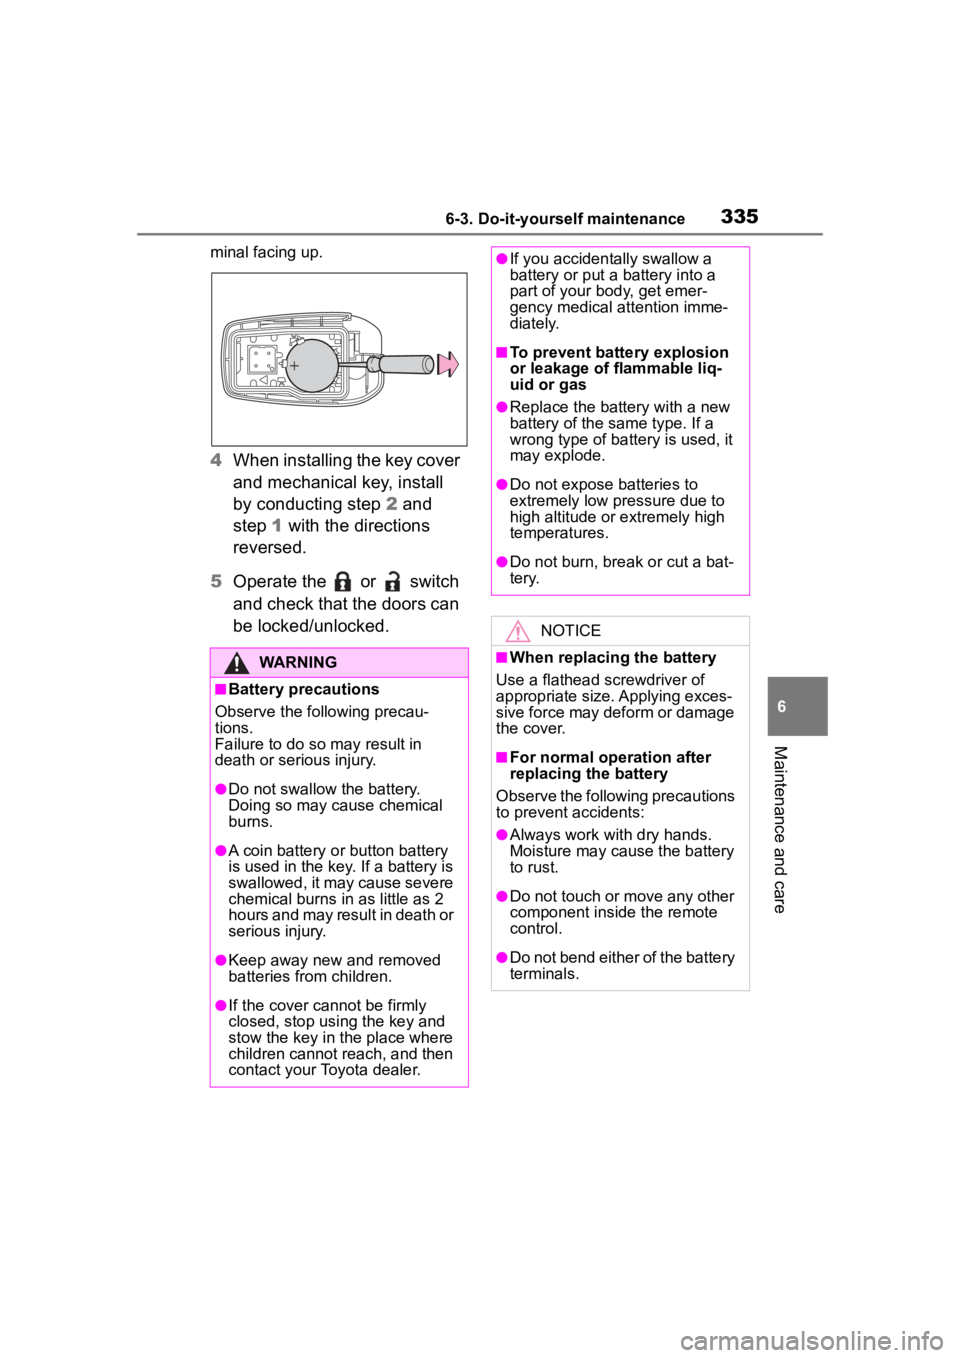
minal facing up.
4When installing the key cover
and mechanical key, install
by conducting step 2 and
step 1 with the directions
reversed.
5 Operate the or switch
and check that the doors can
be locked/unlocked.
WARNING
■Battery precautions
Observe the following precau-
tions.
Failure to do so m ay result in
death or serious injury.
●Do not swallow the battery.
Doing so may cause chemical
burns.
●A coin battery o r button battery
is used in the key. If a battery is
swallowed, it may cause severe
chemical burns in as little as 2
hours and may result in death or
serious injury.
●Keep away new and removed
batteries from children.
●If the cover cannot be firmly
closed, stop using the key and
stow the key in the place where
children cannot reach, and then
contact your Toyota dealer.
●If you accidentally swallow a
battery or put a battery into a
part of your b ody, get emer-
gency medical attention imme-
diately.
■To prevent battery explosion
or leakage of flammable liq-
uid or gas
●Replace the battery with a new
battery of the same type. If a
wrong type of battery is used, it
may explode.
●Do not expose batteries to
extremely low pr essure due to
high altitude or extremely high
temperatures.
●Do not burn, bre ak or cut a bat-
tery.
NOTICE
■When replacing the battery
Use a flathead screwdriver of
appropriate size. Applying exces-
sive force may deform or damage
the cover.
■For normal operation after
replacing the battery
Observe the following precautions
to prevent accidents:
●Always work with dry hands.
Moisture may cause the battery
to rust.
●Do not touch or move any other
component inside the remote
control.
●Do not bend either of the battery
terminals.
Page 336 of 468
3366-3. Do-it-yourself maintenance
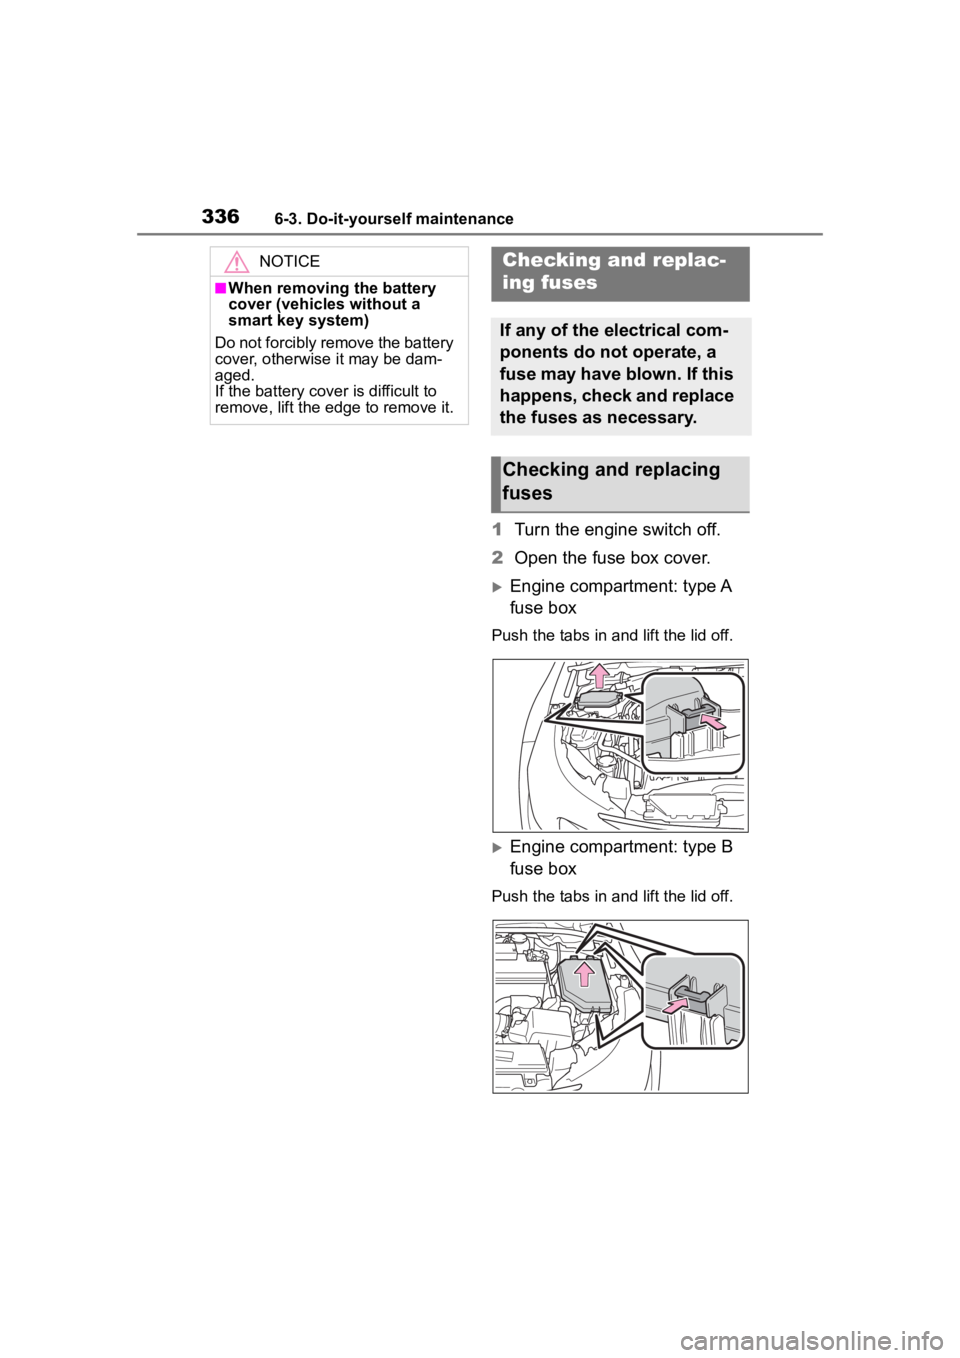
1Turn the engine switch off.
2 Open the fuse box cover.
Engine compartment: type A
fuse box
Push the tabs in and lift the lid off.
Engine compartment: type B
fuse box
Push the tabs in and lift the lid off.
NOTICE
■When removing the battery
cover (vehicles without a
smart key system)
Do not forcibly remove the battery
cover, otherwise it may be dam-
aged.
If the battery cover is difficult to
remove, lift the edge to remove it.
Checking a nd replac-
ing fuses
If any of the electrical com-
ponents do not operate, a
fuse may have blown. If this
happens, check and replace
the fuses as necessary.
Checking and replacing
fuses
Page 347 of 468
347
7
7
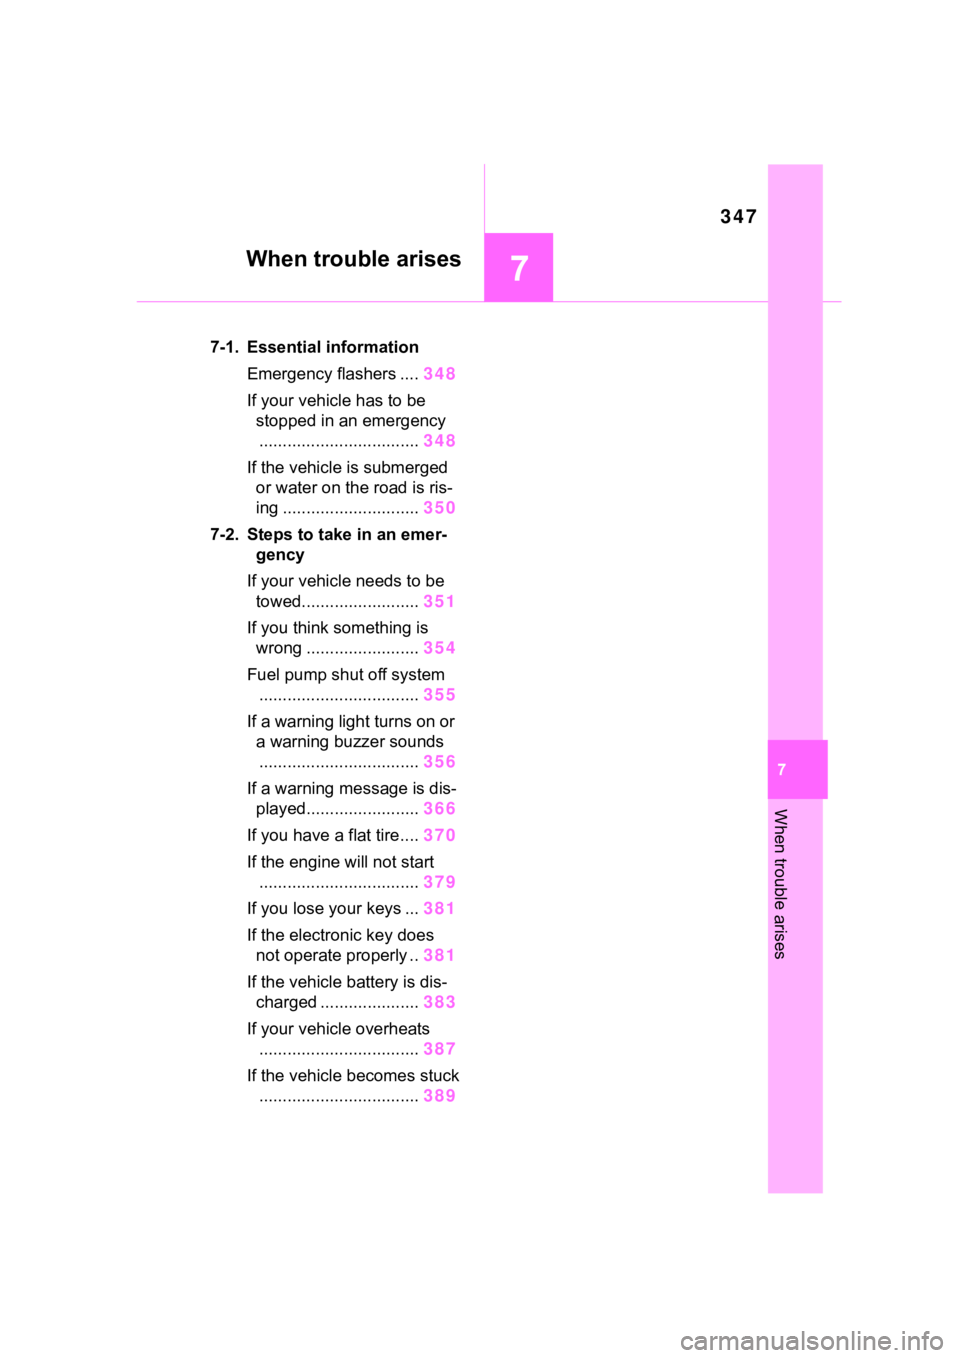
When trouble arises
When trouble arises
.7-1. Essential informationEmergency flashers .... 348
If your vehicle has to be stopped in an emergency.................................. 348
If the vehicle is submerged or water on the road is ris-
ing ............................. 350
7-2. Steps to take in an emer- gency
If your vehicle needs to be towed......................... 351
If you think something is wrong ........................ 354
Fuel pump shut off system .................................. 355
If a warning light turns on or a warning buzzer sounds.................................. 356
If a warning message is dis- played........................ 366
If you have a flat tire.... 370
If the engine will not start .................................. 379
If you lose your keys ... 381
If the electronic key does not operate properly .. 381
If the vehicle battery is dis- charged ..................... 383
If your vehicle overheats .................................. 387
If the vehicle becomes stuck .................................. 389
Page 363 of 468

3637-2. Steps to take in an emergency
7
When trouble arises
■Parking brake indicator
■Brake hold operated indicator
■Warning buzzer
In some cases, the buzzer may not
be heard due to being in a noisy
location or audio sound.
■Front passenger detection sen-
sor, seat belt reminder and
warning buzzer
●If luggage is placed on the front
passenger seat, the front passen-
ger detection sensor may cause
the warning light to flash and the
warning buzzer to sound even if a
passenger is not sitting in the
seat.
●If a cushion is placed on the seat,
the sensor may n ot detect a pas-
senger, and the warning light may
not operate properly.
■Operation of rear passengers’
seat belt re minder lights
●The rear passengers’ seat belt
reminder lights will illuminate for
approximately 60 seconds after
either rear door has been opened
and closed.
●If any rear seat belt is fastened
and then unfastened, the corre-
sponding light for that seat will illu-
minate continuously . If either rear
door is opened and closed while a
rear passengers’ seat belt light is
illuminated, it will tu rn off approxi-
mately 60 seconds after the door
is closed.
■SRS warning light
This warning light system monitors
the airbag sensor assembly, front
impact sensors, side impact sensors
(front door), side impact sensors
(front), driver’s seat position sensor,
driver’s seat belt buckle switch, front
passenger seat belt buckle switch,
“AIR BAG ON” indicator light, “AIR
BAG OFF” indicator light, seat belt
pretensioners, airbags, intercon-
necting wiring and power sources.
( P. 3 2 )
■Electric power steering system
warning light (warning buzzer)
When the battery charge becomes
insufficient or the voltage temporar-
ily drops, the electric power steering
Warning lightDetails/Actions
(Flashes)
(U.S.A.)
or
(Flashes)
(Canada)
It is possible that the parking brake is not fully engaged or
released
Operate the parking brake switch once again.
This light comes on the parking brake is not released. If the
light turns off after the parking brakes is fully released, the
system is operating normally.
Warning lightDetails/Actions
(Flashes)
Indicates a malfunction in the brake hold system
Have the vehicle inspected by your Toyota dealer
immediately.
Page 367 of 468

3677-2. Steps to take in an emergency
7
When trouble arises
the level of the engine oil, and add if
necessary.
This message may appear if the
vehicle is stopped on a slope. Move
the vehicle to a level surface and
check to see if the message disap-
pears.
■If “Engine Stopped Steering
Power Low” is displayed
This message is displayed if the
engine is stopped while driving.
When steering wheel operations are
heavier than usual, grip the steering
wheel firmly and operate it using
more force th an usual.
■If “Auto Power OFF to Conserve
Battery” is displayed
Power was cut off due to the auto-
matic power off function. Next time
when starting the engine, increase
the engine speed slightly and main-
tain that level for approximately 5
minutes to recha rge the battery.
■If “Headlight System Malfunc-
tion Visit Your Dealer” is dis-
played
The following systems may be mal-
functioning. Have the vehicle
inspected by your Toyota dealer
immediately.
●The LED headlight system
●AHB (Automatic High Beam)
■If “System Malfunction Visit
Your Dealer” is displayed
Indicates one of the following sys-
tems is disabled.
●PCS (Pre-Collision system)
●LDA (Lane Departure Alert)
●LTA (Lane Tracing Assist)
●AHB (Automatic High Beam)
●Dynamic radar cruise control
●RSA (Road Sign Assist) (if
equipped)
●BSM (Blind Spot Monitor) (if
equipped)
●RCTA (Rear Cross Traffic
Alert) (if equipped)
●SEA (Safe Exit Assist) (if
equipped)
Have the vehicle inspected by your
Toyota dealer immediately.
■If “System Stopped See
Owner’s Manual” is displayed
Indicates one of the following sys-
tems is disabled.
●PCS (Pre-Collision system)
●LDA (Lane Departure Alert)
●LTA (Lane Tracing Assist)
●AHB (Automatic High Beam)
●Dynamic radar cruise control
●RSA (Road Sign Assist) (if
equipped)
●BSM (Blind Spot Monitor) (if
equipped)
●RCTA (Rear Cross Traffic
Alert) (if equipped)
●SEA (Safe Exit Assist) (if
equipped)
Follow the following correction
methods.
• Check the voltage of the battery
• Check the sensors that the Toyota Safety Sense 3.0 uses for foreign
matter covering them. Remove
them if any. ( P.185)
Indicates the sensors may not be
operating properly. ( P.188)
When problems are solved and the
sensors are operational, this indica-
tion may disappear by itself.
■If “System Stopped Front Cam-
era Low Visibility See Owner’s
Manual” is displayed
Indicates one of the following sys-
tems is disabled.
●PCS (Pre-Collision system)
●LDA (Lane Departure Alert)
Page 370 of 468
3707-2. Steps to take in an emergency
ately.
• “Smart Key System Malfunction”
●If any of the following messages
are displayed on the multi-infor-
mation display, it may indicate a
malfunction. Immediately stop the
vehicle and contact your Toyota
dealer.
• “Braking Power Low”
• “Charging System Malfunction”
• “Oil Pressure Low”
Stop the vehicle in a safe
place on a hard, flat surface.
Set the parking brake.
Shift the shift lever to P.
Stop the engine.
Turn on the emergency flash-
ers.
NOTICE
■If “High Power Consumption
Power to Climate Temporar-
ily Limited” is displayed fre-
quently
There is a possible malfunction
relating to the charging system or
the battery may be deteriorating.
Have the vehicle inspected by
your Toyota dealer.
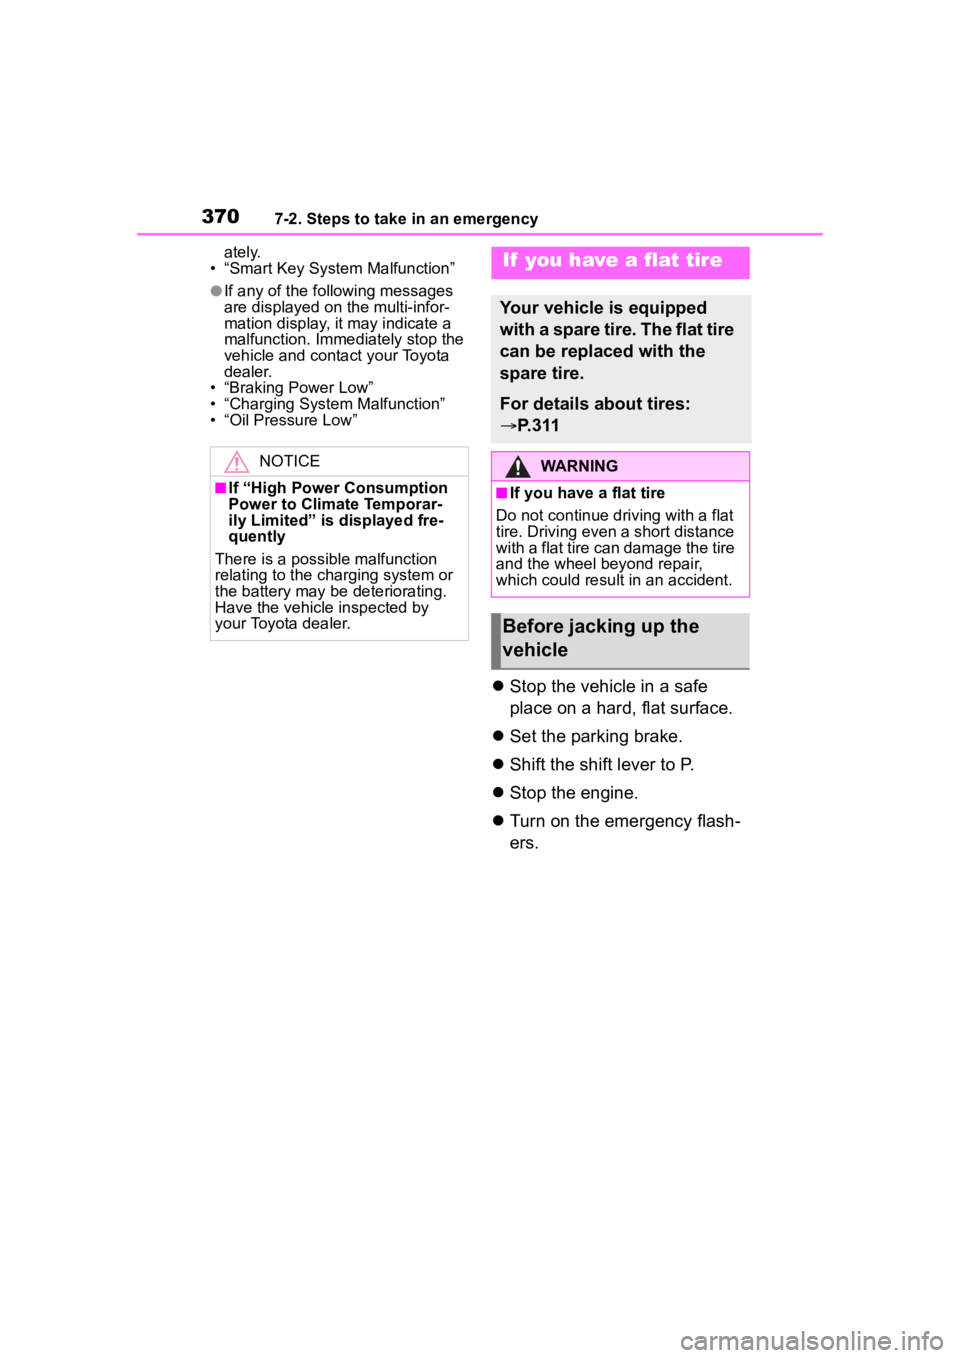
If you have a flat tire
Your vehicle is equipped
with a spare tire. The flat tire
can be replaced with the
spare tire.
For details about tires:
P.311
WARNING
■If you have a flat tire
Do not continue driving with a flat
tire. Driving even a short distance
with a flat tire can damage the tire
and the wheel beyond repair,
which could resul t in an accident.
Before jacking up the
vehicle