2023 TOYOTA COROLLA check engine
[x] Cancel search: check enginePage 159 of 468

1594-2. Driving procedures
4
Driving
engine, the engine switch will be
turned to ACC, not to off.
*2: ACC mode can be enabled/dis-abled on the customize menu.
( P.412)
■Auto power off function
If the vehicle is left in ACC or ON
(the engine is not running) for more
than 20 minutes with the shift lever
in P, the engine switch will automati-
cally turn to OFF.
However, this function cannot
entirely prevent battery discharge.
Do not leave the vehicle with the
engine switch in ACC or ON for long
periods of time when the engine is
not running.
■When ACC customization is in
off
With the engine switch is turned off,
the multimedia system can still be
used for a certain time until the bat-
tery saving function starts operating.
If the engine is stopped with the
shift lever in a position other
than P, the engine switch will not
be turned off. Perform the fol-
lowing procedure to turn the
switch off:
1Check that the parking brake
is set.
2 Shift the shift lever to P.
3 Check that “IGNITION ON” is
displayed on the multi-infor-
mation display and press the
engine switch shortly and
firmly.
4 Check that “ACCESSORY”
or “IGNITION ON” on the
multi-information display are
off.
NOTICE
■To prevent battery discharge
●Do not leave the engine switch
in ACC or ON for long periods of
time without the engine running.
●If “ACCESSORY” or “IGNITION
ON” is displayed on the
multi-informatio n display, the
engine switch is not off. Exit the
vehicle after turning the engine
switch off.
When stopping the engine
with the shift lever in a
position other than P
NOTICE
■To prevent battery discharge
Do not stop the engine when the
shift lever is in a position other
than P. If the engine is stopped in
another shift lever position, the
engine switch will not be turned
off and remained to ON. If the
vehicle is left in ON, battery dis-
charge may occur.
Page 161 of 468

1614-2. Driving procedures
4
Driving
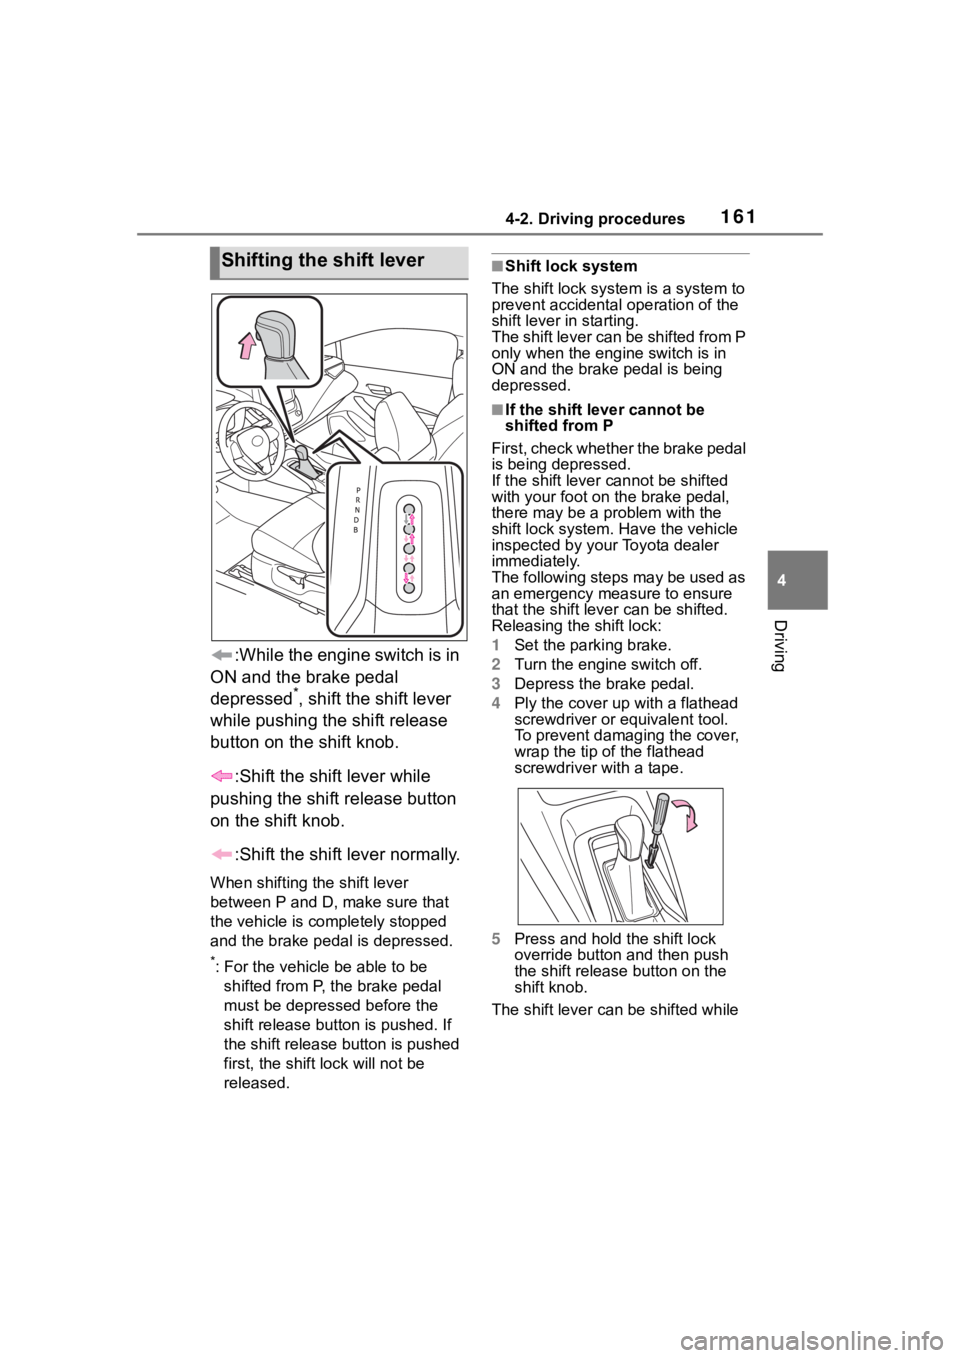
:While the engine switch is in
ON and the brake pedal
depressed
*, shift the shift lever
while pushing the shift release
button on the shift knob.
:Shift the shift lever while
pushing the shift release button
on the shift knob.
:Shift the shift lever normally.
When shifting the shift lever
between P and D, make sure that
the vehicle is completely stopped
and the brake pedal is depressed.
*: For the vehicle be able to be
shifted from P, the brake pedal
must be depresse d before the
shift release button is pushed. If
the shift release button is pushed
first, the shift lock will not be
released.
■Shift lock system
The shift lock syste m is a system to
prevent accidental operation of the
shift lever in starting.
The shift lever can be shifted from P
only when the engi ne switch is in
ON and the brake pedal is being
depressed.
■If the shift lever cannot be
shifted from P
First, check whether the brake pedal
is being depressed.
If the shift lever cannot be shifted
with your foot on the brake pedal,
there may be a p roblem with the
shift lock system. Have the vehicle
inspected by your Toyota dealer
immediately.
The following steps may be used as
an emergency measure to ensure
that the shift lev er can be shifted.
Releasing the shift lock:
1 Set the parking brake.
2 Turn the engine switch off.
3 Depress the brake pedal.
4 Ply the cover up with a flathead
screwdriver or equivalent tool.
To prevent damaging the cover,
wrap the tip of the flathead
screwdriver with a tape.
5 Press and hold the shift lock
override button and then push
the shift release button on the
shift knob.
The shift lever can be shifted while
Shifting the shift lever
Page 164 of 468

1644-2. Driving procedures
■Shift lock system
The shift lock system is a system to
prevent accidental operation of the
shift lever in starting.
The shift lever can be shifted from P
only when the engine switch is in
ON and the brake pedal is being
depressed.
■If the shift lever cannot be
shifted from P
First, check whether the brake pedal
is being depressed.
If the shift lever cannot be shifted
with your foot on the brake pedal,
there may be a pr oblem with the
shift lock system. Have the vehicle
inspected by your Toyota dealer
immediately.
The following steps may be used as
an emergency measure to ensure
that the shift lev er can be shifted.
Releasing the shift lock:
1 Set the parking brake.
2 Turn the engine switch off.
3 Depress the brake pedal.
4 Ply the cover up with a flathead
screwdriver or equivalent tool.
To prevent damaging the cover,
wrap the tip of the flathead
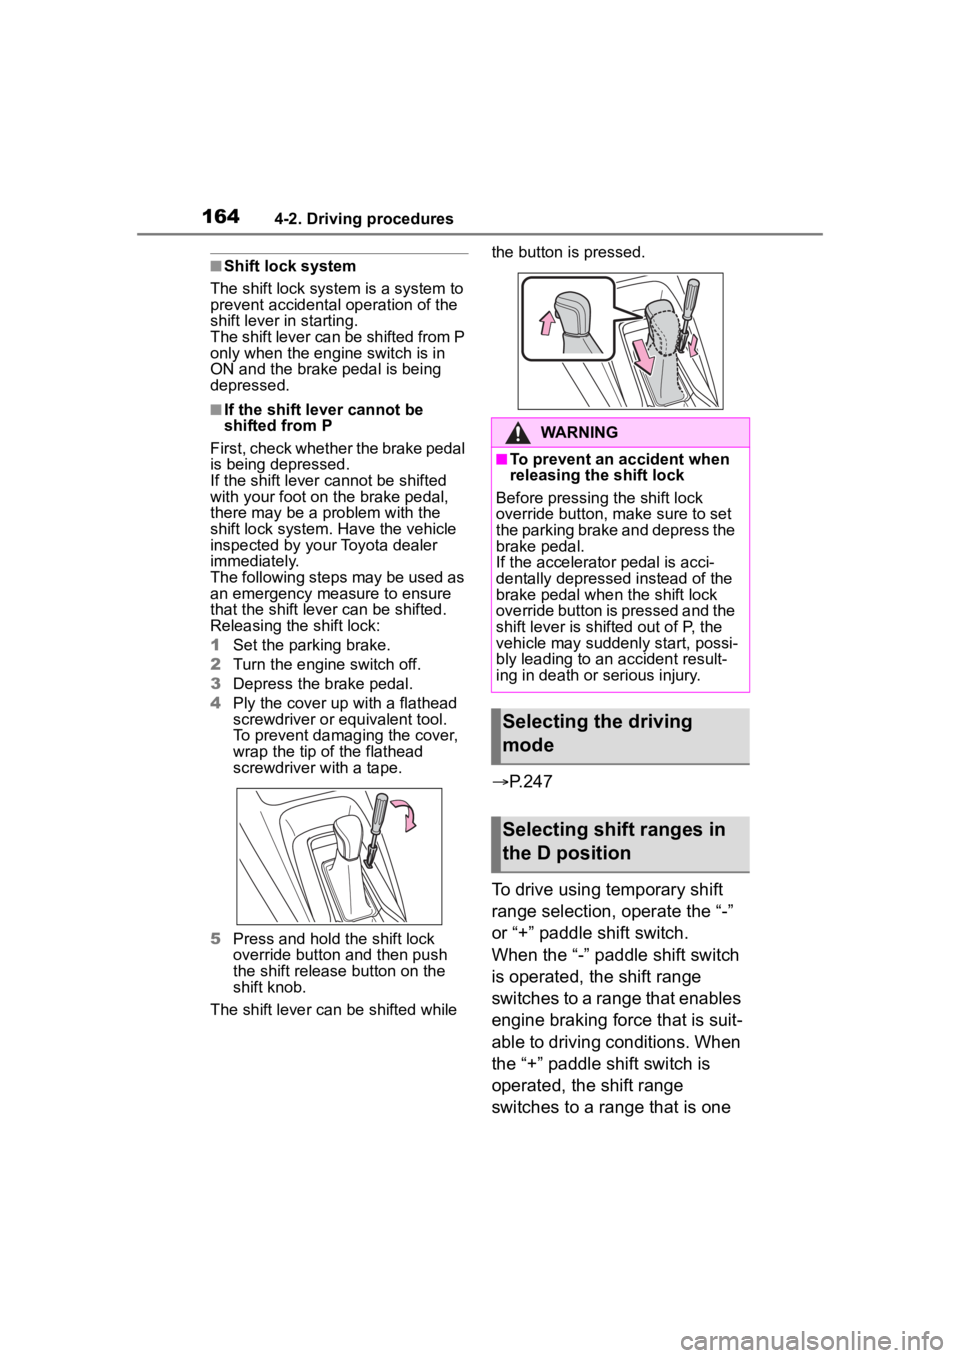
screwdriver with a tape.
5 Press and hold the shift lock
override button and then push
the shift release button on the
shift knob.
The shift lever can be shifted while the button is pressed.
P.247
To drive using temporary shift
range selection, operate the “-”
or “+” paddle shift switch.
When the “-” paddl e shift switch
is operated, the shift range
switches to a range that enables
engine braking force that is suit-
able to driving conditions. When
the “+” paddle shift switch is
operated, the shift range
switches to a range that is one
WARNING
■To prevent an accident when
releasing the shift lock
Before pressing the shift lock
override button, m ake sure to set
the parking brake and depress the
brake pedal.
If the accelerator pedal is acci-
dentally depressed instead of the
brake pedal when the shift lock
override button is pressed and the
shift lever is shifted out of P, the
vehicle may suddenly start, possi-
bly leading to an accident result-
ing in death or serious injury.
Selecting the driving
mode
Selecting shift ranges in
the D position
Page 167 of 468

1674-2. Driving procedures
4
Driving
1Right turn
2 Lane change to the right
(move the lever partway and
release it)
The right hand signals will flash 3
times.
3Lane change to the left
(move the lever partway and
release it)
The left hand signals will flash 3
times.
4Left turn
■Turn signals can be operated
when
The engine switch is in ON.
■If the indicator flashes faster
than usual
Check that a light bulb in the front or
rear turn signal lights has not burned out.
Tur n signal lever
Operating instructions
Page 170 of 468

1704-2. Driving procedures
position/mode, the parking brake
indicator light will turn on and stay
on as described below:
ON: Comes on until the parking
brake is released.
Not in ON: Stays on for approxi-
mately 15 seconds.
●When the engine switch is turned
off with the parking brake set, the
parking brake indicator light will
stay on for about 15 seconds. This
does not indicate a malfunction.
■When the parking brake switch
malfunctions
Automatic mode (automatic brake
setting and releas ing) will be turned
on automatically.
■Parking the vehicle
P. 1 4 3
■Parking brake engaged warning
buzzer
A buzzer will sound if the vehicle is
driven with the parking brake
engaged. “Parking Brake ON” is dis-
played on the multi-information dis-
play (with the vehicle reaching a
speed of 3 mph [5 km/h]).
■If the brake system warning
light comes on
P. 3 5 6
■Usage in winter time
P. 2 5 3
WARNING
■When parking the vehicle
Do not leave a child in the vehicle
alone. The parking brake may be
released unintentionally by a child
and there is the danger of the
vehicle moving that may lead to
an accident resulting in death or
serious injury.
■Parking brake switch
Do not set any objects near the
parking brake switch.
Objects may inte rfere with the
switch and may lead the parking
brake to unexpectedly operate.
■Parking brake automatic lock
function
Never use the automatic parking
brake engagement function in
place of normal parking brake
operation. This function is
designed to reduce the risk of a
collision due to the driver forget-
ting to engage the parking brake.
Over-reliance on this function to
park the vehicle safely may lead
to an accident resulting in death
or serious injury.
NOTICE
■When parking the vehicle
Before you leave the vehicle, shift
the shift lever to P, set the parking
brake and make s ure that the
vehicle does not move.
■When the system malfunc-
tions
Stop the vehicle in a safe place
and check the warning messages.
■When the vehicle battery is
discharged
The parking brake system cannot
be activated. ( P.383)
■When the parking brake can-
not be released due to a mal-
function
Driving the vehicle with the park-
ing brake set will lead to brake
components overheating, which
may affect braking performance
and increase brake wear.
Have the vehicle inspected by
your Toyota dealer immediately if
this occurs.
Page 179 of 468

1794-3. Operating the lights and wipers
4
Driving
operation
3 (U.S.A.) or (Canada)
High speed windshield wiper
operation
4 (U.S.A.) or (Canada)
Temporary operation
5 Washer/wiper dual
operation
Pulling the lever o perates the wip-
ers and washer.
Wipers will automatically operate a
couple of times after the washer
squirts.
Interval adjustment type only:
Wiper intervals can be adjusted
when intermittent operation is
selected.
6 Increases the intermittent
windshield wiper frequency
7 Decreases the intermittent
windshield wiper frequency
■The windshield wiper and
washer can be operated when
The engine switch is in ON.
■If no windshield washer fluid
sprays
Check that the washer nozzles are
not blocked if there is washer fluid in
the windshield washer fluid reser-
voir.
■When stopping the engine in an
emergency while driving
If the windshield wipers are operat-
ing when the engine is stopped, the
windshield wipers will operate in
high speed operation. After the vehi-
cle is stopped, operation will return
to normal when the engine switch is
turned to ON.
WARNING
■Caution regarding the use of
washer fluid
When it is cold, do not use the
washer fluid unt il the windshield
becomes warm. The fluid may
freeze on the windshield and
cause low visibility. This may lead
to an accident, resulting in death
or serious injury.
NOTICE
■When the washer fluid tank is
empty
Do not operate the switch continu-
ally as the washer fluid pump may
overheat.
■When a nozzle becomes
blocked
In this case, contact your Toyota
dealer.Do not try to clear it with a
pin or other object. The nozzle will
be damaged.
Page 281 of 468

2815-4. Other interior features
5
Interior features
■The wireless charger can be
operated when
The engine switch is in ACC or ON.
■Portable devices that can be
charged
●Portable devices compatible with
the Qi wireless charging standard
can be charged by the wireless
charger. However, compatibility
with all devices which meet the Qi
wireless charging standard is not
guaranteed.
●The wireless charger is designed
to supply low power electricity (5
W or less) to a cellular phone,
smartphone, or other portable
device.
■If a cover or accessory is
attached to the portable device
Do not charge a portable device if a
cover or accessory which is not Qi
compatible is attached. Depending
on the type of cover (including for certain genuine manufacture parts)
and/or accessory a
ttached, it may
not be possible to charge the porta-
ble device. If the portable device is
placed on the charging area and
does not charge, remove the cover
and/or accessories.
■If interference is heard in AM
radio broadcasts while
charging
Turn off the wireless charger and
check if the noise is reduced. If
noise is reduced, press and hold the
power supply switch of the wireless
charger for 2 se conds. The fre-
quency of the wireless charger is
changed and noise may be
reduced. When the frequency is
changed, the operation indicator
light will blink (orange) 2 times.
■Charging precautions
●If the electronic key cannot be
detected in the cabin, charging
cannot be performed. When a
Operation indicator lightSuspected causeMeasure
Blinks (orange) at a one
second interval continu-
ouslyVehicle to charger com-
munication failure.
If the engine is running,
stop and then restart the
engine.
If the engine switch is in
ACC, start the engine.
Blinks (orange) 3 times
repeatedly
A foreign object exists
between the portable
device and charging
area.
Remove the foreign
object.
Portable device is not
positioned properly on
the charging area.If there is a case or
cover attached to the
portable device, remove
it.
Blinks (orange) 4 times
repeatedlyThe temperature of the
wireless charger is
excessively high.
Stop charging, remove
the portable device from
the charging tray, wait
for the temperature to
drop, and then start
charging again.
Page 284 of 468

2845-4. Other interior features
1To set the visor in the forward
position, flip it down.
2 To set the visor in the side
position, flip down, unhook,
and swing it to the side.
3 To use the side extender,
place the visor in the side
position, then slide it back-
ward. (if equipped)
Slide the cover to open.
The vanity light turns on. (if
equipped)
■To prevent batte ry discharge
(vehicles with vanity lights)
If the vanity lights remain on when
the engine switch is OFF, the lights
will go off automatically after 20 min-
utes.
■To prevent malfunctions and
data corruptions
●When charging, bringing a
credit, or other magnetic card,
or magnetic storage media
close to the charge area may
clear any stored data due to
magnetic influence. Also, do not
bring a wristwatch or other pre-
cision instrument close to the
charge area since doing so may
cause it to malfunction.
●Do not charge with a non-con-
tact IC card such as a transpor-
tation system IC card inserted
between the charging side of a
portable device and the charge
area. The IC chip may become
extremely hot and damage the
portable device or IC card. Be
especially careful not to charge
a portable device inside a case
or cover with a non-contact IC
card attached.
●Do not leave portable devices
inside the vehicle. The inside of
the vehicle can become hot in
extreme heat, which could
cause a malfunction.
■If the smartphone OS has
been updated
If the smartphone OS has been
updated to a new er version, its
charging specifications may have
changed significantly. For details,
check the information on the man-
ufacturer’s website.
■To prevent battery discharge
Do not use the wireless charger
for a long period of time with the
engine stopped.
Sun visors
Va n i t y m i r r o r s