2023 TOYOTA COROLLA HYBRID warning
[x] Cancel search: warningPage 341 of 496
3416-3. Do-it-yourself maintenance
6
Maintenance and care
After approximately 2 minutes, the
wheel set change will complete, the
tire pressure warning light will turn
off, and a completion message will
be displayed on the multi-informa-
tion display.
If changing does not complete after
approximately 4 minutes, a mes-
sage indicating that the change
could not be compl eted will be dis-
played.
Check which wheel set is installed
and perform the change procedure
again from the beginning.
9 If the specified tire inflation
pressure of the wheel set
installed differs from that of
the previous set, it will be
necessary to perform the tire
inflation pressure setting pro-
cedure of the tire pressure
warning system. ( P.333)
If the specified tire inflation pres-
sure is the same, i t will not be nec-
essary to perform the tire inflation
pressure setting procedure.
10 Register the position of each
wheel.
7-inch display
1 Install the desired wheel set.
2 Select of the multi-infor-
mation display and then
press . 3
Press or to select
“Vehicle Settings” and then
press .
4 Press or to select
“TPWS setting” and then
press .
5 Press or to select
“Tire Set Switching” and then
press .
6 Press or to select
“Register Valve / ID” and then
press .
7 Press or to select
“Tire Set 1” or “Tire Set 2”.
Then press .
8 Select “OK” and then press
.
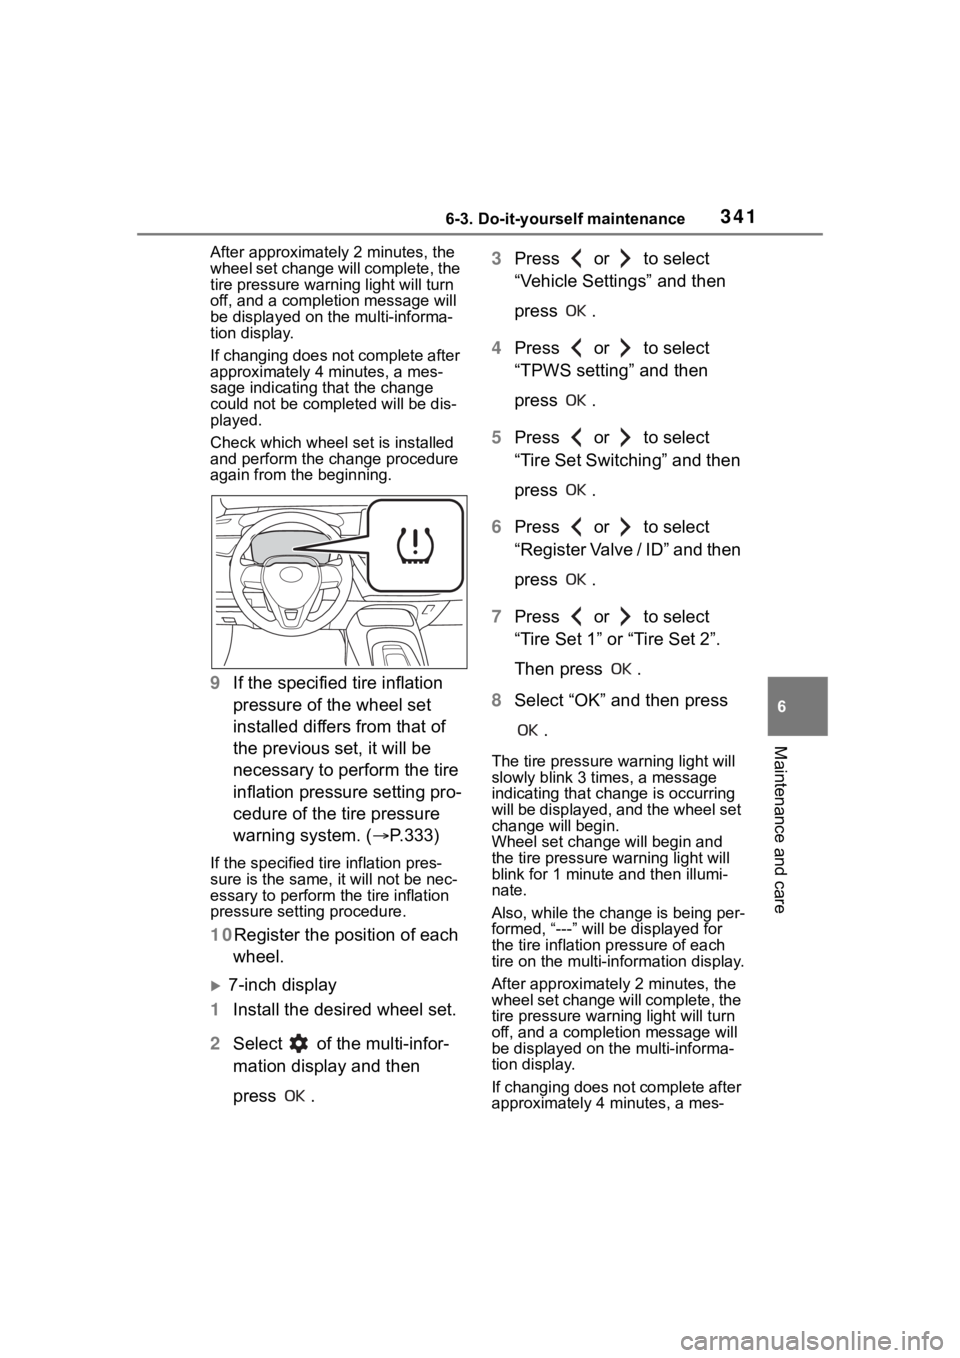
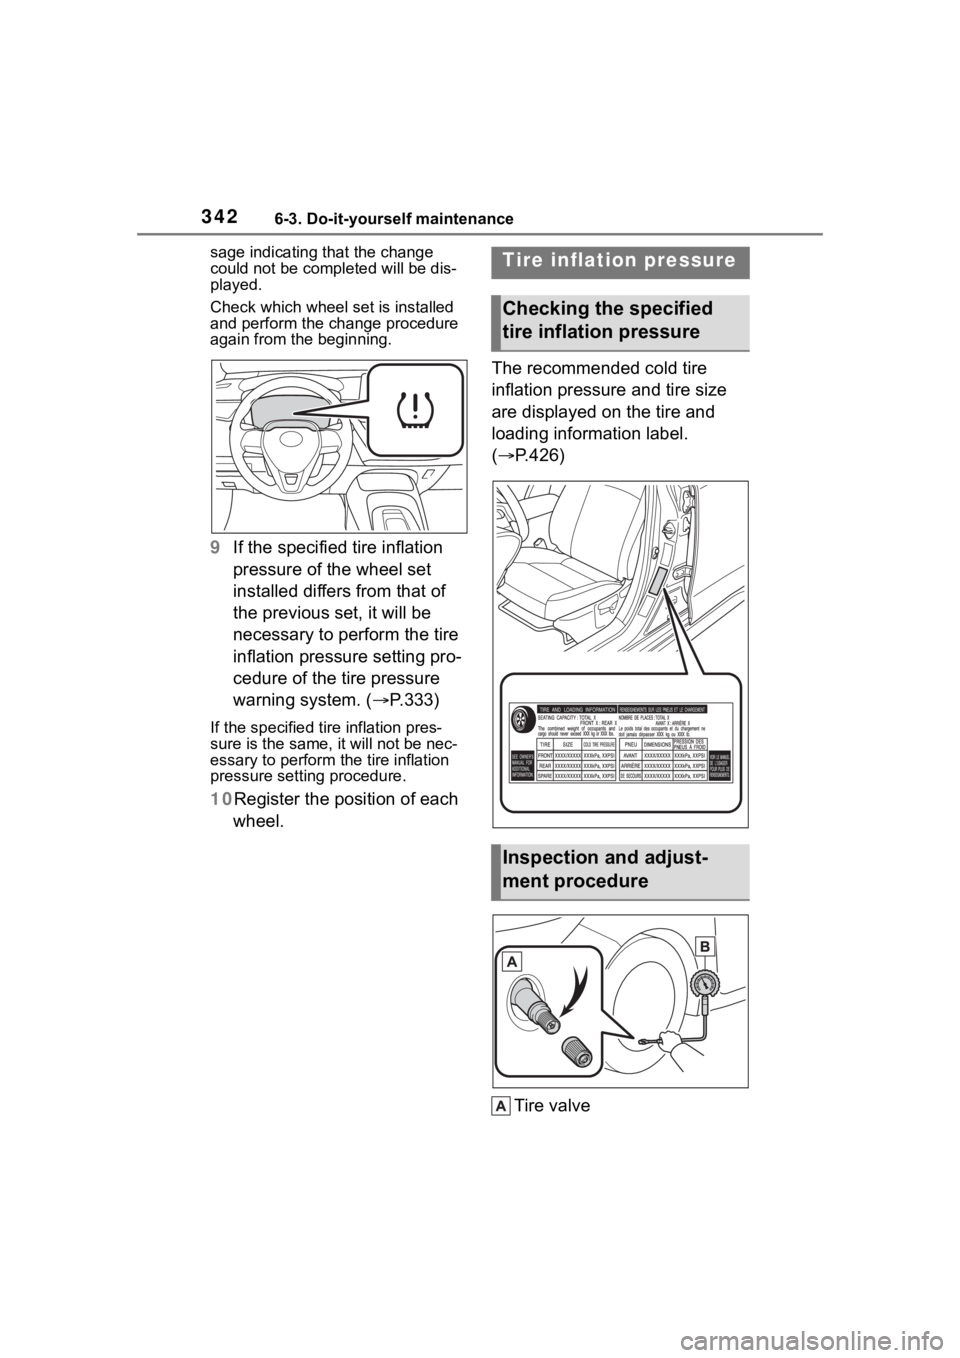
The tire pressure warning light will
slowly blink 3 ti mes, a message
indicating that change is occurring
will be displayed, and the wheel set
change will begin.
Wheel set change will begin and
the tire pressure warning light will
blink for 1 minute and then illumi-
nate.
Also, while the change is being per-
formed, “---” will be displayed for
the tire inflation pressure of each
tire on the multi-in formation display.
After approximatel y 2 minutes, the
wheel set change will complete, the
tire pressure warn ing light will turn
off, and a completion message will
be displayed on the multi-informa-
tion display.
If changing does not complete after
approximately 4 minutes, a mes-
Page 342 of 496
3426-3. Do-it-yourself maintenance
sage indicating that the change
could not be compl eted will be dis-
played.
Check which wheel set is installed
and perform the change procedure
again from the beginning.
9 If the specified tire inflation
pressure of the wheel set
installed differs from that of
the previous set, it will be
necessary to perform the tire
inflation pressure setting pro-
cedure of the tire pressure
warning system. ( P.333)
If the specified tire inflation pres-
sure is the same, i t will not be nec-
essary to perform the tire inflation
pressure setting procedure.
10 Register the position of each
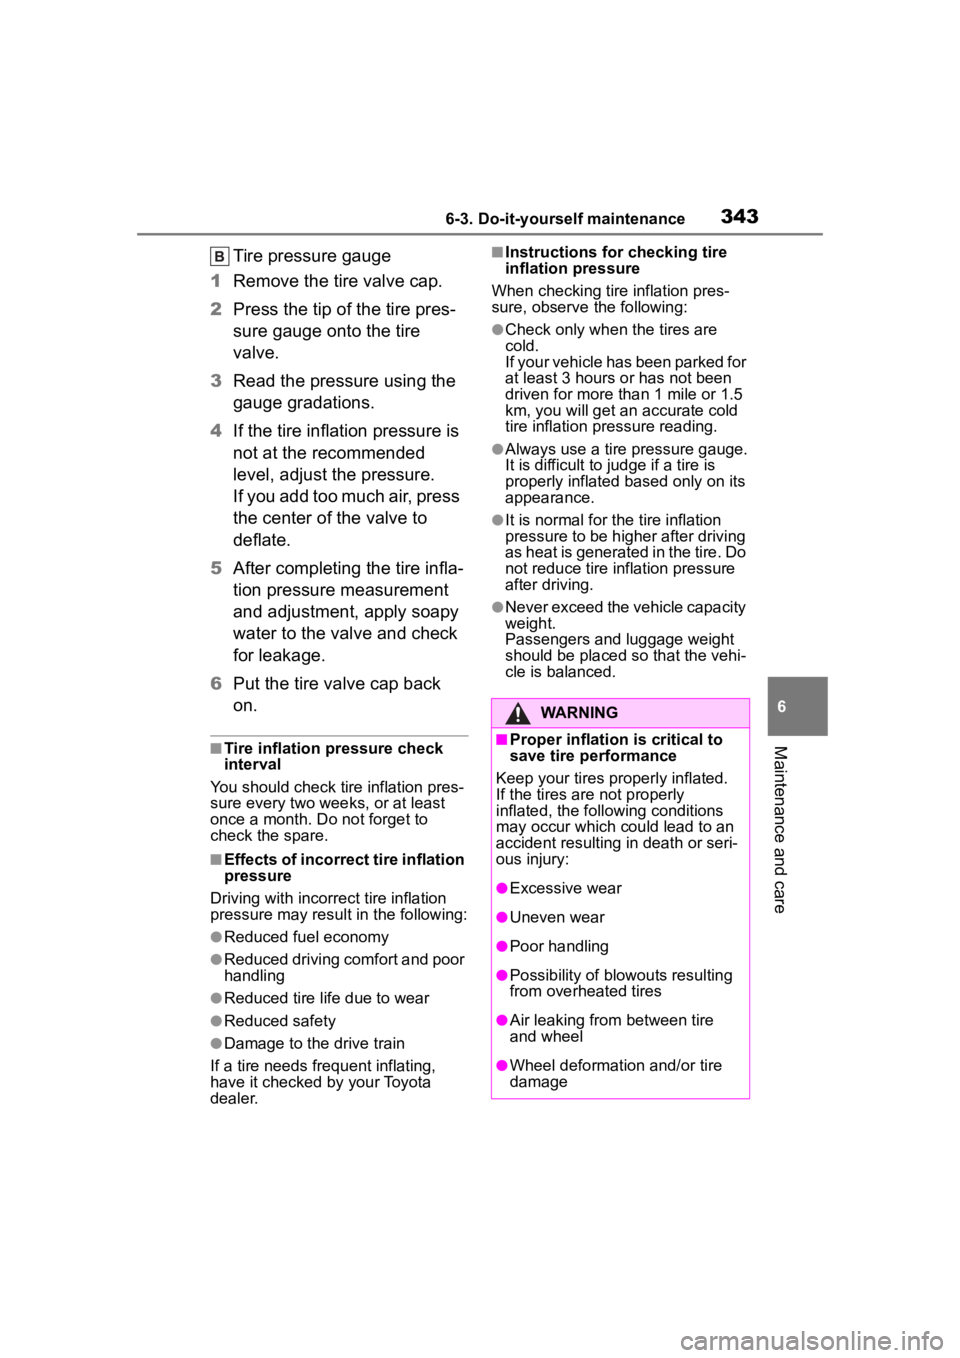
wheel. The recommended cold tire
inflation pressure and tire size
are displayed on the tire and
loading information label.
(
P.426)
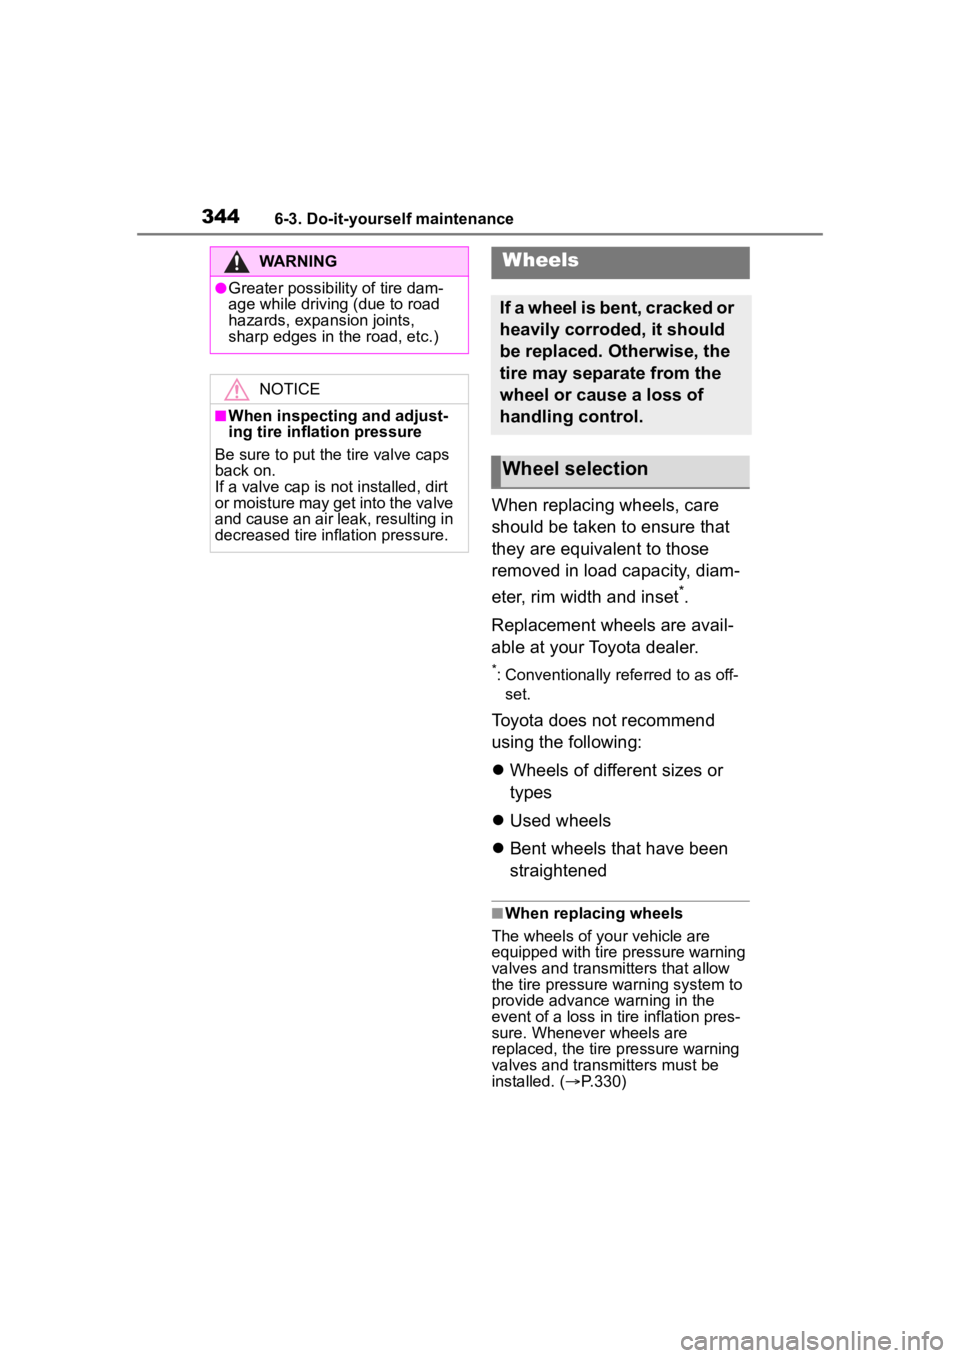
Tire valve
Tire inflation pressure
Checking the specified
tire inflation pressure
Inspection and adjust-
ment procedure
Page 343 of 496
3436-3. Do-it-yourself maintenance
6
Maintenance and care
Tire pressure gauge
1 Remove the tire valve cap.
2 Press the tip of the tire pres-
sure gauge onto the tire
valve.
3 Read the pressure using the
gauge gradations.
4 If the tire inflation pressure is
not at the recommended
level, adjust the pressure.
If you add too much air, press
the center of the valve to
deflate.
5 After completing the tire infla-
tion pressure measurement
and adjustment, apply soapy
water to the valve and check
for leakage.
6 Put the tire valve cap back
on.
■Tire inflation pressure check
interval
You should check tire inflation pres-
sure every two weeks, or at least
once a month. Do not forget to
check the spare.
■Effects of incorrect tire inflation
pressure
Driving with incorrect tire inflation
pressure may result in the following:
●Reduced fuel economy
●Reduced driving comfort and poor
handling
●Reduced tire life due to wear
●Reduced safety
●Damage to the drive train
If a tire needs frequent inflating,
have it checked by your Toyota
dealer.
■Instructions for checking tire
inflation pressure
When checking tire inflation pres-
sure, observe the following:
●Check only when the tires are
cold.
If your vehicle has been parked for
at least 3 hours or has not been
driven for more than 1 mile or 1.5
km, you will get an accurate cold
tire inflation pressure reading.
●Always use a tire pressure gauge.
It is difficult to j udge if a tire is
properly inflated based only on its
appearance.
●It is normal for the tire inflation
pressure to be higher after driving
as heat is generated in the tire. Do
not reduce tire inflation pressure
after driving.
●Never exceed the vehicle capacity
weight.
Passengers and luggage weight
should be placed so that the vehi-
cle is balanced.
WARNING
■Proper inflation is critical to
save tire performance
Keep your tires properly inflated.
If the tires are not properly
inflated, the following conditions
may occur which could lead to an
accident resulting in death or seri-
ous injury:
●Excessive wear
●Uneven wear
●Poor handling
●Possibility of blowouts resulting
from overheated tires
●Air leaking from between tire
and wheel
●Wheel deformation and/or tire
damage
Page 344 of 496
3446-3. Do-it-yourself maintenance
When replacing wheels, care
should be taken to ensure that
they are equivalent to those
removed in load capacity, diam-
eter, rim width and inset
*.
Replacement wheels are avail-
able at your Toyota dealer.
*: Conventionally referred to as off- set.
Toyota does not recommend
using the following:
Wheels of different sizes or
types
Used wheels
Bent wheels that have been
straightened
■When replacing wheels
The wheels of your vehicle are
equipped with tire pressure warning
valves and transmitters that allow
the tire pressure warning system to
provide advance warning in the
event of a loss in tire inflation pres-
sure. Whenever wheels are
replaced, the tire pressure warning
valves and transmitters must be
installed. ( P.330)
WARNING
●Greater possibility of tire dam-
age while driving (due to road
hazards, expansion joints,
sharp edges in the road, etc.)
NOTICE
■When inspecting and adjust-
ing tire inflation pressure
Be sure to put the tire valve caps
back on.
If a valve cap is not installed, dirt
or moisture may get into the valve
and cause an air leak, resulting in
decreased tire inflation pressure.
Wheels
If a wheel is bent, cracked or
heavily corroded, it should
be replaced. Otherwise, the
tire may separate from the
wheel or cause a loss of
handling control.
Wheel selection
Page 345 of 496

3456-3. Do-it-yourself maintenance
6
Maintenance and care
Use only Toyota wheel nuts
and wheel nut wrenches
designed for use with your
aluminum wheels.
When rotating, repairing or
changing your tires, check
that the wheel nuts are still
tight after driving 1000 miles
(1600 km).
Be careful not to damage the
aluminum wheels when using
tire chains.
Use only Toyota genuine bal-
ance weights or equivalent
and a plastic or rubber ham-
mer when balancing your
wheels.
WARNING
■When replacing wheels
●Do not use wheels that are a dif-
ferent size from those recom-
mended in the Owner’s Manual,
as this may result in a loss of
handling control.
●Never use an inner tube in a
leaking wheel which is designed
for a tubeless tire.
Doing so may result in an acci-
dent, causing death or serious
injury.
■When installing the wheel
nuts
Never use oil or grease on the
wheel bolts or wheel nuts.
Oil and grease may cause the
wheel nuts to be excessively tight-
ened, leading to bolt or disc wheel
damage. In addition, the oil or
grease can cause the wheel nuts
to loosen and the wheel may fall
off, causing an accident and
resulting in death or serious injury.
Remove any oil or grease from
the wheel bolts or wheel nuts.
■Use of defective wheels pro-
hibited
Do not use cracked or deformed
wheels. Doing so could cause the
tire to leak air during driving, pos-
sibly causing an accident.
NOTICE
■Replacing tire pressure warn-
ing valves and transmitters
●Because tire repair or replace-
ment may affect the tire pres-
sure warning valves and
transmitters, make sure to have
tires serviced by your Toyota
dealer or other qualified service
shop. In addition, make sure to
purchase your tire pressure
warning valves and transmit-
ters at your Toyota dealer.
●Ensure that only genuine Toyota
wheels are used on your vehi-
cle.
Tire pressure warning valves
and transmitters may not work
properly with non-genuine
wheels.
Aluminum wheel precau-
tions (if equipped)
Page 348 of 496
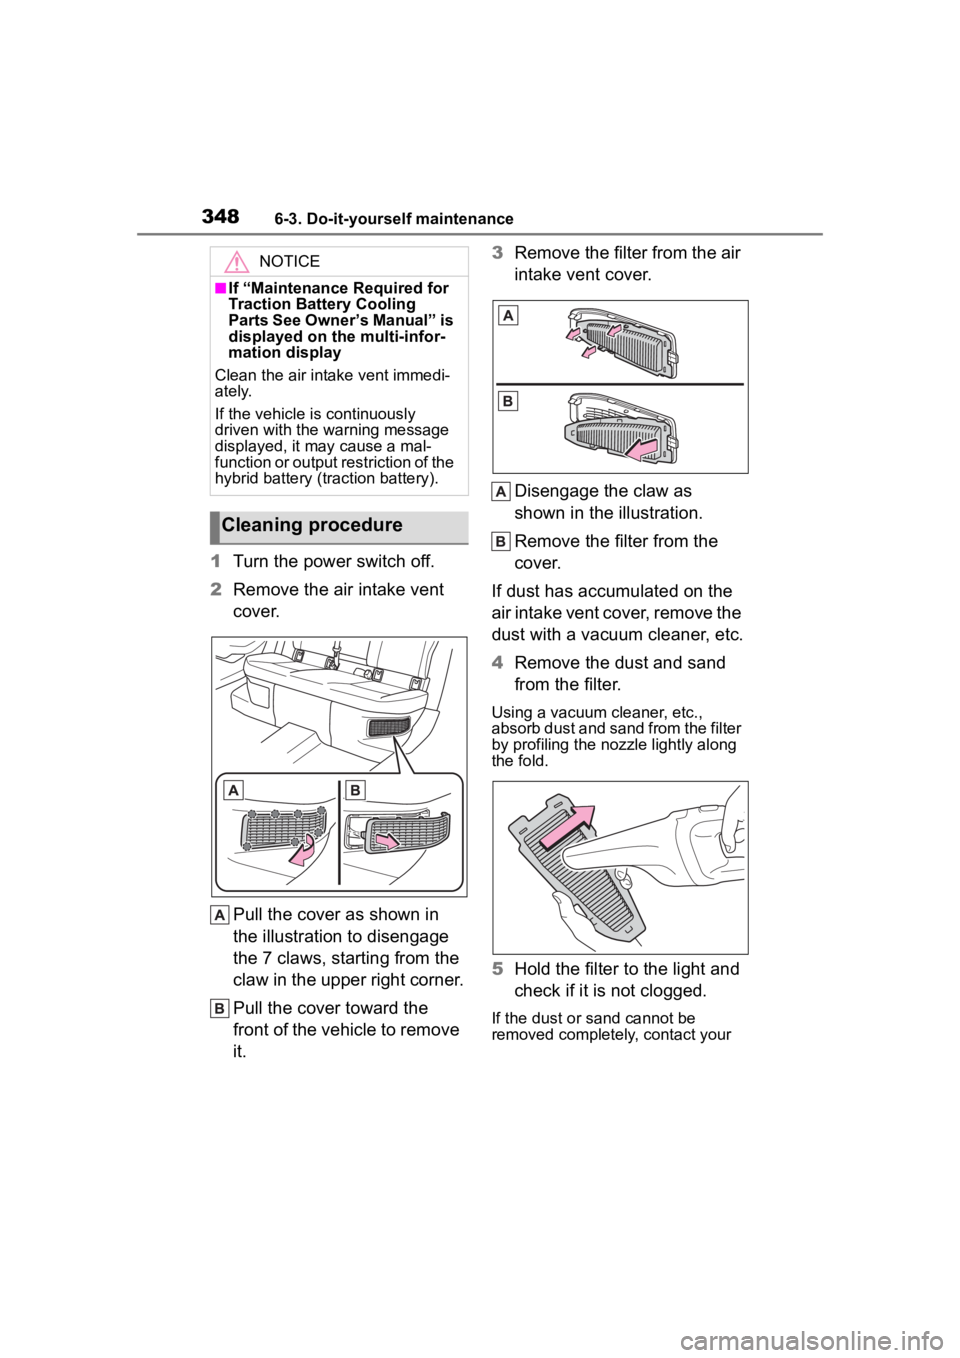
3486-3. Do-it-yourself maintenance
1Turn the power switch off.
2 Remove the air intake vent
cover.
Pull the cover as shown in
the illustration to disengage
the 7 claws, starting from the
claw in the upper right corner.
Pull the cover toward the
front of the vehicle to remove
it. 3
Remove the filter from the air
intake vent cover.
Disengage the claw as
shown in the illustration.
Remove the filter from the
cover.
If dust has accumulated on the
air intake vent cover, remove the
dust with a vacuum cleaner, etc.
4 Remove the dust and sand
from the filter.
Using a vacuum cleaner, etc.,
absorb dust and sand from the filter
by profiling the nozzle lightly along
the fold.
5Hold the filter to the light and
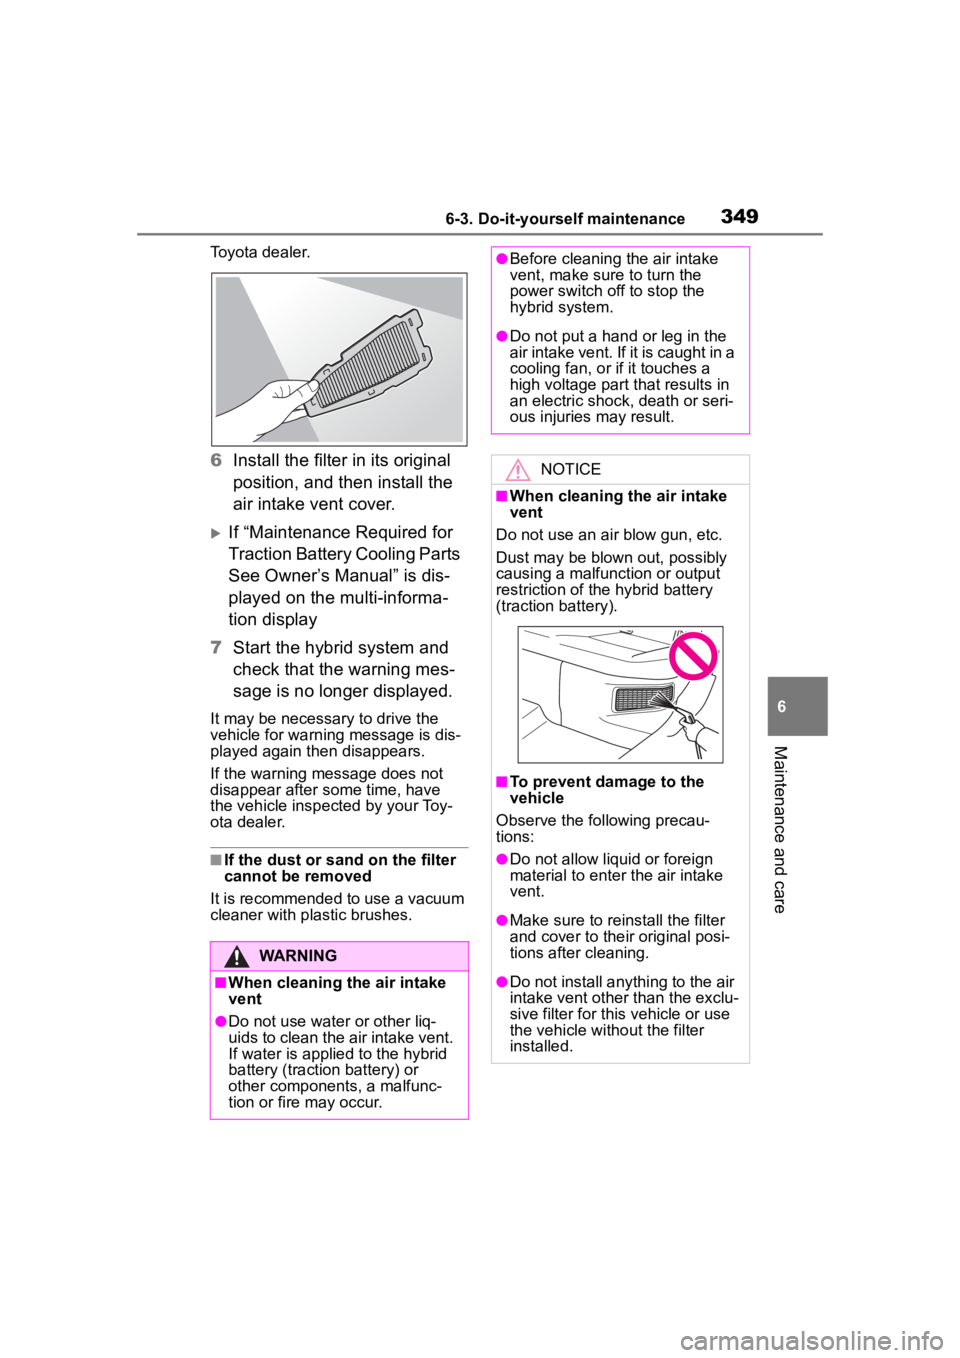
check if it is not clogged.
If the dust or sand cannot be
removed completely, contact your
NOTICE
■If “Maintenance Required for
Traction Battery Cooling
Parts See Owner’s Manual” is
displayed on the multi-infor-
mation display
Clean the air intake vent immedi-
ately.
If the vehicle is continuously
driven with the warning message
displayed, it may cause a mal-
function or output restriction of the
hybrid battery (tr action battery).
Cleaning procedure
Page 349 of 496
3496-3. Do-it-yourself maintenance
6
Maintenance and care
Toyota dealer.
6Install the filter in its original
position, and then install the
air intake vent cover.
If “Maintenance Required for
Traction Battery Cooling Parts
See Owner’s Manual” is dis-
played on the multi-informa-
tion display
7 Start the hybrid system and
check that the warning mes-
sage is no longer displayed.
It may be necessary to drive the
vehicle for warning message is dis-
played again then disappears.
If the warning message does not
disappear after some time, have
the vehicle inspected by your Toy-
ota dealer.
■If the dust or sand on the filter
cannot be removed
It is recommended to use a vacuum
cleaner with plastic brushes.
WARNING
■When cleaning the air intake
vent
●Do not use water or other liq-
uids to clean the air intake vent.
If water is applied to the hybrid
battery (traction battery) or
other components, a malfunc-
tion or fire may occur.
●Before cleaning the air intake
vent, make sure to turn the
power switch off to stop the
hybrid system.
●Do not put a han d or leg in the
air intake vent. If it is caught in a
cooling fan, or if it touches a
high voltage part that results in
an electric shock, death or seri-
ous injuries may result.
NOTICE
■When cleaning the air intake
vent
Do not use an ai r blow gun, etc.
Dust may be blown out, possibly
causing a malfunction or output
restriction of the hybrid battery
(traction battery).
■To prevent damage to the
vehicle
Observe the following precau-
tions:
●Do not allow liquid or foreign
material to enter the air intake
vent.
●Make sure to reinstall the filter
and cover to their original posi-
tions after cleaning.
●Do not install anything to the air
intake vent other than the exclu-
sive filter for this vehicle or use
the vehicle witho ut the filter
installed.
Page 352 of 496
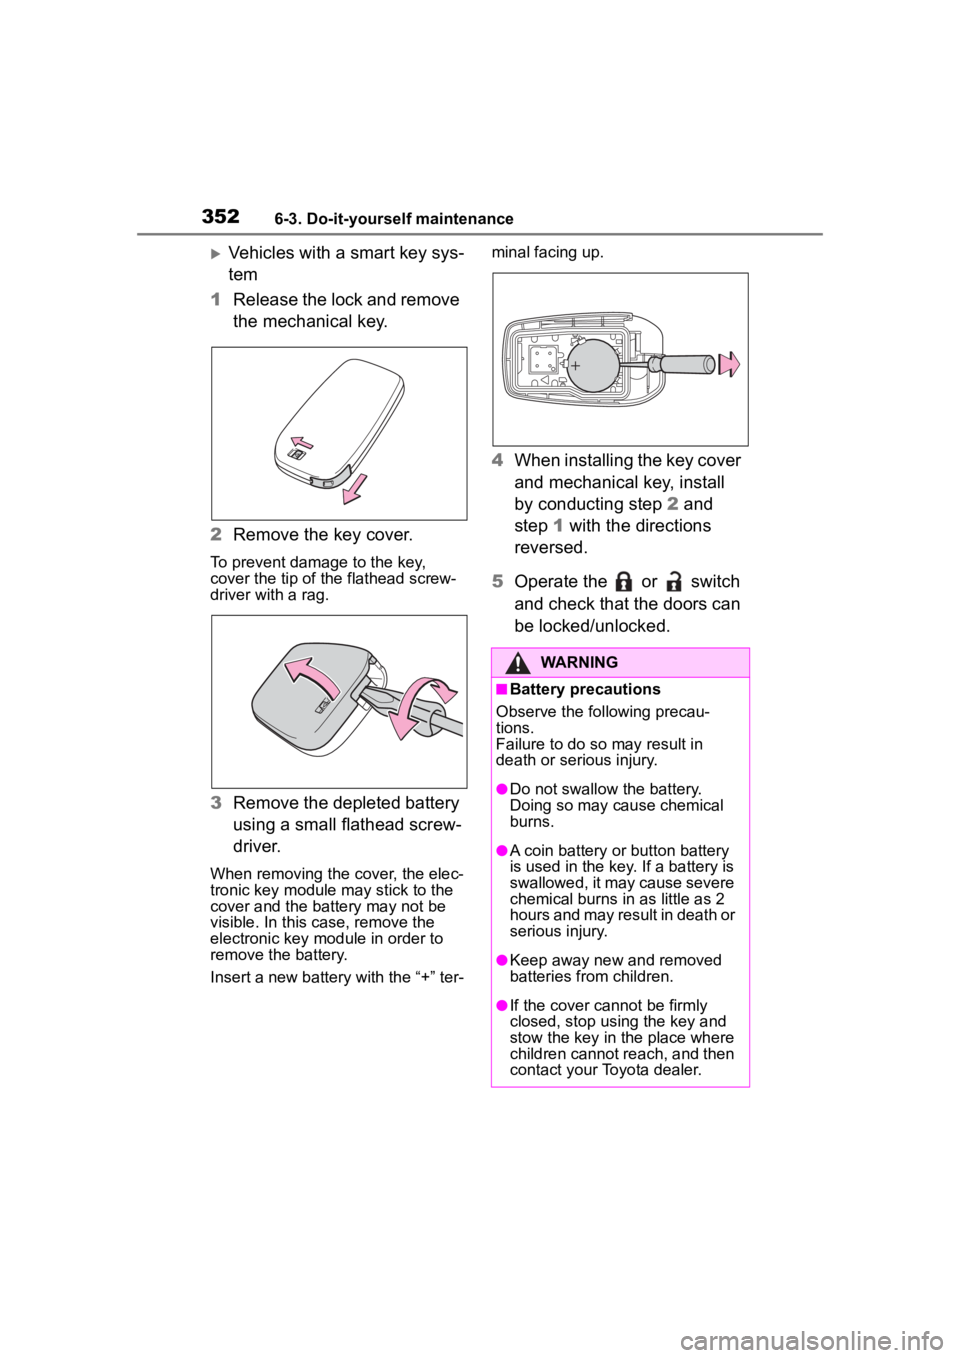
3526-3. Do-it-yourself maintenance
Vehicles with a smart key sys-
tem
1 Release the lock and remove
the mechanical key.
2 Remove the key cover.
To prevent damage to the key,
cover the tip of the flathead screw-
driver with a rag.
3Remove the depleted battery
using a small flathead screw-
driver.
When removing the cover, the elec-
tronic key module may stick to the
cover and the battery may not be
visible. In this case, remove the
electronic key module in order to
remove the battery.
Insert a new battery with the “+” ter- minal facing up.
4
When installing the key cover
and mechanical key, install
by conducting step 2 and
step 1 with the directions
reversed.
5 Operate the or switch
and check that the doors can
be locked/unlocked.
WARNING
■Battery precautions
Observe the following precau-
tions.
Failure to do so may result in
death or serious injury.
●Do not swallow the battery.
Doing so may cause chemical
burns.
●A coin battery or button battery
is used in the key. If a battery is
swallowed, it may cause severe
chemical burns in as little as 2
hours and may result in death or
serious injury.
●Keep away new and removed
batteries from children.
●If the cover cannot be firmly
closed, stop using the key and
stow the key in the place where
children cannot reach, and then
contact your Toyota dealer.