2023 TOYOTA 86 remote control
[x] Cancel search: remote controlPage 118 of 449

1183-2. Opening, closing and locking the doors and trunk
●After registering a new PIN code,
make sure to check that the doors
can be unlocked using the code.
●If the smart key system has been
disabled using the wireless
remote control method, the PIN
code for the PIN code smart entry
cannot be cleared. (P. 1 1 5 )
●In the following cases, perform the
PIN code registration procedure
again.
• If the PIN code has been forgot-
ten.
• When you wish to change the PIN code.
●Make sure to change the PIN
code periodically.
●If the vehicle has been loaned to
another person, make sure that
the PIN code has not been
changed or cleared. If the PIN
code has been changed or
cleared, perform PIN code regis-
tration again.
■Unlocking method
●If an electronic key is within a
detection area, operation of the
smart entry will be given priority.
●I f a m i s t a k e i s m a d e w h i l e e n t e r i n g
the PIN code, wait 5 seconds or
more before performing the proce-
dure again.
●If the incorrect PIN code is
entered 5 times consecutively, a
buzzer will sound for approxi-
mately 2 seconds and operation
will not be possible for 5 minutes.
Page 160 of 449
1604-3. Operating the lights and wipers
when the engine switch is turned off
the battery saving function will oper-
ate and automatically turn off all the
lights after approximately 20 min-
utes.
When any of the fo llowing are per-
formed, the battery -saving function
will be disabled.
●When the engine switch is turned
to ACC or ON
●When the headlight switch is in
the position (U.S.A. only)
●When a door is opened or closed
■Welcome light illumination con-
trol
The headlights and t ail lights auto-
matically turn on at night when the
doors are unlocked using the wire-
less remote control if the light switch
is in the position. The headlights
and tail lights will turn off automati-
cally after approximately 30 sec-
onds.
■Customization
Some functions can be customized.
( P.400)
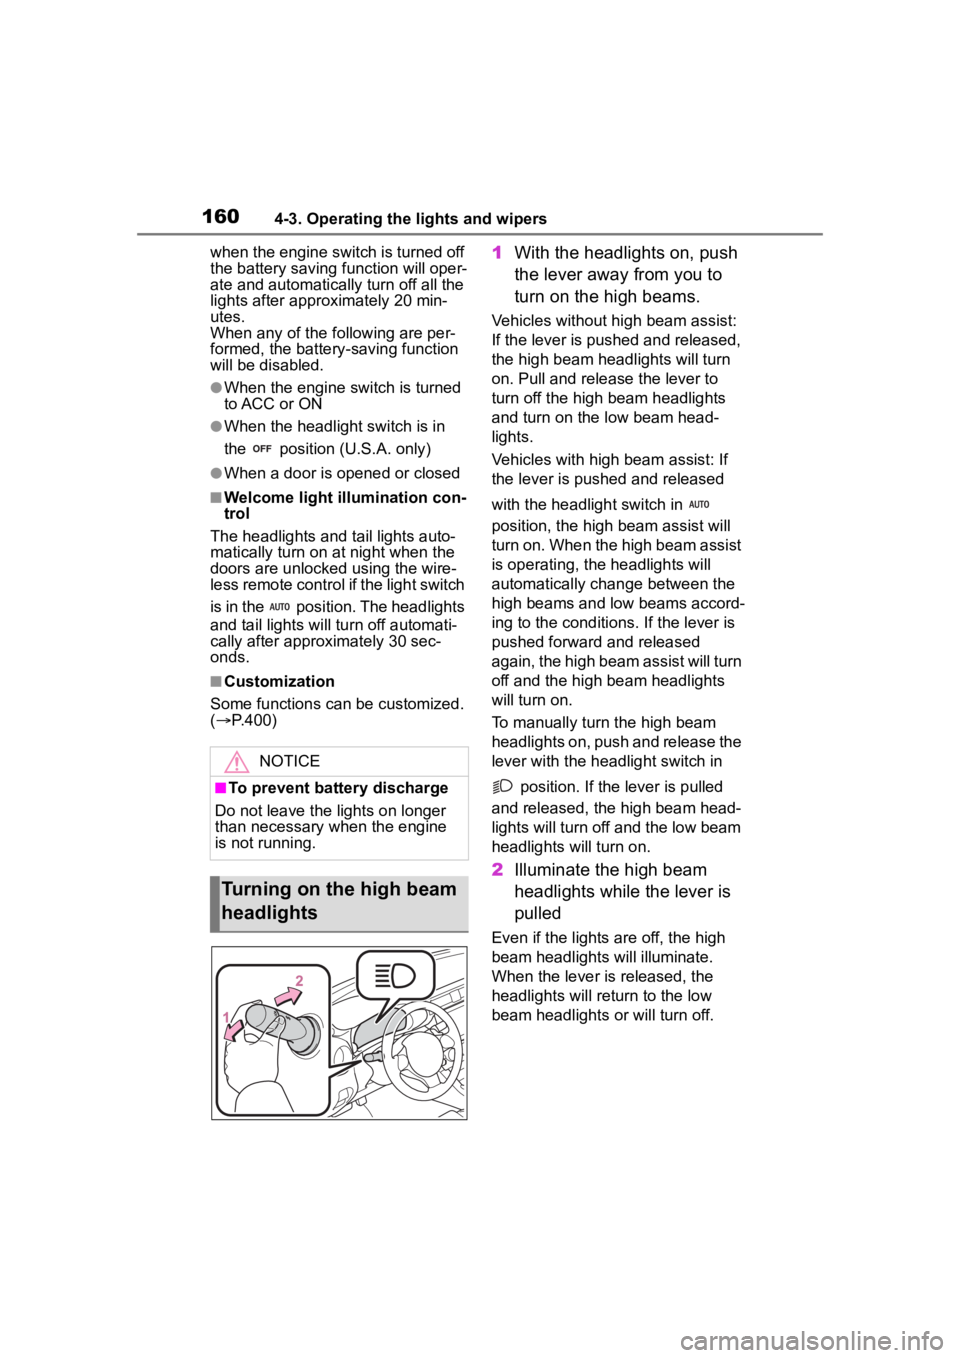
1 With the headlights on, push
the lever away from you to
turn on the high beams.
Vehicles without high beam assist:
If the lever is pushed and released,
the high beam he adlights will turn
on. Pull and releas e the lever to
turn off the high beam headlights
and turn on the low beam head-
lights.
Vehicles with high beam assist: If
the lever is pushed and released
with the headlight switch in
position, the high beam assist will
turn on. When the high beam assist
is operating, the headlights will
automatically change between the
high beams and low beams accord-
ing to the conditio ns. If the lever is
pushed forward and released
again, the high beam assist will turn
off and the high beam headlights
will turn on.
To manually turn the high beam
headlights on, push and release the
lever with the headlight switch in
position. If the lever is pulled
and released, the high beam head-
lights will turn off and the low beam
headlights will turn on.
2 Illuminate the high beam
headlights while the lever is
pulled
Even if the lights are off, the high
beam headlights will illuminate.
When the lever is released, the
headlights will retu rn to the low
beam headlights or will turn off.
NOTICE
■To prevent battery discharge
Do not leave the lights on longer
than necessary when the engine
is not running.
Turning on the high beam
headlights
Page 168 of 449
1684-4. Refueling
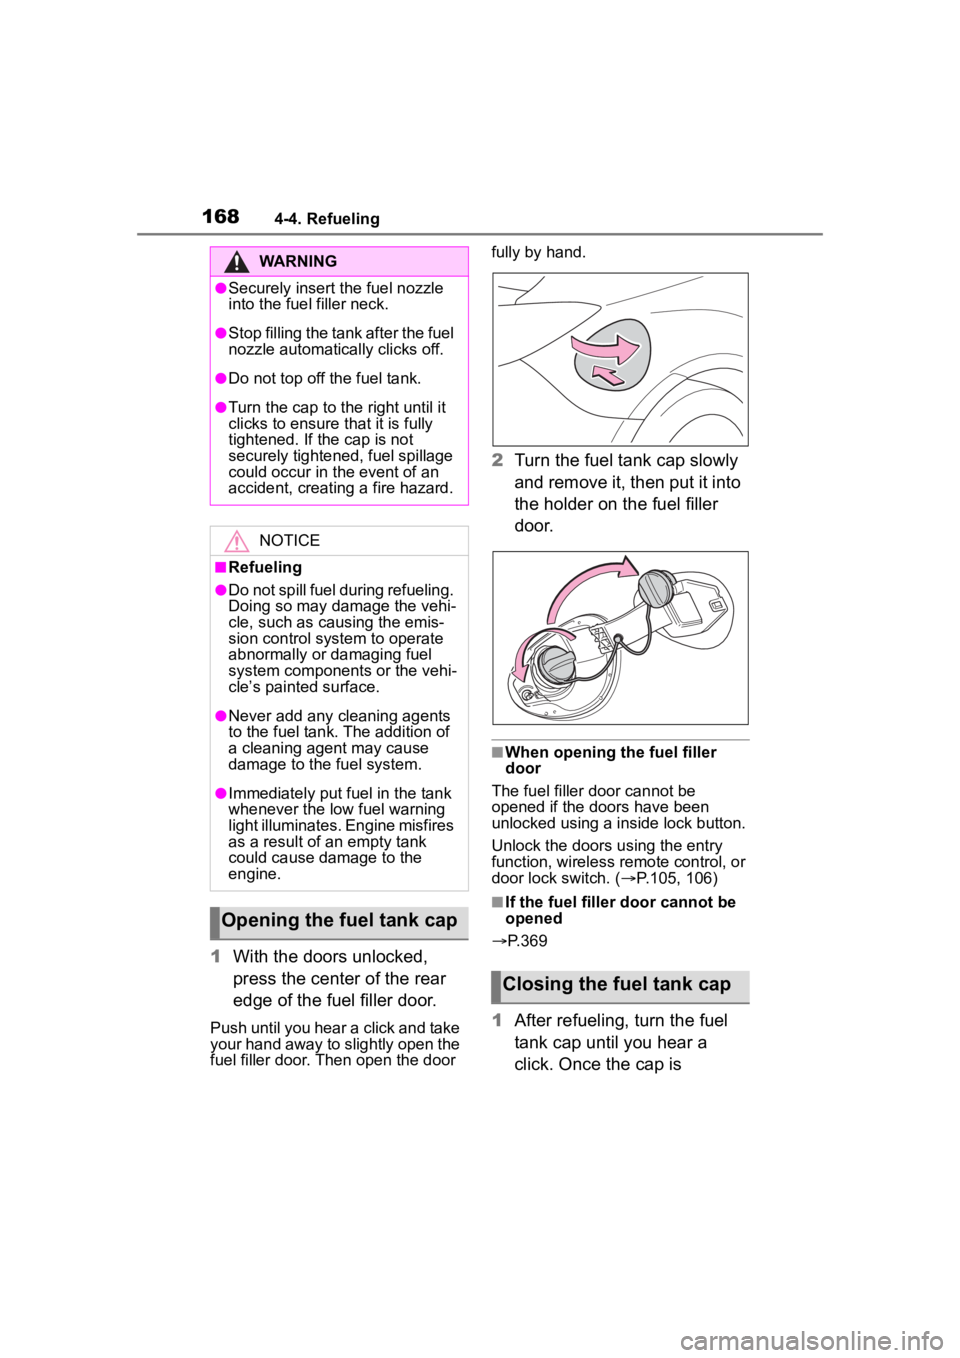
1With the doors unlocked,
press the center of the rear
edge of the fuel filler door.
Push until you hear a click and take
your hand away to slightly open the
fuel filler door. Then open the door fully by hand.
2
Turn the fuel tank cap slowly
and remove it, then put it into
the holder on the fuel filler
door.
■When opening the fuel filler
door
The fuel filler door cannot be
opened if the doo rs have been
unlocked using a inside lock button.
Unlock the doors u sing the entry
function, wireless remote control, or
door lock switch. ( P.105, 106)
■If the fuel filler door cannot be
opened
P.369
1 After refueling, turn the fuel
tank cap until you hear a
click. Once the cap is
WARNING
●Securely insert the fuel nozzle
into the fuel filler neck.
●Stop filling the tank after the fuel
nozzle automatically clicks off.
●Do not top off the fuel tank.
●Turn the cap to the right until it
clicks to ensure that it is fully
tightened. If the cap is not
securely tightened, fuel spillage
could occur in t he event of an
accident, creating a fire hazard.
NOTICE
■Refueling
●Do not spill fuel during refueling.
Doing so may damage the vehi-
cle, such as causing the emis-
sion control system to operate
abnormally or damaging fuel
system components or the vehi-
cle’s painted surface.
●Never add any cleaning agents
to the fuel tank. The addition of
a cleaning agent may cause
damage to the fuel system.
●Immediately put fuel in the tank
whenever the low fuel warning
light illuminates. Engine misfires
as a result of an empty tank
could cause damage to the
engine.
Opening the fuel tank cap
Closing the fuel tank cap
Page 310 of 449
3106-3. Do-it-yourself maintenance
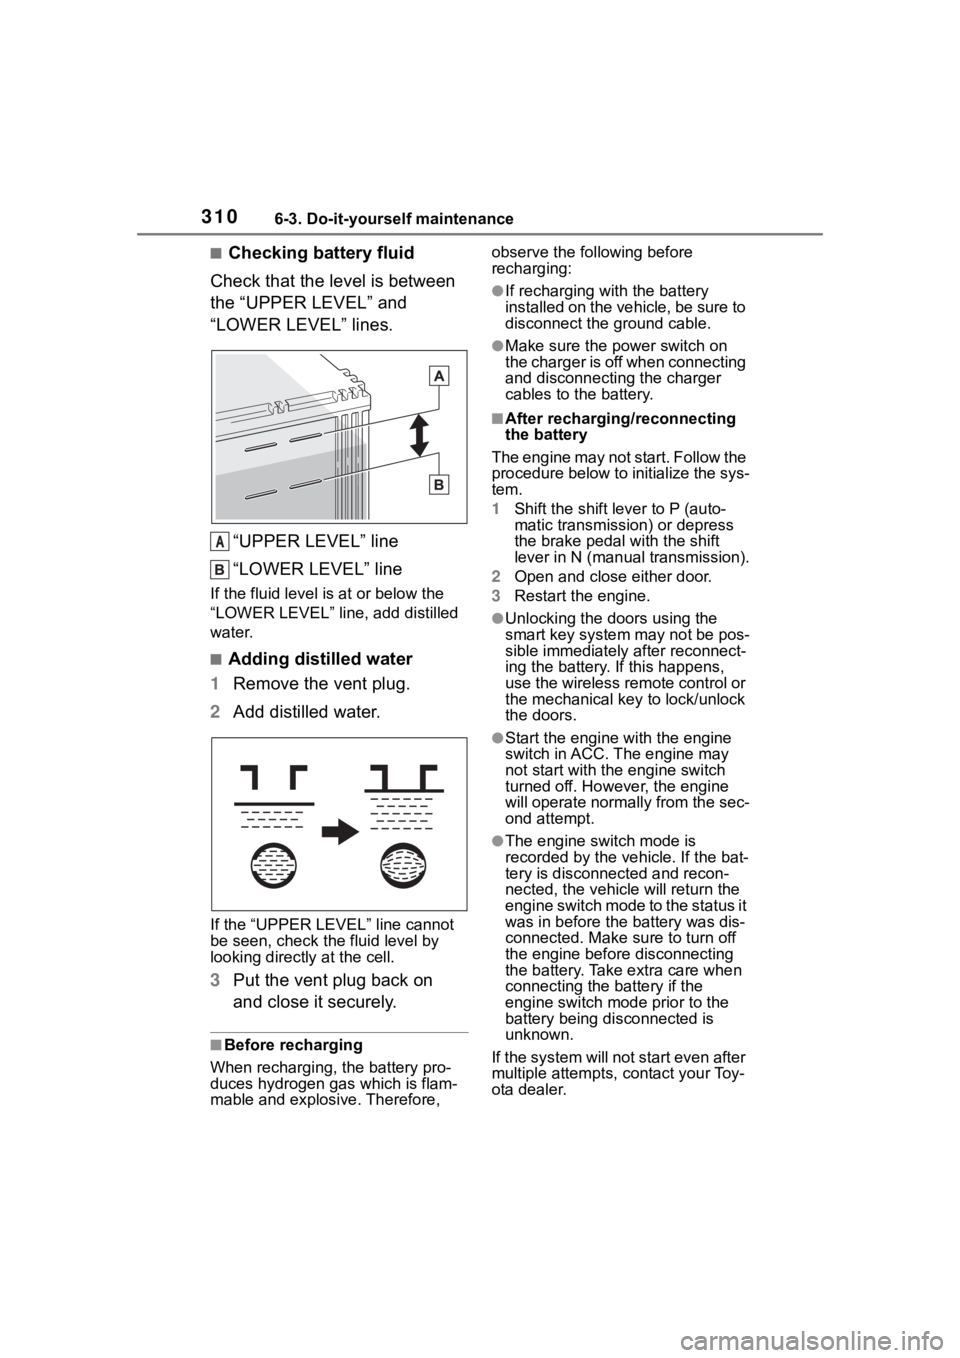
■Checking battery fluid
Check that the level is between
the “UPPER LEVEL” and
“LOWER LEVEL” lines.
“UPPER LEVEL” line
“LOWER LEVEL” line
If the fluid level is at or below the
“LOWER LEVEL” line, add distilled
water.
■Adding distilled water
1 Remove the vent plug.
2 Add distilled water.
If the “UPPER LEVEL ” line cannot
be seen, check the fluid level by
looking directly at the cell.
3 Put the vent plug back on
and close it securely.
■Before recharging
When recharging, t he battery pro-
duces hydrogen ga s which is flam-
mable and explosive. Therefore, observe the following before
recharging:
●If recharging with the battery
installed on the vehicle, be sure to
disconnect the ground cable.
●Make sure the power switch on
the charger is off when connecting
and disconnecting the charger
cables to the battery.
■After recharging/reconnecting
the battery
The engine may not start. Follow the
procedure below to initialize the sys-
tem.
1 Shift the shift lever to P (auto-
matic transmission) or depress
the brake pedal with the shift
lever in N (manual transmission).
2 Open and close either door.
3 Restart the engine.
●Unlocking the doors using the
smart key system may not be pos-
sible immediately after reconnect-
ing the battery. If this happens,
use the wireless remote control or
the mechanical key to lock/unlock
the doors.
●Start the engine with the engine
switch in ACC. T he engine may
not start with th e engine switch
turned off. However, the engine
will operate normally from the sec-
ond attempt.
●The engine switch mode is
recorded by the vehicle. If the bat-
tery is disconnected and recon-
nected, the vehi cle will return the
engine switch mode to the status it
was in before the battery was dis-
connected. Make sure to turn off
the engine before disconnecting
the battery. Take extra care when
connecting the battery if the
engine switch mode prior to the
battery being disconnected is
unknown.
If the system will not start even after
multiple attempts, contact your Toy-
ota dealer.
A
Page 328 of 449
3286-3. Do-it-yourself maintenance
7When installing, reverse the
steps listed.
■Checking interval
Inspect and replace the air condi-
tioning filter according to the mainte-
nance schedule. In dusty areas or
areas with heavy traffic flow, early
replacement may be required. (For
scheduled maintenance information,
please refer to the “Owner’s Manual
Supplement” or “Scheduled Mainte-
nance”.)
■If air flow from the vents
decreases dramatically
The filter may be clogged. Check
the filter and replace if necessary.
■If the electronic key battery is
depleted
The following symptoms may occur:
●The smart key system and wire-
less remote control will not func-
tion properly.
●The operational range will be
reduced.
Flathead screwdriver
Lithium battery CR2032
■Use a CR2032 lithium battery
●Batteries can be purchased at
your Toyota dealer, local electrical
appliance shops or camera stores.
●Replace only with the same or
equivalent type recommended by
the manufacturer.
●Dispose of used batteries accord-
ing to local laws.
NOTICE
■When removing the glove box
Do not forcibly pull the glove box.
Otherwise, the lower claws or the
lower claw engagement points
may be deformed, m aking it diffi-
cult to reinstall or close the glove
box.
■When using the air condition-
ing system
Make sure that a filter is always
installed.
Using the air conditioning system
without a filter may cause damage
to the system.
Electronic key batter y
Replace the battery with a
new one if it is depleted.
As the key may be damaged
if the following procedure is
not performed properly, it is
recommended that key bat-
tery replacement be per-
formed by your Toyota
dealer.
Items to prepare
Page 330 of 449
3306-3. Do-it-yourself maintenance
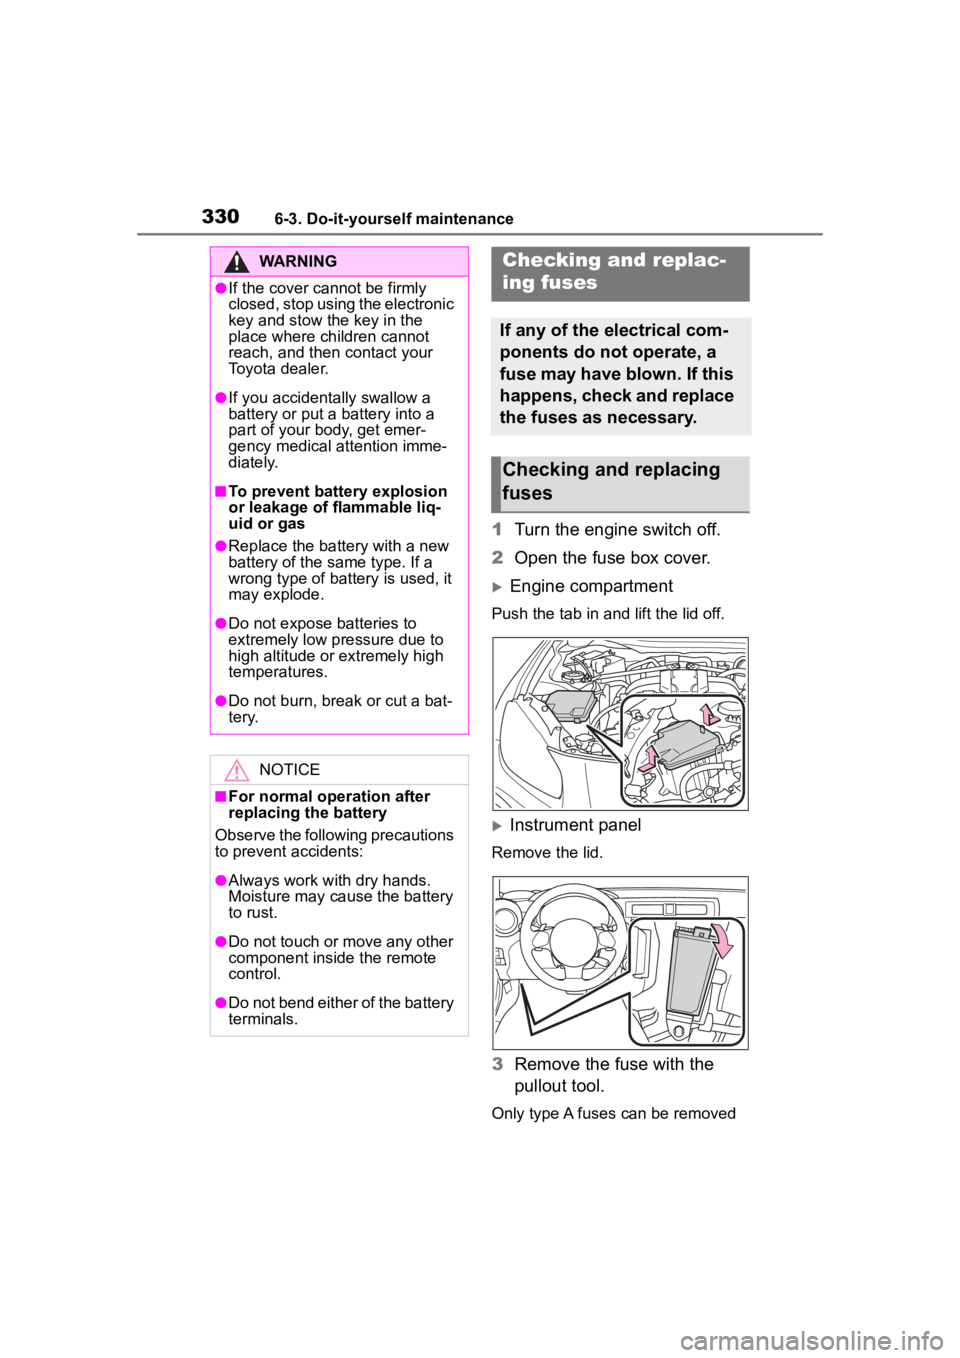
1Turn the engine switch off.
2 Open the fuse box cover.
Engine compartment
Push the tab in and lift the lid off.
Instrument panel
Remove the lid.
3Remove the fuse with the
pullout tool.
Only type A fuses can be removed
WARNING
●If the cover cannot be firmly
closed, stop using the electronic
key and stow the key in the
place where children cannot
reach, and then contact your
Toyota dealer.
●If you accidentally swallow a
battery or put a b attery into a
part of your body, get emer-
gency medical attention imme-
diately.
■To prevent battery explosion
or leakage of flammable liq-
uid or gas
●Replace the battery with a new
battery of the same type. If a
wrong type of battery is used, it
may explode.
●Do not expose batteries to
extremely low pressure due to
high altitude or extremely high
temperatures.
●Do not burn, bre ak or cut a bat-
tery.
NOTICE
■For normal operation after
replacing the battery
Observe the following precautions
to prevent accidents:
●Always work with dry hands.
Moisture may cau se the battery
to rust.
●Do not touch or move any other
component inside the remote
control.
●Do not bend either of the battery
terminals.
Checking a nd replac-
ing fuses
If any of the electrical com-
ponents do not operate, a
fuse may have blown. If this
happens, check and replace
the fuses as necessary.
Checking and replacing
fuses
Page 370 of 449
3707-2. Steps to take in an emergency
■When the electronic key does
not work properly
●Make sure that the smart key sys-
tem has not been deactivated in
the customization setting. If it is
off, turn the function on.
●Check if battery-saving mode is
set. If it is set, cancel the function.
( P.112)
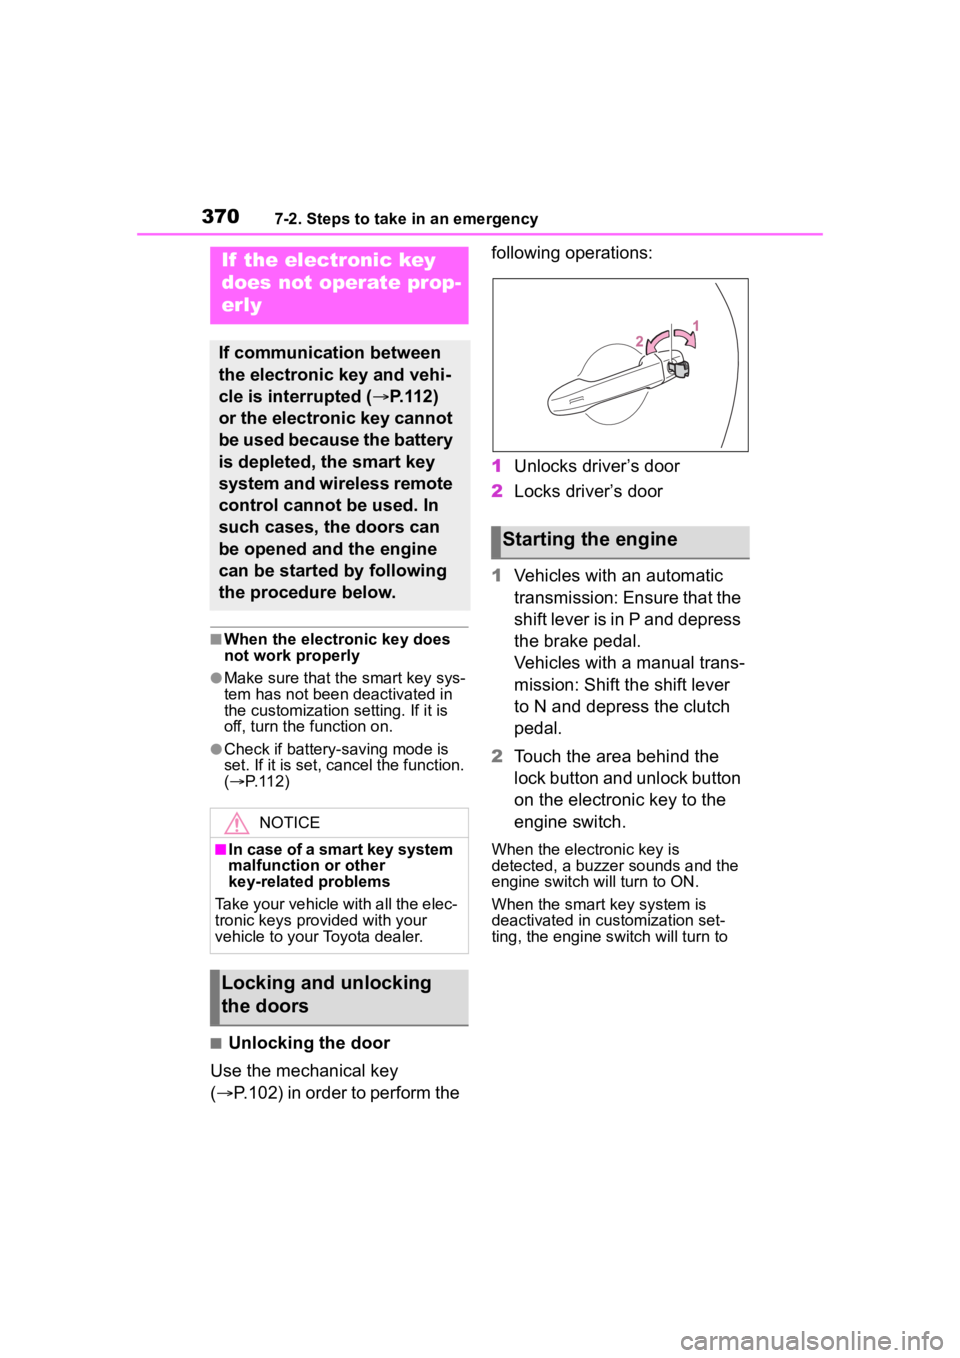
■Unlocking the door
Use the mechanical key
( P.102) in order to perform the following operations:
1
Unlocks driver’s door
2 Locks driver’s door
1 Vehicles with an automatic
transmission: Ensure that the
shift lever is in P and depress
the brake pedal.
Vehicles with a manual trans-
mission: Shift the shift lever
to N and depress the clutch
pedal.
2 Touch the area behind the
lock button and unlock button
on the electronic key to the
engine switch.
When the electronic key is
detected, a buzzer sounds and the
engine switch will turn to ON.
When the smart key system is
deactivated in customization set-
ting, the engine switch will turn to
If the electronic key
does not operate prop-
erly
If communication between
the electronic key and vehi-
cle is interrupted ( P.112)
or the electronic key cannot
be used because the battery
is depleted, the smart key
system and wireless remote
control cannot be used. In
such cases, the doors can
be opened and the engine
can be started by following
the procedure below.
NOTICE
■In case of a smart key system
malfunction or other
key-related problems
Take your vehicle with all the elec-
tronic keys provided with your
vehicle to your Toyota dealer.
Locking and unlocking
the doors
Starting the engine
Page 373 of 449
3737-2. Steps to take in an emergency
7
When trouble arises
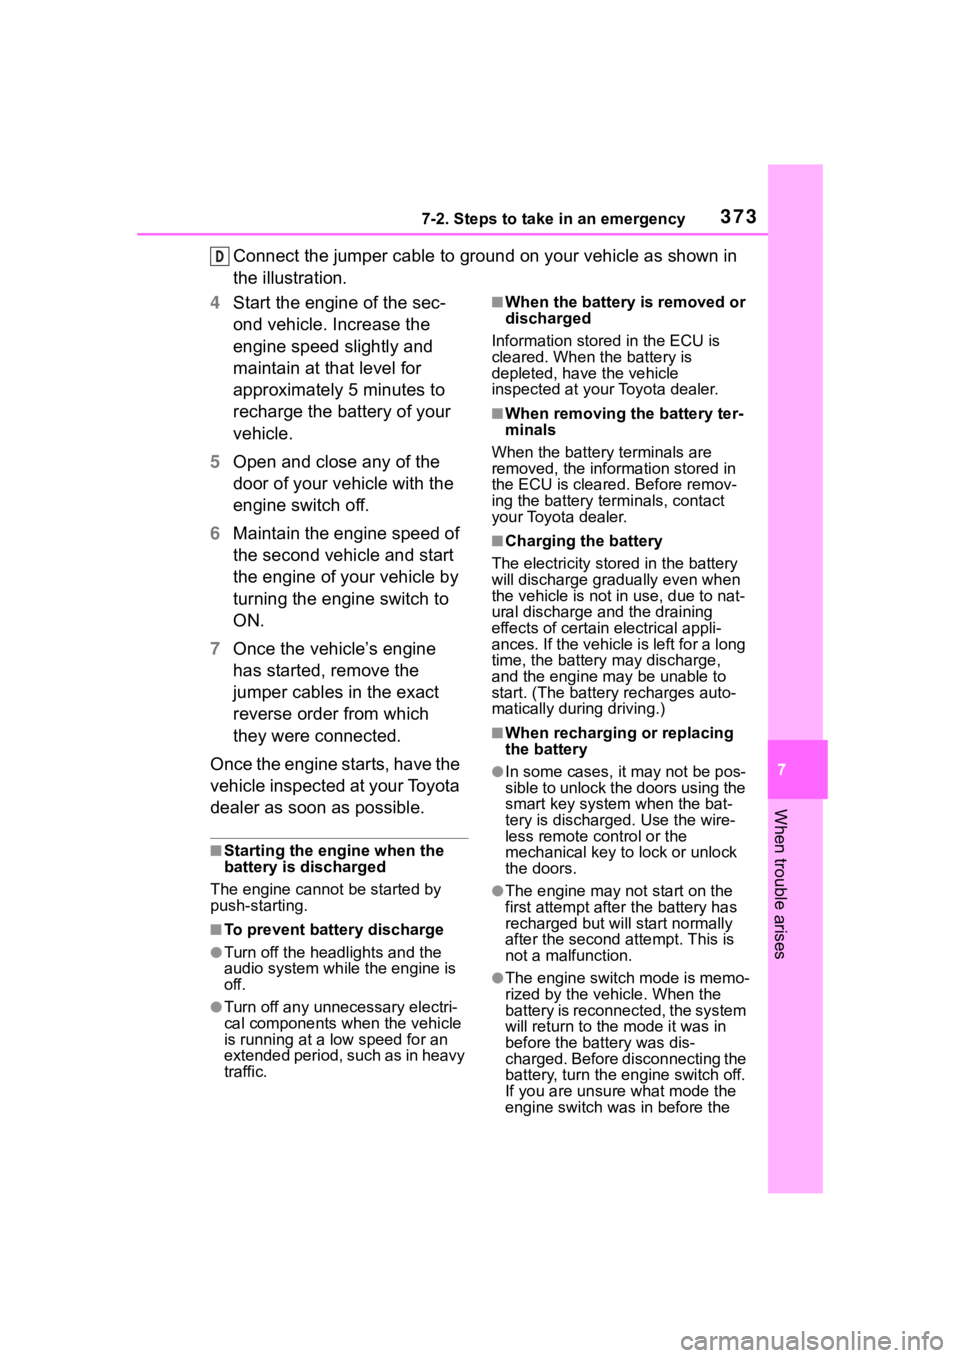
Connect the jumper cable to ground on your vehicle as shown in
the illustration.
4 Start the engine of the sec-
ond vehicle. Increase the
engine speed slightly and
maintain at that level for
approximately 5 minutes to
recharge the battery of your
vehicle.
5 Open and close any of the
door of your vehicle with the
engine switch off.
6 Maintain the engine speed of
the second vehicle and start
the engine of your vehicle by
turning the engine switch to
ON.
7 Once the vehicle’s engine
has started, remove the
jumper cables in the exact
reverse order from which
they were connected.
Once the engine starts, have the
vehicle inspected at your Toyota
dealer as soon as possible.
■Starting the engine when the
battery is discharged
The engine cannot be started by
push-starting.
■To prevent battery discharge
●Turn off the headlights and the
audio system while the engine is
off.
●Turn off any unnecessary electri-
cal components when the vehicle
is running at a low speed for an
extended period, such as in heavy
traffic.
■When the battery is removed or
discharged
Information stored in the ECU is
cleared. When the battery is
depleted, have the vehicle
inspected at your Toyota dealer.
■When removing the battery ter-
minals
When the battery terminals are
removed, the information stored in
the ECU is cleared. Before remov-
ing the battery term inals, contact
your Toyota dealer.
■Charging the battery
The electricity stored in the battery
will discharge grad ually even when
the vehicle is not in use, due to nat-
ural discharge and the draining
effects of certain electrical appli-
ances. If the vehicle is left for a long
time, the battery may discharge,
and the engine may be unable to
start. (The battery recharges auto-
matically during driving.)
■When recharging or replacing
the battery
●In some cases, it may not be pos-
sible to unlock the doors using the
smart key system when the bat-
tery is discharged. Use the wire-
less remote control or the
mechanical key to lock or unlock
the doors.
●The engine may not start on the
first attempt after the battery has
recharged but will start normally
after the second attempt. This is
not a malfunction.
●The engine switch mode is memo-
rized by the vehicle. When the
battery is reconnected, the system
will return to the mode it was in
before the bat tery was dis-
charged. Before disconnecting the
battery, turn the engine switch off.
If you are unsure what mode the
engine switch wa s in before the
D