2023 TOYOTA 86 change time
[x] Cancel search: change timePage 123 of 449
1233-3. Adjusting the seats
3
Before driving
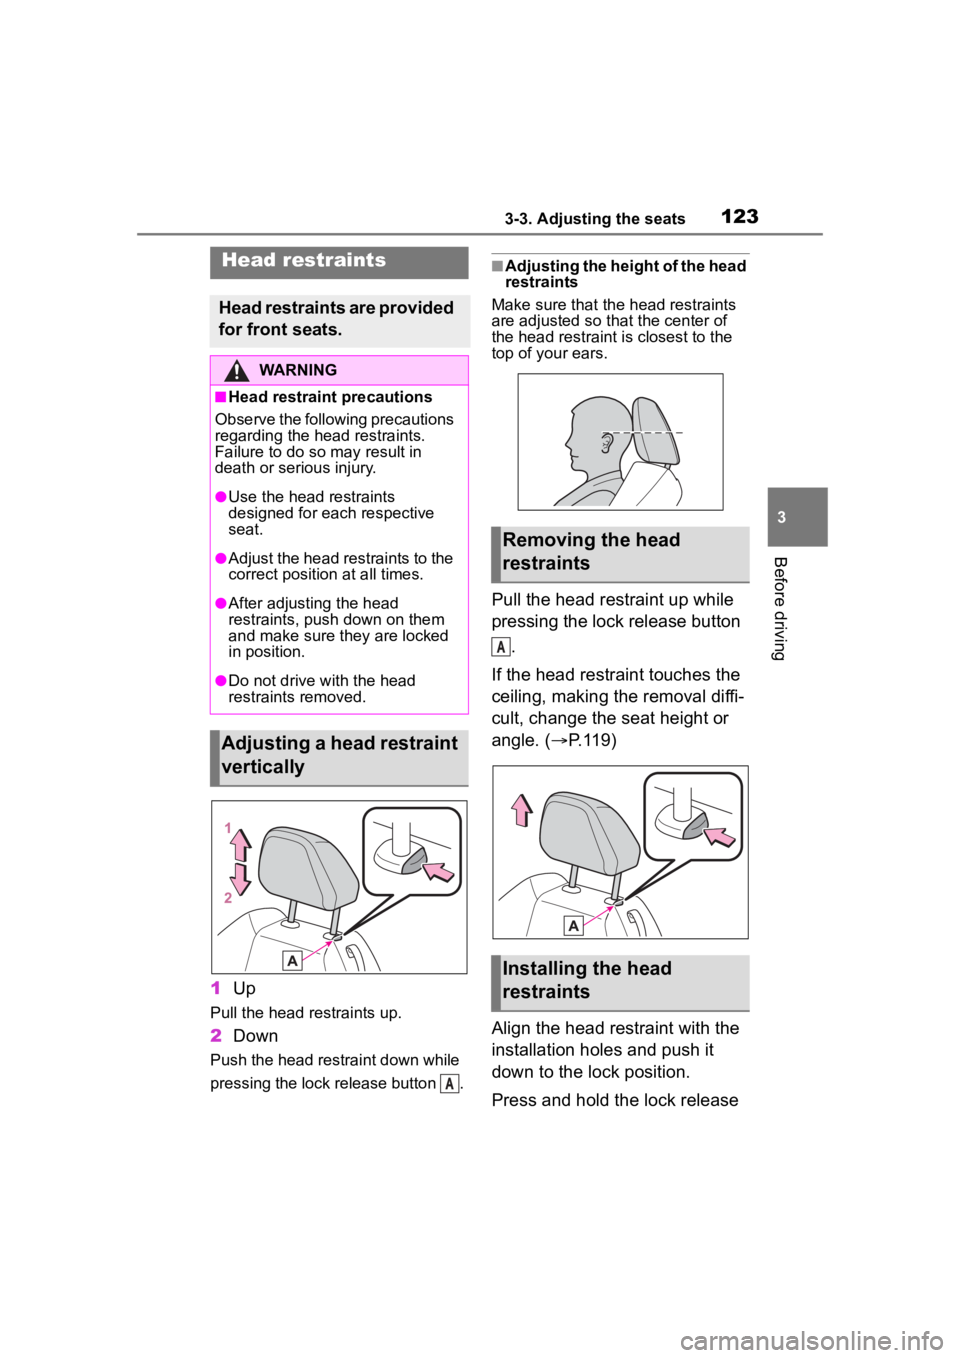
1Up
Pull the head restraints up.
2Down
Push the head restraint down while
pressing the lock release button .
■Adjusting the height of the head
restraints
Make sure that the head restraints
are adjusted so that the center of
the head restraint i s closest to the
top of your ears.
Pull the head restraint up while
pressing the lock release button
.
If the head restraint touches the
ceiling, making the removal diffi-
cult, change the seat height or
angle. ( P.119)
Align the head restraint with the
installation holes and push it
down to the lock position.
Press and hold the lock release
Head restraints
Head restraints are provided
for front seats.
WARNING
■Head restraint precautions
Observe the following precautions
regarding the head restraints.
Failure to do so m ay result in
death or serious injury.
●Use the head restraints
designed for each respective
seat.
●Adjust the head restraints to the
correct position at all times.
●After adjusting the head
restraints, push down on them
and make sure they are locked
in position.
●Do not drive with the head
restraints removed.
Adjusting a head restraint
vertically
A
Removing the head
restraints
Installing the head
restraints
A
Page 146 of 449
1464-2. Driving procedures
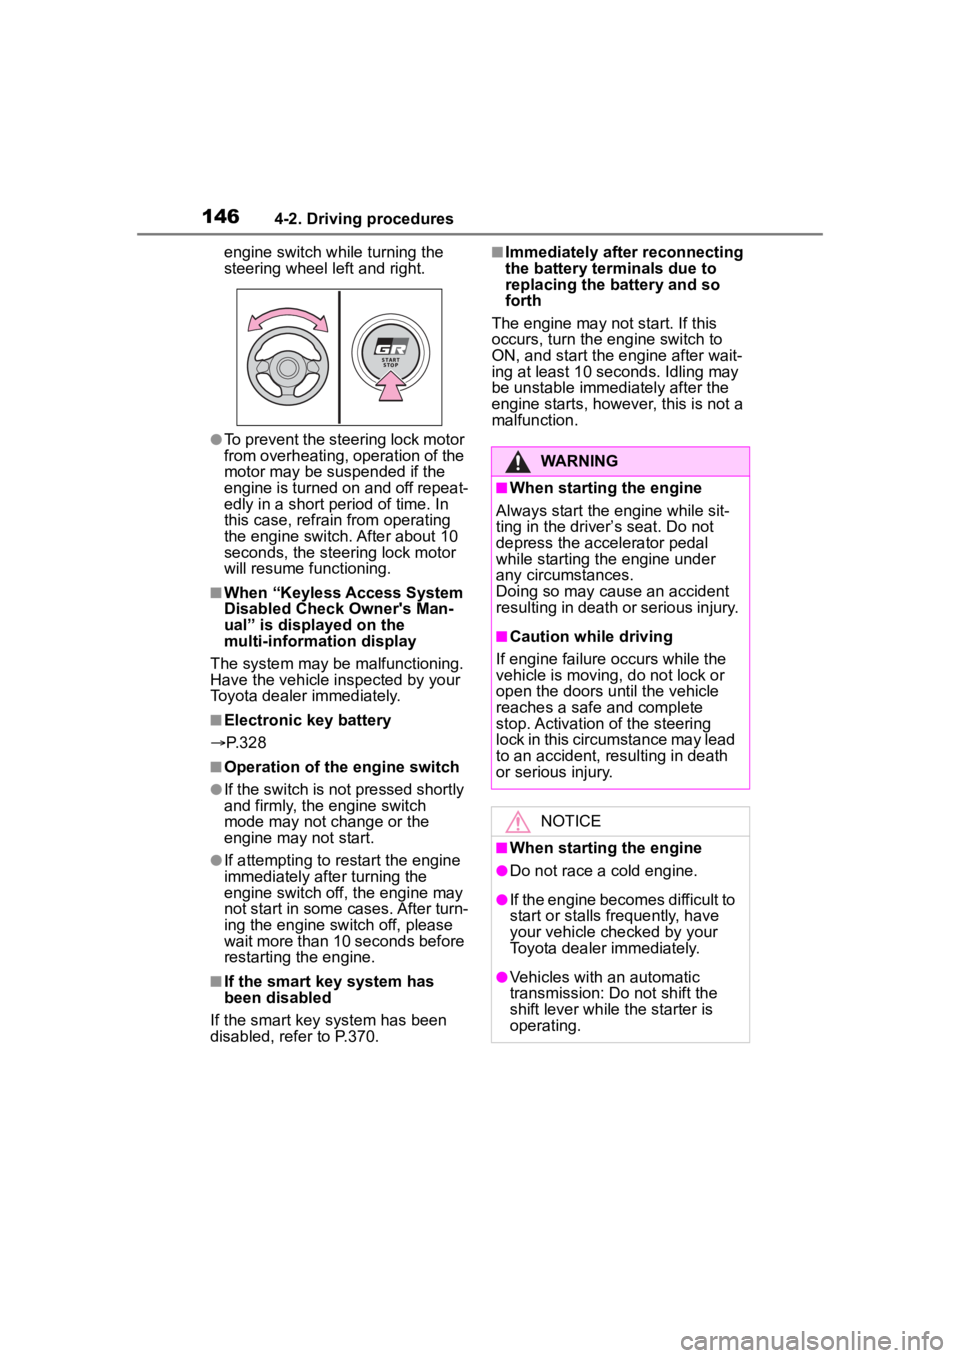
engine switch while turning the
steering wheel left and right.
●To prevent the steering lock motor
from overheating, operation of the
motor may be suspended if the
engine is turned on and off repeat-
edly in a short period of time. In
this case, refrain from operating
the engine switch. After about 10
seconds, the steering lock motor
will resume functioning.
■When “Keyless Access System
Disabled Check Owner's Man-
ual” is displayed on the
multi-information display
The system may be malfunctioning.
Have the vehicle inspected by your
Toyota dealer immediately.
■Electronic key battery
P. 3 2 8
■Operation of the engine switch
●If the switch is not pressed shortly
and firmly, the engine switch
mode may not change or the
engine may not start.
●If attempting to restart the engine
immediately after turning the
engine switch off, the engine may
not start in some cases. After turn-
ing the engine switch off, please
wait more than 10 seconds before
restarting the engine.
■If the smart key system has
been disabled
If the smart key system has been
disabled, refer to P.370.
■Immediately after reconnecting
the battery terminals due to
replacing the battery and so
forth
The engine may not start. If this
occurs, turn the engine switch to
ON, and start the engine after wait-
ing at least 10 seconds. Idling may
be unstable immedi ately after the
engine starts, however, this is not a
malfunction.
WARNING
■When starting the engine
Always start the engine while sit-
ting in the driver’s seat. Do not
depress the accelerator pedal
while starting the engine under
any circumstances.
Doing so may cause an accident
resulting in death o r serious injury.
■Caution while driving
If engine failure occurs while the
vehicle is moving, do not lock or
open the doors until the vehicle
reaches a safe and complete
stop. Activation of the steering
lock in this circumstance may lead
to an accident, resulting in death
or serious injury.
NOTICE
■When starting the engine
●Do not race a cold engine.
●If the engine becomes difficult to
start or stalls frequently, have
your vehicle checked by your
Toyota dealer immediately.
●Vehicles with an automatic
transmission: Do not shift the
shift lever while the starter is
operating.
Page 147 of 449
1474-2. Driving procedures
4
Driving
Automatic transmission
1 Stop the vehicle completely.
2 Set the parking brake
( P.156), and shift the shift
lever to P.
Check the parking brake indicator
is illuminated.
3 Press the engine switch.
The engine will stop, and the meter
display will be extinguished.
4Release the brake pedal and
check that “ACCESSORY” or
“IGNITION ON” is not shown
on the meters.
Manual transmission
1 Stop the vehicle completely.
2 Set the parking brake.
( P.156)
Check the parking brake indicator
is illuminated.
3Shift the shift lever to N.
( P.153)
4 Press the engine switch.
The engine will stop, and the meter
display will be extinguished.
5Release the brake pedal and
check that “ACCESSORY” or
“IGNITION ON” is not shown
on the meters.
Modes can be changed by NOTICE
■Symptoms indicating a mal-
function with the engine
switch
If the engine switch seems to be
operating somewh at differently
than usual, such as the switch
sticking slightly, there may be a
malfunction. Contact your Toyota
dealer immediately.
Stopping the engine
WARNING
■Stopping the engine in an
emergency
If you want to stop the engine in
an emergency while driving the
vehicle, press and hold the engine
switch for more than 2 seconds,
or press it briefly 3 times or more
in succession. ( P.338)
However, do not touch the engine
switch while driving except in an
emergency. Turning the engine off
while driving will not cause loss of
steering or braking control, but the
power assist to these systems will
be lost. This will make it more dif-
ficult to steer a nd brake, so you
should pull over and stop the
vehicle as soon as it is safe to do
so.
●If the engine switch is operated
while the vehicle is running, a
warning message will be shown
on the multi-information display
and a buzzer sounds.
●Vehicles with an automatic
transmission: To restart the
engine after performing an
emergency shutdown, shift the
shift lever to N and then press
the engine switch.
●Vehicles with a manual trans-
mission: To restart the engine
after performing an emergency
shutdown, depress the clutch
pedal and then press the engine
switch.
Changing engine switch
modes
Page 148 of 449
1484-2. Driving procedures
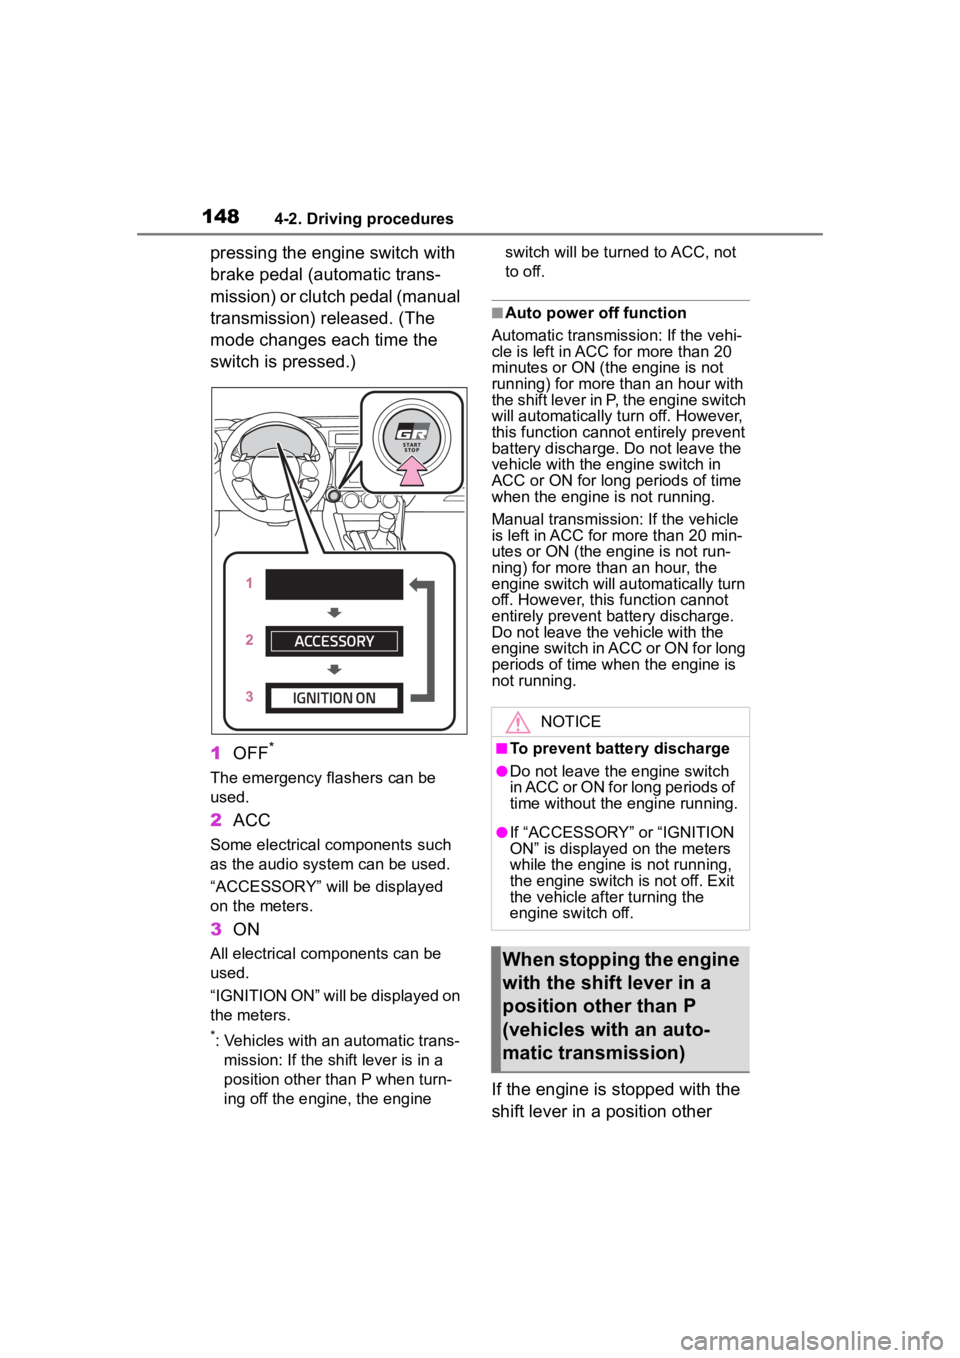
pressing the engine switch with
brake pedal (automatic trans-
mission) or clutch pedal (manual
transmission) released. (The
mode changes each time the
switch is pressed.)
1OFF
*
The emergency flashers can be
used.
2ACC
Some electrical components such
as the audio system can be used.
“ACCESSORY” will be displayed
on the meters.
3ON
All electrical com ponents can be
used.
“IGNITION ON” will be displayed on
the meters.
*: Vehicles with an automatic trans- mission: If the shift lever is in a
position other than P when turn-
ing off the engine, the engine switch will be turned to ACC, not
to off.
■Auto power off function
Automatic transmission: If the vehi-
cle is left in ACC for more than 20
minutes or ON (the engine is not
running) for more than an hour with
the shift lever in P, the engine switch
will automatically turn off. However,
this function cannot entirely prevent
battery discharge. Do not leave the
vehicle with the engine switch in
ACC or ON for long periods of time
when the engine is not running.
Manual transmission: If the vehicle
is left in ACC for more than 20 min-
utes or ON (the engine is not run-
ning) for more than an hour, the
engine switch will automatically turn
off. However, this function cannot
entirely prevent b attery discharge.
Do not leave the v ehicle with the
engine switch in ACC or ON for long
periods of time when the engine is
not running.
If the engine is stopped with the
shift lever in a position other
NOTICE
■To prevent battery discharge
●Do not leave the engine switch
in ACC or ON for long periods of
time without the engine running.
●If “ACCESSORY” or “IGNITION
ON” is displayed on the meters
while the engine is not running,
the engine switch is not off. Exit
the vehicle after turning the
engine switch off.
When stopping the engine
with the shift lever in a
position other than P
(vehicles with an auto-
matic transmission)
Page 152 of 449
1524-2. Driving procedures
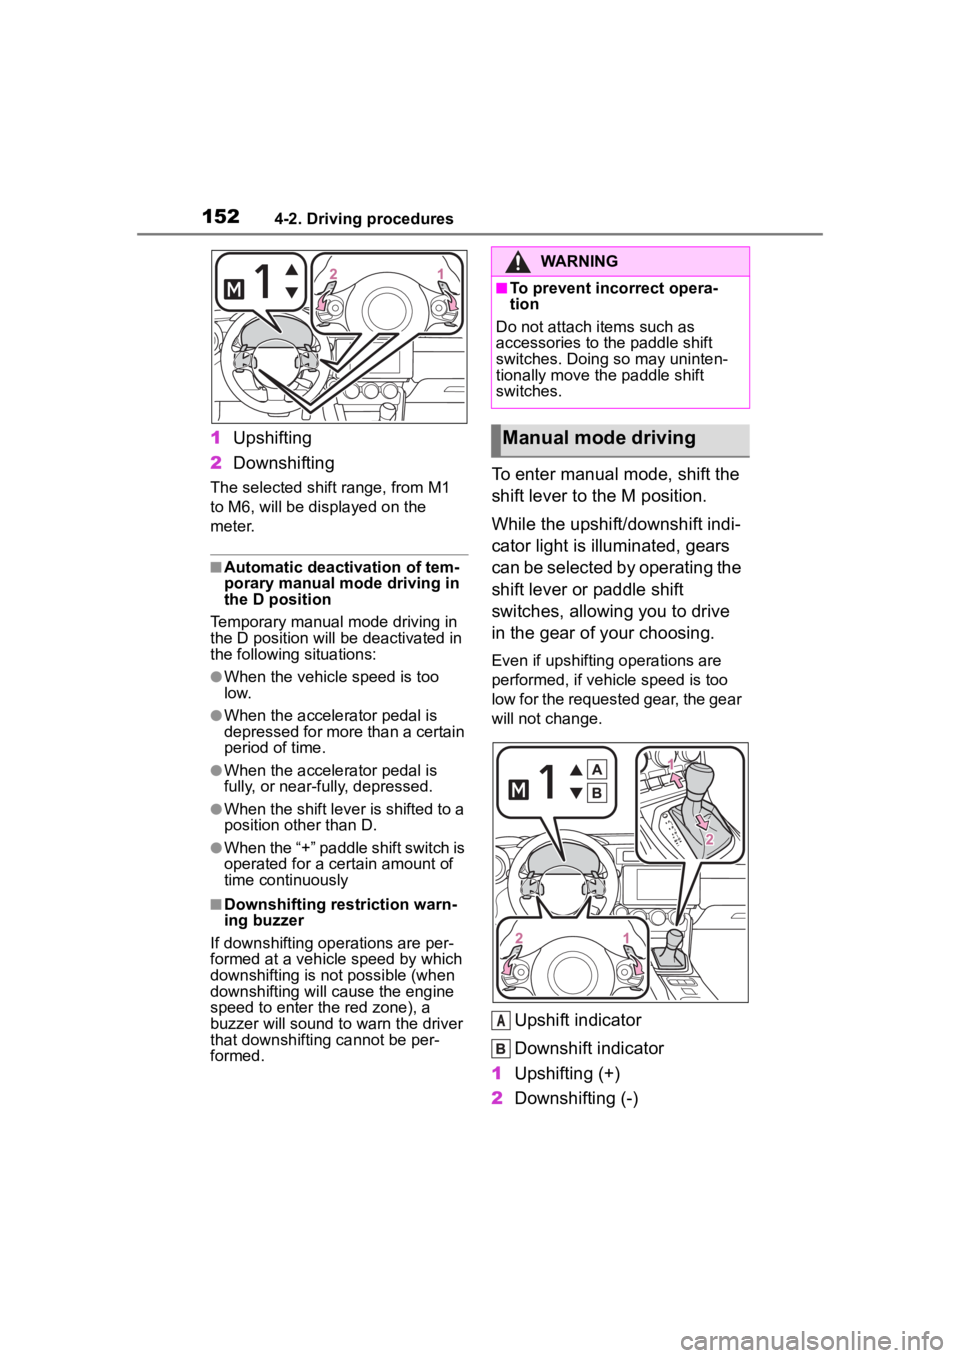
1Upshifting
2 Downshifting
The selected shift range, from M1
to M6, will be dis played on the
meter.
■Automatic deactivation of tem-
porary manual mode driving in
the D position
Temporary manual mode driving in
the D position will be deactivated in
the following situations:
●When the vehicle speed is too
low.
●When the accelerator pedal is
depressed for more than a certain
period of time.
●When the accelerator pedal is
fully, or near-fully, depressed.
●When the shift lever is shifted to a
position other than D.
●When the “+” paddle shift switch is
operated for a certain amount of
time continuously
■Downshifting restriction warn-
ing buzzer
If downshifting operations are per-
formed at a vehicle speed by which
downshifting is not possible (when
downshifting will cause the engine
speed to enter the red zone), a
buzzer will sound to w arn the driver
that downshifting cannot be per-
formed.
To enter manual mode, shift the
shift lever to the M position.
While the upshift/downshift indi-
cator light is illuminated, gears
can be selected by operating the
shift lever or paddle shift
switches, allowing you to drive
in the gear of your choosing.
Even if upshifting operations are
performed, if vehicle speed is too
low for the requested gear, the gear
will not change.
Upshift indicator
Downshift indicator
1 Upshifting (+)
2 Downshifting (-)
WARNING
■To prevent inc orrect opera-
tion
Do not attach items such as
accessories to the paddle shift
switches. Doing so may uninten-
tionally move the paddle shift
switches.
Manual mode driving
A
Page 153 of 449
1534-2. Driving procedures
4
Driving
Each time the shift lever or paddle
shift switches are operated, the
gear changes up or down one gear
and the selected gear, “1” through
“6”, will be set.
The selected gear, from M1 to M6,
will be fixed and displayed on the
meter.
When in manual mode, the gear
will not change unless the shift
lever or paddle shift switches
are operated.
However, even when in the
manual mode, the gears will be
automatically changed in the fol-
lowing situation:
When vehicle speed drops
(downshift only).
When engine oil temperature
is high and engine speed
rises close to the red zone.
■Downshifting restriction warn-
ing buzzer
If downshifting operations are per-
formed at a vehicle speed by which
downshifting is not possible (when
downshifting will cause the engine
speed to enter the red zone), a
buzzer will sound to w arn the driver
that downshifting cannot be per-
formed.
*: If equipped
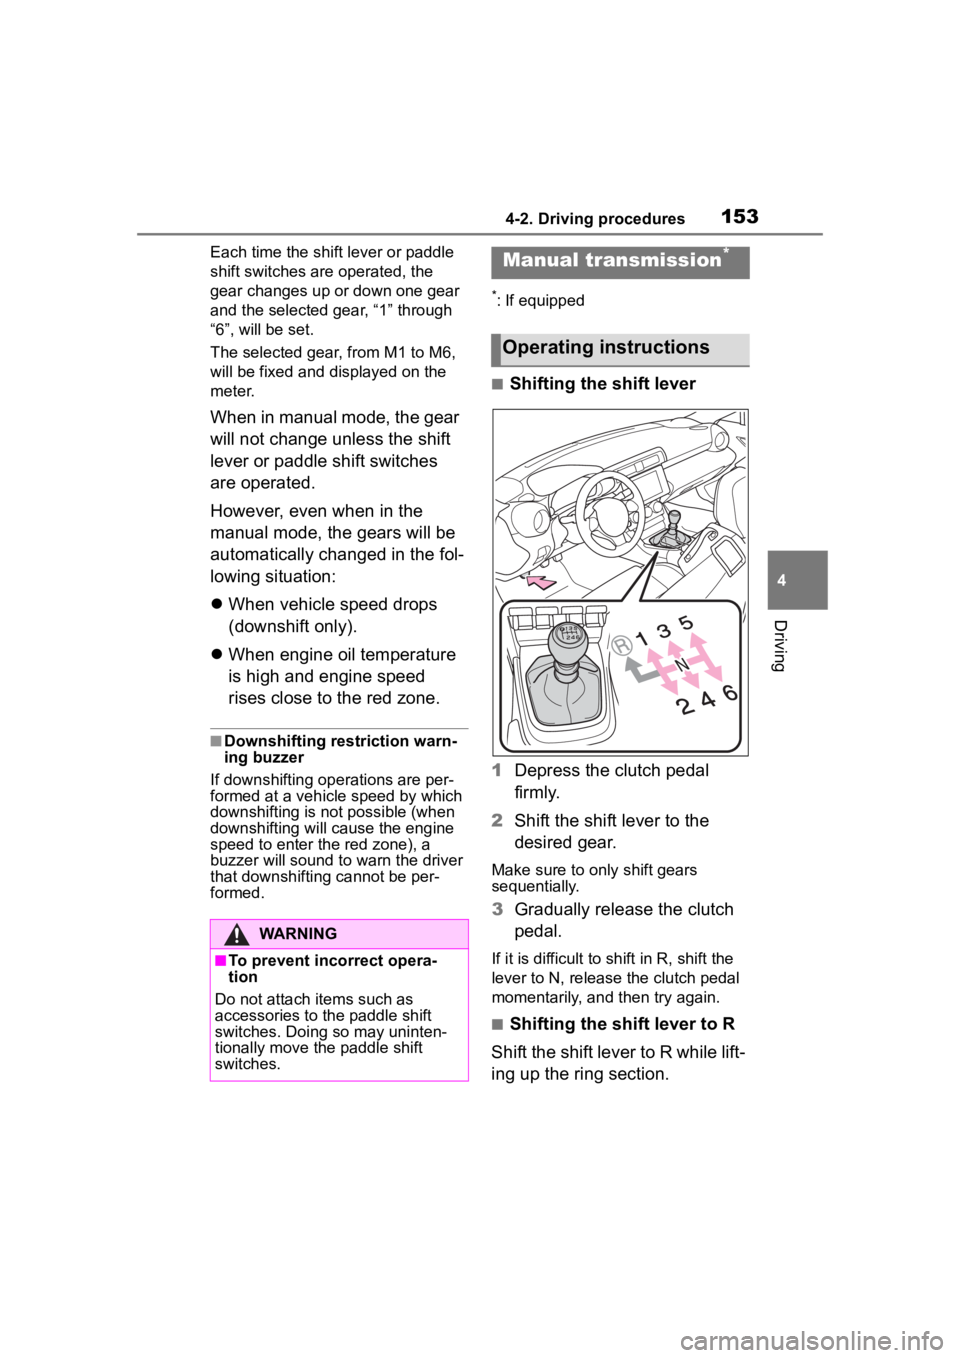
■Shifting the shift lever
1 Depress the clutch pedal
firmly.
2 Shift the shift lever to the
desired gear.
Make sure to only shift gears
sequentially.
3Gradually release the clutch
pedal.
If it is difficult to shift in R, shift the
lever to N, release the clutch pedal
momentarily, and then try again.
■Shifting the shift lever to R
Shift the shift lever to R while lift-
ing up the ring section.
WARNING
■To prevent incorrect opera-
tion
Do not attach items such as
accessories to the paddle shift
switches. Doing so may uninten-
tionally move the paddle shift
switches.
Manual transmission*
Operating instructions
Page 156 of 449
1564-2. Driving procedures
turn signal lights will blink 3 times.
■If the turn signals do not
stop flashing after turning
left or right, or if you want
to stop them flashing
Operate the lever in the oppo-
site direction to either position 2
or 3. If you move the lever to
either position 1 or 4, the
selected turn signals will flash.
■Turn signals can be operated
when
The engine switch is in ON.
■If the indicator flashes faster
than usual
Check that a light bulb in the front or
rear turn signal lights has not
burned out.
■If the turn signals stop flashing
before a lane change has been
performed
Operate the lever again.
■Customization
Some functions can be customized.
( P.400)
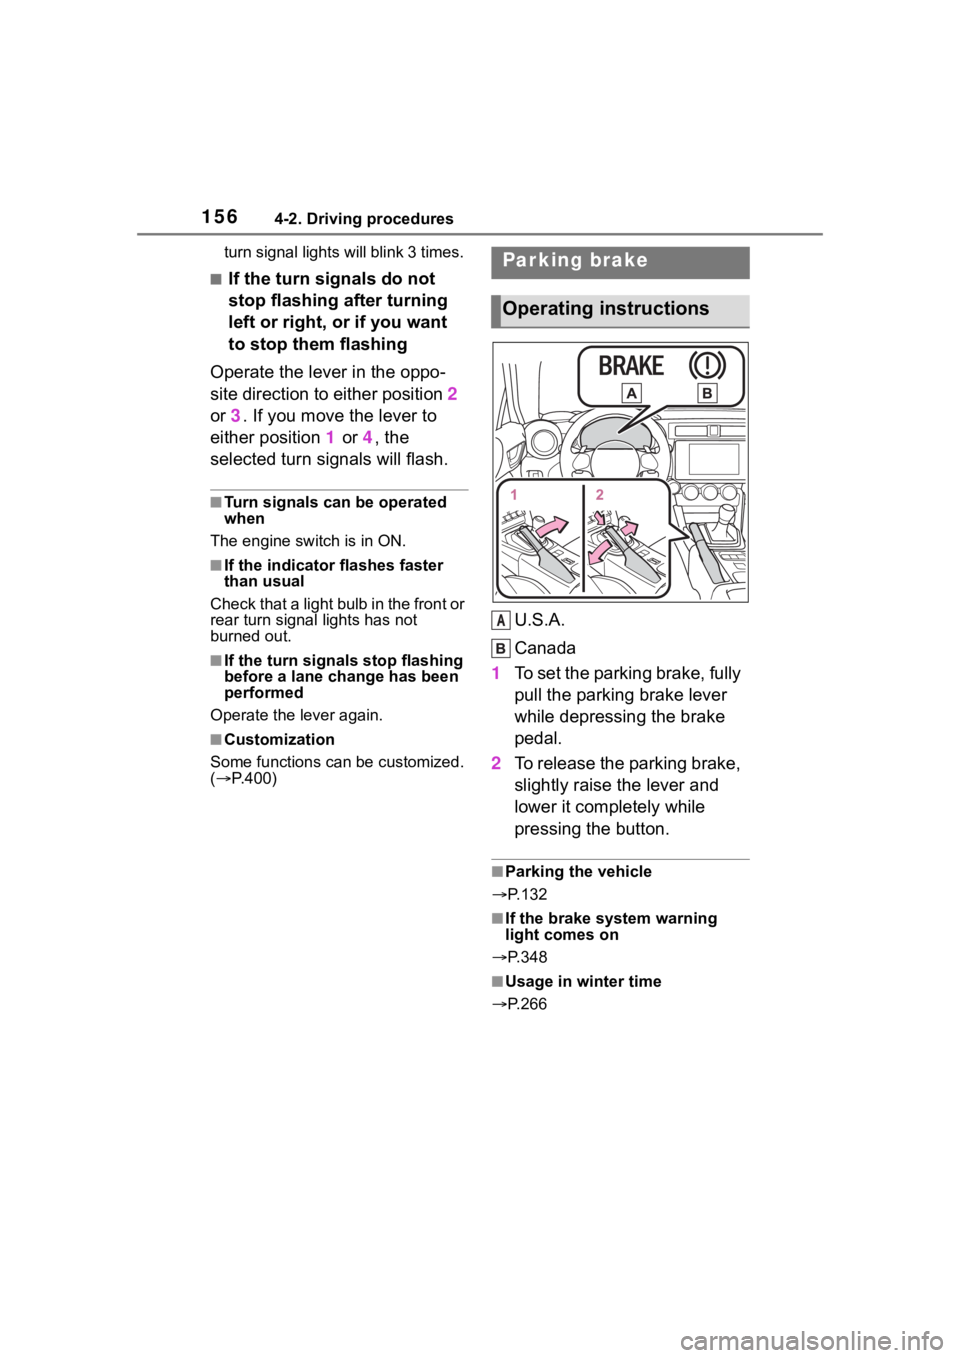
U.S.A.
Canada
1 To set the parking brake, fully
pull the parking brake lever
while depressing the brake
pedal.
2 To release the parking brake,
slightly raise the lever and
lower it completely while
pressing the button.
■Parking the vehicle
P.132
■If the brake system warning
light comes on
P.348
■Usage in winter time
P.266
Parking brake
Operating instructions
A
Page 163 of 449

1634-3. Operating the lights and wipers
4
Driving
detected due to repeated curves,
road dividers or roadside trees
• When vehicles ahead appear in a
faraway lane on a wide road
• When the lights of vehicles ahead are not on
●The high beams may be turned off
if a vehicle ahead that is using fog
lights without its headlights turned
on is detected.
●House lights, street lights, traffic
signals, and illumi nated billboards
or signs and other reflective
objects may cause the high
beams to change to the low
beams, or the low beams to
remain on.
●The following factors may affect
the amount of time taken for the
high beams to turn on or off:
• The brightness of the headlights,
fog lights, and ta il lights of vehi-
cles ahead
• The movement and direction of
vehicles ahead
• When a vehicle ahead only has operational lights on one side
• When a vehicle ahead is a two-wheeled vehicle
• The condition of the road (gradi-
ent, curve, condi tion of the road
surface, etc.)
• The number of passengers and
amount of luggage in the vehicle
• When there is a lag in response due to the limitat ions of the detec-
tion range of the stereo camera
●The high beams may turn on or off
unexpectedly.
●Bicycles or similar vehicles may
not be detected.
●In the following situations the sys-
tem may not be abl e to correctly
detect the surrounding brightness
level. This may cause the low
beams to remain on or the high
beams to flash or dazzle pedestri-
ans or vehicles ahead. In such a
case, it is necess ary to manually
switch between the high and low
beams.
• When driving in inclement weather (heavy rain, snow, fog, sand-
storms, etc.)
• When the windshi eld is obscured
by fog, mist, ice, dirt, etc.
• When the windshield is cracked or damaged
• When the stereo camera is deformed or dirty
• When the temperature of the ste-
reo camera is extremely high
• When the surrounding brightness level is equal to that of headlights,
tail lights or fog lights
• When headlights or tail lights of vehicles ahead are turned off,
dirty, changing color, or not aimed
properly
• When the vehicle is hit by water,
snow, dust, etc. from a preceding
vehicle
• When driving through an area of
intermittently changing brightness
and darkness
• When frequently and repeatedly
driving ascending/descending
roads, or roads with rough, bumpy
or uneven surfaces (such as
stone-paved roads, gravel roads,
etc.)
• When frequently and repeatedly
taking curves or driving on a wind-
ing road
• When there is a h ighly reflective
object ahead of the vehicle, such
as a sign or mirror
• When the back of a preceding
vehicle is highly reflective, such as
a container on a truck
• When the vehicle’s headlights are
damaged or dirty, or are not aimed
properly
• When the vehicle is listing or titling
due to a flat tire, a trailer being
towed, etc.
• Immediately after the engine is
started
• When the headlights are changed between the high beams and low
beams repeatedly in an abnormal
manner
• When the driver believes that the high beams may be flashing or
dazzling pedestrians or other driv-
ers