Page 398 of 608

3986-1. Maintenance and care
4RUNNER (U)
NOTICE
■To prevent paint deterioration an d corrosion on the body and compo-
nents (aluminum wheels etc.)
● Wash the vehicle immediately in the following cases:
• After driving near the sea coast
• After driving on salted roads
• If coal tar or tree sap is present on the paint surface
• If dead insects, insect droppings or bird droppings are present on the
paint surface
• After driving in an area contaminated with soot, oily smoke, mine dust, iron powder or chemical substances
• If the vehicle becomes heavily soiled with dust or mud
• If liquids such as benzene and gasoline are spilled on the pai nt surface
● If the paint is chipped or scratched, have it repaired immediately.
● To prevent the wheels from corroding, remove any dirt and store in a place
with low humidity when storing the wheels.
■ Cleaning the exterior lights
● Wash carefully. Do not use organic substances or scrub with a h ard brush.
This may damage the surfaces of the lights.
● Do not apply wax to the surfaces of the lights.
Wax may cause damage to the lenses.
Page 406 of 608

4066-2. Maintenance
4RUNNER (U)
Vehicle interior
ItemsCheck points
Accelerator pedal• The accelerator pedal should move smoothly(without uneven pedal effort or catching).
Automatic transmis-
sion “Park” mecha-
nism• When parked on a slope and the shift lever is in P,is the vehicle securely stopped?
Brake pedal
• Does the brake pedal move smoothly?
• Does the brake pedal have appropriate clearancefrom the floor? ( P. 531)
• Does the brake pedal have the correct amount of
free play? ( P. 531)
Brakes
• The vehicle should not pull to one side when the
brakes are applied.
• The brakes should work effectively.
• The brake pedal should not feel spongy.
• The brake pedal should not get too close to the floor when the brakes are applied.
Head restraints• Do the head restraints move smoothly and locksecurely?
Indicators/buzzers• Do the indicators and buzzers function properly?
Lights • Do all the lights come on?
Parking brake
• Does the parking brake pedal move smoothly?
• When parked on a slope and the parking brake is
on, is the vehicle securely stopped?
Seat belts• Do the seat belts operate smoothly?
• The seat belts should not be damaged.
Seats• Do the seat controls operate properly?
Steering wheel
• Does the steering wheel rotate smoothly?
• Does the steering wheel have the correct amountof free play?
• There should not be any strange sounds coming
from the steering wheel.
Page 431 of 608

4316-3. Do-it-yourself maintenance
6
Maintenance and care
4RUNNER (U)
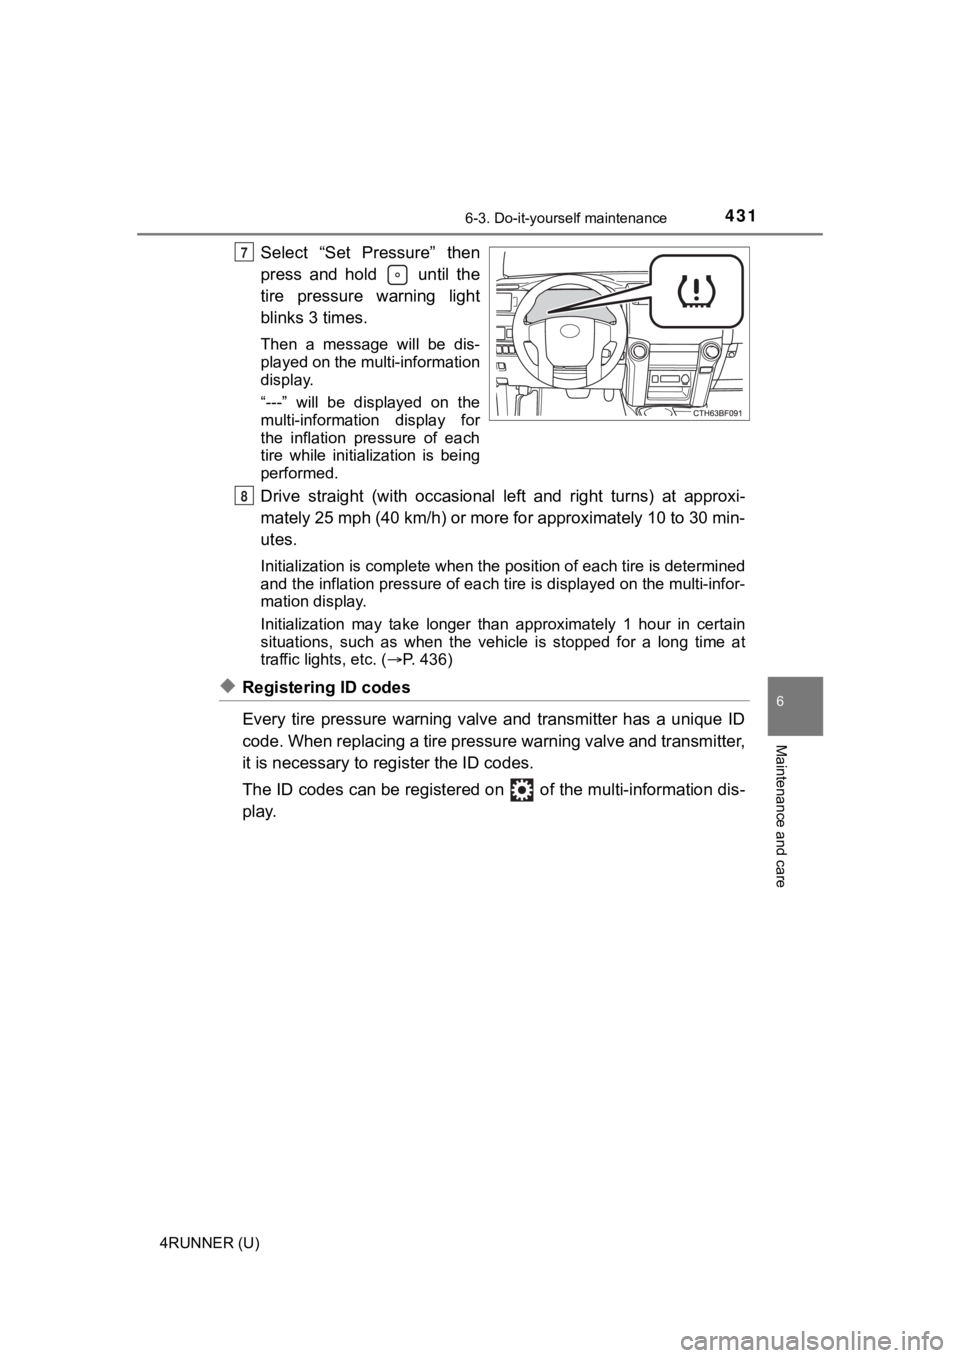
Select “Set Pressure” then
press and hold until the
tire pressure warning light
blinks 3 times.
Then a message will be dis-
played on the multi-information
display.
“---” will be displayed on the
multi-information display for
the inflation pressure of each
tire while initialization is being
performed.
Drive straight (with occasional left and right turns) at approxi-
mately 25 mph (40 km/h) or more for approximately 10 to 30 min-
utes.
Initialization is complete when the position of each tire is determined
and the inflation pressure of ea ch tire is displayed on the multi-infor-
mation display.
Initialization may ta ke longer than approximately 1 hour in cer tain
situations, such as when the veh icle is stopped for a long time at
traffic lights, etc. ( P. 436)
◆Registering ID codes
Every tire pressure warning valve and transmitter has a unique ID
code. When replacing a tire pressure warning valve and transmit ter,
it is necessary to reg ister the ID codes.
The ID codes can be registered on of the multi-information dis -
play.
7
8
Page 432 of 608

4326-3. Do-it-yourself maintenance
4RUNNER (U)■
How to register the ID codes
Select on the multi-information display using the meter con-
trol switches on the steering wheel. ( P. 9 6 )
Select “Vehicle Settings” and then press and hold .
Select “TPWS” and then press .
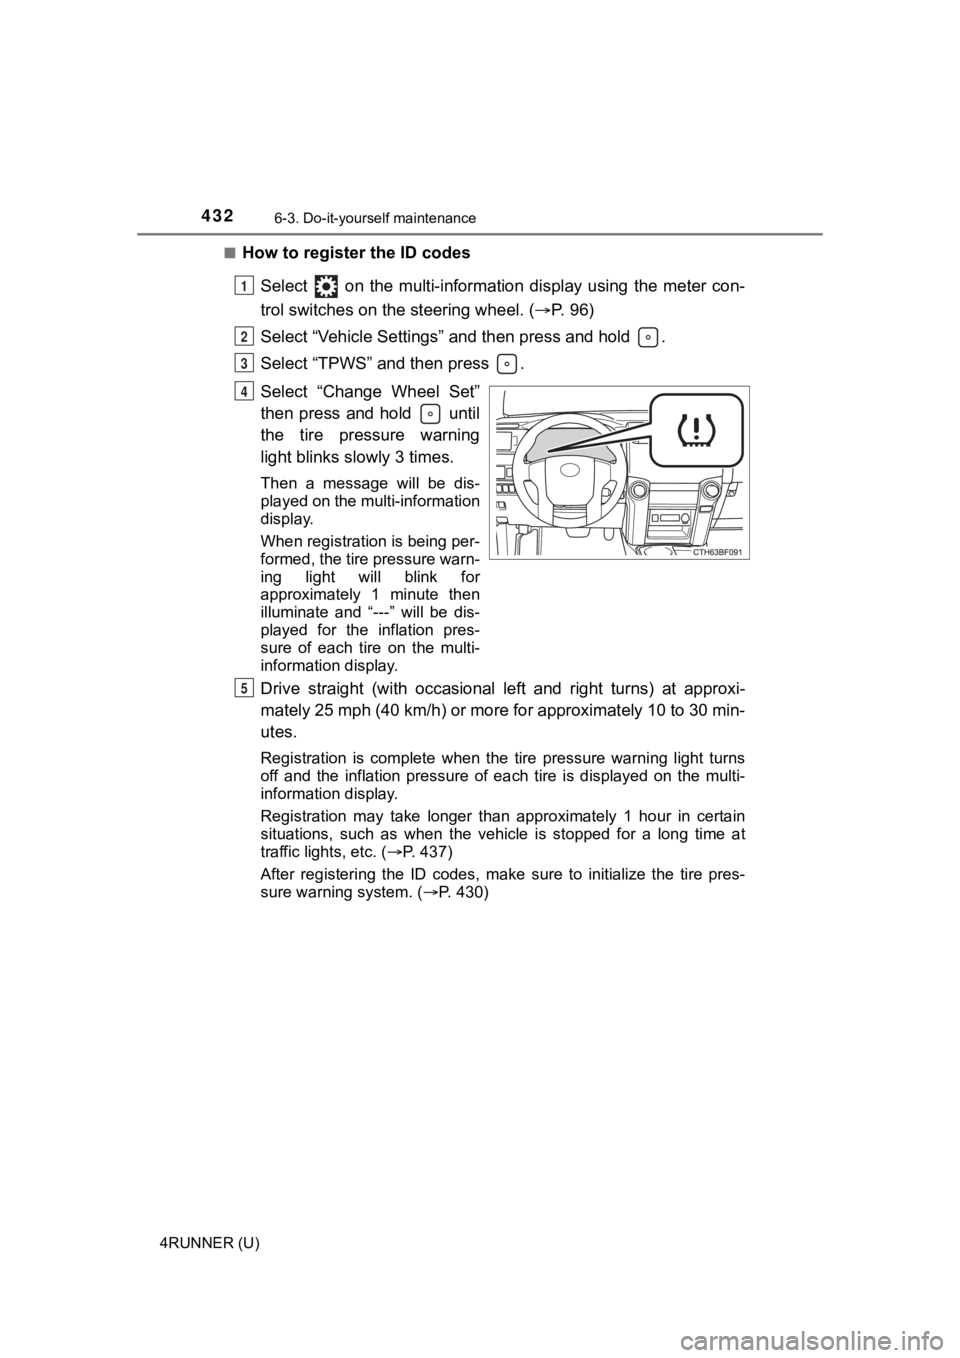
Select “Change Wheel Set”
then press and hold until
the tire pressure warning
light blinks slowly 3 times.
Then a message will be dis-
played on the multi-information
display.
When registration is being per-
formed, the tire pressure warn-
ing light will blink for
approximately 1 minute then
illuminate and “---” will be dis-
played for the inflation pres-
sure of each tire on the multi-
information display.
Drive straight (with occasional left and right turns) at approxi-
mately 25 mph (40 km/h) or more for approximately 10 to 30 min-
utes.
Registration is complete when the tire pressure warning light t urns
off and the inflation pressure of each tire is displayed on the multi-
information display.
Registration may take longer than approximately 1 hour in certain
situations, such as when the veh icle is stopped for a long time at
traffic lights, etc. ( P. 437)
After registering the ID codes, make sure to initialize the tir e pres-
sure warning system. ( P. 430)
1
2
3
4
5
Page 452 of 608
4526-3. Do-it-yourself maintenance
4RUNNER (U)
■After a fuse is replaced
●If the lights do not turn on even after the fuse has been repla ced, a bulb may
need replacement. ( P. 453)
● If the replaced fuse blows again, have the vehicle inspected by your Toyota
dealer.
■ If there is an overload in a circuit
The fuses are designed to blow, protecting the wiring harness f rom damage.
WARNING
■ To prevent system breakdowns and vehicle fire
Observe the following precautions.
Failure to do so may cause damage to the vehicle, and possibly a fire or
injury.
● Never use a fuse of a higher amperage rating than that indicated, or use
any other object in place of a fuse.
● Always use a genuine Toyota fuse or equivalent.
Never replace a fuse with a wire, even as a temporary fix.
● Do not modify the fuses or fuse boxes.
NOTICE
■Before replacing fuses
Have the cause of electrical overload determined and repaired b y your
Toyota dealer as soon as possible.
Page 455 of 608
4556-3. Do-it-yourself maintenance
6
Maintenance and care
4RUNNER (U)■
Headlight high beam (if equi
pped)/daytime running lights
Turn the bulb base counter-
clockwise.
Pull the bulb out while press-
ing the lock release of the
connector.
Replace the light bulb, and
install the bulb base.
Align the 3 tabs on the light bulb
with the mounting and insert.
Turn and secure the bulb
base.
Shake the bulb base gently to
check that it is not loose, turn
the headlights on once and visu-
ally confirm that no light is leak-
ing through the mounting.
Replacing light bulbs
1
2
3
4
Page 458 of 608
4586-3. Do-it-yourself maintenance
4RUNNER (U)■
Front side marker lights
Turn the steering wheel in
the opposite direction of the
front side marker light that
you wish to replace.
For example, if you wish to
replace the front side marker
light on the right side, turn the
steering wheel to the left.
Remove the fender liner
screws.
Partly remove the fender
liner.
1
2
3
Page 460 of 608
4606-3. Do-it-yourself maintenance
4RUNNER (U)■
Rear turn signal lights
Open the back door and
remove the cover.
To prevent damage to the vehi-
cle, cover the tip of the screw-
driver with a rag.
Turn the bulb base counter-
clockwise.
Remove the light bulb.
When installing, reverse the steps listed.
1
2
3
4