Page 178 of 296
High Voltage Components
1.
Heat Pump Assembly
2.
Front Drive Unit
3.
Service Access Panel for High Voltage Components (Penthouse)
4.
High Voltage Battery
5.
High Voltage Busbars
6.
Rear Drive Unit
7.
Charge Port
NOTE: Plaid version not shown.
WARNING: The high voltage system has no user serviceable parts. Do not disassemble, remove or replace high
voltage components, cables or connectors. High voltage cables are typically colored orange for easy
identification.
WARNING: Read and follow all instructions provided on the labels that are attached to Model X. These labels
are there for your safety.
WARNING: In the unlikely event that a fire occurs, immediately contact your local fire emergency responders.
Electric Vehicle Components
176MODEL X Owner
Page 179 of 296
Charging Equipment
Charging equipment designed specifically to charge
your
Model X is available from Tesla.
For information on the charging equipment available for
your region, go to http://shop.tesla.com.
Page 182 of 296
Opening the Charge Port
The charge port is located on the left side of Model X,
behind a door that is part of the rear tail light assembly.
Park
Model X to ensure that the charge cable easily
reaches the charge port.
With Model X in Park, press and release the button on
the Tesla charge cable to open the charge port door.
You can also open the charge port door using any of
these methods:
Page 183 of 296
Page 184 of 296

During Charging
During charging, the charge port light pulses green, and the
touchscreen displays real-time charging status. The
frequency at which the green charge port light pulses
slows down as the charge level approaches full. When charging is complete, the light stops pulsing and is solid green.
NOTE: If Model X is locked, the charge port light does
not light up.
If the charge port light turns red while charging, a fault
is detected. Check the
instrument panel or touchscreen
for an alert describing the fault. A fault can occur due to something as common as a power outage. If a power
outage occurs, charging resumes automatically when power is restored.
NOTE: The thermal system may produce steam under
certain conditions. For example, odorless steam can come from the front of your vehicle while charging at a Supercharger in cold temperature. This is normal and not a cause for concern.
NOTE: It is normal to hear sounds during charging.
Particularly at high currents, the refrigerant compressor and fan operate as needed to keep the Battery cool.
NOTE: Air conditioning performance is generally not
affected by charging. However, in some circumstances
(for example, charging at high currents during a particularly warm day), the air coming from the vents may not be as cool as expected and a message displays on the
instrument panel. This is normal and ensures that
the Battery stays within an optimum temperature range while charging to support longevity and optimum
performance.
WARNING: Never spray liquid at a high velocity
(for example, a pressure washer) towards the
charge port while charging. Doing so can result in
serious injury or damage to the vehicle, charging
equipment, or property.
Stopping Charging
Stop charging at any time by disconnecting the charge
cable or touching
Stop Charging on the touchscreen.
NOTE: To prevent unauthorized unplugging of the
charge cable, the charge cable latch remains locked and
Model X must be unlocked or able to recognize your key
before you can disconnect the charge cable.
To disconnect the charge cable:
1.
Press and hold the button on the connector handle to release the latch.
NOTE: You can also release the latch using the
touchscreen or mobile app, or by pressing and
holding the rear trunk button on the key fob.
If your
vehicle is equipped with a motorized charge port,
you can also press the button to the left of the
charge port to release the latch.
2.
Pull the connector from the charge port. The charge
port door automatically closes.
To disconnect the charge cable when using an adapter at a public charge station:
1.
Unlock Model X.
2.
While holding the public charging handle in one hand and the adapter in the other hand, press and hold the button on the public charging handle and pull both
outwards, removing the handle and adapter at the same time.
NOTE: If the charging station handle separates from
the adapter, leaving the adapter in
Model X, use the
touchscreen to unlock the charge port.
3.
Press and hold the button on the charging handle
again to release the adapter from the public charging handle.
NOTE: The charge port door automatically closes within
approximately 10 seconds of removing the connector from the charge port.
CAUTION: Tesla strongly recommends leaving
Model X plugged in when not in use. This
maintains the Battery at the optimum level of
charge.
Charge Settings
Access charge settings by touching Controls > Charging
when Model X is in Park.
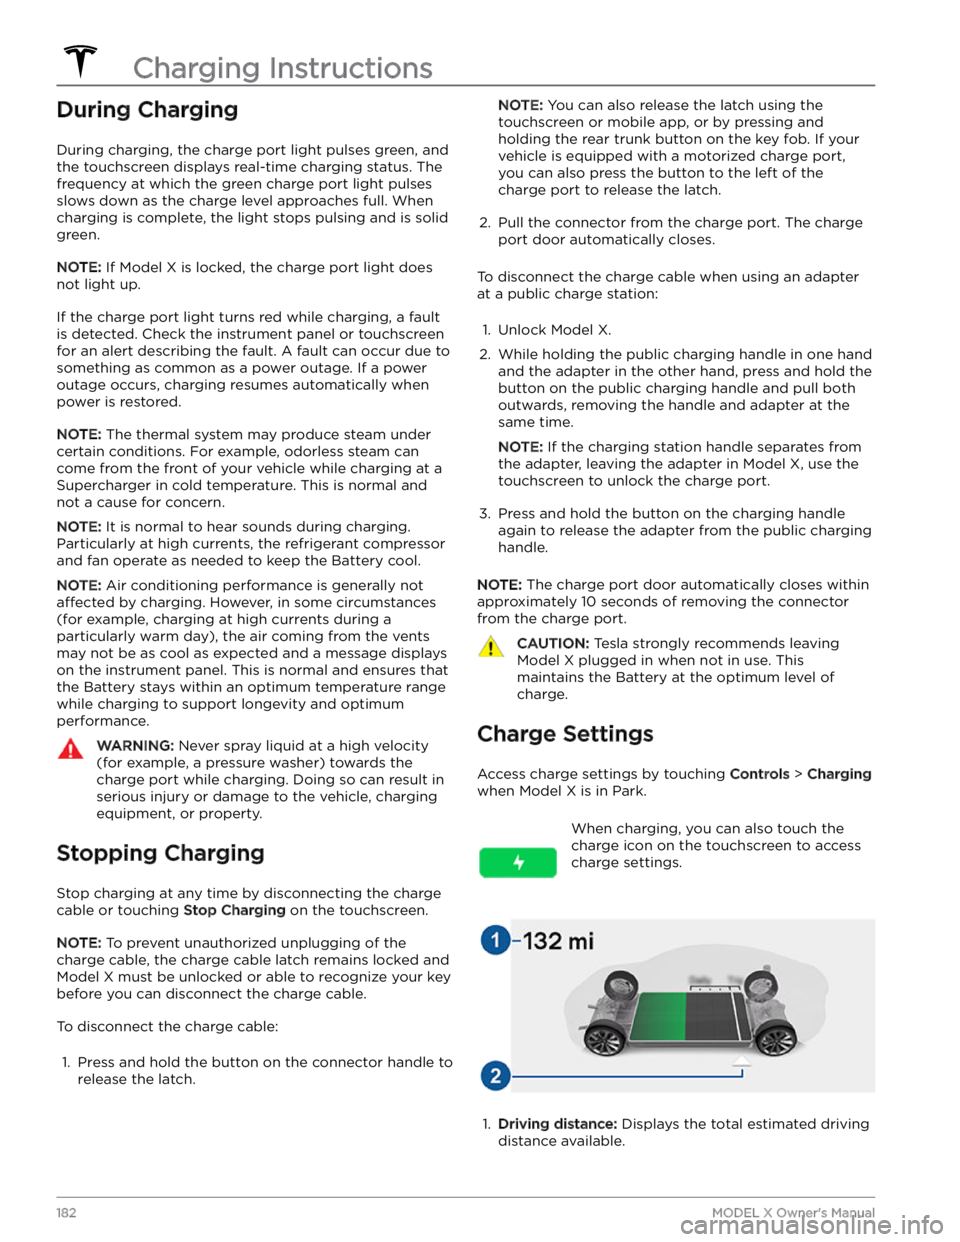
When charging, you can also touch the
charge icon on the touchscreen to access charge settings.1.
Driving distance: Displays the total estimated driving
distance available.
Charging Instructions
182MODEL X Owner
Page 185 of 296
2. Set limit: Adjust the charge limit by dragging the
arrow below the battery to indicate the level of charging you want. The setting you choose applies to
immediate and scheduled charging sessions.
NOTE: A portion of the battery image may appear
blue. This indicates that a small portion of the energy
stored in the battery is not available because the battery is cold. This is normal and no reason for concern. When the battery warms up, the blue portion no longer displays.
You can further adjust charge settings:
Page 187 of 296

Toggle between Scheduled Departure and Scheduled Charging by touching
Controls > Charging > Switch to
Scheduled Charging/Scheduled Departure when
Model X is in Park.
NOTE: Scheduled Charging/Scheduled Departure
settings are also available on the Climate Controls
screen and in the Tesla mobile app.
Think of Scheduled Charging as "When do I want
charging to start?" and think of
Scheduled Departure
Off-Peak Charging which is "When do I want charging to
be complete?"
Scheduled Charging can be used together with
Scheduled Departure Preconditioning but not with
Scheduled Departure Off-Peak Charging.
Scheduled Charging/Scheduled Departure settings are
automatically saved for each location.
NOTE: If you plug in Model X with both Off-Peak
Charging and Scheduled Charging deselected, your
vehicle charges immediately.
Using Scheduled Charging
Use Scheduled Charging to specify a daily time in which
you want
Model X to start charging.
With Scheduled Charging selected, enable the feature
then set a daily time to start charging.
NOTE: Scheduled Charging starts charging immediately
if
Model X is plugged in up to six hours after the
scheduled start time. However, if
Model X is plugged in
after six hours of the scheduled charging time, charging may not start until the scheduled time on the next day.
Using Scheduled Departure
Use Scheduled Departure to set a daily time when you
want
Model X to be ready to drive. Model X
automatically calculates when it needs to start preconditioning and/or charging. This ensures that charging is complete and/or the cabin climate and Battery are preconditioned by your departure time.
When Scheduled Departure is displayed, touch
Schedule to set a daily time when you want Model X to
be ready to drive. Specify a time, then touch
Settings to
enable one or both of the following departure features.
When plugging in with
Off-Peak Charging enabled, the
vehicle
briefly draws power (you may hear clicking) to
calculate the necessary charging start time.
After you
Page 189 of 296
Touch Chargers in the Navigation search
bar to toggle between types of chargers,
including Superchargers and destination charging sites.
When you are at risk of driving beyond the range of
known charging locations, the touchscreen displays a message giving you the opportunity to display a list of
charging locations that are within range. When you
select a charging location from the list,
Model X provides
navigation instructions and the turn-by-turn direction list
displays the predicted amount of energy that will remain when you arrive at the charging destination.
Trip Planner (if available in your market region) routes
you through Supercharger locations to minimize the amount of time you spend charging and driving. To
enable, touch
Controls > Navigation > Trip Planner (see
Trip Planner on page 168).
Energy App
The Energy app provides a visual representation of your vehicle